Oreo Cheesecake Brownies Irresistible Dessert Delight

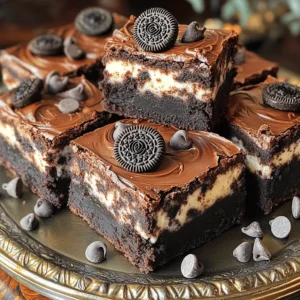
Get ready to indulge in a dessert that combines two favorites: Oreos and cheesecake! Oreo Cheesecake Brownies are a tasty twist on classic chocolate brownies. With a creamy layer of cheesecake and crunchy Oreo bits, each bite is pure bliss. I’ll guide you through easy steps and provide tips to make this treat shine. Grab your apron, and let’s dive into this irresistible dessert delight!

- 1 cup unsalted butter (2 sticks) - 8 oz cream cheese, softened - 1 cup granulated sugar - 1 cup brown sugar, packed - 4 large eggs - 1 teaspoon vanilla extract - 1 cup all-purpose flour - 1/2 cup unsweetened cocoa powder - 1/4 teaspoon salt - 1 cup Oreo cookies, chopped (plus extra for topping) - 1/2 cup mini chocolate chips Gather these simple ingredients before you start. The butter gives richness. Cream cheese adds creaminess. Granulated sugar and brown sugar balance sweetness. You need large eggs for structure. Vanilla extract enhances flavor. All-purpose flour is the base. Cocoa powder gives a deep chocolate taste. Salt brings out all the flavors. Chopped Oreo cookies add fun. Mini chocolate chips provide extra sweetness. Each ingredient plays a big role. The blend of these flavors makes Oreo cheesecake brownies a true delight. Don't skip any items; each one is key to the taste and texture. Enjoy the process of mixing them together! - Preheat your oven to 350°F (175°C). Grease a 9x13-inch baking dish or use parchment paper. - In a medium saucepan, melt 1 cup of unsalted butter over low heat. Remove it from heat and let it cool a bit. - In a large mixing bowl, beat 8 oz of softened cream cheese with 1 cup of granulated sugar until smooth and creamy. - Add in 1 cup of brown sugar, mixing until fully combined. Next, add 4 large eggs one at a time. Stir in 1 teaspoon of vanilla extract. - In another bowl, mix 1 cup of all-purpose flour, 1/2 cup of unsweetened cocoa powder, and 1/4 teaspoon of salt. Gradually add this dry mix to the wet ingredients, stirring until well combined. - Pour half of the brownie batter into the prepared baking dish. Spread it evenly across the dish. - In a separate bowl, mix the remaining cream cheese (or save some for topping) with a little sugar if you want. Drop spoonfuls of this mix over the brownie layer. - Carefully layer the rest of the brownie batter on top of the cream cheese mix. Use a toothpick or knife to swirl gently for a marbled effect. - Sprinkle the extra chopped Oreo cookies and remaining mini chocolate chips on top. With these steps, you’ll create a dreamy dessert that merges rich brownies and creamy cheesecake. Enjoy the fun of baking! To get the perfect texture in your Oreo cheesecake brownies, use room temperature cream cheese. This helps it blend smoothly with the sugars. When mixing, beat until light and fluffy, but avoid overmixing the brownie batter. For cooling, let the brownies sit in the pan for about 15 minutes. This helps them set without becoming too dry. Then, transfer them to a wire rack to cool completely. If you want a lighter option, you can use Greek yogurt instead of cream cheese. It still gives a creamy texture but has less fat. For a gluten-free version, swap all-purpose flour with a gluten-free flour blend. Just check that it has a good binding agent, like xanthan gum, for best results. Serve your Oreo cheesecake brownies on a nice platter. For a fun touch, add whole Oreos on top. You can also dust them lightly with cocoa powder for a classy look. Cut the brownies into neat squares for uniformity. This makes them easy to share and enjoy! {{image_2}} You can switch up the flavors in your Oreo cheesecake brownies. Try adding different cookie types. For example, use peanut butter or mint Oreos for a fun twist. You can also change the cream cheese flavor. Add a bit of lemon zest for a fresh kick or a splash of almond extract for warmth. If you're vegan, you can still enjoy these brownies. Replace butter with coconut oil and use a vegan cream cheese. For a sugar-free option, try using a sugar substitute like erythritol. Just make sure to check the measurements, as they often vary. Want to make your brownies extra rich? Use dark chocolate instead of semi-sweet. It adds a deeper flavor and makes the dessert more decadent. You can also add nuts, like walnuts or pecans, for a crunchy texture. Other candies, like caramel bits or toffee, can also bring a fun surprise in each bite. - Storing in the fridge: Keep your Oreo cheesecake brownies in an airtight container. They stay fresh for several days. Place a piece of parchment paper between layers if stacking. This keeps them from sticking together. - Freezing brownies: You can freeze these brownies for later. Wrap each piece tightly in plastic wrap. Then, place them in a freezer bag. They can stay good for up to three months. - How long do they last?: In the fridge, these brownies last about five days. If stored properly in the freezer, they last three months. Always check for any signs of spoilage before eating. - Recommended methods for warming: To reheat, use the microwave. Warm each piece for about 10-15 seconds. You can also use an oven. Preheat it to 350°F (175°C) and heat for about 5-10 minutes. This restores that gooey texture. Enjoy warm for the best taste! To test if the brownies are done, use a toothpick. Insert it into the center. If it comes out mostly clean, they are ready. A few moist crumbs are fine, as this keeps them soft. Look for these visual cues: - The edges should pull away from the pan. - The surface will look set and slightly puffed. - A glossy finish is normal, but avoid wet batter. Yes, you can make these brownies ahead of time. Bake them and let them cool completely. Once cool, slice them into squares. For storage, wrap the brownies in plastic wrap. Then, place them in an airtight container. This keeps them fresh for up to five days in the fridge. You can also freeze them for up to three months. Just thaw them overnight in the fridge when you’re ready to enjoy. These brownies pair well with several tasty treats: - Vanilla ice cream adds a creamy touch. - Whipped cream gives a light contrast. - Fresh berries add a fruity flavor. You can also serve them with a drizzle of chocolate sauce. This adds extra sweetness and depth. Enjoy experimenting with different sides to enhance your dessert experience! In this post, we covered how to make delicious Oreo cheesecake brownies. We discussed the key ingredients like butter, cream cheese, and chocolate. I provided step-by-step instructions to help you bake them perfectly. You learned about storage, variations, and some handy tips. These brownies are fun to make and great to share. Get creative with toppings and flavors. Enjoy your baking adventure!

Ingredients

List of Ingredients

– 1 cup unsalted butter (2 sticks)

– 8 oz cream cheese, softened

– 1 cup granulated sugar

– 1 cup brown sugar, packed

– 4 large eggs

– 1 teaspoon vanilla extract

– 1 cup all-purpose flour

– 1/2 cup unsweetened cocoa powder

– 1/4 teaspoon salt

– 1 cup Oreo cookies, chopped (plus extra for topping)

– 1/2 cup mini chocolate chips

Gather these simple ingredients before you start. The butter gives richness. Cream cheese adds creaminess. Granulated sugar and brown sugar balance sweetness. You need large eggs for structure. Vanilla extract enhances flavor. All-purpose flour is the base. Cocoa powder gives a deep chocolate taste. Salt brings out all the flavors. Chopped Oreo cookies add fun. Mini chocolate chips provide extra sweetness.

Each ingredient plays a big role. The blend of these flavors makes Oreo cheesecake brownies a true delight. Don’t skip any items; each one is key to the taste and texture. Enjoy the process of mixing them together!

Step-by-Step Instructions

Preparation Steps

– Preheat your oven to 350°F (175°C). Grease a 9×13-inch baking dish or use parchment paper.

– In a medium saucepan, melt 1 cup of unsalted butter over low heat. Remove it from heat and let it cool a bit.

– In a large mixing bowl, beat 8 oz of softened cream cheese with 1 cup of granulated sugar until smooth and creamy.

Combining Ingredients

– Add in 1 cup of brown sugar, mixing until fully combined. Next, add 4 large eggs one at a time. Stir in 1 teaspoon of vanilla extract.

– In another bowl, mix 1 cup of all-purpose flour, 1/2 cup of unsweetened cocoa powder, and 1/4 teaspoon of salt. Gradually add this dry mix to the wet ingredients, stirring until well combined.

Assembling the Brownies

– Pour half of the brownie batter into the prepared baking dish. Spread it evenly across the dish.

– In a separate bowl, mix the remaining cream cheese (or save some for topping) with a little sugar if you want. Drop spoonfuls of this mix over the brownie layer.

– Carefully layer the rest of the brownie batter on top of the cream cheese mix. Use a toothpick or knife to swirl gently for a marbled effect.

– Sprinkle the extra chopped Oreo cookies and remaining mini chocolate chips on top.

With these steps, you’ll create a dreamy dessert that merges rich brownies and creamy cheesecake. Enjoy the fun of baking!

Tips & Tricks

Baking Tips

To get the perfect texture in your Oreo cheesecake brownies, use room temperature cream cheese. This helps it blend smoothly with the sugars. When mixing, beat until light and fluffy, but avoid overmixing the brownie batter. For cooling, let the brownies sit in the pan for about 15 minutes. This helps them set without becoming too dry. Then, transfer them to a wire rack to cool completely.

Ingredient Substitutions

If you want a lighter option, you can use Greek yogurt instead of cream cheese. It still gives a creamy texture but has less fat. For a gluten-free version, swap all-purpose flour with a gluten-free flour blend. Just check that it has a good binding agent, like xanthan gum, for best results.

Presentation Tips

Serve your Oreo cheesecake brownies on a nice platter. For a fun touch, add whole Oreos on top. You can also dust them lightly with cocoa powder for a classy look. Cut the brownies into neat squares for uniformity. This makes them easy to share and enjoy!

Variations

Flavor Variations

You can switch up the flavors in your Oreo cheesecake brownies. Try adding different cookie types. For example, use peanut butter or mint Oreos for a fun twist. You can also change the cream cheese flavor. Add a bit of lemon zest for a fresh kick or a splash of almond extract for warmth.

Dietary Variations

If you’re vegan, you can still enjoy these brownies. Replace butter with coconut oil and use a vegan cream cheese. For a sugar-free option, try using a sugar substitute like erythritol. Just make sure to check the measurements, as they often vary.

Chocolate Add-Ins

Want to make your brownies extra rich? Use dark chocolate instead of semi-sweet. It adds a deeper flavor and makes the dessert more decadent. You can also add nuts, like walnuts or pecans, for a crunchy texture. Other candies, like caramel bits or toffee, can also bring a fun surprise in each bite.

Storage Info

Best Storage Practices

Storing in the fridge: Keep your Oreo cheesecake brownies in an airtight container. They stay fresh for several days. Place a piece of parchment paper between layers if stacking. This keeps them from sticking together.

Freezing brownies: You can freeze these brownies for later. Wrap each piece tightly in plastic wrap. Then, place them in a freezer bag. They can stay good for up to three months.

Shelf Life

How long do they last?: In the fridge, these brownies last about five days. If stored properly in the freezer, they last three months. Always check for any signs of spoilage before eating.

Reheating Guidelines

Recommended methods for warming: To reheat, use the microwave. Warm each piece for about 10-15 seconds. You can also use an oven. Preheat it to 350°F (175°C) and heat for about 5-10 minutes. This restores that gooey texture. Enjoy warm for the best taste!

FAQs

How do I know when the brownies are done?

To test if the brownies are done, use a toothpick. Insert it into the center. If it comes out mostly clean, they are ready. A few moist crumbs are fine, as this keeps them soft.

Look for these visual cues:

– The edges should pull away from the pan.

– The surface will look set and slightly puffed.

– A glossy finish is normal, but avoid wet batter.

Can I make this recipe ahead of time?

Yes, you can make these brownies ahead of time. Bake them and let them cool completely. Once cool, slice them into squares.

For storage, wrap the brownies in plastic wrap. Then, place them in an airtight container. This keeps them fresh for up to five days in the fridge. You can also freeze them for up to three months. Just thaw them overnight in the fridge when you’re ready to enjoy.

What to serve with Oreo cheesecake brownies?

These brownies pair well with several tasty treats:

– Vanilla ice cream adds a creamy touch.

– Whipped cream gives a light contrast.

– Fresh berries add a fruity flavor.

You can also serve them with a drizzle of chocolate sauce. This adds extra sweetness and depth. Enjoy experimenting with different sides to enhance your dessert experience!

In this post, we covered how to make delicious Oreo cheesecake brownies. We discussed the key ingredients like butter, cream cheese, and chocolate. I provided step-by-step instructions to help you bake them perfectly. You learned about storage, variations, and some handy tips.

These brownies are fun to make and great to share. Get creative with toppings and flavors. Enjoy your baking adventure!

- 1 cup unsalted butter (2 sticks) - 8 oz cream cheese, softened - 1 cup granulated sugar - 1 cup brown sugar, packed - 4 large eggs - 1 teaspoon vanilla extract - 1 cup all-purpose flour - 1/2 cup unsweetened cocoa powder - 1/4 teaspoon salt - 1 cup Oreo cookies, chopped (plus extra for topping) - 1/2 cup mini chocolate chips Gather these simple ingredients before you start. The butter gives richness. Cream cheese adds creaminess. Granulated sugar and brown sugar balance sweetness. You need large eggs for structure. Vanilla extract enhances flavor. All-purpose flour is the base. Cocoa powder gives a deep chocolate taste. Salt brings out all the flavors. Chopped Oreo cookies add fun. Mini chocolate chips provide extra sweetness. Each ingredient plays a big role. The blend of these flavors makes Oreo cheesecake brownies a true delight. Don't skip any items; each one is key to the taste and texture. Enjoy the process of mixing them together! - Preheat your oven to 350°F (175°C). Grease a 9x13-inch baking dish or use parchment paper. - In a medium saucepan, melt 1 cup of unsalted butter over low heat. Remove it from heat and let it cool a bit. - In a large mixing bowl, beat 8 oz of softened cream cheese with 1 cup of granulated sugar until smooth and creamy. - Add in 1 cup of brown sugar, mixing until fully combined. Next, add 4 large eggs one at a time. Stir in 1 teaspoon of vanilla extract. - In another bowl, mix 1 cup of all-purpose flour, 1/2 cup of unsweetened cocoa powder, and 1/4 teaspoon of salt. Gradually add this dry mix to the wet ingredients, stirring until well combined. - Pour half of the brownie batter into the prepared baking dish. Spread it evenly across the dish. - In a separate bowl, mix the remaining cream cheese (or save some for topping) with a little sugar if you want. Drop spoonfuls of this mix over the brownie layer. - Carefully layer the rest of the brownie batter on top of the cream cheese mix. Use a toothpick or knife to swirl gently for a marbled effect. - Sprinkle the extra chopped Oreo cookies and remaining mini chocolate chips on top. With these steps, you’ll create a dreamy dessert that merges rich brownies and creamy cheesecake. Enjoy the fun of baking! To get the perfect texture in your Oreo cheesecake brownies, use room temperature cream cheese. This helps it blend smoothly with the sugars. When mixing, beat until light and fluffy, but avoid overmixing the brownie batter. For cooling, let the brownies sit in the pan for about 15 minutes. This helps them set without becoming too dry. Then, transfer them to a wire rack to cool completely. If you want a lighter option, you can use Greek yogurt instead of cream cheese. It still gives a creamy texture but has less fat. For a gluten-free version, swap all-purpose flour with a gluten-free flour blend. Just check that it has a good binding agent, like xanthan gum, for best results. Serve your Oreo cheesecake brownies on a nice platter. For a fun touch, add whole Oreos on top. You can also dust them lightly with cocoa powder for a classy look. Cut the brownies into neat squares for uniformity. This makes them easy to share and enjoy! {{image_2}} You can switch up the flavors in your Oreo cheesecake brownies. Try adding different cookie types. For example, use peanut butter or mint Oreos for a fun twist. You can also change the cream cheese flavor. Add a bit of lemon zest for a fresh kick or a splash of almond extract for warmth. If you're vegan, you can still enjoy these brownies. Replace butter with coconut oil and use a vegan cream cheese. For a sugar-free option, try using a sugar substitute like erythritol. Just make sure to check the measurements, as they often vary. Want to make your brownies extra rich? Use dark chocolate instead of semi-sweet. It adds a deeper flavor and makes the dessert more decadent. You can also add nuts, like walnuts or pecans, for a crunchy texture. Other candies, like caramel bits or toffee, can also bring a fun surprise in each bite. - Storing in the fridge: Keep your Oreo cheesecake brownies in an airtight container. They stay fresh for several days. Place a piece of parchment paper between layers if stacking. This keeps them from sticking together. - Freezing brownies: You can freeze these brownies for later. Wrap each piece tightly in plastic wrap. Then, place them in a freezer bag. They can stay good for up to three months. - How long do they last?: In the fridge, these brownies last about five days. If stored properly in the freezer, they last three months. Always check for any signs of spoilage before eating. - Recommended methods for warming: To reheat, use the microwave. Warm each piece for about 10-15 seconds. You can also use an oven. Preheat it to 350°F (175°C) and heat for about 5-10 minutes. This restores that gooey texture. Enjoy warm for the best taste! To test if the brownies are done, use a toothpick. Insert it into the center. If it comes out mostly clean, they are ready. A few moist crumbs are fine, as this keeps them soft. Look for these visual cues: - The edges should pull away from the pan. - The surface will look set and slightly puffed. - A glossy finish is normal, but avoid wet batter. Yes, you can make these brownies ahead of time. Bake them and let them cool completely. Once cool, slice them into squares. For storage, wrap the brownies in plastic wrap. Then, place them in an airtight container. This keeps them fresh for up to five days in the fridge. You can also freeze them for up to three months. Just thaw them overnight in the fridge when you’re ready to enjoy. These brownies pair well with several tasty treats: - Vanilla ice cream adds a creamy touch. - Whipped cream gives a light contrast. - Fresh berries add a fruity flavor. You can also serve them with a drizzle of chocolate sauce. This adds extra sweetness and depth. Enjoy experimenting with different sides to enhance your dessert experience! In this post, we covered how to make delicious Oreo cheesecake brownies. We discussed the key ingredients like butter, cream cheese, and chocolate. I provided step-by-step instructions to help you bake them perfectly. You learned about storage, variations, and some handy tips. These brownies are fun to make and great to share. Get creative with toppings and flavors. Enjoy your baking adventure!

Oreo Cheesecake Brownies

Indulge in the ultimate treat with these Oreo Cheesecake Brownies! This easy recipe combines creamy cheesecake and rich brownies, packed with chopped Oreos and chocolate chips for a delicious twist. Perfect for parties or a sweet craving at home, these brownies are sure to impress. Ready to bake something amazing? Click through to explore the full recipe and treat yourself to a bite of heaven!

Ingredients
  

1 cup unsalted butter (2 sticks)

8 oz cream cheese, softened

1 cup granulated sugar

1 cup brown sugar, packed

4 large eggs

1 teaspoon vanilla extract

1 cup all-purpose flour

1/2 cup unsweetened cocoa powder

1/4 teaspoon salt

1 cup Oreo cookies, chopped (plus extra for topping)

1/2 cup mini chocolate chips

Instructions
 

Preheat your oven to 350°F (175°C) and grease a 9x13-inch baking dish or line it with parchment paper for easy removal.

    In a medium saucepan, melt the butter over low heat. Once melted, remove from heat and let it cool slightly.

      In a large mixing bowl, beat together the softened cream cheese and granulated sugar until smooth and creamy.

        Add in the brown sugar and mix until fully combined. Then, incorporate the eggs one at a time, followed by the vanilla extract.

          In another bowl, whisk together the flour, cocoa powder, and salt. Gradually add this dry mixture to the wet ingredients, stirring until well combined.

            Gently fold in the chopped Oreo cookies and half of the mini chocolate chips into the brownie batter.

              Pour half of the brownie batter into the prepared baking dish and spread evenly.

                In a separate bowl, mix the remaining cream cheese (or reserve some for topping) with a little sugar if desired, then drop spoonfuls of it over the brownie layer.

                  Carefully layer the remaining brownie batter on top of the cream cheese mixture. Swirl gently with a toothpick or knife for a marbled effect.

                    Sprinkle the additional chopped Oreos and remaining chocolate chips on top.

                      Bake in the preheated oven for 30-35 minutes, or until a toothpick inserted into the center comes out mostly clean (a few moist crumbs are okay).

                        Allow the brownies to cool in the pan for about 15 minutes before slicing into squares.

                          Prep Time: 20 minutes | Total Time: 50 minutes | Servings: 12-16

                            - Presentation Tips: Serve these decadent brownies on a beautiful platter, garnished with a few whole Oreos or a dusting of cocoa powder for an elegant touch.