FREE DINNER EBOOK! Get your copy!
  • Cookie Policy
  • GDPR Policy
  • Disclaimer
  • Terms Of Use
  • Visit my other site: Fun Cookie Recipes
tasty trail blazer
  • Home
  • Dinner
  • Desserts
  • Drinks
  • Appetizers
  • Contact
  • About
  • Privacy Policy
  • Home
  • Dinner
  • Desserts
  • Drinks
  • Appetizers
  • Contact
  • About
  • Privacy Policy
  • Cookie Policy
  • GDPR Policy
  • Disclaimer
  • Terms Of Use
Visit my other site: Fun Cookie Recipes

HOME / CATEGORIES /

Latest

To make these tasty pumpkin chocolate chip muffins, gather these key ingredients: - 1 cup canned pumpkin puree - 1/2 cup vegetable oil - 3/4 cup brown sugar, packed - 1/4 cup granulated sugar - 2 large eggs - 1 teaspoon vanilla extract - 1 1/2 cups all-purpose flour - 1 teaspoon baking soda - 1 teaspoon baking powder - 1 teaspoon ground cinnamon - 1/2 teaspoon ground nutmeg - 1/2 teaspoon ground ginger - 1/4 teaspoon salt - 1 cup semi-sweet chocolate chips - 1/2 cup chopped walnuts (optional) You can make some swaps if you need to: - Use coconut oil in place of vegetable oil for a slight coconut flavor. - Try maple syrup instead of brown sugar for a unique taste. - Substitute whole wheat flour for all-purpose flour for more fiber. - Replace eggs with flaxseed meal mixed with water for a vegan option. Choosing fresh ingredients makes a big difference. Here are some tips: - Look for canned pumpkin with no added sugar or spices. Pure pumpkin gives the best flavor. - Choose oils that are clear and free from cloudiness. - For eggs, check the expiration date on the carton. Fresh eggs are best. - When picking spices, smell them. Strong scents mean they are fresh and flavorful. - If using nuts, pick ones that are not stale. They should be crunchy and fragrant. To start, preheat your oven to 350°F (175°C). This helps the muffins bake evenly. Then, line a muffin tin with paper liners or spray it with cooking spray. Next, grab a large bowl. Combine 1 cup of canned pumpkin puree, 1/2 cup of vegetable oil, 3/4 cup of packed brown sugar, and 1/4 cup of granulated sugar. Whisk these ingredients together until they blend nicely. Now, add 2 large eggs and 1 teaspoon of vanilla extract to your mixture. Whisk again until it looks fluffy. In another bowl, mix together 1 1/2 cups of all-purpose flour, 1 teaspoon of baking soda, 1 teaspoon of baking powder, 1 teaspoon of ground cinnamon, 1/2 teaspoon of ground nutmeg, 1/2 teaspoon of ground ginger, and 1/4 teaspoon of salt. This mix gives your muffins great flavor and rise. Slowly add the dry mix to your pumpkin mix. Stir gently and stop as soon as it combines. Overmixing can make the muffins tough. Finally, fold in 1 cup of semi-sweet chocolate chips and 1/2 cup of chopped walnuts if you like nuts. Now, scoop the batter into the muffin tins. Fill each cup about 3/4 full. This allows room for the muffins to rise. Bake them in your preheated oven for 18 to 20 minutes. To check if they are done, insert a toothpick into the center of a muffin. If it comes out clean, they are ready! Once baked, let the muffins cool in the pan for about 5 minutes. This helps them firm up a bit. Then, transfer them to a wire rack. Let them cool completely before serving. Enjoy these muffins warm, or store them for later. They pair well with coffee or tea! To get that soft, fluffy texture, use a light touch when mixing. Overmixing the batter makes the muffins dense. Mix until ingredients are just combined. This keeps your muffins airy. Also, let your batter rest for a few minutes before baking. This step helps the muffins rise better in the oven. One big mistake is not measuring flour correctly. Too much flour can make muffins dry. Use the scoop and level method for best results. Another mistake is skipping the cooling time. Allowing muffins to cool helps set their shape. If you take them out too soon, they might fall apart. You can change the flavor of your muffins by adding nuts or spices. Chopped walnuts add a nice crunch. You can also try adding dried fruits or coconut. For a twist, swap some chocolate chips for white chocolate or butterscotch chips. Don't be afraid to experiment! {{image_2}} You can easily make these muffins nut-free. Simply skip the chopped walnuts. The muffins still taste amazing. You can also add more chocolate chips for extra sweetness. This makes them perfect for kids or anyone with nut allergies. Want to make these muffins vegan? Swap the eggs for flax eggs. Use 1 tablespoon of ground flaxseed mixed with 2.5 tablespoons of water. Let it sit for five minutes to thicken. For the oil, you can use unsweetened applesauce. This keeps the muffins moist and adds natural sweetness. Get creative with flavors! Try adding spices like cardamom or allspice for extra warmth. You can mix in dried fruits like cranberries or raisins for a chewy texture. For a fun twist, add a dash of orange zest. This will brighten the flavor and give a fresh touch. Each variation will make your muffins stand out. To keep your muffins fresh, store them in an airtight container. This helps to lock in moisture and flavor. You can place parchment paper between layers to avoid sticking. If you want to keep them for a longer time, store them at room temperature for up to three days. For longer storage, consider freezing. To freeze your muffins, let them cool completely. Then, wrap each muffin tightly in plastic wrap. Place them in a freezer bag or container. They will stay fresh for up to three months. When you want to enjoy one, just remove it from the freezer. Let it sit at room temperature for about 30 minutes. You can also microwave it for about 20 seconds to warm it up. Homemade muffins last about three days at room temperature. If you keep them in the fridge, they can last up to a week. Freezing extends their life to about three months. Always check for signs of spoilage, like mold or an off smell, before eating. This ensures you enjoy your muffins at their best! Yes, you can use fresh pumpkin. Just roast it first. Cut the pumpkin in half and scoop out the seeds. Roast it at 400°F for about 45 minutes. Let it cool, then mash it up. This fresh puree gives a rich taste. However, canned pumpkin is easier and saves time. To make these muffins healthier, try these swaps: - Use whole wheat flour instead of all-purpose flour. - Replace half the oil with unsweetened applesauce. - Use less sugar or substitute with honey or maple syrup. - Add flaxseed or chia seeds for fiber and omega-3s. These changes keep the muffins tasty and nutritious. You can add many fun ingredients! Here are some ideas: - Chopped nuts like pecans or almonds for crunch. - Dried fruits like cranberries or raisins for sweetness. - Seeds like pumpkin or sunflower seeds for a healthy touch. - Spices like cloves or allspice for extra flavor. These add-ins will make your muffins unique and delicious! In this blog post, we explored the key ingredients for delicious muffins and how to select fresh options. I provided step-by-step instructions on making the batter, baking, and serving. We also discussed tips for texture and avoiding mistakes, plus fun variations like nut-free and vegan options. Lastly, I covered storage tips to keep your muffins fresh. Remember, with a few basic steps, you can create tasty muffins at home that suit your needs and preferences. Happy baking!

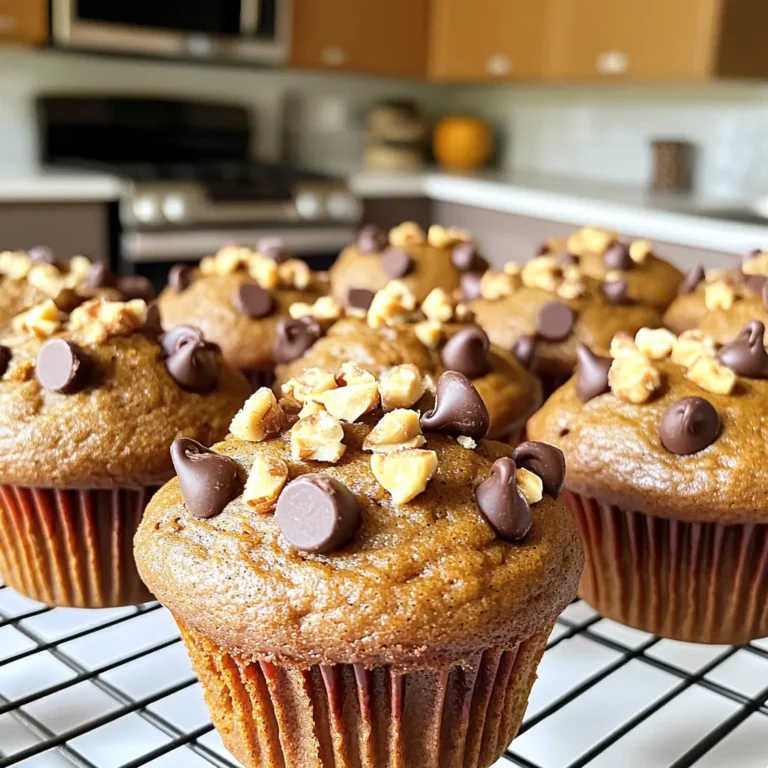
Pumpkin Chocolate Chip Muffins Bakery Style Delight

- 2 cups all-purpose flour - 1 tablespoon baking powder - 1/2 teaspoon baking soda - 1/2 teaspoon salt - 1 teaspoon ground cinnamon - 1/2 teaspoon nutmeg To start, we need to mix our dry ingredients. Flour is the base of our cake. Baking powder and baking soda help it rise. Salt enhances flavor. Cinnamon and nutmeg add warmth and spice. This blend gives our cake its amazing flavor. - 1/2 cup unsalted butter, softened - 1 cup granulated sugar - 2 large eggs - 1 cup apple cider Next, we focus on the wet ingredients. Softened butter makes the cake rich. Granulated sugar adds sweetness. Eggs provide structure and moisture. Apple cider gives a fruity twist. It makes the cake moist and adds a hint of fall. - 1 medium apple, peeled and diced (preferably Granny Smith) - 1 teaspoon vanilla extract Now for the fun part—add-ins! Diced apple adds texture and flavor. I like using Granny Smith apples for a tart touch. Vanilla extract brings everything together with a sweet aroma. These add-ins make every bite a delight! First, I preheat my oven to 350°F (175°C). This step is key for a perfect bake. Next, I grease and flour a 9x13 inch baking dish. This helps the cake come out easily. In a medium bowl, I whisk together the dry ingredients. This includes 2 cups of all-purpose flour, 1 tablespoon of baking powder, 1/2 teaspoon of baking soda, 1/2 teaspoon of salt, 1 teaspoon of ground cinnamon, and 1/2 teaspoon of nutmeg. I set this bowl aside. In a larger bowl, I cream 1/2 cup of softened unsalted butter with 1 cup of granulated sugar. I mix until it becomes light and fluffy. Then, I add 2 large eggs one at a time, mixing well after each. I stir in 1 cup of apple cider and 1 teaspoon of vanilla extract next. Gradually, I add the dry mixture to the wet mixture. I mix until just combined, being careful not to overmix. Finally, I gently fold in 1 medium apple, peeled and diced. I take a small bowl to mix 1/2 cup of brown sugar with 1 tablespoon of ground cinnamon. This will be my cinnamon swirl mix. Next, I pour half of the batter into the prepared baking dish. I spread it evenly. Then, I sprinkle half of the brown sugar cinnamon mixture on top. I pour the rest of the batter over this layer and smooth it out. Finally, I sprinkle the remaining brown sugar cinnamon mix on top. I use a knife to gently swirl the topping into the batter. This creates a nice marbled effect. I bake the cake for 30-35 minutes. I check for doneness by inserting a toothpick in the center. If it comes out clean, my cake is ready! While the cake bakes, I prepare the glaze. I mix 1 cup of powdered sugar with 1 tablespoon of apple cider. If it's too thick, I add more cider to reach my desired drizzling consistency. After baking, I let the cake cool slightly in the pan. Then, I drizzle the glaze over the top. This step adds a sweet finish to my apple cider cinnamon roll cake. - Avoiding overmixing: Mix your batter just until you see no dry flour. This keeps your cake light and fluffy. Overmixing can make it dense and tough, which is not what we want. - Swirling technique for best results: When you layer the batter and cinnamon mixture, use a knife to gently swirl the topping into the batter. This creates a pretty marbled look and helps blend the flavors. Don’t overdo it; you want to see some distinct swirls. - Presentation tips for serving: Cut the cake into squares and serve it warm. A rustic wooden platter looks great for this cake. You can add a sprinkle of extra cinnamon on top for a nice touch. - Pairing options: Serve your cake with a dollop of whipped cream or a scoop of vanilla ice cream. The creaminess balances the warm spices in the cake and makes each bite feel special. {{image_2}} You can easily adjust this apple cider cinnamon roll cake to fit your needs. For a gluten-free option, use a gluten-free flour blend. This will provide a great texture without the gluten. If you want a dairy-free cake, swap the unsalted butter for coconut oil or a dairy-free butter. These substitutes keep the cake moist and tasty. To make your cake even yummier, think about adding nuts or raisins. Chopped walnuts or pecans add a delightful crunch. Raisins can give a sweet burst of flavor in every bite. You can also infuse the cake with extra spices. Try adding cardamom or ginger for a warm hint. These spices will elevate your cake’s taste profile. This cake is perfect for using seasonal fruits. Instead of apples, you can try pears or cranberries. Both fruits work well and add a new twist. If you want to change the cider flavor, use spiced or flavored apple ciders. It adds a unique taste that fits any season. These variations keep the cake fresh and exciting. To store leftovers, first let the cake cool completely. Wrap it in plastic wrap or place it in an airtight container. This keeps the cake fresh and moist. In the fridge, your Apple Cider Cinnamon Roll Cake will last about 5 days. You can freeze the whole cake or individual pieces. If freezing the whole cake, wrap it tightly in plastic wrap, then in foil. For individual pieces, place them in a freezer-safe bag or container. When ready to enjoy, let the cake thaw in the fridge overnight. For the best texture, warm it in the oven for a few minutes before serving. To make your cake fluffy, use fresh baking powder. Make sure to cream the butter and sugar well. This adds air to the mix, making it light. Also, don’t overmix the batter; mix until just combined. Lastly, make sure your eggs are at room temperature for better blending. Yes, you can use store-bought apple cider. It saves time and still adds great flavor. Look for a cider with no added sugars. If you want to try something different, apple juice can work too, but it will taste sweeter. If your cake is dry, add a splash of apple cider to the batter. This helps add moisture. You can also brush the top with a little melted butter or more cider after baking. Serve it warm with whipped cream or ice cream to enjoy it better. To check if your cake is done, insert a toothpick in the center. If it comes out clean or with just a few crumbs, your cake is ready. If it has wet batter, bake it a little longer. The top should be golden brown and spring back when you touch it. This blog post covered the essential elements for making a delicious cinnamon roll cake. We talked about the ingredients, detailed the step-by-step process, and shared useful tips. You now know about ingredient substitutions, seasonal variations, and how to store your cake. Baking is fun and creative. Don't hesitate to try new flavors or add-ins. With these guidelines, you're ready to create a tasty treat. Enjoy your baking journey and share your delicious results!

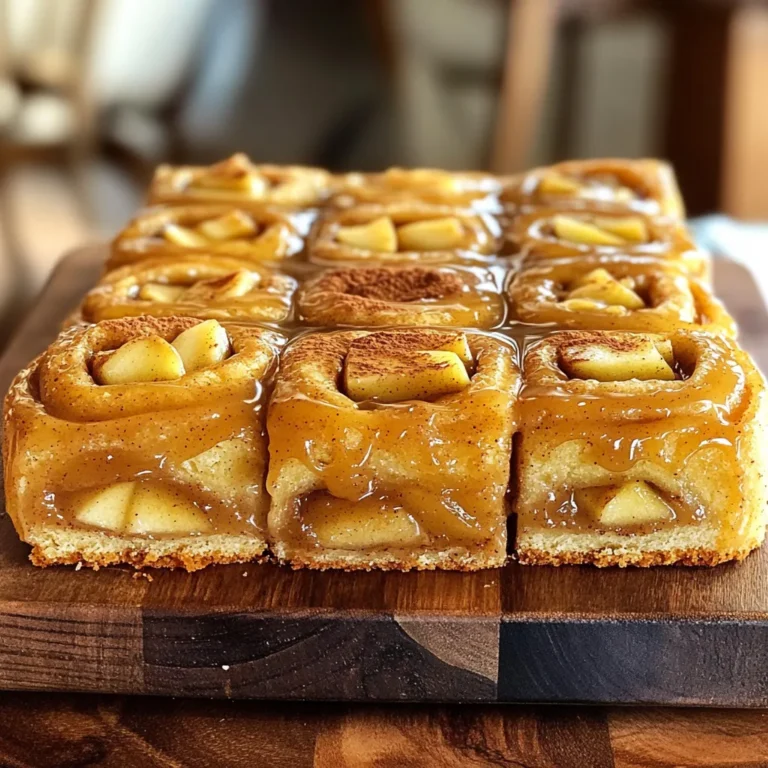
Apple Cider Cinnamon Roll Cake Delightfully Tasty Treat

- 1 block (14 oz) firm tofu, pressed and drained - 2 tablespoons cornstarch - 1 tablespoon olive oil - 3 tablespoons honey (or maple syrup for a vegan option) - 3 cloves garlic, minced - 1 tablespoon soy sauce (or tamari for gluten-free) - 1 tablespoon rice vinegar - 1 teaspoon sesame oil - 1/2 teaspoon black pepper - 2 green onions, sliced for garnish - Sesame seeds for garnish For tofu, I recommend using firm tofu for the best texture. Brands like Nasoya and House Foods are great choices. For honey, local raw honey offers rich flavor. If you prefer a vegan option, select pure maple syrup. For soy sauce, Kikkoman is a trusted brand. If you need gluten-free, try Tamari. Each serving (about 1/2 cup) contains: - Calories: 210 - Protein: 9g - Carbohydrates: 24g - Dietary Fiber: 1g - Sugars: 10g - Fat: 9g - Sodium: 300mg This dish packs protein and flavor with a sweet touch from honey or maple syrup. Enjoy it guilt-free! First, I take the tofu and press it to remove water. This step helps the tofu get crispy. Next, I cut the pressed tofu into bite-size cubes, about one inch. This size helps each piece cook evenly. After cutting, I put the tofu in a bowl. I sprinkle two tablespoons of cornstarch over the cubes. I gently toss the tofu until every piece is coated. The cornstarch helps create a crunchy texture when air frying. Next, I drizzle one tablespoon of olive oil over the tofu. This oil helps the cornstarch stick and adds flavor. I then mix the tofu again to ensure every piece gets a light coat of oil. While the tofu cooks, I prepare the sauce. In a small saucepan, I combine three tablespoons of honey, three minced garlic cloves, one tablespoon of soy sauce, one tablespoon of rice vinegar, one teaspoon of sesame oil, and half a teaspoon of black pepper. I heat the mixture over medium heat. I stir it often until the sauce bubbles and thickens, which takes about three to four minutes. This bubbling action brings out the flavors and makes the sauce rich. To air fry the tofu, I preheat the air fryer to 375°F (190°C). Once heated, I place the tofu cubes in the basket in a single layer. This spacing is key; it allows hot air to circulate and crisp the tofu. I set the timer for 15 to 20 minutes. Halfway through, I shake the basket. This step ensures all sides cook evenly and become golden brown. The result should be crispy, crunchy tofu with a delicious, sticky sauce that you can enjoy! One big mistake is not pressing the tofu enough. Always drain and press your tofu well. This helps to remove excess water, making it crispier. Another mistake is overcrowding the basket. Air needs space to circulate. If you stack the tofu, it won’t cook evenly. Lastly, skipping the cornstarch can lead to a soggy texture. Cornstarch forms a nice crispy layer. Tofu can be bland, so marinating helps. Let your tofu sit in the sauce for at least 30 minutes. This adds flavor. You can also try double frying. First, cook the tofu until firm. Then, let it cool and fry again for extra crunch. Experiment with different oils, too. Each oil adds its own taste and aroma. Most air fryers cook at similar speeds, but some vary. Start with the recommended time of 15-20 minutes at 375°F (190°C). Check the tofu halfway through. If it’s not golden, add 3-5 more minutes. Each model may need slight adjustments. Always refer to your air fryer manual for guidance. Don’t forget to shake the basket to ensure even cooking! {{image_2}} You can easily make this dish vegan by swapping honey for maple syrup. Maple syrup gives a sweet and rich flavor. Just use the same amount as honey. It keeps the dish sticky and delicious, perfect for coating the tofu. Feel free to add your favorite veggies to this dish. Broccoli, bell peppers, or snap peas work well. Just chop them into bite-sized pieces. Toss them in the air fryer with the tofu for a colorful meal. You can also spice up the sauce. Add red pepper flakes for heat or ginger for a fresh twist. A bit of lime juice can brighten up the flavors too. You can serve this honey garlic tofu in many ways. For an Asian twist, serve it over rice or noodles. Add sesame seeds and sliced green onions on top. For a Mexican flair, use it in tacos with fresh salsa and avocado. You can also enjoy it in a salad with mixed greens and a tangy dressing. The options are endless, making this dish perfect for any meal. To keep your leftover crispy honey garlic tofu fresh, let it cool first. Store it in an airtight container. Place it in the fridge. This helps maintain its flavor and texture. You can also separate the sauce if you prefer. This prevents the tofu from getting too soggy. You can store air-fried tofu in the fridge for up to three days. After that, it may lose its texture and flavor. If you want to keep it longer, consider freezing it. Frozen tofu can last up to three months. Just remember to thaw it before reheating. To reheat your tofu and keep it crispy, use the air fryer again. Preheat the air fryer to 375°F (190°C). Place the tofu in a single layer and air fry for about 5-7 minutes. This will help revive the crunch. If you don’t have an air fryer, you can use a skillet. Heat a bit of oil, then add the tofu until warm and crispy again. No, you should not use soft tofu. Soft tofu will not hold its shape. It will break apart during cooking. Firm tofu is best for this recipe. It gives you the crispy texture you want. To press tofu, place it on a plate. Use another plate on top to add weight. You can also use paper towels to soak up moisture. Let it sit for 15-30 minutes. This helps the tofu absorb flavors better. Yes, this recipe can be gluten-free. Use tamari instead of soy sauce. Always check labels for gluten-free options. The rest of the ingredients are naturally gluten-free. To make it spicier, add red pepper flakes to the sauce. You can also mix in sriracha or chili paste. Adjust the spice to fit your taste. Start with a little, and add more as needed. In this blog post, we covered the key ingredients and steps to make Air Fryer Crispy Honey Garlic Tofu. I shared useful tips, common mistakes to avoid, and tasty variations to try. Remember to store leftover tofu properly to keep it fresh and crispy. This recipe is flexible, so feel free to adjust as needed. Enjoy experimenting with flavors and cooking methods. You’ll be thrilled with how easy and delicious this dish can be. Happy cooking!

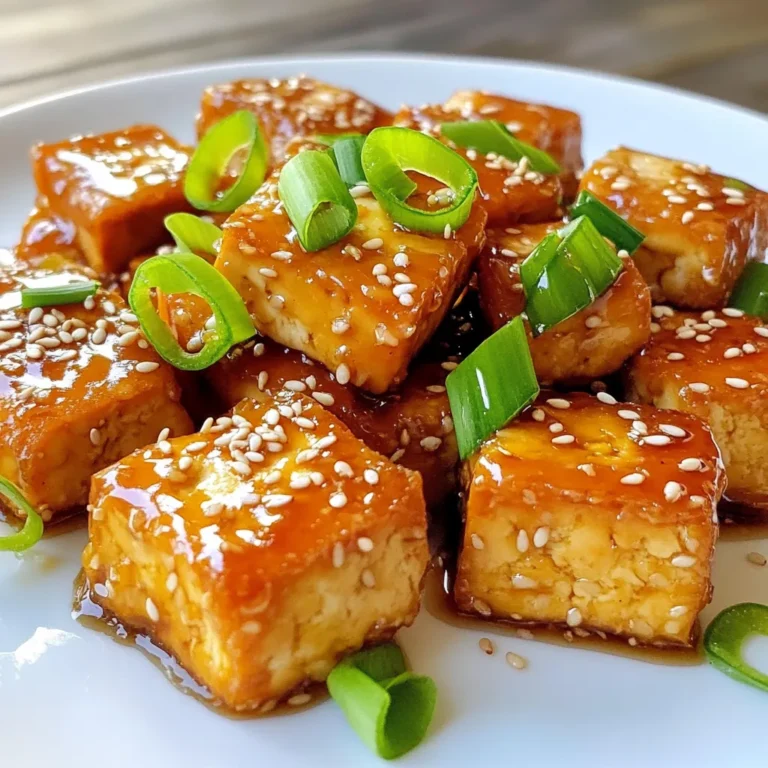
Air Fryer Crispy Honey Garlic Tofu Simple Delight

For your Cinnamon Apple Coffee Cake, you'll need the following ingredients: - 2 cups all-purpose flour - 1 teaspoon baking powder - 1 teaspoon baking soda - 1 teaspoon ground cinnamon - ½ teaspoon salt - ¾ cup unsalted butter, softened - 1 cup granulated sugar - 2 large eggs - 1 teaspoon vanilla extract - 1 cup plain Greek yogurt - 2 cups apples, peeled and diced (about 2 medium apples) - ½ cup brown sugar - 1 tablespoon cinnamon (for topping) - ½ cup chopped walnuts (optional) These ingredients come together to create a soft, moist cake that bursts with flavor. The apples add sweetness and texture, while the cinnamon gives it a warm, inviting aroma. Using Greek yogurt keeps the cake tender and adds a nice tang. Make sure to have everything ready before you start. It helps to measure out the ingredients first. This way, you won’t miss anything and can focus on the fun of baking! Preheat your oven to 350°F (175°C). Grease a 9x13-inch baking pan. You can also line it with parchment paper for easy removal. This step ensures your cake bakes evenly and comes out smoothly. In a medium bowl, whisk together the following dry ingredients: - 2 cups all-purpose flour - 1 teaspoon baking powder - 1 teaspoon baking soda - 1 teaspoon ground cinnamon - ½ teaspoon salt Mix these well. This helps distribute the leavening agents and spices evenly, which is key for a fluffy cake. In a large mixing bowl, beat together: - ¾ cup unsalted butter, softened - 1 cup granulated sugar Mix until light and fluffy, about 3-4 minutes. Then, add in: - 2 large eggs, one at a time - 1 teaspoon vanilla extract Mix well after each addition. This step adds air for a light texture. Now, mix in: - 1 cup plain Greek yogurt Blend until fully incorporated. Gradually add the dry ingredients. Mix gently until just combined. Be careful not to overmix; this keeps the cake tender. Gently fold in: - 2 cups apples, peeled and diced - ½ cup chopped walnuts (optional) Use a spatula to combine. This adds moisture and crunch to your cake. Pour half of the batter into the prepared baking pan. Spread it evenly. Sprinkle half of the cinnamon sugar mixture over the batter. Pour the remaining batter on top and spread gently. Finally, sprinkle the last of the cinnamon sugar on top. Bake in the preheated oven for 35-40 minutes. Check for doneness by inserting a toothpick into the center. If it comes out clean, your cake is ready. Let the coffee cake cool in the pan for about 10 minutes. Then, transfer it to a wire rack to cool completely. Cut into squares and serve warm. Enjoy this treat with coffee for a perfect afternoon snack! Choosing the right apples for baking is key. I recommend using firm apples like Granny Smith or Honeycrisp. These apples hold their shape and provide a nice tartness. Avoid soft apples, as they can turn mushy during baking. When selecting apples, look for ones that are free of bruises and have a shiny skin. Freshness matters here! To achieve the perfect texture, follow a few simple tips. First, don't overmix the batter. Mix until just combined to keep the cake light. Use room temperature butter and eggs for a smoother batter. Also, ensure your oven is correctly preheated to 350°F (175°C). This helps the cake rise evenly, so check your oven’s temperature with an oven thermometer. Pair this coffee cake with a warm drink. Coffee is a classic choice, but tea works well too. You can also serve it with a scoop of vanilla ice cream for a sweet treat. For a fun twist, top it with whipped cream and a sprinkle of cinnamon. This adds a lovely touch to your serving! {{image_2}} To make a nut-free version of this cinnamon apple coffee cake, simply leave out the chopped walnuts. You can replace the texture they add by using sunflower seeds or pumpkin seeds. Both options give a nice crunch without any nuts. This keeps the cake safe for those with nut allergies. You can boost the flavor by adding other spices. Nutmeg and allspice work well with cinnamon. Start with a pinch of each spice and taste as you mix. Just a little can change the whole cake. This is a great way to explore new flavors and find what you like best. Want a vegan version? You can swap out the eggs for flax eggs. To make one flax egg, mix 1 tablespoon of flaxseed meal with 2.5 tablespoons of water. Let it sit until it thickens. For the butter, use vegan butter or coconut oil. You can also use almond milk or soy yogurt instead of Greek yogurt. This keeps the cake moist and tasty while being vegan-friendly. To keep the coffee cake fresh, place it in an airtight container. Store it at room temperature for up to three days. If you want it to last longer, refrigerate it. The cool air helps maintain its moist texture. Just be sure to let it come to room temperature before serving. If you want to freeze the cake, slice it first. Wrap each piece tightly in plastic wrap. Then, place the wrapped slices in a freezer bag. You can freeze it for up to three months. When you're ready to enjoy it, just pull out a slice and let it thaw in the fridge overnight. To reheat the coffee cake, preheat your oven to 350°F (175°C). Place the slice on a baking sheet. Cover it with aluminum foil to prevent it from drying out. Heat for about 10-15 minutes until warm. You can also use the microwave for a quick fix. Heat for about 15-20 seconds, but check that it doesn't get too hot. Enjoy your warm slice with a cup of coffee! Yes, you can! If you don’t have Greek yogurt, regular yogurt works well too. You can also try plant-based yogurt if you prefer. Just keep the amount the same. The yogurt adds moisture and helps the cake rise, so pick a plain variety for best results. This coffee cake lasts about 3 to 4 days at room temperature. Keep it in an airtight container to maintain freshness. If you want it to last longer, you can refrigerate it for up to a week. Make sure to cover it well to prevent it from drying out. Absolutely! To make this coffee cake gluten-free, use a 1:1 gluten-free flour blend. Brands like Bob's Red Mill or King Arthur Flour work great. Just be sure to check that your baking powder is gluten-free too. The texture may be slightly different, but the taste will still be delicious! I recommend using a 9x13-inch baking pan for this recipe. This size helps the cake bake evenly and makes it easy to cut into squares. If you prefer smaller pieces, you can use an 8x8-inch pan, but keep an eye on the baking time, as it may need a little longer. This blog post covered a delicious coffee cake recipe. We discussed the key ingredients, step-by-step instructions, and tips for baking success. You learned how to customize the recipe with variations and storage options to keep it fresh. Baking creates joy and delicious memories. Now, gather your ingredients and start making this cake. Enjoy every bite and share it with friends and family! Bake with love and creativity, and you can’t go wrong.

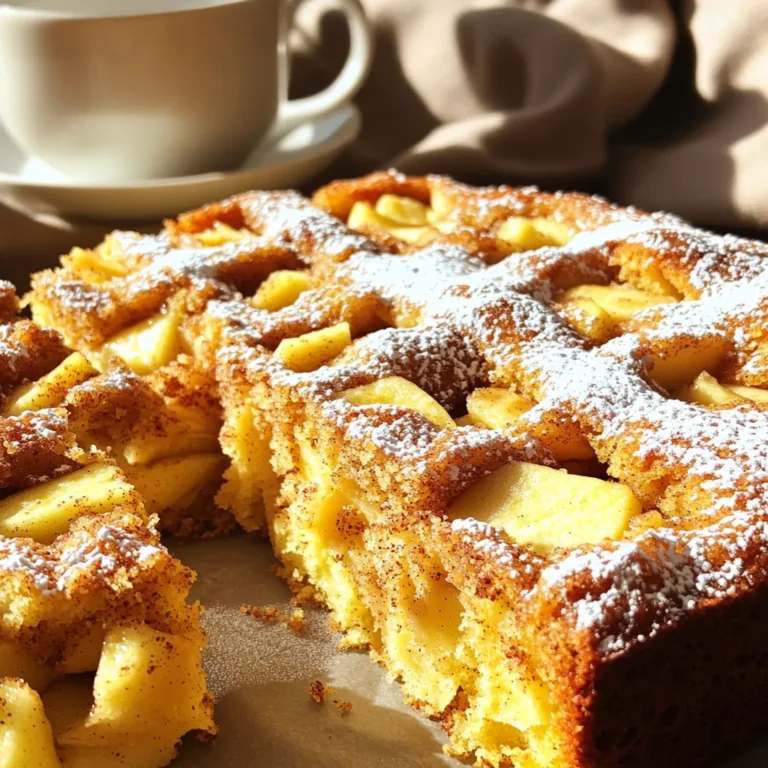
Cinnamon Apple Coffee Cake Bakery Style Delight

- 1 pound boneless, skinless chicken thighs, diced - 1 cup orzo pasta - 4 cups chicken broth - 1 cup heavy cream The main stars of this dish are chicken, orzo, and a rich cream. Chicken thighs work best here as they stay juicy and tender. Orzo, a small pasta, absorbs flavors well. The chicken broth adds depth, while heavy cream brings a luscious texture. - 1 onion, finely chopped - 3 cloves garlic, minced - 1 lemon, zested and juiced - 1 cup baby spinach - 1 teaspoon dried thyme - 1 teaspoon paprika - Salt and pepper to taste - 2 tablespoons olive oil Aromatics like onion and garlic provide a savory base. Fresh lemon adds brightness, while spinach gives a pop of color and nutrients. Thyme and paprika elevate the dish, creating a warm and zesty flavor. Don't forget the salt and pepper; they pull everything together. - One pot - Cooking utensils To make this dish, you only need one pot. This makes cleanup super easy! A good pot helps distribute heat evenly. You will also need basic utensils like a spatula and a knife for chopping. With these tools, you're all set to create a creamy lemon chicken orzo that dazzles. - Browning the Chicken Start by heating 2 tablespoons of olive oil in a large pot over medium heat. Once the oil is hot, add 1 pound of diced boneless, skinless chicken thighs. This step gives the chicken a nice brown color. Cook the chicken for about 5 to 7 minutes. Make sure to stir it often. When the chicken is browned on all sides, remove it from the pot and set it aside. - Seasoning to Taste While cooking the chicken, season it with salt, pepper, and 1 teaspoon of paprika. This adds a lovely flavor. You can adjust the salt and pepper based on your preference. - Sautéing Onion and Garlic In the same pot, add 1 finely chopped onion. Sauté it for about 3 to 4 minutes until it becomes translucent. Then, add 3 cloves of minced garlic. Sauté for another minute until you smell its great aroma. - Toasting the Orzo Next, stir in 1 cup of orzo pasta and 1 teaspoon of dried thyme. Cook them together for 1 to 2 minutes. This toasting step helps bring out the flavor of the orzo. - Adding Liquids and Chicken Pour in 4 cups of chicken broth, the juice of 1 lemon, and the zest of that lemon. Make sure to scrape the bottom of the pot to release any tasty bits stuck there. Now, return the browned chicken to the pot. Bring the mixture to a boil. - Cooking the Orzo to Perfection Once boiling, reduce the heat to a simmer. Cook uncovered for about 10 minutes. Stir occasionally. The orzo should be al dente, and most of the broth will be absorbed. - Incorporating Cream and Spinach After the orzo is cooked, stir in 1 cup of heavy cream and 1 cup of baby spinach. Cook for another 2 to 3 minutes. You want the spinach to wilt and the sauce to become creamy. - Adjusting Seasoning Taste your dish and adjust the seasoning if needed. Add more salt and pepper if you like. Let it sit for a couple of minutes before serving. Enjoy your delicious creamy lemon chicken orzo! - Searing Chicken for Flavor Start by heating olive oil in a large pot. Add diced chicken thighs, season them well, and cook until browned. This step locks in the flavors and gives the chicken a great texture. It takes about 5-7 minutes. Don’t rush! Searing adds depth to your dish. - Perfectly Toasting Orzo After cooking the onions and garlic, add the orzo pasta to the pot. Toast the orzo for 1-2 minutes. This step enhances its nutty flavor. Stir it often to ensure it doesn’t burn. Toasting makes a big difference in taste. - Chicken Alternatives If you prefer, swap chicken thighs for boneless chicken breasts. You can also use turkey or even tofu for a plant-based option. Just adjust the cooking time based on what you choose. - Dairy-Free Options For a dairy-free meal, replace heavy cream with coconut milk or a dairy-free cream. This keeps the dish creamy while making it suitable for those with dietary restrictions. - Garnishing Ideas To make your dish pop, garnish with freshly chopped parsley. A sprinkle of lemon zest adds a bright touch. These small details make your meal look inviting and fresh. - Serving Recommendations Serve the creamy lemon chicken orzo in shallow bowls. This style allows the vibrant colors to shine. Pair it with a light salad for a complete meal. It’s all about creating an enjoyable dining experience! {{image_2}} You can make this creamy lemon chicken orzo even better with simple tweaks. - Additional Vegetables: Toss in veggies like bell peppers, zucchini, or peas. They add color and nutrition. You can also use mushrooms for a savory touch. - Different Natural Flavors: Adding herbs like basil or dill can change the taste. You can also use a splash of white wine for depth. This recipe can fit different diets easily. - Gluten-Free Options: Swap orzo with gluten-free pasta. There are many great brands that work well. - Low-Calorie Versions: Use less cream or replace it with Greek yogurt. You can also use chicken breast instead of thighs for fewer calories. Try mixing in flavors from other cuisines to spice things up. - Mediterranean Twist: Add olives, feta cheese, or artichokes. These ingredients will bring a fresh, tangy flavor. - Asian-Inspired Modifications: Use sesame oil instead of olive oil. Add soy sauce and ginger for a different taste. You can even top it with green onions for a nice crunch. How do you store leftovers? After dinner, let the creamy lemon chicken orzo cool. Place it in an airtight container. This keeps the dish fresh. Store it in the fridge for up to three days. What are the best practices for container use? Use glass or BPA-free plastic containers. These materials help keep flavors intact. Make sure the lid seals well. This prevents any air from getting in. What are some freezing tips for one pot meals? You can freeze creamy lemon chicken orzo, but do it wisely. Use a freezer-safe container. Leave some space at the top for expansion. It's best to freeze it within 24 hours of cooking. How do you thaw and reheat meals? To thaw, place it in the fridge overnight. If you’re in a hurry, you can use the microwave. Heat it on low power to avoid hot spots. Stir it occasionally while reheating. How long does it last? In the fridge, the orzo keeps fresh for three days. If frozen, it can last for up to three months. Mark the date on the container for easy reference. What are the signs of spoilage? Look for a sour smell or any discoloration. If you see mold, it’s time to toss it. Always trust your senses; when in doubt, throw it out! To make orzo less sticky, you should follow a few key tips. First, toast the orzo in the pot for 1-2 minutes. This helps prevent stickiness. Second, stir the orzo frequently while it cooks. This keeps it separate. Finally, use enough liquid, like chicken broth. If the orzo absorbs too much broth, it can become sticky. - Toast orzo for 1-2 minutes. - Stir frequently while cooking. - Use enough broth for cooking. Yes, you can use other types of pasta. Some good options are farfalle, penne, or rotini. These shapes hold sauce well and cook nicely. If you choose a different pasta, adjust the cooking time based on the package instructions. Remember, the goal is a tender pasta in a creamy sauce. - Farfalle, penne, rotini are good alternatives. - Adjust cooking time as needed. This recipe works great for meal prep. You can make a big batch and store leftovers easily. To store, let the dish cool down first. Then, place it in an airtight container. It will last in the fridge for 3-4 days. If you want to freeze it, keep it in a freezer-safe container. This way, you can enjoy it later! - Store in airtight containers. - Lasts 3-4 days in the fridge. - Freeze for longer storage. This blog post covered how to make a delicious one-pot dish using chicken and orzo pasta. We explored key ingredients like chicken, broth, and seasoning options. You learned step-by-step instructions, plus helpful tips for cooking and presentation. In closing, this recipe is flexible and easy to adapt. Feel free to try different ingredients or flavors. Happy cooking! Enjoy every bite!

Creamy Lemon Chicken Orzo One Pot Delight

To make a delicious Caramel Apple Ice Cream Sundae, gather these simple ingredients: - 4 cups vanilla ice cream - 2 large apples (Granny Smith or Honeycrisp), peeled, cored, and diced - 1 cup caramel sauce (store-bought or homemade) - 1 teaspoon cinnamon - 1 tablespoon lemon juice - 1/2 cup chopped walnuts or pecans (optional) - Whipped cream for topping - Maraschino cherries for garnish - Additional caramel sauce for drizzling These ingredients create a tasty fall treat that blends creamy ice cream with warm, spiced apples. The tartness of the Granny Smith apples pairs well with sweet caramel and soft ice cream. You can also switch the apples for Honeycrisp if you prefer a sweeter taste. Using fresh ingredients makes the sundae more flavorful. I love adding walnuts or pecans for a nice crunch. If you want a classic sundae look, finish it off with whipped cream and a cherry on top. You can drizzle more caramel sauce for extra sweetness. This sundae is perfect for gatherings or a cozy night in. Enjoy the flavors of fall in each delightful bite! First, take your two large apples, either Granny Smith or Honeycrisp. Peel, core, and dice them into small pieces. In a medium bowl, toss the diced apples with 1 tablespoon of lemon juice and 1 teaspoon of cinnamon. This step prevents browning and adds a nice flavor. Next, heat a skillet over medium heat. Add the spiced apples to the skillet and sauté for about 5-7 minutes. You want the apples to be tender but still slightly crisp. Once they are cooked, remove them from the heat and allow them to cool for a moment. While the apples cool, scoop generous portions of 4 cups of vanilla ice cream into individual serving bowls or glasses. Use a large spoon to make it easy. Now, take the warm sautéed apples and spoon them over the ice cream. The heat from the apples will melt the ice cream just enough to create a delicious mix. Now it's time to add the fun! Drizzle a generous amount of caramel sauce over the apples and ice cream. This step makes everything even sweeter. If you want, sprinkle 1/2 cup of chopped walnuts or pecans on top for a nice crunch. Finally, finish your sundae with a dollop of whipped cream. Don’t forget a maraschino cherry on top for that classic look. For an extra treat, drizzle more caramel sauce over the whipped cream just before serving. Enjoy your tasty fall treat! For your caramel apple ice cream sundaes, I love using Granny Smith or Honeycrisp apples. Granny Smith apples offer a tart flavor that balances the sweetness of the caramel. Honeycrisp apples are juicy and sweet, adding a nice crunch. Both apples hold their shape well, which is great for this dessert. You want apples that are firm and fresh for the best taste and texture. Making your own caramel sauce is easy and fun. Here’s a simple recipe: - 1 cup sugar - 6 tablespoons butter - 1/2 cup heavy cream 1. In a medium pot, heat sugar over medium heat. Stir until it melts and turns golden brown. 2. Remove from heat and add butter, stirring until melted. 3. Carefully stir in heavy cream. The mixture will bubble. 4. Return to heat for 1-2 more minutes. Let it cool before using. Using homemade caramel sauce adds a personal touch to your sundaes. To make your sundae look stunning, use clear glasses or bowls. Start with a scoop of ice cream at the bottom. Then, add the warm sautéed apples on top. Drizzle caramel sauce generously. For a fun crunch, sprinkle chopped walnuts or pecans. Top it off with whipped cream and a maraschino cherry. A little extra caramel on top is always a great idea! This makes your sundae not only tasty but also a feast for the eyes. {{image_2}} You can switch up the ice cream to fit your taste. Almond ice cream adds a nutty twist. Caramel ice cream brings an extra layer of sweetness. Cinnamon ice cream gives a warm, spiced flavor. Each choice enhances the sundae in a new way. Feel free to experiment with fun add-ins. Chocolate chips bring a sweet crunch. Crushed cookies add texture and flavor. You can also use sprinkles for color or marshmallows for fluffiness. These little touches make your sundae even more enjoyable. Change the fruits based on the season. In winter, try pears or cranberries. Spring can feature fresh berries. Summer is perfect for peaches or cherries. You can also swap caramel for chocolate or fudge sauce for a new twist. Each season offers delicious options to explore. To keep your apples fresh, store them in the fridge. Place them in a sealed bag or container. This helps prevent browning and keeps them crunchy. For ice cream, always keep it in the freezer. Make sure the lid is tight to avoid freezer burn. You can freeze caramel apple sundaes, but they may change in texture. Ice cream will become harder, and the apples may turn mushy. If you want to freeze them, cover each sundae well. Use plastic wrap or airtight containers. Caramel sauce lasts about two weeks in the fridge. Store it in a jar with a lid. Ice cream typically lasts about two to three months in the freezer if kept sealed. Always check for ice crystals or off smells before using. Yes, you can prepare some parts ahead. You can sauté the apples a few hours before serving. Store them in the fridge. Just keep the ice cream separate. Assemble the sundae right before you eat. This keeps everything fresh and tasty. If you want a nut-free option, try using crushed graham crackers or cookies for crunch. You can also add seeds, like sunflower or pumpkin seeds. They add texture without the nuts. Choose what you enjoy most. To stop apples from browning, toss them with lemon juice right after cutting. The acid in the juice helps keep them fresh. This also adds a nice zing to the apples. Remember to add cinnamon for flavor too. Yes! You can use dairy-free ice cream made from almond or coconut milk. For the caramel sauce, choose a dairy-free version or make your own with coconut cream. This way, you can enjoy the sundae without dairy. To make it healthier, use less caramel sauce and ice cream. You can add more apples for fiber. You might also use a low-sugar ice cream or yogurt as a base. This way, you can still enjoy the flavor without the extra sugar. Caramel apple sundaes are easy to make and perfect for any occasion. You learned how to choose the right apples, create homemade caramel, and present your dish beautifully. With different variations and tips, you can customize this treat. Store leftovers properly, and enjoy them later. The options are endless, so play with flavors and toppings. Dive into making this yummy dessert and share it with loved ones. You’ll love the mix of flavors and textures in each scoop. Happy sundae-making!

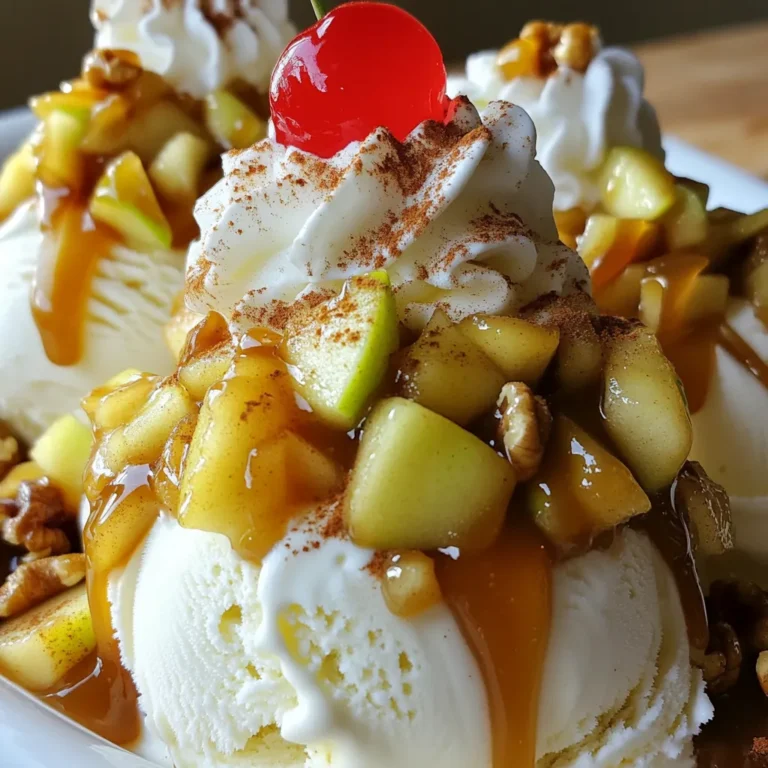
Caramel Apple Ice Cream Sundaes Tasty Fall Treat

- 2.5-3 pounds boneless turkey breast - 1 tablespoon olive oil - 1 cup low-sodium chicken broth - 1 teaspoon garlic powder - 1 teaspoon onion powder - 1 teaspoon dried thyme - 1 teaspoon dried rosemary - 1 teaspoon dried sage - 1 teaspoon salt - 1/2 teaspoon black pepper - 1 large onion, sliced - 3 carrots, cut into large pieces - 2 stalks celery, cut into large pieces For this savory herb turkey breast, you start with a few key ingredients. First, choose a boneless turkey breast weighing between 2.5 to 3 pounds. It cooks well in the slow cooker. Next, you need olive oil to help the herbs stick to the turkey. The flavor comes from a mix of herbs. You will need garlic powder, onion powder, dried thyme, dried rosemary, dried sage, salt, and black pepper. Each herb adds its own unique taste. To boost the flavor, we add vegetables. Slice up one large onion and chop three carrots and two stalks of celery. These veggies add depth and sweetness to the dish. You will also need one cup of low-sodium chicken broth. This broth keeps the turkey moist and adds great flavor. Now, you have everything you need to create a delicious, savory herb turkey breast in your slow cooker. - In a small bowl, combine: - 1 teaspoon garlic powder - 1 teaspoon onion powder - 1 teaspoon dried thyme - 1 teaspoon dried rosemary - 1 teaspoon dried sage - 1 teaspoon salt - 1/2 teaspoon black pepper Mix these dry herbs and spices well. This blend gives the turkey its savory flavor. - Pat the turkey breast dry with paper towels. This helps the rub stick better. - Coat the turkey breast with 1 tablespoon of olive oil. This adds moisture and flavor. - Generously apply the herb mixture all over the turkey. Make sure to cover every side. - Take the slow cooker and layer the bottom with vegetables: - 1 large onion, sliced - 3 carrots, cut into large pieces - 2 stalks celery, cut into large pieces - Pour in 1 cup of low-sodium chicken broth. This broth will keep the turkey moist and add flavor. - Place the seasoned turkey breast on top of the vegetables. - Cover the slow cooker with its lid. - Set it to low and cook for 6-8 hours. The turkey is ready when it reaches 165°F (75°C). - Once cooked, carefully remove the turkey breast from the slow cooker. - Let it rest for about 10 minutes before slicing. This helps the juices stay in the meat. - Use the cooking liquid and vegetables as a tasty side or sauce. To check the internal temperature of your turkey, use a meat thermometer. Insert it into the thickest part of the breast. The turkey is safe to eat when it reaches 165°F (75°C). This ensures it is cooked well but still juicy. Let it rest for ten minutes after cooking. This helps the juices settle and keeps the meat moist. When serving the turkey, slice it on a large platter. Arrange the cooked vegetables around the turkey for color and texture. Drizzle some of the cooking broth over the turkey. This adds flavor and moisture. Garnish with fresh herbs like parsley or rosemary for a nice touch. Pair it with mashed potatoes or a green salad for a complete meal. To keep your turkey moist during cooking, start with a good rub of olive oil. This helps lock in moisture. Using low-sodium chicken broth also adds flavor and keeps the meat tender. Cooking on low heat for 6-8 hours allows the turkey to absorb the broth’s flavors. Avoid lifting the lid while cooking, as this can let heat escape and dry out the meat. {{image_2}} You can change the herbs for a new taste. Try these options: - Oregano: A great choice for a Mediterranean flair. - Basil: Adds a sweet, fragrant touch. - Cumin: For a warm, earthy flavor. - Paprika: Gives a mild heat and color. - Chili powder: If you like a spicy kick. Mix and match these herbs to find your favorite blend. Each will bring its own unique twist to your savory herb turkey breast. You can also use different cuts of turkey. A bone-in turkey breast works well. The bone adds flavor and moisture. Other meats, like chicken or pork, can fit into this recipe too. Just adjust cooking time based on the size and type of meat. For chicken, aim for 4-6 hours on low. For pork, follow similar times as turkey. Make sure the meat reaches 165°F (75°C) for safety. Add more vegetables to make it a full meal. You can include: - Potatoes: Cut into chunks for heartiness. - Green beans: Adds color and crunch. - Mushrooms: For an earthy flavor. These veggies cook well with the turkey. They soak up all the tasty juices. You can also serve with rice or quinoa on the side for a filling dish. The options are endless! To store leftovers safely, let the turkey cool down first. After cooling, wrap it tightly in plastic wrap or foil. Place it in an airtight container. This keeps it fresh and avoids spoilage. Leftover turkey can stay in the fridge for up to four days. Always label your container with the date. This way, you know when it’s best to eat it. To freeze cooked turkey, first slice it into smaller pieces. This helps it freeze faster and thaw easier. Place the slices in a freezer-safe bag or container. Remove as much air as possible to prevent freezer burn. Frozen turkey can last for up to six months. When you’re ready to use it, thaw it overnight in the fridge. To reheat the turkey, the oven is your best friend. Preheat it to 325°F (160°C). Place the turkey in a baking dish and add a bit of broth or water. This keeps it moist as it heats. Cover the dish with foil to trap in steam. Heat it for about 20-30 minutes. If you want a quick option, use the microwave. Heat in short bursts, stirring between each. This helps avoid hot spots and keeps the turkey tasty. Cook the turkey breast for 6 to 8 hours on low heat. You want it to reach 165°F (75°C). Always check the thickest part of the meat. If you cook it longer, it will become more tender. Yes, you can cook the turkey on high. If you choose high, it will take about 3 to 4 hours. Make sure to check the internal temperature at the 3-hour mark. This ensures it cooks evenly and stays juicy. If the turkey is dry, try serving it with the broth from the cooker. You can also shred the turkey to keep it moist. Adding a sauce or gravy can help mask dryness too. Using frozen turkey breast is possible, but it will need extra cooking time. Plan for about 8 to 10 hours on low. Always ensure the meat reaches that safe internal temperature. Yes, it is safe to leave the slow cooker on overnight. Just make sure it’s set to low. This will keep the turkey at a safe temperature while it cooks. Leaving it unattended is fine as long as you use a reliable slow cooker. In this post, we explored how to cook a tasty slow cooker turkey. We covered the main ingredients, step-by-step instructions, and tips to ensure a moist turkey. You can also adapt the flavors and create a complete meal with this recipe. Remember to store leftovers properly and use the reheating tips for the best taste. With these easy steps, you'll be on your way to a delicious meal anyone can enjoy. Happy cooking!

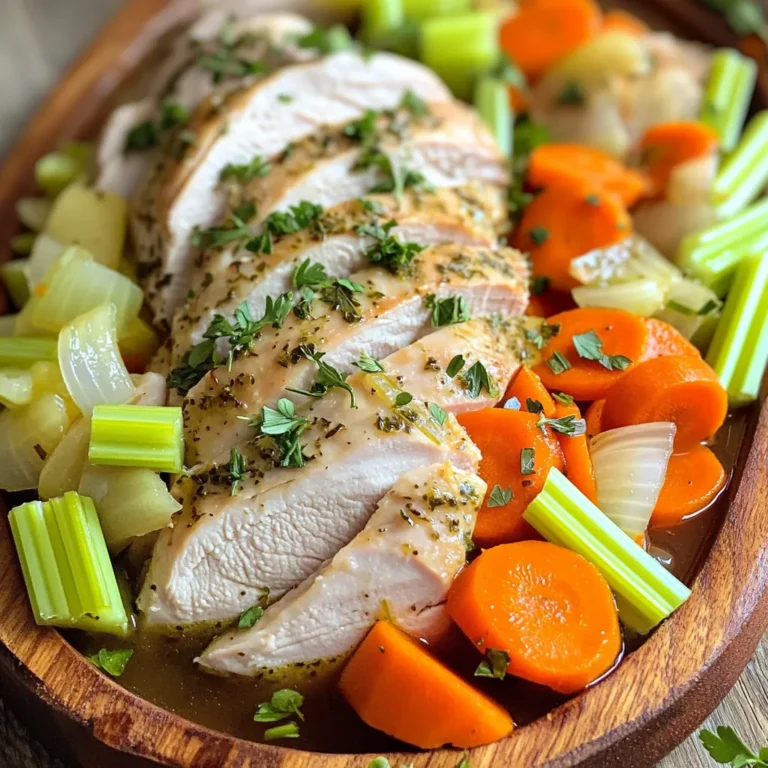
Savory Herb Turkey Breast Slow Cooker Delight

To make Pumpkin Chocolate Chip Cookie Dough Bars, you'll need some simple ingredients. Here’s the full list: - 1 cup pumpkin puree - 1 cup brown sugar - 1/2 cup granulated sugar - 1/2 cup unsalted butter, softened - 1 teaspoon vanilla extract - 2 cups all-purpose flour - 1 teaspoon baking soda - 1/2 teaspoon baking powder - 1/2 teaspoon salt - 1/2 teaspoon pumpkin pie spice - 1 cup semi-sweet chocolate chips - 1/2 cup chopped walnuts (optional) These ingredients make a rich and tasty treat. The pumpkin puree adds moisture and flavor. The sugars create sweetness, while butter gives a nice richness. The flour acts as the base, and the baking soda and powder help the bars rise. The spices give a warm touch, making these bars perfect for fall. I love using semi-sweet chocolate chips, but feel free to mix it up. If you want a nutty crunch, add the walnuts. Each ingredient plays a key role in creating a delicious dessert that everyone will love. - Preheat your oven to 350°F (175°C). Prepare an 8x8 inch baking pan by lining it with parchment paper. Leave some paper hanging over the edges for easy removal. - In a large bowl, cream together 1/2 cup softened butter, 1 cup brown sugar, and 1/2 cup granulated sugar. Mix until it looks light and fluffy. - Add 1 cup pumpkin puree and 1 teaspoon vanilla extract to the butter and sugar mixture. Mix well until everything combines smoothly. - In another bowl, whisk together 2 cups all-purpose flour, 1 teaspoon baking soda, 1/2 teaspoon baking powder, 1/2 teaspoon salt, and 1/2 teaspoon pumpkin pie spice. This helps to blend the dry ingredients well. - Gradually add the dry mixture to the wet mixture. Stir until just combined. Do not overmix, or your bars might become tough. - Fold in 1 cup semi-sweet chocolate chips and 1/2 cup chopped walnuts (if you like them) until evenly mixed. - Pour the cookie dough into your prepared baking pan. Spread it evenly across the pan. - Bake for 25-30 minutes. Check if they are done by inserting a toothpick in the center. It should come out clean when ready. - Once baked, let the bars cool completely in the pan on a wire rack. After cooling, lift them out using the parchment paper. - Cut into squares and enjoy! - Ensuring the right texture and doneness: To get the best bars, watch the baking time. Check them at 25 minutes. The edges should be golden. A toothpick should come out clean from the center. - Checking for freshness of baking ingredients: Old baking soda or powder can ruin your bars. Always check dates. Fresh ingredients make a big difference in taste. - Preventing overmixing: Mix your dough just until combined. Overmixing makes the bars tough. A gentle hand keeps them soft and chewy. - Using different types of chocolate chips: You can try dark, milk, or even white chocolate chips. Each type gives a unique flavor. Mix them for a fun twist! - Adding spices for an extra kick: Besides pumpkin pie spice, try cinnamon or nutmeg. These spices can take your bars to the next level. Just a pinch can add warmth and depth. - Best accompaniments and garnishes: Serve your bars with a scoop of vanilla ice cream or a dollop of whipped cream. A sprinkle of chopped nuts also adds crunch. - Pairing ideas with beverages: These bars go well with warm apple cider or a cup of coffee. The flavors blend perfectly, making every bite delightful. {{image_2}} You can make these bars gluten-free by using almond flour or a store-bought gluten-free blend. Both options work well. Just be sure to check the blend for baking powder and soda. For a vegan twist, swap the butter for coconut oil or a vegan butter stick. Use a flax egg instead of a regular egg. Simply mix 1 tablespoon of flaxseed meal with 2.5 tablespoons of water. Let it sit for five minutes to thicken. Feel free to add dried fruits like cranberries or raisins for a chewy texture. Chopped seeds such as pumpkin or sunflower can provide added crunch. These mix-ins give the bars a fun twist. If you want to spice things up, try cinnamon or nutmeg. You can even add a pinch of cayenne for a surprising kick. Each spice brings its own unique flavor to the bars. For a festive season, consider adding colored sprinkles or shaped candies. You can also use themed cookie cutters for fun shapes. These bars make great gifts or treats for parties. Another idea is to layer the bars with cream cheese frosting. This adds richness and a creamy contrast to the pumpkin. It makes a delightful treat perfect for fall gatherings. To keep your Pumpkin Chocolate Chip Cookie Dough Bars fresh, use an airtight container. Make sure they cool completely before storage. This helps avoid sogginess. You can also layer the bars with parchment paper to prevent sticking. For easy transport, a tin or a glass container with a tight lid works best. At room temperature, these bars last about 3-4 days. If you store them in the fridge, they can last up to a week. For longer storage, you can freeze them. Wrap each bar tightly in plastic wrap, then place them in a freezer bag. They’ll stay fresh for up to 3 months. When you want to enjoy your bars warm, preheat your oven to 350°F (175°C). Place the bars on a baking sheet for about 10 minutes. This helps keep their soft texture. You can also microwave them for about 10-15 seconds. Just be careful not to overheat, as this can make them tough. Enjoy your warm bars with a scoop of ice cream for a special treat! Can I use fresh pumpkin instead of canned? Yes, you can use fresh pumpkin. Just cook and puree it first. Fresh pumpkin may make the bars a bit lighter and fluffier. What size pan can I use if I don’t have an 8x8 inch pan? You can use a 9x9 inch pan. The bars may bake faster. Check them a few minutes early. How can I tell when the bars are done baking? The edges should turn golden brown. Insert a toothpick; it should come out clean. What can I use instead of walnuts? You can use pecans or skip the nuts. Try adding seeds for a crunchy bite instead. Can I substitute the brown sugar with another sweetener? Yes, you can use coconut sugar or maple syrup. Adjust the amount, as these may be sweeter. What's the best way to serve these bars? Serve them in squares on a nice plate. You can add a scoop of ice cream on top for fun. Do these bars need to be served warm? No, they taste great at room temperature. However, warm bars bring out the chocolate flavor even more! This recipe combines simple ingredients and easy steps to create delicious pumpkin bars. From mixing pumpkin puree and sugars to baking the perfect blend, every step counts. Remember to explore variations, like gluten-free options or unique flavors. Proper storage keeps your bars tasty for days. Enjoy these treats with friends or family, and let the aromas fill your kitchen. Sharing these bars will bring joy to any gathering. Embrace the season with this fun and tasty recipe!

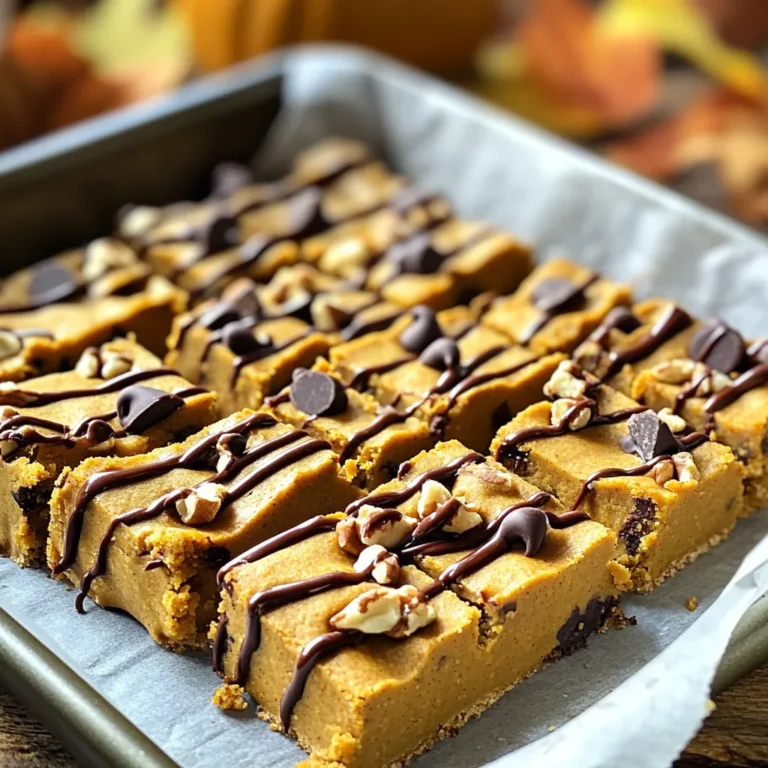
Pumpkin Chocolate Chip Cookie Dough Bars Delight

- 2 medium sweet potatoes, peeled and cubed - 1 large red onion, cut into wedges - 2 cups Brussels sprouts, trimmed and halved - 1 cup butternut squash, peeled and diced - 1 red bell pepper, chopped The mix of these veggies gives a great fall taste. Sweet potatoes bring a soft, sweet flavor. Red onions add a nice bite. Brussels sprouts offer a slight nuttiness. Butternut squash brings creaminess, and red bell peppers add color and crunch. - 4 tablespoons olive oil - 4 tablespoons pure maple syrup - 1 teaspoon cinnamon - 1 teaspoon salt - ½ teaspoon black pepper This glaze is simple and tasty. Olive oil helps the veggies roast well. Maple syrup adds sweetness that pairs perfectly with the fall flavors. Cinnamon brings warmth, while salt and black pepper enhance all the tastes. - Fresh thyme leaves Thyme adds a fresh touch. It lifts the dish and adds a lovely aroma. Plus, it looks pretty on top of the roasted veggies. First, preheat your oven to 425°F (220°C). This high heat helps the veggies get nice and crispy. While the oven heats up, grab a large sheet pan. Line it with parchment paper. This makes cleanup quick and easy. Next, take a large mixing bowl. Add the sweet potatoes, red onion, Brussels sprouts, butternut squash, and red bell pepper. These colorful veggies will make your dish pop! In a small bowl, whisk together the olive oil, pure maple syrup, cinnamon, salt, and black pepper. Mix until all the ingredients blend well. This maple glaze adds a sweet touch to your veggies. Pour this glaze over the mixed vegetables. Toss them gently. Make sure every piece gets coated in the glaze. Now, spread the coated vegetables in a single layer on your prepared sheet pan. This helps them roast evenly. Place the pan in your preheated oven. Roast for 25 to 30 minutes. Halfway through, take the pan out and toss the veggies. This ensures they cook evenly and develop a nice caramelized finish. Once done, the veggies should be tender and slightly golden. To get that perfect glaze on your veggies, follow these steps: - Even coating is key. Pour the glaze over the veggies in a large bowl. Toss them well with your hands or a spatula. You want every piece to shine with that sweet maple goodness. - Roast at the right temp. Preheat your oven to 425°F (220°C). This high heat helps caramelize the sugars in the veggies. This makes them tender on the inside and crispy outside. When it’s time to serve, you have options: - Serve from the pan. Just bring the sheet pan to the table. It looks rustic and invites everyone to dig in. - Use a platter. If you want a fancier look, transfer the veggies to a nice serving platter. Drizzle with a bit more maple syrup. Add some thyme leaves for a pop of color. You can make this dish your own: - Adjust the glaze. Want it sweeter? Add more maple syrup. Prefer it spicier? Toss in some chili flakes. - Add spices or herbs. Try rosemary or sage for a different taste. They pair well with fall veggies. Experiment and find your favorite mix! {{image_2}} You can switch up the veggies based on what you have. Try adding: - Carrots - Cauliflower - Turnips - Sweet peppers These veggies roast well and add fun colors. If you have dietary needs, you can use: - Zucchini for a low-carb option - Beets for a sweet touch - Green beans for crunch Want some extra crunch? Toss in: - Chopped pecans - Sliced almonds - Pumpkin seeds These add a great texture. For more flavor, try different herbs like: - Rosemary for a woodsy taste - Sage for a warm note - Parsley for freshness Experimenting with these options keeps your dish exciting! Need more servings? Just increase your ingredients! Here are some tips: - Double the veggies for a crowd - Increase the glaze ingredients by 50% Make sure to spread everything out on the sheet pan. This helps with even roasting. For meal prep, cut your veggies a day ahead. Store them in the fridge. This makes cooking faster and easier! To store your roasted fall veggies, let them cool first. Place the veggies in an airtight container. This helps keep them fresh. You can store them in the fridge for up to four days. Make sure to label your container with the date. This way, you will know when to use them. You can reheat your roasted veggies in two ways: in the microwave or the oven. - Microwave: Place veggies in a microwave-safe dish. Heat for 1-2 minutes, stirring halfway. This works well but may make them soft. - Oven: For better texture, preheat your oven to 350°F (175°C). Spread the veggies on a baking sheet. Heat for about 10-15 minutes. Toss them halfway for even warmth. If you want to freeze roasted veggies, let them cool completely. Spread them out on a baking sheet in a single layer. Freeze them for 1-2 hours. Once frozen, transfer them to a freezer-safe bag or container. Remove as much air as possible to prevent freezer burn. To thaw, place them in the fridge overnight. Reheat them in the oven or microwave as mentioned above. Enjoy your tasty veggies later! Yes, you can use frozen vegetables. However, fresh veggies give better taste and texture. Frozen vegetables are often blanched before freezing. This means they can cook faster but may lack some crunch. If you choose frozen, adjust cooking time to prevent mushiness. Look for a few signs to tell when the veggies are ready. They should be tender when pierced with a fork. You want them to be slightly caramelized on the edges. The colors should be vibrant and inviting. A little browning adds great flavor, so don’t be shy! Yes, you can prep the veggies in advance! Cut and wash them, then store in the fridge. Use an airtight container to keep them fresh. You can also mix the glaze ahead. When you're ready to cook, just toss the veggies and glaze together. It saves time and makes cooking easier! This blog post covered how to create perfectly roasted veggies with a maple glaze. We explored the best ingredients, preparation steps, and flavor tips. You can customize the recipe by using different veggies or adding spices. Storing leftovers and reheating methods also help keep your dish fresh. With these easy steps and tips, you can enjoy delicious roasted vegetables anytime. Trust your taste, use fresh ingredients, and have fun in the kitchen!

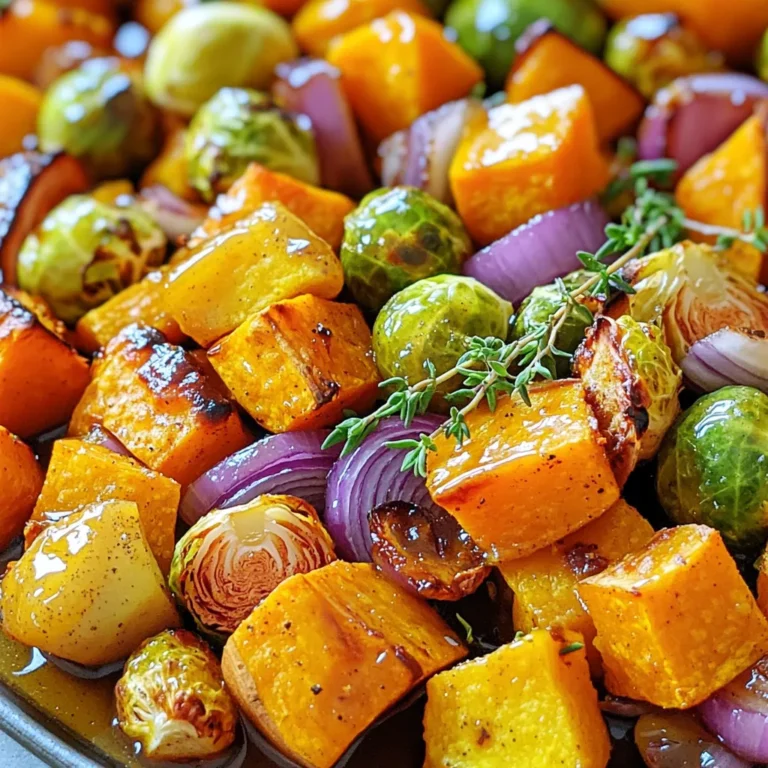
Roasted Fall Veggies with Maple Glaze Sheet Pan Delight

To make air fryer mozzarella stuffed meatballs, you need fresh and simple ingredients. Here’s what you will use: - 1 lb ground beef (or ground turkey) - 1/2 cup breadcrumbs - 1/4 cup grated Parmesan cheese - 1/4 cup fresh parsley, chopped - 1 garlic clove, minced - 1 large egg - 1 teaspoon Italian seasoning - Salt and pepper to taste - 6 small mozzarella balls (bocconcini) - 1 cup marinara sauce (for dipping) These ingredients blend well to create a tasty dish. The ground meat gives a rich flavor, while the mozzarella adds a gooey surprise inside. You can change things up with a few optional ingredients. Here are some ideas: - Use ground chicken or pork instead of beef or turkey. - Add chopped onions or bell peppers for extra crunch. - Substitute the parsley with basil for a different herb flavor. - Spice it up with crushed red pepper flakes for heat. These options allow you to make the recipe your own. Experiment and find what you love. To prepare these delicious meatballs, you will need some handy kitchen tools: - Large mixing bowl - Air fryer - Baking sheet (for easy transfer) - Small saucepan (for warming the marinara sauce) - Measuring cups and spoons - Mixing spoon or spatula Having the right tools makes cooking easier and more fun. Enjoy making these delightful meatballs! Start by gathering all your ingredients. In a large mixing bowl, add 1 lb of ground beef or turkey. Then, add 1/2 cup of breadcrumbs, 1/4 cup of grated Parmesan, and 1/4 cup of chopped fresh parsley. Next, mince 1 garlic clove and toss that in too. Crack 1 large egg into the bowl. Add 1 teaspoon of Italian seasoning, salt, and pepper to taste. Mix all the ingredients well. Use your hands for the best results. Make sure everything is combined evenly. You want each bite to have the same great flavor. Now, let’s form the meatballs. Take about 2 tablespoons of the meat mixture. Flatten it in your palm, creating a small disc. Then, place a mozzarella ball in the center. Gently fold the meat around the cheese. Roll it into a ball shape. Repeat this process until you use all the meat and cheese. Arrange the stuffed meatballs on a plate. Make sure they are not touching, as they need space to cook evenly. Before you air fry, preheat your air fryer to 375°F (190°C). Once preheated, place the meatballs in the air fryer basket. Ensure there's space between them for air circulation. Cook the meatballs for 10-12 minutes. They should turn golden brown and reach an internal temperature of 160°F (70°C). While they cook, heat 1 cup of marinara sauce in a small saucepan over medium heat. After cooking, let the meatballs rest for a couple of minutes. Serve them warm with the marinara sauce for dipping. Enjoy your delicious creation! For the best results, cook your meatballs at 375°F (190°C). This heat ensures the meatballs cook evenly. It takes about 10 to 12 minutes for them to brown nicely and reach a safe internal temperature of 160°F (70°C). Use a meat thermometer for accuracy. If you want a crispier outside, add a few more minutes, but keep an eye on them. To make sure your meatballs are well-stuffed, take about 2 tablespoons of the meat mixture. Flatten it in your palm. Place a mozzarella ball in the center and fold the meat around it. Seal it tightly to keep the cheese from leaking out while cooking. If you have extra meat mixture, you can make more meatballs or use it for other dishes. Serve your meatballs on a platter for a fun presentation. You can garnish them with fresh basil leaves for color and flavor. A small bowl of warm marinara sauce in the center is perfect for dipping. If you want to impress your guests, sprinkle extra Parmesan cheese on top. Pair these meatballs with a side salad or some garlic bread for a complete meal. {{image_2}} You can switch up the meat in this recipe. Ground turkey or chicken works great if you want a lighter option. These meats still taste good and keep the meatballs juicy. You can also try ground pork for a richer flavor. For stuffing, instead of mozzarella, use crumbled feta or cheddar. Both cheeses melt well and add a nice twist. Feel free to mix in chopped spinach or sun-dried tomatoes for added flavor. If you prefer a vegetarian meal, replace the meat with a mix of lentils and mushrooms. Cook lentils until tender and chop mushrooms finely. Combine them with breadcrumbs, cheese, and herbs just like the meat version. Use small cubes of mozzarella or vegan cheese for stuffing. This version is still packed with flavor and gives you the same cheesy surprise. You can also add some grated zucchini for extra moisture and nutrition. To elevate the taste, play with spices and herbs. Add crushed red pepper for heat or smoked paprika for a nice depth. Fresh herbs like basil or oregano can add a bright note. You can also experiment with garlic powder or onion powder in the meat mixture. For a tangy twist, try mixing in some Worcestershire sauce or hot sauce. These small changes can create a whole new flavor experience with each batch of meatballs. After enjoying your air fryer mozzarella stuffed meatballs, let them cool. Place the meatballs in an airtight container. Store them in the fridge for up to three days. Make sure they are fully covered to keep them fresh and tasty. To reheat the meatballs, you have a few options. The air fryer works best. Preheat it to 350°F (175°C). Place the meatballs in the basket for about 5-7 minutes. You can also use a microwave. Heat them for 30 seconds at a time until warm. Keep an eye on them so they don't overcook. If you want to save some meatballs for later, freezing works great. First, let the cooked meatballs cool completely. Place them in a freezer-safe bag or container. Label it with the date. You can keep them in the freezer for up to three months. When you want to eat them, thaw in the fridge overnight before reheating. Enjoy your easy meal prep! To check if your meatballs are done, use a meat thermometer. The inside should reach 160°F (70°C). You can also cut one open. The meat should no longer be pink, and the juices should run clear. If they meet these signs, your meatballs are ready to eat! Yes, you can use other cheeses for stuffing. Cheddar or pepper jack work well. These cheeses melt nicely and add unique flavors. Experiment with your favorites to see what you like best. Just make sure the cheese is similar in size to mozzarella balls. Any air fryer will work for these meatballs. I recommend one with a basket style. This type allows space for air to flow around the meatballs. Ensure your air fryer can reach 375°F (190°C). This temperature is key for getting them crispy on the outside and juicy on the inside. This guide covered everything from ingredients to serving tips for meatballs. You learned about key ingredients, variations, and how to store leftovers. I shared useful tips to ensure perfect meatballs every time. Remember, you can adapt this recipe to fit your taste. Keep experimenting with flavors and enjoy the process. Your cooking journey is only beginning, so have fun with it!

Air Fryer Mozzarella Stuffed Meatballs Delight

PREV 1 … 15 16 17 … 65 NEXT
tasty trail blazer

explore

DessertsDinnerAppetizersDrinks

Our Policies

  • Cookie Policy
  • Copyright Policy
  • Disclaimer
  • GDPR Policy
  • Terms Of Use
Back to Top
  • About
  • Contact Us
  • Privacy Policy
© 2025 tasty trail blazer