FREE DINNER EBOOK! Get your copy!
  • Cookie Policy
  • GDPR Policy
  • Disclaimer
  • Terms Of Use
  • Visit my other site: Fun Cookie Recipes
tasty trail blazer
  • Home
  • Dinner
  • Desserts
  • Drinks
  • Appetizers
  • Contact
  • About
  • Privacy Policy
  • Home
  • Dinner
  • Desserts
  • Drinks
  • Appetizers
  • Contact
  • About
  • Privacy Policy
  • Cookie Policy
  • GDPR Policy
  • Disclaimer
  • Terms Of Use
Visit my other site: Fun Cookie Recipes

HOME / CATEGORIES /

Latest

To make Apple Cheesecake Crescents, you need: - 1 can (8 oz) crescent roll dough - 1 cup cream cheese, softened - 1/2 cup powdered sugar - 1 teaspoon vanilla extract - 1 medium apple, peeled and diced (preferably Granny Smith) - 1 teaspoon cinnamon - 1 tablespoon lemon juice - 1/4 cup chopped walnuts (optional) - 1 egg, beaten (for egg wash) - Extra powdered sugar for dusting You can enhance the taste with: - 1/2 teaspoon nutmeg for warmth - 1/4 cup raisins for sweetness - A pinch of salt to balance flavors If you need alternatives, try these: - Use low-fat cream cheese for fewer calories. - Swap walnuts for pecans or omit them entirely. - Use apple pie spice instead of cinnamon for a twist. - Try gluten-free crescent dough for a gluten-free option. {{ingredient_image_1}} 1. Start by preheating your oven to 375°F (190°C). This step is key for even baking. 2. Line a baking sheet with parchment paper. This helps keep the crescents from sticking. 3. In a medium bowl, mix the softened cream cheese with powdered sugar and vanilla. Stir until smooth and creamy. 4. Next, take another bowl and toss the diced apple with cinnamon and lemon juice. This adds flavor and keeps the apples fresh. If you like, add chopped walnuts for a nice crunch. 5. Unroll the crescent dough on a clean surface. You will see triangles, which you will fill. 6. Place a generous tablespoon of the cream cheese mixture at the thick end of each triangle. 7. Add a spoonful of the cinnamon apple mixture on top of the cream cheese. 8. Roll the crescent from the thick end to the tip. Make sure to seal the edges well so the filling stays inside. 9. Brush the tops of the crescents lightly with the beaten egg. This gives them a nice golden color. 10. Arrange the crescents on the prepared baking sheet, making sure they have space. 11. Bake for 12-15 minutes, or until golden brown. Keep an eye on them as they bake. - Use softened cream cheese for easy mixing. - Choose a tart apple like Granny Smith for a nice balance of flavors. - Don’t skip the lemon juice; it brightens the taste of the apples. - Let the crescents cool for a few minutes before dusting with powdered sugar. This helps the sugar stick. - Serve warm for a delightful dessert experience. One common mistake is not sealing the crescents well. If you leave gaps, the filling may leak out while baking. Make sure to pinch the edges tightly. Another mistake is using too much filling. A generous tablespoon is enough. If you overload, the crescents may not bake properly. Also, don’t skip the egg wash. It gives a nice golden color. To boost the flavors, try adding a pinch of nutmeg along with the cinnamon. This extra spice adds warmth and depth. You can also mix in some caramel sauce into the cream cheese. This creates a rich and sweet layer. For a nutty twist, use pecans instead of walnuts. They pair well with the apple and cream cheese. Serve the crescents warm for the best taste. Place them on a decorative plate to impress guests. A dollop of whipped cream adds a nice touch. You can also offer a scoop of vanilla ice cream alongside. For a fun twist, drizzle some caramel sauce over the top. This makes each bite even more delightful! Pro Tips Choose the Right Apple: For a balanced flavor, opt for tart apples like Granny Smith; they complement the sweetness of the cream cheese perfectly. Room Temperature Ingredients: Ensure your cream cheese is softened to room temperature for a smoother filling that blends easily with the powdered sugar. Seal the Edges Well: After rolling the crescents, pinch the edges tightly to prevent any filling from leaking during baking. Experiment with Spices: Feel free to add nutmeg or allspice along with cinnamon for an extra layer of flavor in the apple mixture. {{image_2}} You can switch up the apples for other fruits. Pears work great too. You might like peaches or berries. Just chop them small. Each fruit brings a new taste. Try mixing fruits for fun flavors. For a twist, add spices to the cream cheese. A pinch of nutmeg adds warmth. You can mix in lemon zest for freshness. Want a caramel touch? Add a bit of caramel sauce. These small changes can create exciting flavors. If you need a gluten-free choice, use gluten-free crescent rolls. Many stores carry them. Check the label to make sure. You can still enjoy the creamy filling. This way, everyone can savor the dessert! To keep your Apple Cheesecake Crescents fresh, place them in an airtight container. Make sure they cool completely first. Store them in the fridge for up to three days. If you want to save them longer, freezing is a great option. You can freeze Apple Cheesecake Crescents for later enjoyment. Wrap each crescent tightly in plastic wrap. Then, place them in a freezer bag or container. They will stay good for about two months. When you're ready to enjoy them, thaw in the fridge overnight. To reheat the crescents, preheat your oven to 350°F (175°C). Place the crescents on a baking sheet. Heat for about 10 minutes or until warm. This keeps them crispy and delicious. You can also use a microwave, but they may lose some crispness. Enjoy them warm! You can tell the crescents are done when they turn golden brown. Look for a nice, warm color. The edges should be crispy and feel firm to the touch. You can also smell a sweet aroma as they bake. This means the cream cheese and apples are cooking well inside. Yes, you can make these ahead of time. You can prepare the filling and the dough separately. Keep them in the fridge until you're ready to bake. Just remember to roll and bake them fresh for the best taste. If you bake them early, store them in an airtight container and reheat before serving. You can try many toppings for your crescents. Consider adding caramel sauce for a sweet touch. A scoop of ice cream makes a great dessert too. You can sprinkle chopped nuts on top for crunch. Whipped cream is always a favorite. Get creative with your toppings! This blog post explored all you need for perfect crescents. We covered key ingredients, step-by-step instructions, and tips to avoid common mistakes. You can also discover fun variations and storage info to keep them fresh. Using these insights will help you bake delicious crescents. Try different flavors and toppings to make each batch unique. Enjoy the process, and your taste buds will thank you!

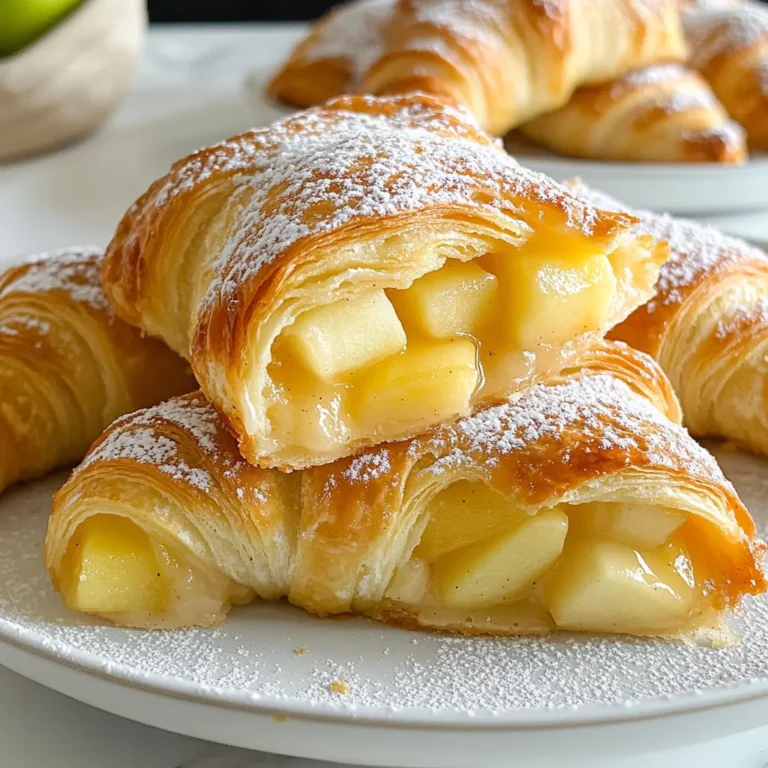
Apple Cheesecake Crescents Tasty and Easy Dessert

- 1 pound potato gnocchi - 2 cups fresh spinach, chopped - 1 cup basil pesto - 1 cup heavy cream - 1/2 cup grated Parmesan cheese - 1 tablespoon olive oil - 2 cloves garlic, minced - Salt and pepper to taste - Fresh basil leaves for garnish For this recipe, I use 1 pound of gnocchi. This amount serves about four people. I add 2 cups of fresh spinach for color and nutrients. The basil pesto can be store-bought or homemade, but I often make my own for better taste. I like to use 1 cup of heavy cream to give a nice richness. The grated Parmesan cheese adds a savory kick, so I use 1/2 cup. A tablespoon of olive oil helps sauté the garlic. I also use 2 cloves of minced garlic for flavor. Finally, I season with salt and pepper to taste. Always choose fresh spinach for the best taste and texture. Look for bright green leaves without any wilting. For the basil pesto, if you can, try to use fresh basil. It makes a big difference in flavor. When buying Parmesan, choose a block and grate it yourself. Freshly grated cheese melts better and tastes richer. {{ingredient_image_1}} First, fill a large pot with salted water. Bring it to a boil. Once boiling, add the potato gnocchi. Cook them for 2-3 minutes. You know they are ready when they float to the top. Use a slotted spoon to remove them. Drain and set the gnocchi aside while you prepare the sauce. In the same pot, heat 1 tablespoon of olive oil over medium heat. Add 2 minced cloves of garlic. Sauté for about 1 minute. You want the garlic to smell fragrant but not burn. Next, add 2 cups of chopped fresh spinach. Cook the spinach for 2-3 minutes. It should wilt and turn bright green. Now, pour in 1 cup of heavy cream and 1 cup of basil pesto into the pot. Stir well to mix everything. Allow this mixture to simmer for 2-3 minutes. This helps it thicken nicely. Once thick, add 1/2 cup of grated Parmesan cheese. Stir until the cheese melts and the sauce is smooth. Season with salt and pepper to taste. Gently fold the cooked gnocchi into the creamy pesto sauce. Make sure each piece is well coated. Cook for an additional 2 minutes to heat everything through. Remove the pot from heat. Serve your creamy pesto spinach gnocchi immediately. Garnish with fresh basil leaves and extra Parmesan cheese if you like. Enjoy this flavorful dish! To cook gnocchi right, start with salted water. Bring a large pot to a boil. When the water bubbles, add the gnocchi. Cook them for about 2-3 minutes. You'll know they're done when they float. Remove them quickly and drain. This keeps them soft and ready for the sauce. Taste is key in cooking. To make your creamy pesto spinach gnocchi shine, add salt and pepper. You can also try a pinch of red pepper flakes for heat. Fresh herbs like parsley or thyme add a nice touch too. Always taste as you go. Adjust until you love the flavor. For a rich, creamy sauce, use heavy cream. It blends well with pesto and cheese. Make sure to stir the sauce often. This helps it thicken nicely. If the sauce is too thick, add a splash of pasta water. This keeps it smooth and rich. Always fold the gnocchi gently into the sauce to avoid breaking them. Pro Tips Use Fresh Spinach: Fresh spinach adds a vibrant color and rich flavor to the dish. If using frozen spinach, ensure it's fully thawed and drained to avoid excess moisture. Homemade Pesto: For an extra burst of flavor, consider making your own pesto! Blend fresh basil, garlic, pine nuts, Parmesan cheese, and olive oil for a personalized touch. Adjust Creaminess: If you prefer a lighter sauce, reduce the amount of heavy cream or substitute half-and-half. This can help balance the richness of the dish. Garnish Wisely: Don’t skimp on garnishes! Fresh basil leaves and a sprinkle of extra Parmesan cheese elevate the dish visually and enhance the flavor. {{image_2}} If you can't find gnocchi, don't worry! You can use other types of pasta. Bowtie, penne, or even spaghetti work well. Just cook them according to package instructions. This keeps the dish quick and easy. You’ll still get that creamy pesto flavor, which is the star here. For added protein, consider chicken or shrimp. Cook diced chicken in the pot until golden. If using shrimp, add them after the garlic and spinach. They cook fast, just a few minutes. This makes your meal heartier and more filling. You can also try tofu for a plant-based option. To make this dish vegan, swap out the heavy cream for coconut milk. Use nutritional yeast instead of Parmesan for that cheesy flavor. Check your pesto too; some brands have cheese. Look for a vegan pesto or make your own! These changes keep it tasty and plant-friendly. You can store leftovers in the fridge. Place the gnocchi in an airtight container. They will stay fresh for up to three days. Before storing, let them cool down. This helps keep the cream from separating. To freeze, place the gnocchi in a single layer on a baking sheet. Freeze them for about one hour. Once frozen, transfer them to a freezer bag. They can last up to three months. When ready to use, cook them straight from frozen. This keeps the texture nice. Reheat the gnocchi gently on the stove. Add a splash of cream or water to help it warm up. Stir often to prevent sticking. You can also use the microwave. Heat in short bursts, stirring in between. This way, you can enjoy your delicious meal again! Yes, you can use homemade pesto! Fresh basil, garlic, and nuts make it special. Making it at home lets you control the taste and texture. Just blend the ingredients until smooth. Add olive oil and cheese to get a creamy feel. You can also tweak the flavors to suit your taste. You will know gnocchi is done when it floats. Cooking them usually takes about 2-3 minutes. When they rise to the top, they are ready to drain. If you want a soft texture, avoid cooking them too long. This keeps them light and fluffy. Creamy Pesto Spinach Gnocchi pairs well with many dishes. You can serve it with a simple green salad. Grilled chicken or shrimp adds protein and flavor. For a heartier meal, try garlic bread or roasted vegetables on the side. These options balance the creaminess of the dish. Yes, you can make this dish gluten-free! Look for gluten-free gnocchi, which are made from rice or other flours. Be sure to check the labels for any hidden gluten. The rest of the ingredients are naturally gluten-free. This way, everyone can enjoy the creamy goodness! This blog post covered everything you need for creamy pesto spinach gnocchi. We talked about ingredients, measurements, and tips for freshness. You learned step-by-step instructions for cooking and blending flavors. We also explored helpful tips for perfect gnocchi and tasty variations. Keep these ideas in mind as you cook. Using fresh ingredients and following our tips will boost your dish. Enjoy experimenting and crafting your perfect creamy pesto spinach gnocchi!

Creamy Pesto Spinach Gnocchi Flavorful Delight Recipe

For a delicious Coconut Curry Salmon, you need these key ingredients: - 4 salmon fillets - 1 can (13.5 oz) coconut milk - 2 tablespoons red curry paste - 1 tablespoon fresh ginger, grated - 2 garlic cloves, minced - 1 bell pepper, sliced (red or yellow) - 1 cup snap peas - 1 small zucchini, sliced - 1 tablespoon soy sauce (or tamari for gluten-free) - 1 tablespoon olive oil - Fresh cilantro, for garnish - Lime wedges, for serving - Salt and pepper to taste These ingredients make a rich, creamy, and flavorful dish. The salmon fillets provide protein. The coconut milk gives a smooth base. The red curry paste adds a spicy kick. Fresh ginger and garlic create a warm aroma. You can add some optional ingredients to boost flavor: - Chopped green onions - Sliced mushrooms - Baby spinach - Chopped red chili for heat Each option adds a unique twist. For example, mushrooms give a nice texture. Spinach brings in extra nutrients. You can mix and match based on your taste. Using fresh ingredients makes a big difference. Fresh salmon tastes better and has a firmer texture. Fresh vegetables add crunch and color to your dish. When you choose high-quality coconut milk, it enhances the sauce's creaminess. Always pick ingredients with bright colors and good smells. This choice ensures your Coconut Curry Salmon shines on the plate. {{ingredient_image_1}} First, gather all your ingredients. You will need: - 4 salmon fillets - 1 can (13.5 oz) coconut milk - 2 tablespoons red curry paste - 1 tablespoon fresh ginger, grated - 2 garlic cloves, minced - 1 bell pepper, sliced (red or yellow) - 1 cup snap peas - 1 small zucchini, sliced - 1 tablespoon soy sauce (or tamari for gluten-free) - 1 tablespoon olive oil - Fresh cilantro, for garnish - Lime wedges, for serving - Salt and pepper to taste Next, wash and slice the vegetables. This helps them cook evenly. Make sure to grate the ginger and mince the garlic well. This step adds great flavor. Start by preheating your oven to 400°F (200°C). Use a large oven-safe skillet for cooking. Heat the olive oil over medium heat. Add the minced garlic and grated ginger. Sauté for about 1 minute until fragrant. Now, stir in the red curry paste. Let it cook for another 1-2 minutes. This helps the flavors mix well. Pour in the coconut milk and soy sauce. Whisk until smooth. Bring this mixture to a gentle simmer. Add the bell peppers, snap peas, and zucchini to the skillet. Stir to coat the veggies in the sauce. Cook for 3-4 minutes until the vegetables are slightly tender. Next, gently place the salmon fillets into the pan. Spoon some of the curry sauce over each piece, ensuring the skin side is down. Transfer the skillet to your preheated oven. Roast for 12-15 minutes. The salmon is done when it flakes easily with a fork. Remove it from the oven and let it rest for a couple of minutes. Garnish with fresh cilantro and serve with lime wedges. Enjoy your Coconut Curry Salmon One Pan meal! To make the coconut curry taste great, use fresh ginger and garlic. They bring a punch of flavor. Red curry paste adds warmth and spice. Mix it well with the coconut milk for balance. Taste the sauce before adding salt. Adjust it to your liking. For extra depth, add a splash of lime juice. It brightens the dish. Fresh cilantro at the end gives it a nice finish. Cook the salmon for a tender and flaky texture. Start with skin-side down in the pan. This keeps the fish moist. Use a fork to check if it flakes easily. If it does, it's done! Avoid overcooking. Salmon can dry out quickly. Roasting it at 400°F (200°C) for 12-15 minutes works perfectly. Serve the coconut curry salmon with rice or quinoa. They soak up the flavorful sauce well. Add a simple salad for crunch. Fresh vegetables like cucumber or lettuce work great. You can also serve it with lime wedges for a zesty kick. This meal is colorful and full of flavor. Pro Tips Use Fresh Ingredients: Fresh ginger and garlic will enhance the flavor of your curry, making it aromatic and vibrant. Adjust Spice Level: Feel free to add more red curry paste if you like it spicier, or reduce it if you prefer a milder flavor. Check Salmon Doneness: Salmon is perfectly cooked when it flakes easily with a fork. Keep an eye on it to avoid overcooking. Serve with Rice: This coconut curry salmon pairs wonderfully with jasmine or basmati rice, which helps soak up the delicious sauce. {{image_2}} You can swap salmon for other proteins easily. Try chicken, shrimp, or even firm white fish. Each option brings a unique flavor to the dish. For chicken, cut it into small pieces. Cook it until it's no longer pink. For shrimp, add them directly into the curry sauce. They cook faster, about 5-7 minutes. Use a light white fish like tilapia for a mild taste. Just make sure you adjust cooking times. A vegetarian option works well too! Use firm tofu or chickpeas in place of salmon. For tofu, press it to remove extra water, then cut it into cubes. Sauté the tofu until it's golden. Add it to the curry sauce and simmer until heated through. If you choose chickpeas, add a can of drained chickpeas to the pan. They will soak up the flavors of the curry. This makes for a protein-rich and hearty dish. If you love heat, boost the spice level! Add more red curry paste to the sauce. For extra kick, toss in fresh chili peppers or red pepper flakes. You can also use spicy curry powder for added depth. Taste as you go, and adjust to your liking. If the spice gets too intense, balance it with a little extra coconut milk. This will cool the dish down while keeping it creamy. Enjoy exploring these variations! To keep your Coconut Curry Salmon fresh, store leftovers in an airtight container. Place the salmon and veggies together in the container. Cool the dish to room temperature before sealing it. This helps prevent moisture loss. Your leftovers will stay fresh for up to three days in the fridge. When you are ready to enjoy your leftovers, preheat your oven to 350°F (175°C). Place the salmon and veggies in an oven-safe dish. Cover it with foil to keep the moisture in. Heat for about 15 minutes or until warmed through. Avoid the microwave, as it can make the salmon tough. You can freeze Coconut Curry Salmon if you want to save it for later. First, let it cool completely. Then, place it in a freezer-safe container or bag. Be sure to remove as much air as possible. This helps prevent freezer burn. It can last up to three months in the freezer. When you’re ready to eat, thaw it in the fridge overnight before reheating. Yes, you can make Coconut Curry Salmon gluten-free. Simply use tamari instead of soy sauce. Tamari is a great option that tastes similar to soy sauce but has no gluten. This small swap keeps the dish delicious and safe for those with gluten sensitivities. You can serve Coconut Curry Salmon with many sides. Here are a few ideas: - Steamed rice or quinoa to soak up the curry. - A fresh green salad for a crunchy contrast. - Naan bread to mop up the sauce. - Roasted vegetables for extra flavor and nutrition. Cooking salmon in the oven usually takes about 12-15 minutes at 400°F (200°C). The salmon is ready when it flakes easily with a fork. Keep an eye on it to avoid overcooking. It’s best to let it rest for a couple of minutes after removing it from the oven. This helps keep the salmon juicy. You learned how to make Coconut Curry Salmon with fresh, tasty ingredients. We explored key steps, from prepping to baking, to get that flaky salmon just right. I shared tips for perfect flavor and texture, plus ways to customize the dish. Whether you stick with salmon or explore veggie options, this meal can fit anyone. Remember to store your leftovers properly for the best taste. Enjoy cooking this easy dish that packs flavor in every bite!

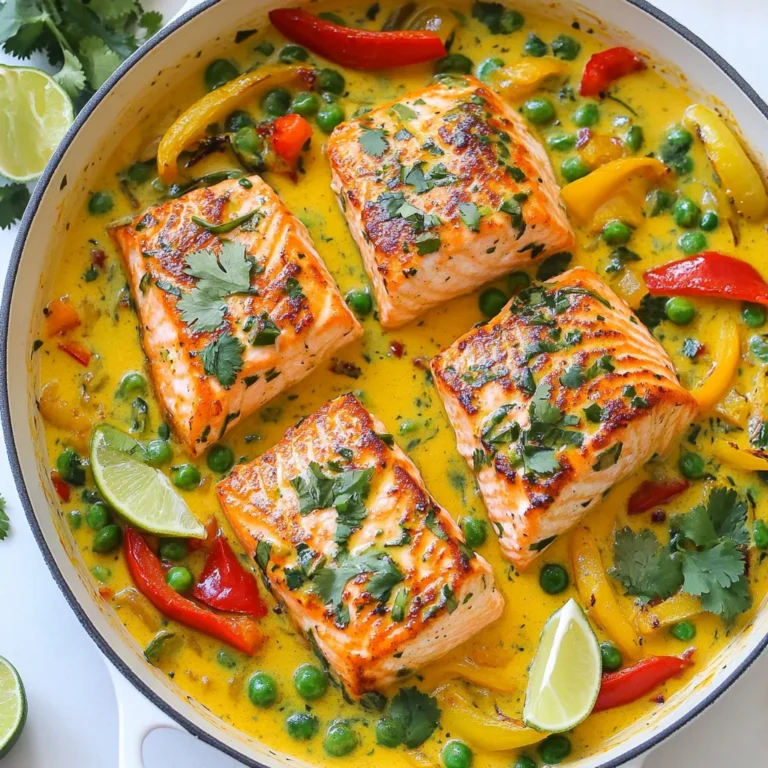
Coconut Curry Salmon One Pan Delicious and Simple Meal

- 4 cups all-purpose flour - 1/4 cup granulated sugar - 1 packet (2 1/4 teaspoons) active dry yeast - 1 teaspoon salt - 1 cup whole milk, warmed - 1/2 cup unsalted butter, softened - 2 large eggs - 1 cup hazelnuts, toasted and chopped - 1 cup chocolate hazelnut spread (like Nutella) - 1/3 cup unsweetened cocoa powder - 1/4 cup powdered sugar (for dusting) To make a great Chocolate Hazelnut Babka, start with fresh ingredients. Use all-purpose flour for a soft texture. You need granulated sugar, which adds sweetness. The active dry yeast helps the dough rise. A little salt brings out the flavors. Whole milk adds richness. Softened unsalted butter makes the dough tender. The two large eggs help bind everything together. Chopped hazelnuts give a nice crunch. Use a high-quality chocolate hazelnut spread for creamy goodness. Unsweetened cocoa powder deepens the chocolate flavor. Finally, powdered sugar is perfect for a sweet dusting on top. With these ingredients, you create a lovely babka that tastes amazing and looks beautiful! {{ingredient_image_1}} 1. Start by warming the milk. Add granulated sugar and sprinkle the yeast on top. 2. Let it sit for about 5-10 minutes until it gets foamy. 3. In a large bowl, mix the flour and salt. Make a well in the center. 4. Pour in the yeast mixture, butter, and eggs. Stir until a soft dough forms. 5. Knead the dough for 10 minutes on a floured surface. It should be smooth and elastic. 6. Place the dough in a greased bowl. Cover it with a damp towel and let it rise. 7. Find a warm place and let it rise for 1-2 hours until it doubles in size. 1. After rising, punch the dough down gently. 2. Roll it into a rectangle about 1/4 inch thick. 3. Spread chocolate hazelnut spread evenly over the dough. 4. Sprinkle cocoa powder and chopped hazelnuts on top of the spread. 5. Starting from one edge, roll the dough tightly into a log. 6. Cut the log in half lengthwise to see the layers. 7. Twist the two halves together, forming a braid. Tuck the ends under. 8. Place the twisted dough in a greased loaf pan. Cover it again. 9. Let it rise for another 30-40 minutes. 1. Preheat your oven to 350°F (175°C). 2. Once the dough has risen, bake it for 25-30 minutes. 3. Check for doneness by looking for a golden brown color. 4. Let the babka cool in the pan for 10 minutes. 5. Then transfer it to a wire rack to cool completely. 6. Dust with powdered sugar before serving. To get the best dough, focus on kneading it well. Knead for about 10 minutes. The dough should feel smooth and elastic. If it's sticky, dust with more flour. For rising, find a warm spot. An oven turned off, but warm, is ideal. Cover the dough with a damp towel. This keeps it cozy while it rises. To boost flavor, think outside the box. You can add a splash of vanilla extract. This adds warmth to the chocolate. Consider mixing in some orange zest for a fresh twist. It brightens the flavors nicely. When spreading the chocolate hazelnut spread, warm it slightly. This makes it easier to spread and enhances the taste. Don't forget to sprinkle a bit of sea salt on top. It makes the chocolate flavor pop. When serving, slice the babka into thick pieces. Arrange them on a lovely platter. It looks inviting and will impress your guests. For garnishing, add a few whole hazelnuts on top. They add a nice touch and show off the ingredients. Serve with extra chocolate hazelnut spread on the side. This way, everyone can enjoy more of that rich flavor. Pro Tips Use Fresh Yeast: Make sure your yeast is fresh for the best rise. Check the expiration date and store it properly to maintain its potency. Knead Thoroughly: Knead the dough until it is smooth and elastic. This ensures a good structure, which will hold up the layers of chocolate and hazelnuts. Proper Cooling: Allow the babka to cool completely on a wire rack to prevent it from becoming soggy, which helps maintain its texture. Experiment with Fillings: Feel free to customize the filling by adding spices like cinnamon or using different nut spreads for a unique twist on the classic recipe. {{image_2}} You can change the filling in your babka to keep things fun. Instead of chocolate hazelnut spread, try dark chocolate spread for a richer taste. You can also use fruit fillings like raspberry or cherry for a fresh twist. These options add unique flavors and brighten your babka. If you need gluten-free options, use a gluten-free flour blend. This way, you can still enjoy babka without the gluten. For a vegan twist, substitute eggs with flax eggs. Use plant-based butter and almond milk too. These swaps let everyone join in on the treat. Babka has many cultural styles. In Poland, you might find a poppy seed filling. In Israel, babka often has a sweeter, richer dough. Each version brings a new taste and story. Trying these different styles can be exciting and delicious. To keep your leftover babka fresh, wrap it tightly in plastic wrap. You can also place it in an airtight container. This method helps keep moisture in and prevents it from drying out. Store it at room temperature for up to three days. If you want it to last longer, consider freezing it. To freeze babka, first let it cool completely. Then, wrap it well in plastic wrap. Make sure to wrap it tightly to avoid freezer burn. Place the wrapped babka in a freezer bag. It can last up to three months in the freezer. When you are ready to enjoy it, take the babka out of the freezer. Thaw it in the fridge overnight or at room temperature for a few hours. For a warm treat, reheat slices in the oven at 350°F (175°C) for about ten minutes. This will bring back its lovely, fresh taste. You can tell if your babka is done by looking at its color. It should be golden brown on top. You can also tap the bottom. If it sounds hollow, it’s ready. Another sign is checking the internal temperature. It should be around 190°F (88°C). If you see these signs, your babka is perfect! Yes, you can make this babka ahead of time. First, prepare the dough and let it rise. After that, shape it but do not let it rise a second time. You can wrap it tightly and chill it in the fridge for up to 24 hours. When you’re ready to bake, take it out and let it rise for about 30-40 minutes before baking. This way, you save time and still enjoy fresh babka! You can serve your Chocolate Hazelnut Babka with some great pairings. Here are a few ideas: - A scoop of vanilla ice cream - A dollop of whipped cream - Fresh berries like strawberries or raspberries - A cup of coffee or hot chocolate These options will enhance your babka experience and make it even more delightful! In this post, we explored how to make a delicious Chocolate Hazelnut Babka. We covered the ingredients, step-by-step instructions, and tips for perfect texture. You learned about variations, storage, and answers to common questions. Babka is fun to make and share. With practice, you can create a stunning loaf. Enjoy baking and eating your homemade treat!

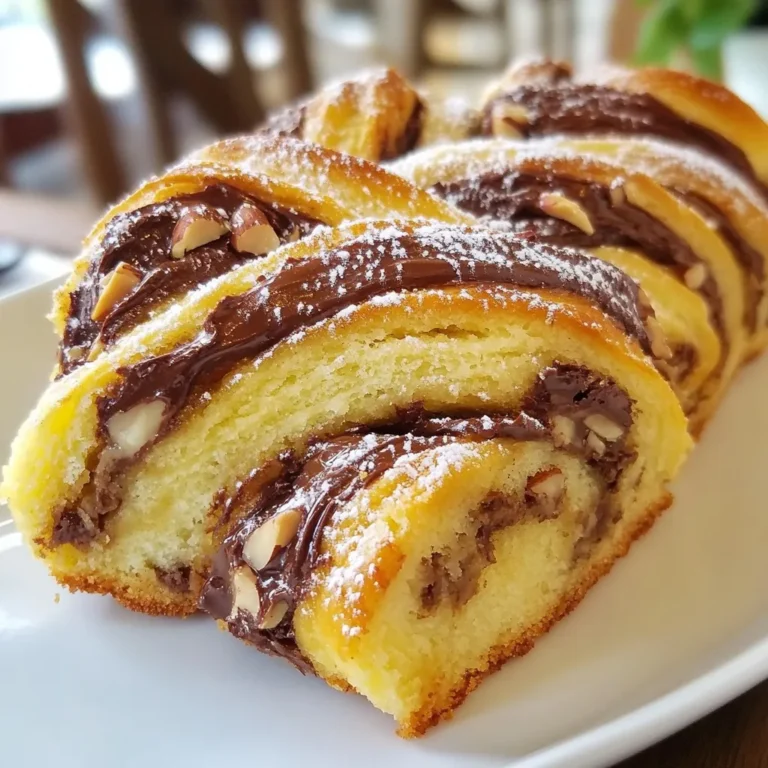
Chocolate Hazelnut Babka Delightful and Easy Recipe

To make a hearty bowl of Ground Turkey Taco Soup, gather these fresh ingredients: - 1 pound ground turkey - 1 medium onion, diced - 2 cloves garlic, minced - 1 red bell pepper, diced - 1 can (15 oz) black beans, drained and rinsed - 1 can (15 oz) kidney beans, drained and rinsed - 1 can (14 oz) diced tomatoes with green chilies - 1 can (15 oz) corn, drained - 4 cups chicken or vegetable broth - 2 tablespoons taco seasoning (store-bought or homemade) - 1 tablespoon olive oil - Salt and pepper, to taste For those special touches, consider these optional toppings: - Shredded cheese - Avocado - Cilantro - Sour cream - Tortilla chips These ingredients create a warm, flavorful soup that comforts you on any day. Each item adds its own unique taste and texture, making every bite a delight. You can mix and match toppings to personalize your bowl. Enjoy the process of gathering these ingredients and let the fun of cooking begin! {{ingredient_image_1}} To start, I heat olive oil in a large pot over medium heat. I add one diced onion and sauté it for about 3-4 minutes. I wait until the onion turns translucent. Next, I stir in two cloves of minced garlic and one diced red bell pepper. I cook this mixture for an extra 2-3 minutes, letting the bell pepper soften. Then, I add one pound of ground turkey to the pot. I break it apart with a spoon. I cook the turkey until it is browned and cooked through, which takes about 5-7 minutes. Once the turkey is cooked, I sprinkle two tablespoons of taco seasoning over it. I stir well to coat all the ingredients. After this, I pour in four cups of chicken or vegetable broth. I also add one can of drained black beans, one can of drained kidney beans, one can of diced tomatoes (with their juice), and one can of drained corn. I give everything a good stir and bring it to a gentle boil. Now it’s time to let the soup simmer. I reduce the heat and let it cook for 15-20 minutes. I stir occasionally to mix the flavors. Before serving, I season the soup with salt and pepper to taste. This step is key to enhancing the soup's flavor. To adjust the spice levels in your soup, start with the taco seasoning. If you like it spicy, add more seasoning or include fresh jalapeños. You can also use hot sauce for an extra kick. For those who prefer less heat, use mild taco seasoning and limit fresh peppers. For texture and consistency, aim for a thick soup. If it's too thin, let it simmer longer. If it's too thick, add more broth or water. A balanced texture makes each bite enjoyable. You can cook this soup in several ways. A slow cooker works well for busy days. Simply brown the turkey and veggies, then transfer everything to the slow cooker. Cook on low for 6-8 hours or high for 3-4 hours. An Instant Pot is another great option. After browning the turkey and veggies, add all ingredients to the pot. Seal it and cook on high for 10 minutes. This method saves time and keeps flavors rich. Feel free to switch up the meats or beans. If you want a different flavor, try ground chicken or beef. For a vegetarian twist, use lentils or chickpeas. You can also mix black beans with pinto beans for variety. This soup is versatile, so have fun experimenting! Pro Tips Use Lean Turkey: Opt for 93% lean ground turkey to keep the soup healthier without sacrificing flavor. Customize the Spice: Adjust the amount of taco seasoning based on your family's spice tolerance for a personalized kick. Add Fresh Ingredients: For an extra burst of flavor, toss in some fresh lime juice or chopped jalapeños before serving. Make it Ahead: This soup tastes even better the next day! Make a big batch and store leftovers for an easy lunch or dinner. {{image_2}} You can easily make this soup meat-free. Just swap the ground turkey for a plant-based protein. Options like lentils or crumbled tofu work well. They add protein and texture to the dish. You can also use canned chickpeas for a hearty touch. This keeps the soup filling and delicious without meat. Want to change the taste? Try adding different spices or herbs. A teaspoon of cumin gives a warm flavor. Paprika adds a smoky touch. Fresh herbs like cilantro or parsley can brighten it up. If you enjoy heat, sprinkle in some cayenne pepper. Experimenting with spices adds fun to your cooking. Bring a fiesta to your bowl by adding Mexican-inspired items. Chopped jalapeños can add heat and crunch. Squeeze in fresh lime juice for a zesty kick. You can also toss in some fresh corn or diced avocado for a fresh touch. These additions make every bowl a tasty treat. To keep your ground turkey taco soup fresh, use good storage methods. First, let the soup cool to room temperature. Then, transfer it to airtight containers. This helps stop moisture loss and keeps the flavors intact. You can refrigerate the soup for up to five days. If you want to keep it longer, freeze the soup in freezer-safe containers. Make sure to leave some space at the top, as liquids expand when frozen. When you are ready to enjoy the soup again, reheating is easy. For the best taste and texture, use the stove. Pour the soup into a pot over medium heat. Stir it often to keep it from sticking. Heat until it bubbles and is hot throughout. If you prefer using a microwave, place the soup in a microwave-safe bowl. Heat it in short intervals, stirring in between. This helps heat it evenly. Your ground turkey taco soup can last in the fridge for about five days. In the freezer, it stays good for about three months. After that, the taste and quality may fade. Always check for signs of spoilage before eating, such as off smells or changes in texture. Enjoy it while it's fresh for the best flavors! To add heat to your soup, try these tips: - Add fresh jalapeños: Chop them up and stir them in. - Use spicy taco seasoning: Look for blends with extra heat. - Mix in cayenne pepper: Start with a pinch and add more if needed. - Top with hot salsa: A spoonful on each bowl brings a kick. These methods let you control the spice. Start small and adjust to your taste. Yes, you can. Canned beans save time and effort. Here’s why you might choose them: - Convenient: No soaking or long cooking times. Just open and rinse. - Consistent texture: Canned beans often have a softer bite. - Variety: You can mix different types like black and kidney beans. If you use canned beans, remember to drain and rinse them. This helps reduce sodium and improves flavor. Serving sides can enhance your meal. Here are some great options: - Cornbread: Sweet and fluffy, it complements the soup well. - Tortilla chips: Crunchy chips add a nice texture. - Rice: A side of rice can make the meal heartier. - Salad: A fresh green salad lightens the dish. These sides not only taste great but also make your meal feel complete. Enjoy mixing and matching! You now have all you need to make a delicious Ground Turkey Taco Soup. We covered the key ingredients, step-by-step instructions, and different tips to enhance your dish. Don't forget about fun variations, like vegetarian options and new spice ideas. Proper storage and reheating ensure your soup stays tasty. Enjoy experimenting with flavor and texture to make this meal your own. Try it out, and feel free to make it your signature dish. With these insights, you’ll impress anyone at the table!

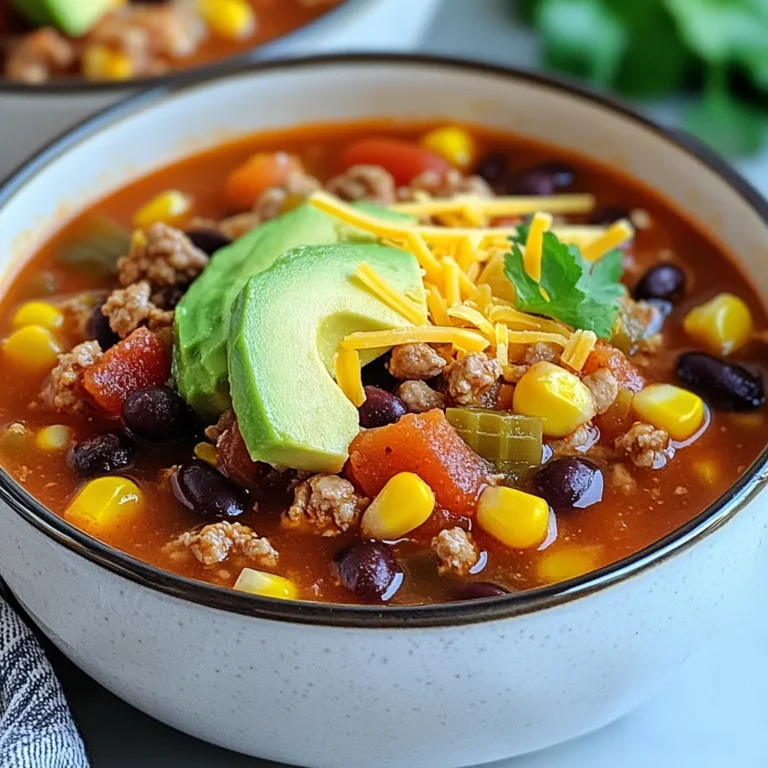
Ground Turkey Taco Soup Hearty Comfort in a Bowl

- 1 cup orzo pasta - 2 cups vegetable broth or water - 1 cup cherry tomatoes, halved - 1 cucumber, diced - 1 red bell pepper, diced - 1/2 red onion, finely chopped - 1/2 cup Kalamata olives, pitted and halved - 1 cup feta cheese, crumbled - 1/4 cup fresh parsley, chopped - 1/4 cup fresh mint, chopped - Juice of 2 lemons - 1/4 cup extra-virgin olive oil - Salt and pepper to taste Using fresh ingredients is key for this salad. Fresh veggies add crunch and bright flavor. I recommend ripe cherry tomatoes for sweetness. Choose firm cucumbers and colorful bell peppers for a nice look. The herbs should be vibrant and fragrant. When possible, use high-quality extra-virgin olive oil. This will enhance the taste of your dressing. You can swap orzo for quinoa or couscous if you prefer. For a gluten-free option, use gluten-free pasta. If you don’t have Kalamata olives, green olives work too. You can replace feta with goat cheese or leave it out for a vegan dish. Fresh herbs like basil or dill can add a twist, too. Just be creative and make this salad your own! {{ingredient_image_1}} Start by boiling two cups of vegetable broth or water in a medium saucepan. Once it reaches a boil, add one cup of orzo pasta. Cook it according to the package instructions, usually about 8 to 10 minutes, until it is al dente. After cooking, drain the orzo and rinse it under cold water. This step stops the cooking process. Allow the orzo to cool completely before using it in the salad. While the orzo cools, you can prepare the vegetables. Take one cup of cherry tomatoes and cut them in half. Next, dice one cucumber and one red bell pepper. For the red onion, chop half of it finely. Finally, halve half a cup of Kalamata olives and set them aside. These fresh veggies add color and crunch to our salad. In a separate bowl, whisk together the juice of two lemons and a quarter cup of extra-virgin olive oil. Add salt and pepper to taste. Whisk until the dressing is well mixed and emulsified. This dressing brings bright, zesty flavor to the salad. In a large mixing bowl, combine the cooled orzo, cherry tomatoes, cucumber, red bell pepper, red onion, and Kalamata olives. Pour the dressing over the mixture and gently toss it to coat everything evenly. Now, fold in one cup of crumbled feta cheese, a quarter cup of chopped fresh parsley, and a quarter cup of chopped fresh mint. Make sure everything is well combined. Taste your salad and adjust the seasoning with more salt, pepper, or lemon juice if needed. Cover the salad and refrigerate it for at least 30 minutes. This time allows the flavors to meld beautifully. To cook orzo, start with a medium saucepan. Bring two cups of vegetable broth or water to a rolling boil. Add one cup of orzo pasta. Cook it for about eight to ten minutes. Taste it a minute or two before the time is up. You want it al dente, which means it should be firm but tender. Once cooked, drain the orzo and rinse it with cold water. This stops cooking and keeps it from getting mushy. For a beautiful presentation, serve the salad in a large bowl. Top it with extra mint and parsley for a fresh look. Drizzle a little olive oil around the edges of the bowl to enhance the flavor. To make it even prettier, use a colorful platter. You can also serve it in individual bowls for a more personal touch. This Greek Lemon Orzo Salad pairs well with grilled chicken or shrimp. The bright flavors complement the protein nicely. You can also serve it with pita bread and hummus for a complete meal. For a vegetarian option, add some roasted veggies or chickpeas. A glass of chilled white wine makes a perfect drink with this salad too. Pro Tips Cook Orzo Al Dente: Make sure to cook the orzo just until al dente for the best texture. It will continue to absorb flavors and moisture as it sits in the salad. Chill Before Serving: Allowing the salad to chill in the refrigerator for at least 30 minutes helps the flavors meld together, making each bite more vibrant. Use Fresh Herbs: Fresh parsley and mint elevate the flavor profile of this salad. Add them just before serving to maintain their bright color and taste. Customize Your Veggies: Feel free to swap in your favorite vegetables or whatever you have on hand. Bell peppers, zucchini, or even artichokes work wonderfully in this dish! {{image_2}} You can easily make this salad vegetarian or vegan. For a vegetarian twist, use plant-based feta cheese. There are many brands that taste great and melt well in salads. If you want it vegan, skip the cheese altogether. You can add extra nuts or seeds for flavor and protein. Sunflower seeds or toasted almonds work well here. They add a nice crunch! Feel free to get creative with your toppings! Try adding roasted red peppers for a smoky flavor. Artichoke hearts add a nice tang if you want something different. Avocado can also bring creaminess and healthy fats. For a bit of spice, throw in some sliced jalapeños. Fresh herbs like dill or basil can give the salad a fresh lift. The options are endless! Greek salads can change based on the region. In Crete, they often add barley instead of orzo. In the islands, you may find more seafood mixed in. Some areas use capers, while others prefer more olives. Each variation brings a unique twist to the classic flavors. You can try these regional styles to keep things exciting. Mixing different elements can make your salad truly your own! To keep your Greek Lemon Orzo Salad fresh, store it in an airtight container. This helps lock in flavor and moisture. Make sure the salad is completely cool before sealing it. If you have leftovers, divide them into smaller portions. This makes it easy to grab when you want a quick meal. The salad stays fresh for about 3 days in the fridge. After that, the vegetables may lose crunch. Check for any off smells or changes in texture. If you notice these, it’s best to toss the salad. Always refrigerate within two hours of making it. This keeps harmful bacteria from growing. Greek Lemon Orzo Salad tastes best cold, so I recommend eating it straight from the fridge. If you prefer it warm, heat it gently on the stove. Add a splash of olive oil and a bit of lemon juice to refresh the flavors. Stir often to prevent sticking. You can also serve the salad with grilled chicken or fish for a full meal. Yes, you can make this salad ahead of time. It tastes even better after resting. The flavors blend well when chilled. I suggest making it a few hours before serving. Just keep it in the fridge. If you need a feta substitute, try goat cheese or ricotta. Both add creaminess. For a dairy-free option, use a nut-based cheese. This keeps the salad fresh and tasty. No, orzo pasta is not gluten-free. It is made from wheat. If you want a gluten-free version, use a gluten-free pasta. Quinoa or rice can also work well here. They keep the salad light and filling. To add spice, mix in chopped jalapeños or red pepper flakes. You can also use a spicier olive oil. Another option is to add a dash of hot sauce. This gives the salad an exciting kick. Greek Lemon Orzo Salad is fresh and easy to make. You learned about key ingredients, cooking steps, and useful tips. I shared different ways to adapt the recipe and how to store it. This salad is great for any meal or snack. You can enjoy it with friends or keep it for leftovers. Remember, using fresh ingredients makes a big difference. Now, you can create a delicious dish that everyone loves! Enjoy the journey of making your salad.

Greek Lemon Orzo Salad Fresh and Flavorful Recipe

For this tasty dish, you need: - 1 cup orzo pasta - 2 boneless, skinless chicken breasts - 1 tablespoon olive oil - 1 red bell pepper, diced - 1 zucchini, diced - 1 cup cherry tomatoes, halved - 1/4 cup Kalamata olives, pitted and sliced - 1/4 cup feta cheese, crumbled - 2 cups chicken broth - 1 tablespoon fresh lemon juice - Fresh parsley for garnish These ingredients make a flavorful one-pan meal. The orzo gives a nice base, while the chicken adds protein. The fresh veggies bring color and crunch. You also need these seasonings: - 1 teaspoon dried oregano - 1 teaspoon garlic powder - Salt and pepper to taste These simple spices enhance the dish. Oregano adds a Mediterranean touch. Garlic powder provides depth to the chicken's flavor. For a finishing touch, consider these garnishes: - Extra crumbled feta - Lemon wedges - Fresh parsley These garnishes make your dish look great. They add extra flavor and brightness to each bite. Serve the orzo in a big bowl for a beautiful presentation. {{ingredient_image_1}} First, grab a medium pot and fill it with 2 cups of water. Bring the water to a boil. Once boiling, stir in 1 cup of orzo pasta. Cook for about 8 to 10 minutes. You want the orzo to be al dente, which means it should be firm but not hard. After cooking, drain the orzo and set it aside. This simple step sets the stage for a tasty dish. While the orzo cooks, take 2 boneless, skinless chicken breasts. Season them with 1 tablespoon of olive oil, 1 teaspoon of dried oregano, 1 teaspoon of garlic powder, salt, and pepper. Heat a large skillet over medium-high heat. Add the seasoned chicken to the skillet and cook for about 6 to 7 minutes per side. You want the chicken to be golden brown and cooked through. Once done, remove the chicken and let it rest for a few minutes. Then, slice it into strips. In the same skillet, add 1 diced red bell pepper and 1 diced zucchini. Sauté the veggies for about 3 to 4 minutes. They should start to soften but still retain some crunch. After that, add in 1 cup of halved cherry tomatoes and 1/4 cup of sliced Kalamata olives. Cook for another 2 to 3 minutes. This step brings vibrant colors and fresh flavors to your dish. Pour in 2 cups of chicken broth to the skillet and bring it to a gentle simmer. Now, mix in the cooked orzo and the sliced chicken. Add 1 tablespoon of fresh lemon juice for a zesty kick. Stir everything well and let it heat through for about 2 to 3 minutes. This is where the magic happens, and all the flavors blend together. Remove the skillet from the heat. Sprinkle 1/4 cup of crumbled feta cheese on top. Gently fold the cheese into the dish without breaking it up too much. The feta adds creaminess and a salty punch. Before serving, garnish with fresh parsley. Serve the orzo in a large bowl. For a lovely touch, add extra feta and lemon wedges on the side. Enjoy your beautiful Mediterranean Chicken Orzo! To cook orzo just right, use plenty of water. Bring 2 cups of water to a boil before adding 1 cup of orzo. Stir it well and let it cook for 8-10 minutes. Check for al dente texture. The orzo should be soft but still firm. Drain it well and set aside. This helps keep your dish light and fluffy. For tasty chicken, season it well before cooking. I recommend using 1 teaspoon of dried oregano and garlic powder. Add salt and pepper to suit your taste. Rub the spices on both sides of the chicken breasts. This step adds depth and flavor to your meal. Cook until the chicken turns golden brown. It takes about 6-7 minutes on each side. Serve the Mediterranean chicken orzo in a large bowl. Top it with crumbled feta cheese and fresh parsley. You can also add a sprinkle of extra feta for flavor. Place lemon wedges on the side. This adds a nice zesty touch. The bright colors of the veggies make the dish look appealing. Enjoy your beautiful meal! Pro Tips Use Fresh Herbs: Fresh parsley not only adds a pop of color but also enhances the flavor of the dish. Consider adding fresh dill or basil for an additional Mediterranean twist. Perfectly Cooked Chicken: To ensure your chicken is juicy and tender, let it rest for a few minutes after cooking before slicing. This allows the juices to redistribute. Customize Your Veggies: Feel free to swap in seasonal vegetables based on what you have available. Spinach, artichokes, or eggplant would make great additions. Serve with a Side: Pair your Mediterranean Chicken Orzo Delight with a side salad or crusty bread to soak up the delicious flavors of the dish. {{image_2}} You can swap chicken for shrimp or tofu in this recipe. Shrimp cooks fast, so add it in the last few minutes. Just toss it in with the vegetables. Tofu works well too. Use firm tofu and sauté it until golden brown. Both options keep it tasty and fun. You can add many veggies to the mix. Try spinach or kale for a green boost. Artichoke hearts give a nice tang. You can also use carrots for a bit of sweetness. Just chop them small so they cook quickly. This way, you can enjoy different flavors every time you make it. Feta cheese is great, but try goat cheese for a new twist. Goat cheese adds a creamy texture and a tangy taste. You can also use mozzarella for a milder flavor. Just sprinkle it on top and let it melt a little. This change can make your Mediterranean Chicken Orzo feel fresh and new. After enjoying your Mediterranean Chicken Orzo, let it cool. Place any leftovers in an airtight container. Store it in the fridge for up to three days. Make sure to separate the orzo from the chicken if you can. This keeps it fresh for longer. To reheat, you can use the microwave or stovetop. If using a microwave, place the orzo in a bowl. Add a splash of water to keep it moist. Heat for about 1-2 minutes, stirring halfway through. On the stovetop, use a non-stick pan over low heat. Stir often until warm. This way, the flavors stay rich and delicious. You can freeze Mediterranean Chicken Orzo for later. Portion it into freezer-safe bags or containers. Make sure to remove as much air as possible. It will stay good for up to three months. When you’re ready to eat, thaw it in the fridge overnight. Reheat it on the stovetop or microwave as mentioned. Enjoy your meal again! Yes, you can prepare Mediterranean Chicken Orzo ahead of time. Cook the orzo and chicken, then mix with the veggies. Store it in the fridge for up to two days. Just remember to add fresh feta and parsley before serving. To reheat, use a skillet over medium heat. Add a splash of broth or water to keep it moist. Stir gently until warmed through. You can also use the microwave, but cover it to avoid drying out. Yes, this dish is quite healthy. It has lean chicken, fresh veggies, and whole grains from orzo. The olives and feta add healthy fats. Balance it with a side salad for a complete meal. Absolutely! You can swap chicken for shrimp or tofu. Change the veggies based on what you like or have. Feel free to adjust spices to suit your taste. Cooking should be fun and personal! This dish pairs well with a simple green salad or garlic bread. You can also serve it with roasted vegetables or a yogurt dip for extra flavor. We explored making Mediterranean Chicken Orzo, focusing on main ingredients, seasonings, and garnishes. I shared clear steps from cooking to presentation. Tips helped you get perfected orzo and tasty chicken. You can customize proteins and veggies for variety. Proper storage and reheating keep leftovers fresh. Enjoy experimenting with this recipe. It’s a great meal for any occasion. Happy cooking!

Mediterranean Chicken Orzo Flavorful One-Pan Meal

- 4 large russet potatoes - 1 medium onion - 3 cloves garlic - 4 cups vegetable broth - 1 cup heavy cream The main ingredients create the heart of the soup. The russet potatoes give it a creamy texture. Onions and garlic add depth and flavor. Vegetable broth forms the base, while heavy cream makes it rich. - 1 cup shredded cheddar cheese - 1/2 cup crispy shallots - 1/4 cup green onions Toppings elevate the soup. Shredded cheddar cheese melts into a gooey delight. Crispy shallots add crunch and flavor. Green onions bring a fresh pop of color and taste. - Salt and pepper to taste - Optional: Pinch of smoked paprika Seasoning is key to flavor. Salt and pepper enhance the taste of the soup. A pinch of smoked paprika can bring a smoky depth. These simple touches can transform your dish. {{ingredient_image_1}} How to peel and dice potatoes To start, grab your russet potatoes. Use a vegetable peeler to remove the skin. Be sure to peel off all the brown spots. Next, rinse the potatoes under cold water. Cut each potato in half. Then slice each half into smaller pieces. Aim for 1-inch cubes. This size helps them cook evenly. Chopping onions and mincing garlic Take your onion and cut off both ends. Slice it in half and peel off the skin. Lay it flat, then slice it into small pieces. For the garlic, remove the skin from each clove. Use the flat side of a knife to crush the clove slightly. This makes it easier to chop. Mince the garlic into tiny bits. Sautéing onions and garlic In a large pot, heat the olive oil over medium heat. Add the chopped onion first. Sauté it for about five minutes until it turns clear. Now, stir in the minced garlic and cook for one more minute. This step builds a great flavor base for your soup. Boiling, simmering, and blending the soup Once the onions and garlic are fragrant, add the diced potatoes and vegetable broth. Turn the heat up to high and bring it to a boil. After it boils, lower the heat to a simmer. Let it cook for 20 to 25 minutes, or until the potatoes are soft. Now, use an immersion blender to blend the soup until smooth. If you like a chunkier soup, blend only half of it. Incorporating cream and cheese Now it's time to make the soup creamy. Stir in the heavy cream and shredded cheddar cheese. Keep the heat low and let it warm until the cheese melts. This creates a rich, comforting texture. Seasoning adjustments Finally, taste your soup. Add salt and pepper to your liking. If you want a smoky touch, sprinkle in a pinch of smoked paprika. Stir well before serving. Enjoy your loaded potato soup! To get the right texture in your loaded potato soup, you can blend it two ways. If you want it creamy, use an immersion blender to purée all the soup until smooth. For a chunkier soup, blend just half, leaving some potato pieces intact. This gives you a nice mix of textures that makes each bite exciting. To boost the flavor of your soup, think about adding spices or herbs. A pinch of smoked paprika adds a warm, smoky taste. You can also sprinkle in some thyme or chives for a fresh, herbal note. Experiment with flavors to find what you love best! Using the right tools makes cooking easier. For this soup, a large pot is key. A sturdy stockpot helps cook the potatoes evenly. For blending, an immersion blender is perfect. It’s easy to use and clean. If you prefer, a standard blender works well too; just remember to blend in batches. Pro Tips Use Yukon Gold Potatoes: These potatoes have a creamy texture and buttery flavor, making your soup even richer. Add Fresh Herbs: Consider adding fresh thyme or rosemary for an aromatic boost that complements the creamy base. Experiment with Cheese: Try mixing different cheeses like Gruyère or Parmesan for a unique flavor profile. Garnish Creatively: Enhance presentation by using a drizzle of truffle oil or a sprinkle of paprika for color. {{image_2}} You can make loaded potato soup even better by adding bacon bits. Bacon adds a nice crunch and salty flavor. If you want veggies, try adding broccoli or carrots. They give your soup extra color and nutrition. You can also add corn for a sweet touch. Just stir them in when you blend the soup. If you need a dairy-free option, use plant-based cream. Coconut cream works great! It gives a rich taste without dairy. For cheese, try a plant-based cheddar. These swaps keep your soup creamy while being kind to your tummy. Mix up the cheese for fun flavors. Try pepper jack for a spicy kick. You can also swap vegetable broth for chicken broth. This gives a deeper taste. Adding a dash of hot sauce can also spice things up. Explore these twists to find your favorite! To store leftover loaded potato soup, let it cool first. Once cool, pour it into an airtight container. Make sure to seal it tight. You can keep it in the fridge for up to three days. When you want to eat it again, just reheat it on the stove or in the microwave. Stir it well to mix the flavors. If you want to freeze your soup, follow these steps. First, cool the soup completely. Then, pour it into freezer-safe containers. Leave some space at the top for expansion. You can also freeze it in portion sizes. When you want to enjoy it, thaw it overnight in the fridge. Reheat it on the stove over low heat. If it's too thick, add a splash of broth or water to thin it out. In the fridge, loaded potato soup lasts about three days. In the freezer, you can keep it for up to three months. After that, the soup may lose its flavor and texture. Always check for any signs of spoilage before eating. If it smells bad or looks off, it's better to toss it out. If you want a dairy-free option, use coconut cream or cashew cream. Coconut cream adds a slight sweetness, while cashew cream gives a rich mouthfeel. Both can keep your soup creamy. Just remember, these options change the flavor. So, taste and adjust your seasonings as needed. Yes, you can make this soup ahead of time. Cook it fully, then cool it down. Store it in the fridge for up to three days. When you reheat, the flavors blend even more. If you have time, let it sit overnight. Just add fresh toppings before serving. Serve this soup with crusty bread for dipping. A simple side salad also works well. You can pair it with a light coleslaw too. These sides balance the soup's creaminess. Enjoy experimenting with different combinations! This blog post covered how to make a delicious loaded potato soup. We went through the main ingredients, step-by-step instructions, tips for the perfect texture, and ways to customize the recipe. You learned how to store and reheat leftovers and even found answers to common questions. Loaded potato soup is easy to make and full of flavor. With simple tweaks, you can make it your own. Enjoy every warm bowl and share it with friends. Happy cooking!

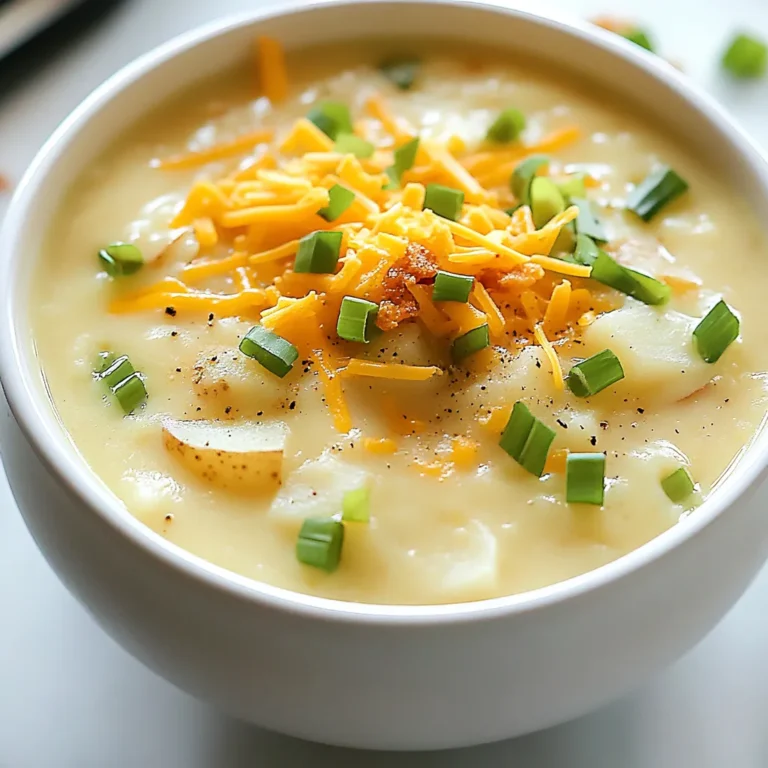
Loaded Potato Soup Comforting Creamy Delight

- 12 oz linguine or fettuccine - 1 lb raw shrimp, peeled and deveined - 2 tablespoons Cajun seasoning - 2 tablespoons olive oil - 1 bell pepper (red or yellow), diced - 1 small onion, diced - 3 cloves garlic, minced - 1 cup diced tomatoes (canned or fresh) - 1 cup heavy cream - 1 cup grated Parmesan cheese - Salt and pepper to taste - Fresh parsley, chopped (for garnish) - Large pot for boiling pasta - Large skillet for cooking - Mixing bowl for seasoning shrimp - Wooden spoon or spatula for stirring - Knife and cutting board for chopping - Spinach or kale for extra greens - Sliced mushrooms for added texture - Lemon juice for a fresh zing - Extra Cajun seasoning for more heat Gather all these ingredients and tools before you start cooking. This will make your time in the kitchen smooth and fun! Each item plays a key role in building the rich flavors of this Cajun shrimp pasta. Feel free to get creative with the optional add-ins to make the dish your own! {{ingredient_image_1}} Start by boiling water in a large pot. Add salt to the water. Once it's boiling, add 12 oz of linguine or fettuccine. Cook according to the package instructions until the pasta is al dente, which means it should be firm but not hard. This usually takes around 8-10 minutes. After cooking, drain the pasta and set it aside. Next, take 1 lb of raw shrimp, peeled and deveined. Place the shrimp in a large bowl. Sprinkle 2 tablespoons of Cajun seasoning over the shrimp. Toss the shrimp well to coat them evenly. Heat 2 tablespoons of olive oil in a large skillet over medium heat. Once the oil is hot, add the shrimp. Cook them for about 2-3 minutes on each side until they turn pink. Make sure not to overcook the shrimp. Once done, remove the shrimp from the skillet and set them aside. In the same skillet where you cooked the shrimp, add diced onion and bell pepper. You can use either a red or yellow bell pepper. Sauté them for about 4-5 minutes until they soften. Next, add 3 cloves of minced garlic and cook for another minute. You will smell a nice aroma! Now, add 1 cup of diced tomatoes, either canned or fresh, and let it simmer for about 3-4 minutes. Lower the heat and pour in 1 cup of heavy cream. Allow it to come to a gentle simmer, cooking for about 2 minutes until it thickens slightly. Stir in 1 cup of grated Parmesan cheese until it melts into the sauce. Taste and add salt and pepper if needed. Now, it’s time to bring it all together. Add the cooked pasta and shrimp back into the skillet. Toss everything until the pasta and shrimp are well-coated with the creamy Cajun sauce. The flavors should blend nicely. Remove from heat and garnish with fresh chopped parsley before serving. Enjoy your delicious Cajun Shrimp Pasta! To cook shrimp well, focus on timing. Cook them for just 2-3 minutes per side. They should turn pink and opaque. Overcooked shrimp become tough. If you follow the time closely, you get tender shrimp with great flavor. Use fresh or thawed shrimp for best results. Always peel and devein them for a clean taste. To thicken the sauce, start by simmering it longer. After adding the heavy cream, let it cook gently. This helps the sauce reduce and thicken. Another tip is to stir in more grated Parmesan cheese. The cheese adds richness and helps bind the sauce. If you need a quick fix, use a cornstarch slurry. Mix one tablespoon of cornstarch with two tablespoons of water, then stir it in. Serve the Cajun shrimp pasta hot, garnished with fresh parsley. A sprinkle of extra cheese adds a nice touch. Pair it with a side salad for balance. Garlic bread complements the dish well too. For a twist, add a squeeze of lemon juice before serving. This brightens the flavors and enhances the meal. Enjoy your great tasting dinner! Pro Tips Use Fresh Shrimp: Fresh shrimp will elevate the flavor of your dish. If possible, choose shrimp that is sustainably sourced and wild-caught for the best taste. Adjust Cajun Spice: Cajun seasoning can vary in heat. Start with a small amount and adjust to your taste preference, especially if you're serving guests with different spice tolerances. Perfect Pasta: To ensure your pasta is perfectly cooked, aim for al dente. It will continue cooking slightly when mixed with the sauce, preventing it from becoming mushy. Garnish for Freshness: Fresh parsley not only adds color but also a burst of freshness. Consider adding a squeeze of lemon juice before serving for an extra zing! {{image_2}} You can make this dish vegetarian by swapping shrimp for veggies. Use mushrooms, zucchini, or bell peppers. Toss them in Cajun seasoning for flavor. You can also add chickpeas for protein. This keeps the dish hearty and satisfying. Cook the veggies until tender, then follow the rest of the steps. It’s a great way to enjoy Cajun flavors without meat. Want more heat? Add more Cajun seasoning. You can also mix in red pepper flakes. A dash of hot sauce can elevate the spice. Cook the shrimp with extra seasoning to ensure every bite has a kick. If you like it really spicy, try adding jalapeños. You can adjust the heat to your taste. To make this dish lighter, use whole wheat pasta. You can replace heavy cream with Greek yogurt or a low-fat cream. This change keeps the creaminess, but cuts down on calories. You can also use less cheese or a lighter cheese option. Fresh herbs can add flavor without extra calories. These swaps help you enjoy the dish while being mindful of health. To store leftover Cajun shrimp pasta, let it cool first. Place it in an airtight container. You can keep it in the fridge for up to three days. Make sure to label the container with the date. This keeps track of freshness. When you’re ready to eat, you can reheat the pasta easily. Use a microwave-safe dish and cover it. Heat in the microwave for about 1-2 minutes. Stir halfway through to heat evenly. If you prefer, you can reheat it on the stove. Just add a splash of water or cream to keep it moist. If you want to freeze the pasta, do it right after cooking. Place it in a freezer-safe container or bag. Make sure to remove as much air as possible. It can last up to two months in the freezer. To thaw, place it in the fridge overnight before reheating. This keeps the pasta tasty and fresh. You can use half-and-half or whole milk. Both make a lighter sauce. If you want a vegan option, try coconut cream or cashew cream. These add a nice flavor without dairy. Yes, you can use frozen shrimp. Just make sure to thaw them first. Place them in cold water for about 10-15 minutes. This way, they cook evenly and stay juicy. To adjust the spice, use less Cajun seasoning. You can also add more cream to cool it down. If you want extra heat, add cayenne pepper or hot sauce. Taste as you go to find your perfect level. In this blog post, we broke down the key steps for making delicious Cajun shrimp pasta. We covered essential ingredients, tools, and optional add-ins. You learned how to cook shrimp perfectly and make a rich cream sauce. We shared tips for serving and modifying the recipe to fit your taste. Cajun shrimp pasta is a fun dish to make and enjoy. Try it your way and impress yourself!

Cajun Shrimp Pasta Flavorful and Quick Dinner Recipe

- 2 cups cooked chicken, shredded or diced - 1/2 cup dried cranberries - 1/2 cup pecans, roughly chopped - 1/2 cup celery, finely chopped - 1/4 cup red onion, finely chopped The main ingredients in this salad are simple yet tasty. Start with cooked chicken. You can use leftover chicken or cook it fresh. Shred or dice it into bite-sized pieces. Next, add dried cranberries. They bring a sweet and tart flavor. Pecans add crunch and a nutty taste. Chop them roughly for the best texture. Celery gives a nice crunch, while red onion adds a slight bite. Together, these ingredients create a fresh and colorful mix. - 1/2 cup Greek yogurt - 2 tablespoons mayonnaise - 1 tablespoon Dijon mustard - 1 tablespoon honey - Salt and pepper to taste For the dressing, start with Greek yogurt. It adds creaminess and tang. Mix in mayonnaise for extra richness. Then, add Dijon mustard for a zesty kick. Honey sweetens the dressing just right. Finally, season with salt and pepper to enhance the flavors. Whisk these ingredients together until smooth. This dressing ties the salad together beautifully. - Fresh parsley Fresh parsley is an optional garnish. It adds a pop of color and brightens the dish. You can chop it finely and sprinkle it on top before serving. This simple touch makes your salad look even more inviting. {{ingredient_image_1}} First, gather your chicken and veggies. In a large bowl, mix the cooked chicken, dried cranberries, chopped pecans, finely chopped celery, and red onion. Make sure everything is well combined. Next, you want to prepare the dressing. Use a separate small bowl. This keeps the flavors from mixing too soon. Now, let’s make the dressing. Whisk together the Greek yogurt, mayonnaise, Dijon mustard, honey, salt, and pepper. Keep whisking until it is smooth. This dressing adds creaminess and a sweet touch. Pour the dressing over your chicken mixture. Gently fold everything together. You want to coat all the ingredients, but be careful not to break them apart. After mixing, taste the salad. Adjust the salt and pepper if needed. Then, cover the bowl and refrigerate for at least 30 minutes. This chilling time lets the flavors blend well. For serving, you can place the salad on a bed of mixed greens. This adds color and freshness. If you prefer, use the salad as a filling for whole-grain bread. It makes a tasty sandwich. To finish, garnish with freshly chopped parsley. It adds a pop of color and flavor. Enjoy your beautiful and delicious Cranberry Pecan Chicken Salad! For shredding chicken, I suggest using two forks. Hold one fork steady and use the other to pull apart the meat. This method works best if the chicken is warm. If you have cooked chicken in the fridge, warm it slightly in the microwave. You can also use your hands to shred the chicken. Just make sure it's cool enough to handle. To add more flavor to your salad, consider these options: - Add diced apples for sweetness and crunch. - Toss in some crumbled feta cheese for a tangy taste. - Include diced bell peppers for color and a fresh bite. - Mix in a few herbs like dill or thyme for an earthy touch. These add-ins make the salad more exciting and unique. You can mix and match based on what you like best. To get the right texture, balance crunchiness and creaminess. For more crunch, use toasted pecans. Toasting enhances their flavor and gives a satisfying crunch. You can also add more chopped celery or even some radishes for extra crunch. For creaminess, adjust the amount of Greek yogurt and mayonnaise. If you like it creamier, add more yogurt. For a lighter version, cut back on the mayo and use more yogurt. This way, you make the salad your own! Pro Tips Use Rotisserie Chicken: For a quicker prep time, consider using store-bought rotisserie chicken. It adds flavor and saves you from the hassle of cooking. Customize the Nuts: Feel free to substitute pecans with walnuts or almonds for a different nutty flavor and crunch in your salad. Add Fresh Herbs: Enhance the flavor by mixing in fresh herbs like dill or thyme, which pair well with chicken and add freshness to the salad. Serve Chilled: For the best taste, serve the chicken salad chilled. It allows the flavors to meld beautifully and provides a refreshing experience. {{image_2}} You can make this salad even healthier. Try using low-fat yogurt in place of Greek yogurt. This change cuts down on calories while still keeping it creamy. You can also swap out the mayonnaise for more yogurt. This keeps the dressing light without losing flavor. If you need a gluten-free option, use gluten-free yogurt and check your mustard. Most mustards are gluten-free, but it's always good to read the label. For a vegan version, replace chicken with chickpeas or tofu. Use vegan mayo and yogurt to keep it plant-based. Changing nuts or fruits can give this salad a new twist. Try walnuts or almonds instead of pecans. You can also add fresh fruits like apples or grapes for a sweet crunch. Each nut or fruit adds its own flavor, making the salad unique. Don't be afraid to experiment! To keep your cranberry pecan chicken salad fresh, store it in the fridge. Use an airtight container to prevent spills or odors. Make sure to cover the bowl tightly if you don't have a lid. The salad will taste best if eaten within three days. If you want to save the salad for later, freezing is an option. However, some ingredients may change texture when thawed. To freeze, pack the salad in a freezer-safe container. Leave some space at the top, as it will expand. When ready to eat, thaw it in the fridge overnight before serving. In the fridge, cranberry pecan chicken salad lasts about three to four days. After that, the flavors may change, and it might not taste as good. Always check for any off smells or changes in texture before you eat it. If you see any signs of spoilage, it’s best to discard the salad. Yes, you can use rotisserie chicken for this salad. It saves time and adds flavor. The chicken is already cooked and seasoned. This makes your prep quick and easy. Just shred or chop the chicken before mixing. Plus, it helps keep the salad juicy and tender. Yes, this salad can be gluten-free. The main ingredients are naturally gluten-free. Ensure the mayonnaise and Dijon mustard are also gluten-free. Many brands offer gluten-free options. Always check the labels when you shop. This way, you can enjoy this dish without worry. You can make this salad ahead of time. I suggest prepping it a few hours before serving. This allows the flavors to blend nicely. Store it in the fridge until you are ready to enjoy it. For the best taste, eat it within two days. If you don't have Greek yogurt, try sour cream. It offers a similar creaminess. You can also use regular yogurt if you prefer. For a lighter option, consider using cottage cheese. These alternatives will still keep your salad tasty and delicious. This blog post covered a tasty chicken salad recipe. We went over the main ingredients, which include chicken, cranberries, pecans, celery, and red onion. I shared how to prepare the chicken mixture and make a creamy dressing. You learned tips for shredding chicken and enhancing flavor. We also explored healthy substitutes and storage tips. Remember, this salad is easy to customize. Try new ingredients or serve it in a sandwich. Visit often for more fun recipes!

Cranberry Pecan Chicken Salad Fresh and Flavorful Dish

PREV 1 … 47 48 49 … 65 NEXT
tasty trail blazer

explore

DessertsDinnerAppetizersDrinks

Our Policies

  • Cookie Policy
  • Copyright Policy
  • Disclaimer
  • GDPR Policy
  • Terms Of Use
Back to Top
  • About
  • Contact Us
  • Privacy Policy
© 2025 tasty trail blazer