FREE DINNER EBOOK! Get your copy!
  • Cookie Policy
  • GDPR Policy
  • Disclaimer
  • Terms Of Use
  • Visit my other site: Fun Cookie Recipes
tasty trail blazer
  • Home
  • Dinner
  • Desserts
  • Drinks
  • Appetizers
  • Contact
  • About
  • Privacy Policy
  • Home
  • Dinner
  • Desserts
  • Drinks
  • Appetizers
  • Contact
  • About
  • Privacy Policy
  • Cookie Policy
  • GDPR Policy
  • Disclaimer
  • Terms Of Use
Visit my other site: Fun Cookie Recipes

HOME / CATEGORIES /

Latest

- 4 boneless chicken breasts - 1 cup pecorino cheese, grated - 2 lemons (zest and juice) - 3 cloves garlic, minced - 1/4 cup olive oil - 1 tablespoon fresh thyme, chopped (or 1 teaspoon dried thyme) - Salt and pepper to taste - 1 cup cherry tomatoes, halved (for garnish) - Fresh parsley, chopped (for garnish) 1. Preheat the oven to 400°F (200°C). This ensures even cooking. 2. In a bowl, mix the grated pecorino cheese, lemon zest, minced garlic, olive oil, thyme, salt, and pepper. This creates a flavorful paste. 1. Pat the chicken breasts dry with paper towels. This helps the coating stick. 2. Place the chicken in a baking dish. This will keep them neat while cooking. 3. Squeeze the juice from one lemon over the chicken. Ensure they are well coated. 4. Spread the pecorino mixture evenly over each chicken breast. Press gently to make it stick. 5. Slice the other lemon into thin rounds. Place these on top of the chicken for added flavor. 6. Scatter the halved cherry tomatoes around the chicken. Drizzle a little olive oil over them and season with salt and pepper. 1. Bake in the preheated oven for 25-30 minutes. The chicken should reach an internal temperature of 165°F (75°C) when done. 2. If you want a golden crust, broil on high for an extra 2-3 minutes. Watch closely to avoid burning. 3. Once finished, let the chicken rest for 5 minutes before serving. This helps keep it juicy. Serve the chicken on a large platter. Top with roasted tomatoes and lemon slices. Sprinkle fresh parsley for a beautiful touch. Enjoy! {{ingredient_image_1}} To enhance the taste of Lemon Pecorino Chicken, adjust the seasoning. If you like more zest, add extra lemon juice or zest. If you prefer it saltier, sprinkle more salt over the chicken. For unused pecorino cheese, store it in an airtight container in the fridge. This helps it stay fresh for longer. Try to use it within a week for the best flavor. To keep your chicken juicy, pat it dry before cooking. This helps the seasoning stick and gives a nice crust. Another tip is to avoid overcooking. Check the internal temperature; it should reach 165°F (75°C). When broiling, keep a close eye on the chicken. Broil for only 2-3 minutes at the end of baking. This gives a golden crust without burning the cheese or chicken. To store leftovers, let the chicken cool first. Place it in an airtight container. This keeps moisture inside and prevents odors from mixing. You can store Lemon Pecorino Chicken in the fridge for up to three days. If you want to keep it longer, consider freezing it. To reheat the chicken, use the oven or a skillet for best results. Preheat your oven to 350°F (175°C). Cover the chicken with foil to keep it moist. Heat for about 15-20 minutes. If using a skillet, add a splash of water or broth. Heat over medium-low until warm. Avoid using a microwave, as it can dry out the chicken. For a great look, serve the chicken on a large platter. Arrange the roasted tomatoes around the chicken. Add lemon slices on top for bright color. A sprinkle of fresh parsley gives a nice touch. This makes your dish pop and invites everyone to dig in. Use fresh herbs like thyme or parsley to garnish. Chop them finely and sprinkle over the top. This adds freshness and flavor. To add color, consider slicing colorful bell peppers or zucchini. Place them around the chicken for a vibrant, inviting meal. Pro Tips Use Fresh Ingredients: Always opt for fresh lemons and high-quality pecorino cheese to enhance the flavor of the dish significantly. Perfectly Cooked Chicken: Use a meat thermometer to ensure your chicken reaches an internal temperature of 165°F (75°C) for safe and juicy results. Customize the Herbs: Feel free to experiment with different herbs like rosemary or oregano to personalize the flavor profile of your chicken. Rest Before Serving: Allow the chicken to rest for at least 5 minutes after baking to help retain its juices, resulting in a more tender bite. {{image_2}} Can I make Lemon Pecorino Chicken ahead of time? Yes, you can prepare it in advance. Marinate the chicken and store it in the fridge. Bake it the next day for fresh flavors. What side dishes pair well with this recipe? Great sides include roasted vegetables, garlic bread, or a light salad. These options balance the rich flavors of the chicken. Can I use chicken thighs instead of breasts? Absolutely! Chicken thighs have more fat, which keeps them juicy. Just adjust the cooking time to ensure they reach 165°F. How do I know when the chicken is fully cooked? Use a meat thermometer. The chicken should reach 165°F in the thickest part. This ensures it's safe to eat. Can I use pre-grated pecorino cheese? Yes, pre-grated pecorino works well. However, fresh grated cheese often has better flavor and melts nicely. What if I don’t have fresh thyme? You can use dried thyme instead. Just use one teaspoon of dried thyme for each tablespoon of fresh thyme. How can I make the dish more tangy? Add extra lemon juice or zest. You can also serve it with a lemon wedge for a fresh burst. Are there alternatives if I can't find pecorino cheese? Parmesan cheese is a great substitute. It has a similar flavor and will work well in this dish. This blog explores a simple yet flavorful Lemon Pecorino Chicken recipe. You learned about key ingredients such as chicken, pecorino cheese, and fresh herbs. The step-by-step instructions guide you from prep to baking, including tips for juicy chicken and creative variations. Storing leftovers and presentation tips ensure your meal looks and tastes great. Remember, cooking can be fun, and experimenting will lead to unique flavors. Use what you learn here to create your own version and impress your friends and family!

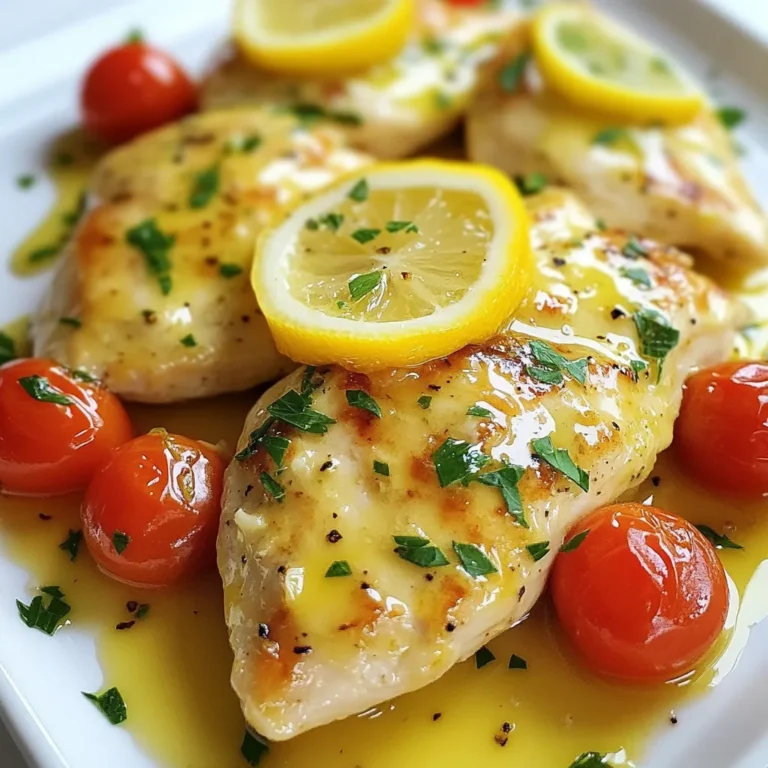
Lemon Pecorino Chicken Savory and Simple Delight

- 2 boneless, skinless chicken breasts - 1/2 cup teriyaki sauce - 1 tablespoon sesame oil - 1 cup shredded cabbage (purple or green) - 1/2 cup carrots, julienned - 1/4 cup green onions, chopped - 8 small corn or flour tortillas For these tacos, chicken breasts are the star. They soak up the teriyaki sauce well. The sauce adds a sweet and salty taste. Sesame oil gives a nice, nutty flavor. Cabbage, carrots, and green onions add crunch and color. Finally, the tortillas hold everything together. - Fresh cilantro - Lime wedges - Sesame seeds Fresh cilantro adds a bright taste. Lime wedges give a zesty kick. Sesame seeds enhance the look and flavor. You can add these for a personal touch. They help make your tacos even better! {{ingredient_image_1}} For the best flavor, marinate the chicken for at least 30 minutes. If you have time, let it sit for 2 hours. This will make the chicken more tasty. Place the chicken in a bowl and pour the teriyaki sauce over it. Make sure the chicken is fully covered. The sauce has soy and sugar, which give great flavor. Heat the sesame oil in a skillet over medium heat. This oil adds a nice nutty flavor. Remove the chicken from the marinade but keep the marinade for later. Cook the chicken for 5-7 minutes on each side. The chicken should turn golden brown and reach an internal temperature of 165°F. This means it is safe to eat. After cooking, pour the reserved marinade into the skillet. Let it simmer for about 2-3 minutes to thicken. This glaze will coat the chicken nicely. While it thickens, mix the shredded cabbage, julienned carrots, and chopped green onions in a bowl. These fresh toppings add crunch and color to your tacos. Once the chicken is glazed, slice it into strips. Take a small tortilla and place a few chicken strips on it. Top with the cabbage and carrot mix. Sprinkle sesame seeds on top for a little crunch. Add fresh cilantro leaves for a burst of flavor. Serve these tacos with lime wedges on the side. Squeeze lime juice over the top before taking a bite. Enjoy your tasty teriyaki chicken tacos! To get great flavor in your teriyaki chicken tacos, marinate the chicken well. I suggest marinating for at least 30 minutes. If you can, aim for 2 hours. This allows the flavors to soak in. You can add extra seasonings, like garlic or ginger, to enhance the taste. A pinch of red pepper flakes can also give a nice kick. Cook the chicken on medium heat. This helps it cook evenly. Aim for a temperature of 165°F (74°C) to ensure it's safe to eat. To avoid dryness, don’t overcook the chicken. Keep an eye on it, and remove it as soon as it’s done. Warming tortillas is easy and important. You can heat them in a dry skillet for about 30 seconds on each side. This makes them soft and warm. If you want variety, try using lettuce wraps instead of tortillas. They add crunch and freshness to your tacos. Pro Tips Marinate for Maximum Flavor: The longer you marinate the chicken, the more flavorful it will be. Aim for 2 hours if possible, or even overnight for the best results. Use a Meat Thermometer: To ensure your chicken is perfectly cooked, use a meat thermometer. The internal temperature should reach 165°F (75°C). Customize Your Toppings: Feel free to add other fresh toppings such as diced avocado, jalapeños, or corn to give your tacos a personal touch. Warm Tortillas Properly: Warming the tortillas enhances their flavor and texture. Don’t skip this step for a better taco experience! {{image_2}} You can change up the chicken in teriyaki tacos. Try using shrimp for a seafood twist. Shrimp cooks fast and absorbs the teriyaki sauce well. If you prefer beef, use thin slices of flank steak. Marinade it the same way you do with chicken. For a vegetarian option, use tofu. Press it to remove water and cut it into cubes. Marinate the tofu in teriyaki sauce for flavor. Cook it until golden. Another great choice is tempeh. It has a nutty taste and works nicely in tacos. You can make these tacos spicy or sweet. To add heat, mix in some sriracha with the teriyaki sauce. You can also add diced jalapeños on top for extra spice. If you want a sweeter flavor, add honey or brown sugar to the marinade. Consider adding international flavors too. For a Mexican twist, mix in some chipotle sauce. For a Korean flavor, add kimchi as a topping. These changes can make your tacos exciting and unique. Toppings can change the whole taco experience. Try adding avocado slices for creaminess. You can also use pickled red onions for a tangy crunch. If you like a bit of nutty flavor, sprinkle some crushed peanuts on top. Swap out the veggies too. Instead of cabbage, use arugula for a peppery taste. You can also add bell peppers for sweetness. Different sauces can enhance the tacos too. A drizzle of peanut sauce or spicy mayo adds a great touch. To store leftover tacos, let them cool first. Place them in an airtight container. This keeps them fresh and tasty. Store in the fridge for up to three days. Use parchment paper between layers to avoid sogginess. To reheat tacos, use a skillet over medium heat. Heat each taco for about 2-3 minutes on each side. This method helps keep the tortilla crisp. You can also use a microwave, but this may make the tortilla soft. If using a microwave, cover the tacos with a damp paper towel to help retain moisture. You can freeze tacos, but it's best to freeze the chicken and toppings separately. For the chicken, let it cool and place it in a freezer bag. Squeeze out the air before sealing. For the toppings, pack them in a separate bag. When ready to eat, thaw the chicken overnight in the fridge. Reheat the chicken and toppings before assembling the tacos. This keeps the flavors fresh and the textures nice. I recommend marinating the chicken for at least 30 minutes. This allows the flavors to soak in. If you have more time, marinating for 2 hours is even better. The longer you marinate, the tastier the chicken becomes. Always keep the chicken in the fridge while it marinates to keep it safe. Yes, you can prepare many parts ahead of time. Cook the chicken and store it in the fridge for up to three days. You can also chop the veggies and store them in an airtight container. Just warm the chicken and tortillas before serving. This makes it easy for busy nights. You can serve your tacos with many tasty sides. Consider guacamole or salsa for a fresh kick. Rice or quinoa can make it a fuller meal. A simple salad with lime dressing pairs well too. You could also add some chips for extra crunch. To find teriyaki chicken tacos, check local taco shops or Asian fusion restaurants. Many places offer unique takes on traditional tacos. Use apps like Yelp or Google Maps to search for nearby options. Don’t hesitate to ask friends for their favorite spots too! To make teriyaki chicken tacos, gather fresh ingredients and follow our easy steps. Marinate the chicken for great flavor, then cook it just right. Use warm tortillas and add your favorite toppings for a tasty meal. Don't forget to try different proteins and flavors for variety. Store leftovers properly, so they stay fresh. With these tips, you'll impress your friends and family. Enjoy making and sharing this fun dish!

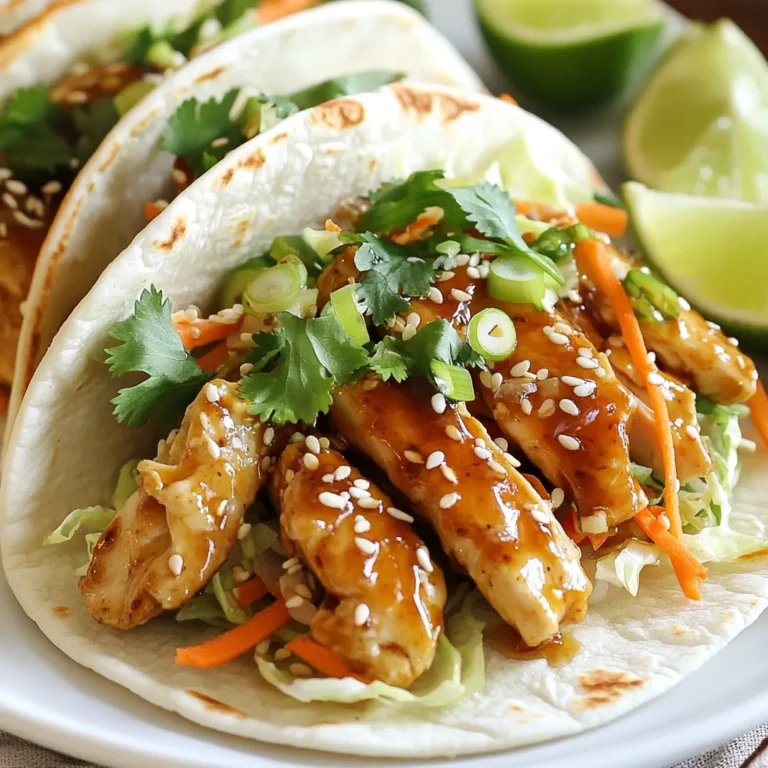
Teriyaki Chicken Tacos Flavorful and Easy Recipe

- 1 cup creamy peanut butter - 1/2 cup honey - 3 cups rolled oats - 1 cup dark chocolate chips - 1/2 cup chopped walnuts (optional) - 1 tsp vanilla extract - 1/4 tsp sea salt For this recipe, I measure ingredients in cups and teaspoons. Using these units keeps it simple. A cup equals 8 fluid ounces. A teaspoon is a small spoon you use for stirring. It’s best for measuring small amounts of ingredients. You can add fun extras to your moose treats. Chopped walnuts give a nice crunch. You might also try dried fruit like raisins or cranberries. They add sweetness and chewiness. Another option is using seeds like chia or flax for more nutrition. Each add-in changes the flavor and texture, making your treats unique. {{ingredient_image_1}} Start by gathering all your ingredients. You will need peanut butter, honey, oats, dark chocolate chips, walnuts, vanilla, and sea salt. This recipe is easy and quick. You can finish it in about 15 minutes. In a large bowl, mix the creamy peanut butter and honey. Stir until it is smooth. Next, add the vanilla extract and sea salt. Mix again to combine well. Then, slowly add the rolled oats. Use a spatula or your hands to mix everything together. If you want to add walnuts, now is the time. Make sure they are mixed in well. Melt the dark chocolate chips in a microwave-safe bowl. Heat them in 30-second intervals, stirring in between. Once melted and smooth, pour the chocolate into the oat mixture. Stir until all the oats are coated in chocolate. Line an 8x8-inch baking dish with parchment paper. Leave some overhang for easy removal. Press the mixture firmly into the dish. Smooth the top with a spatula. Place the dish in the fridge for at least one hour. This helps the treats set up. After they are firm, lift them out using the parchment. Cut into squares or bars as you like. Enjoy your no-bake moose treats! To get the best texture in your moose treats, you need to mix well. Combine peanut butter and honey until smooth. This step helps your treats hold together. If you add oats too quickly, it can clump. Mix in oats gradually for even distribution. If you use walnuts, chop them small. This way, they blend nicely with the oats. Presentation matters! Serve these treats on a rustic wooden board. You can also use a decorative plate. For a fun touch, drizzle melted chocolate on top. Add some colorful sprinkles for extra flair. Cut them into squares or bars for easy serving. Kids love them as snacks, and they are great for parties! You can make these treats a bit healthier. Use natural peanut butter with no added sugar. Swap honey for maple syrup if you want a vegan option. If you want fewer calories, cut down on chocolate chips. Use dark chocolate with a higher cocoa content for extra health benefits. You can also add seeds or dried fruit for added nutrients. Pro Tips Chill the Chocolate: For a smoother melt, ensure your dark chocolate chips are at room temperature before melting. Oat Substitutions: If you're looking for a gluten-free option, use certified gluten-free oats for your moose treats. Nut Alternatives: You can replace walnuts with other nuts like almonds or pecans, or omit them altogether for a nut-free version. Serving Suggestions: These treats pair wonderfully with a glass of milk or a cup of coffee for a delightful snack. {{image_2}} You can easily make these treats nut-free. Simply swap the peanut butter with sunbutter or soy nut butter. Both options work great and keep the treat creamy. This change allows kids with nut allergies to enjoy these yummy bites. You won’t lose flavor or texture, so everyone can enjoy them! Feel free to get creative with flavors! You can add a dash of cinnamon or a splash of almond extract to boost the taste. Want a chocolate twist? Add cocoa powder for richer chocolate flavor. You can also mix in some mini marshmallows for a fun twist. These additions make your moose treats even more delightful! To make these treats vegan, replace honey with maple syrup or agave nectar. This keeps the sweetness just right. For gluten-free options, use certified gluten-free oats. Both changes will let more people enjoy these treats without worry. Now everyone can share in the fun of no-bake moose treats! To keep your no-bake moose treats fresh, store them in an airtight container. Place parchment paper between layers to prevent sticking. This method helps keep the treats moist and delicious. You can also wrap them individually in plastic wrap for easy grab-and-go snacks. These tasty treats last about a week when stored properly. After that, they may lose their texture and flavor. If you notice any changes, it's best to toss them out. Always check for signs of spoilage before eating. You can freeze these moose treats for up to three months. Cut them into squares before freezing. Wrap each piece in plastic wrap and place them in a freezer-safe bag. When you’re ready to enjoy, let them thaw in the fridge or at room temperature. This method keeps them fresh and ready for a quick snack. Yes, you can use crunchy peanut butter. It will add texture and a nice crunch. The flavor will still shine through. Just make sure to mix it well with honey. This way, it binds nicely with oats and chocolate. To make the treats last longer, store them in an airtight container. Keep them in the fridge. They can stay fresh for up to two weeks. If you want to keep them longer, freeze them. They can last up to three months in the freezer. Absolutely! You can add dried fruit or seeds. Try raisins, cranberries, or sunflower seeds. Just remember to adjust the amount of oats if you add more mix-ins. This keeps the treats balanced and tasty. Get creative and enjoy your new flavors! In this post, we covered key ingredients, step-by-step instructions, and tips for delicious treats. You learned about optional add-ins and variations, plus the best ways to store your treats. Remember, you can customize flavors or make them nut-free or vegan. With these basics, you can create tasty snacks that everyone will love. Enjoy experimenting and have fun in your kitchen!

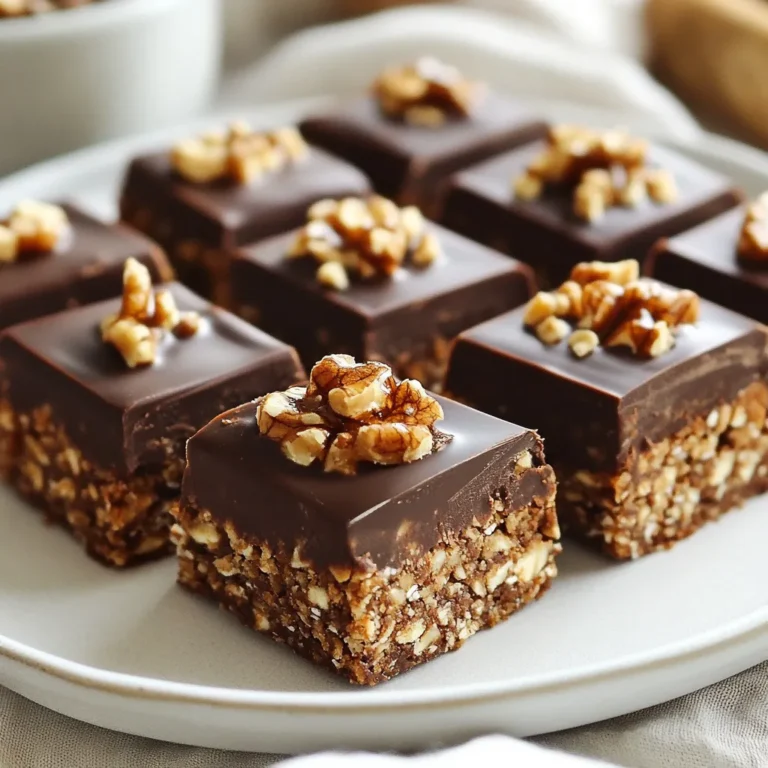
Easy No-Bake Moose Treats Delightfully Simple Recipe

To make white chocolate raspberry blondies, gather these key items: - 1 cup unsalted butter, melted - 1 cup brown sugar - 1/2 cup granulated sugar - 2 large eggs - 2 teaspoons vanilla extract - 2 cups all-purpose flour - 1/4 teaspoon baking soda - 1/4 teaspoon salt - 1 cup white chocolate chips - 1 cup fresh raspberries These ingredients create a sweet and moist treat. The butter adds richness, while the sugars give it sweetness. The eggs help bind everything together, and the vanilla adds flavor. The flour forms the base, and the baking soda helps the blondies rise. Finally, the white chocolate and raspberries give each bite a burst of flavor. If you need substitutes, here are some good options: - Use coconut oil instead of unsalted butter for a dairy-free version. - Swap brown sugar for coconut sugar for a healthier choice. - Try applesauce in place of eggs to make it vegan. - Use almond flour instead of all-purpose flour for a gluten-free option. These swaps can change the flavor and texture a bit. Experimenting with substitutes can lead to fun new tastes. To bake these blondies, you’ll need some essential tools: - A mixing bowl for combining ingredients. - A whisk or spoon for mixing. - A 9x9-inch baking pan for the blondies. - Parchment paper for easy removal. - An oven thermometer to ensure your oven is at the right temperature. Having the right tools makes baking easier. It helps you create the best white chocolate raspberry blondies every time. {{ingredient_image_1}} First, set your oven to 350°F (175°C). This temperature helps the blondies bake evenly. Take a 9x9-inch baking pan and grease it well. You can also line it with parchment paper. This keeps the blondies from sticking. In a large bowl, mix the melted butter, brown sugar, and granulated sugar. Whisk them until they are smooth and combined. Then, add in two large eggs and two teaspoons of vanilla extract. Stir everything together until mixed. In another bowl, sift two cups of all-purpose flour, 1/4 teaspoon of baking soda, and 1/4 teaspoon of salt. Slowly add this dry mix to the wet mix. Stir just until you see no flour. Now comes the fun part! Gently fold in one cup of white chocolate chips. Then, add one cup of fresh raspberries. Be careful when mixing to keep the raspberries whole. This step adds great flavor and color to your blondies. Once everything is mixed, pour the batter into your prepared pan. Spread it out evenly before baking. To get that perfect blondie texture, mix your wet and dry ingredients well. Start with melted butter and sugars. This mix should be smooth and creamy. Next, add eggs and vanilla, blending well. When you add flour, mix just until combined. Over-mixing can make them tough. Fold in white chocolate chips and raspberries gently. This keeps the raspberries whole and juicy. After baking, let the blondies cool for about 15 minutes in the pan. This helps them set up. Then, transfer them to a wire rack to cool completely. Once cool, use a sharp knife to cut them into squares. For clean cuts, wipe the knife between cuts. This keeps the edges nice and neat. To serve your blondies, use a decorative plate. Dust them lightly with powdered sugar for a touch of elegance. Add a few fresh raspberries on top for color and flavor. You can even pair them with a scoop of vanilla ice cream. This adds a nice contrast and makes them even more special. Pro Tips Use Room Temperature Eggs: Ensure your eggs are at room temperature for better emulsification, leading to a smoother batter. Handle Raspberries Gently: When folding in the raspberries, be careful not to crush them too much to maintain their shape and flavor. Check for Doneness: Since ovens can vary, start checking your blondies a few minutes before the recommended baking time to avoid overbaking. Cool Before Cutting: Allow the blondies to cool completely in the pan before cutting to ensure clean edges and prevent crumbling. {{image_2}} You can add nuts to your blondies for extra crunch. Try adding 1/2 cup of chopped walnuts or pecans. These nuts pair well with the white chocolate and raspberries. You can also swap in dark chocolate chips for a richer taste. If you love coconut, add 1/2 cup of shredded coconut to the mix. Each of these options can change the flavor while keeping the treat yummy. If you need a gluten-free option, use gluten-free flour instead of all-purpose flour. Make sure to check that your chocolate chips are gluten-free too. For a dairy-free version, swap the butter for coconut oil and use dairy-free chocolate chips. These changes will still give you a delightful blondie while meeting your dietary needs. While raspberries shine in this recipe, you can try other berries too. Blueberries or blackberries work great as substitutes. If you want a tropical twist, use diced mango or strawberries. Each berry adds its own unique flavor, making your blondies special and fun. Just remember, if you use larger berries, cut them into smaller pieces to avoid breaking the blondie texture. To keep your white chocolate raspberry blondies fresh, store them in an airtight container. This keeps them soft and moist. You can also layer them between sheets of parchment paper. Avoid letting them sit out in the open air. If you want to add some flair, you can sprinkle a bit of powdered sugar on top before storing. When stored properly, blondies last about 4 to 5 days at room temperature. If you place them in the fridge, they can last up to a week. However, the cold may make them a bit firmer. For the best taste and texture, enjoy them within the first few days. If you want to save some for later, freezing is a great option. First, let the blondies cool completely. Then, wrap them tightly in plastic wrap. After that, place them in a zip-top bag or airtight container. They can stay in the freezer for up to three months. When you're ready to eat them, just thaw them in the fridge overnight. Reheat them in the oven for a few minutes to bring back that fresh-baked taste. Yes, you can use frozen raspberries. They will work well in this recipe. Keep in mind that frozen raspberries may add more moisture. They might also break apart more during mixing. To help with this, add them straight from the freezer. This helps keep them whole and bright in your blondies. If you need an egg substitute, try using applesauce. Use 1/4 cup of unsweetened applesauce for each egg. Another option is to use flaxseed meal. Mix 1 tablespoon of flaxseed meal with 2.5 tablespoons of water. Let it sit for a few minutes to thicken. Both options work well to bind the ingredients together. Check the blondies around the 25-minute mark. They should have lightly golden edges and a soft center. Insert a toothpick into the middle. If it comes out mostly clean with some crumbs, they are ready. Remember not to overbake, as they will continue to cook a bit after you take them out of the oven. You learned how to make white chocolate raspberry blondies in this post. We covered key ingredients, substitutions, and baking essentials. I shared tips for perfect texture and serving ideas. You can even try different flavors and dietary options. Lastly, I provided storage tips to keep your treats fresh. Enjoy baking your blondies, and remember, practice makes perfect.

White Chocolate Raspberry Blondies Simple and Tasty Treat

- 1 lb chicken breasts, boneless and skinless - 6 cups low-sodium chicken broth - 1 onion, quartered - 3-4 pieces of star anise - 3-4 cloves - 1 cinnamon stick - 1 tablespoon ginger, sliced - 2 tablespoons fish sauce - 1 tablespoon sugar - 1 teaspoon salt - 8 oz rice noodles - Fresh herbs (basil, cilantro, mint) for garnish - Lime wedges, for serving - Sliced jalapeños, for serving (optional) - Bean sprouts, for serving (optional) When making Instant Pot chicken pho, each ingredient plays a key role. The chicken provides protein. The broth is the base, giving depth to the dish. Fresh herbs add bright flavors, while spices create warmth. Using low-sodium broth helps control salt levels. This way, you can adjust flavors to your taste. Fresh herbs are a must. They add aroma and taste that make pho special. Lime wedges brighten the soup and add a fresh zing. I find that garnishing with jalapeños and bean sprouts gives a nice crunch. You can add them if you like spice or texture. Each bite should feel balanced and flavorful. When you gather these ingredients, you're on your way to making a dish that warms the heart. {{ingredient_image_1}} To start, set your Instant Pot to sauté mode. Add the quartered onion and let it cook for about five minutes. You want to watch it closely. The goal is to caramelize the onion. This brings out its natural sweetness. Stir it occasionally to prevent burning. Caramelizing the onion adds a rich flavor to your pho. Next, add the chicken breasts, spices, and broth. Don’t forget to include the star anise, cloves, cinnamon stick, ginger, fish sauce, sugar, and salt. Give everything a good stir. Make sure all the ingredients mix well. Now, secure the lid on the Instant Pot. Set it to manual or pressure cook mode for 15 minutes. Ensure the valve is sealing to keep the steam inside. This step builds a deep, savory broth. After the timer goes off, let the pot naturally release pressure for 10 minutes. Then, carefully switch to a quick release to let out any remaining steam. Open the lid and take out the chicken. Shred it using two forks. This technique makes it easy to get perfectly shredded chicken. Return the shredded chicken to the pot. Now, add the rice noodles to the broth. Stir them in and set the pot back to sauté mode. Cook the noodles for about 4-5 minutes until they become tender. This method ensures they soak up all that delicious broth flavor. Once everything is ready, your Instant Pot Chicken Pho is set to serve! To make your Instant Pot chicken pho shine, consider adding a few simple tweaks: - Use fresh herbs: Fresh basil, cilantro, and mint elevate the dish. Add them just before serving for a burst of flavor. - Adjust the spices: If you love bold flavors, try adding more star anise or a pinch of cayenne pepper for heat. - Add lime juice: A squeeze of fresh lime juice brightens the soup and balances the flavors. Fresh herbs are vital for pho. They bring a bright taste that cuts through the richness of the broth. Without them, your dish may feel flat and lifeless. Always keep a handful of herbs on hand for garnishing. While making pho is fun, there are pitfalls to avoid: - Don’t overcrowd the pot: If you add too many ingredients, pressure cooking may fail. Stick to the recipe for best results. - Watch the pressure release: Always allow for a natural release before switching to quick release. This step keeps the broth clear and flavorful. Common mistakes include not sealing the lid properly or opening it too soon. Always ensure the valve is in the sealing position. This gives you the perfect broth and chicken every time. Pro Tips Marinate for Extra Flavor: For a deeper flavor, marinate the chicken in fish sauce and ginger for 30 minutes before cooking. Customize Your Herbs: Feel free to mix and match herbs based on what you have; cilantro, Thai basil, and mint all add unique flavors. Use Homemade Broth: If possible, use homemade chicken broth for a richer and more authentic taste. Adjust Spice Levels: Control the heat by adding more or fewer jalapeños according to your spice preference. {{image_2}} You can easily change the protein in your Instant Pot chicken pho. If you want to swap chicken for beef, use boneless chuck or brisket. These meats add a rich flavor. Cook them in the pot for about 20 minutes. Shred the beef just like the chicken. For a vegetarian or vegan option, try tofu or mushrooms. Use firm tofu and cut it into cubes. Sauté it briefly before adding the broth. Shiitake or portobello mushrooms also work well. They add depth and umami to the broth. Do you like a kick in your pho? Add fresh sliced jalapeños for heat. You can also stir in chili paste or sriracha. Adjust the amount based on your spice level. Want to mix it up? Try adding different herbs like Thai basil or green onions. You can also use hoisin sauce for a sweet twist. If you're out of fish sauce, soy sauce is a good alternative. It keeps the savory flavor intact while being plant-based. To keep your Instant Pot chicken pho fresh, use these tips: - Refrigeration Tips for Leftovers: Store leftover pho in an airtight container. Keep it in the fridge for up to three days. If you have broth and noodles mixed, the noodles may get mushy. It's best to store them separately. - Freezing Instructions for Pho: You can freeze pho for later. Place the broth and shredded chicken in freezer-safe bags. Be sure to leave some space for expansion. The noodles can also be frozen, but it's best to cook them fresh if you can. To enjoy your pho again, follow these methods: - Best Ways to Reheat Pho: The best way to reheat pho is on the stove. Pour the broth into a pot and heat until simmering. If using the microwave, heat in short bursts, stirring often. - Maintaining Flavor and Texture: To keep the flavor, avoid boiling the broth too long. When reheating noodles, add them to the broth for just a minute. This way, they stay soft and tasty. Add fresh herbs and lime right before serving to revive the dish. Pho is a Vietnamese soup that warms the soul. It has a rich broth, tender meat, and rice noodles. Pho is more than just food; it connects people. Families gather around bowls of pho. Street vendors serve it hot and fresh. The flavors come from spices like star anise and cloves. Each bowl tells a story of culture and tradition. Pho is often enjoyed with fresh herbs and lime. This dish is a staple in Vietnam and loved worldwide. Yes, you can use frozen chicken! Just make sure to thaw it first. The best way to thaw chicken is in the fridge overnight. If you're short on time, you can use the microwave. Set it to defrost and check often. For cooking, you may need to add a few extra minutes. Make sure the chicken reaches 165°F for safety. Using frozen chicken can still give you tasty pho. To make authentic pho broth, focus on the spices. Traditional methods simmer bones for hours, but the Instant Pot saves time. Use spices like star anise, cloves, and cinnamon. Sauté them first to release their flavors. Add your chicken broth, and let the pot work its magic. The Instant Pot infuses flavors quickly, which is great for busy cooks. While it may not be the same as the long simmer, you still get a delicious, aromatic broth. This blog post covered everything you need to make delicious pho at home. We explored the key ingredients like chicken, spices, and garnishes. You learned step-by-step instructions for cooking and flavoring the broth. I shared tips to enhance your dish, cooking precautions, and variations for different tastes. Lastly, we discussed storage solutions and reheating methods to keep your pho tasty. Now, with these insights, you're ready to create your perfect bowl of pho. Enjoy the process and savor each bite!

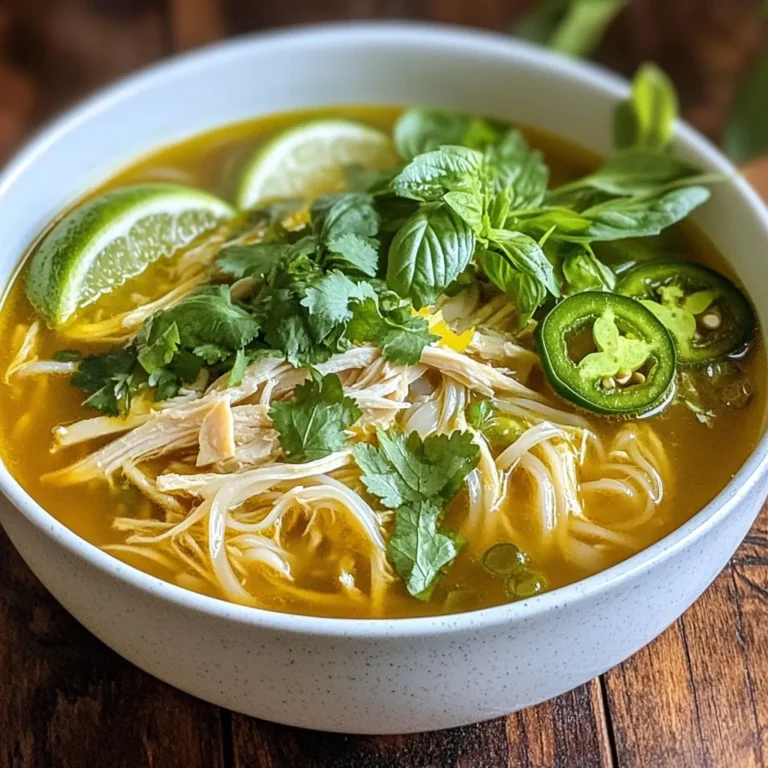
Instant Pot Chicken Pho Flavorful and Simple Recipe

When making Chicken Enchilada Rice Casserole, you need fresh and tasty ingredients. Here’s what to gather: - 2 cups cooked rice (white or brown) - 1 lb chicken breast, cooked and shredded - 1 can (15 oz) black beans, drained and rinsed - 1 can (10 oz) enchilada sauce (mild or spicy) - 1 cup corn kernels (fresh, frozen, or canned) - 1 cup diced bell peppers (red and green) - 1 small onion, chopped - 2 cups shredded cheese (cheddar or Mexican blend) - Spices: ground cumin, garlic powder, chili powder - Salt and pepper - Fresh cilantro for garnish (optional) These ingredients create a warm and filling dish. The chicken gives protein, while the beans add fiber. The rice serves as a hearty base. You can choose mild or spicy enchilada sauce based on your taste. Bell peppers and corn add color and sweetness. Using fresh cilantro as a garnish brightens the dish. It adds a lovely taste that balances the flavors. If you want a twist, try different cheeses or add more spices. This casserole is easy to make and perfect for any night. Enjoy the cooking! {{ingredient_image_1}} - Preheat your oven to 375°F (190°C). - In a large mixing bowl, combine: - 2 cups cooked rice (white or brown) - 1 lb cooked and shredded chicken breast - 1 can (15 oz) black beans, drained and rinsed - 1 cup corn kernels (fresh, frozen, or canned) - 1 cup diced bell peppers (a mix of red and green) - 1 small chopped onion - Pour in 1 can (10 oz) of enchilada sauce. Stir until all the ingredients are coated. - Add 1 teaspoon each of ground cumin, garlic powder, and chili powder. Season with salt and pepper to taste. Mix well. - Transfer the mixture into a greased 9x13 inch baking dish. Spread it evenly. - Top the casserole with 2 cups of shredded cheese (cheddar or a Mexican blend). Make sure to cover it well. - Bake in the preheated oven for 25-30 minutes. The cheese should be melted and bubbly. - Once baked, remove the casserole from the oven. Let it cool for a few minutes. - You can garnish with fresh chopped cilantro if you like. - This dish pairs well with a side of tortilla chips, guacamole, or a fresh salad. Enjoy! To get the best cheese texture, use a mix of cheeses. I love a blend of cheddar and a Mexican mix. This gives both flavor and creaminess. Don't skip the cheese on top. It melts beautifully and adds a nice golden color. For cooking, a 9x13 inch baking dish is perfect. It holds all the yummy layers and helps with even baking. You can swap out the chicken for ground beef or turkey. If you want a veggie twist, try adding mushrooms or zucchini. For heat, adjust the spices to your taste. Add more chili powder for a kick or use mild sauce for a softer flavor. Garnish the casserole with fresh cilantro for a pop of color. You can also add sour cream or sliced avocado on the side. For a festive touch, serve with tortilla chips or a fresh salad. Plating matters! Use a large spoon to scoop out the casserole and show off those layers. Pro Tips Use Leftover Rice: If you have leftover rice from a previous meal, this is a perfect way to use it up and add more flavor to your casserole. Customize Your Veggies: Feel free to swap out the bell peppers for other vegetables like zucchini or spinach to enhance the nutritional value. Cheese Options: Experiment with different types of cheese such as pepper jack for a spicy kick or mozzarella for a milder flavor. Meal Prep Friendly: This casserole can be made ahead of time and stored in the fridge for up to 3 days or frozen for longer storage. {{image_2}} To create a vegetarian version of this casserole, swap the chicken for more veggies. Here are the ingredients you will need: - 2 cups cooked rice (white or brown) - 1 can (15 oz) black beans, drained and rinsed - 1 can (10 oz) enchilada sauce (mild or spicy) - 1 cup corn kernels (fresh, frozen, or canned) - 1 cup diced bell peppers (use a mix of colors) - 1 small onion, chopped - 2 cups shredded cheese (cheddar or Mexican blend) - 1 teaspoon ground cumin - 1 teaspoon garlic powder - 1 teaspoon chili powder - Salt and pepper to taste - Fresh cilantro, chopped for garnish (optional) You can add zucchini, spinach, or mushrooms for extra flavor. This version is hearty and satisfying. If you want to switch up the protein, you have great options. Here are some ideas: - Ground beef or turkey for a heartier meal. - Shredded tofu for a plant-based choice. - Chorizo for a spicy kick. Each protein brings its own flavor, so feel free to experiment. You can also mix and match for fun! Adding different spices or sauces can change the dish completely. Here are some tips: - Use taco seasoning for a zesty twist. - Try a smoky chipotle sauce for added depth. - Add jalapeños for heat. These changes keep your casserole fresh and exciting. Enjoy finding your favorite flavor combinations! To keep your Chicken Enchilada Rice Casserole fresh, store it in an airtight container. Let it cool down first. Place it in the fridge for up to three days. If you want to save it longer, freezing is a great option. Use a freezer-safe container or wrap it tightly in foil. This way, it can last for up to three months. Reheating is simple. The best way is to use the oven. Preheat it to 350°F (175°C). Place the casserole in an oven-safe dish. Cover it with foil to keep it moist. Heat for about 20-25 minutes or until warm. You can also use the microwave. Just heat it in short intervals, stirring in between to avoid cold spots. In the fridge, your casserole will stay fresh for about three days. If frozen, it can last for three months. To make sure it’s safe to eat, always check for any signs of spoilage before you dig in. Can I use uncooked rice in this recipe? I do not recommend using uncooked rice. The recipe calls for cooked rice. This ensures the rice can soak up the sauce and flavors as it bakes. Uncooked rice will not cook properly in the casserole and can lead to a dry dish. How can I make this recipe gluten-free? To make this casserole gluten-free, choose gluten-free enchilada sauce. Most canned sauces contain gluten. Always check the label. You can also use brown rice instead of white. This makes your meal healthy and safe for those with gluten issues. What's the best way to customize the flavors? You can change the flavors by adding spices or vegetables. Try adding jalapeños for heat or extra cumin for depth. You can also swap out the beans for pinto or kidney beans. This allows you to create a dish that matches your taste. Each serving has around 400 calories. The breakdown is about: - Protein: 30g - Carbohydrates: 40g - Fat: 15g This dish is filling and provides a good mix of nutrients. To serve a larger group, double the recipe. Use a bigger baking dish or two smaller ones. This dish works well for potlucks and family gatherings. You can also prepare it ahead of time. Just bake it when your guests arrive. This chicken enchilada rice casserole is simple and tasty. We discussed the main ingredients, step-by-step instructions, and helpful tips to make it perfect. Remember to mix in your favorite spices or veggies for a personal touch. You can customize it however you like! Leftovers can be stored and enjoyed later, too. No matter how you serve it, this dish is sure to please your friends and family. Enjoy your cooking, and don’t forget to share the delicious results!

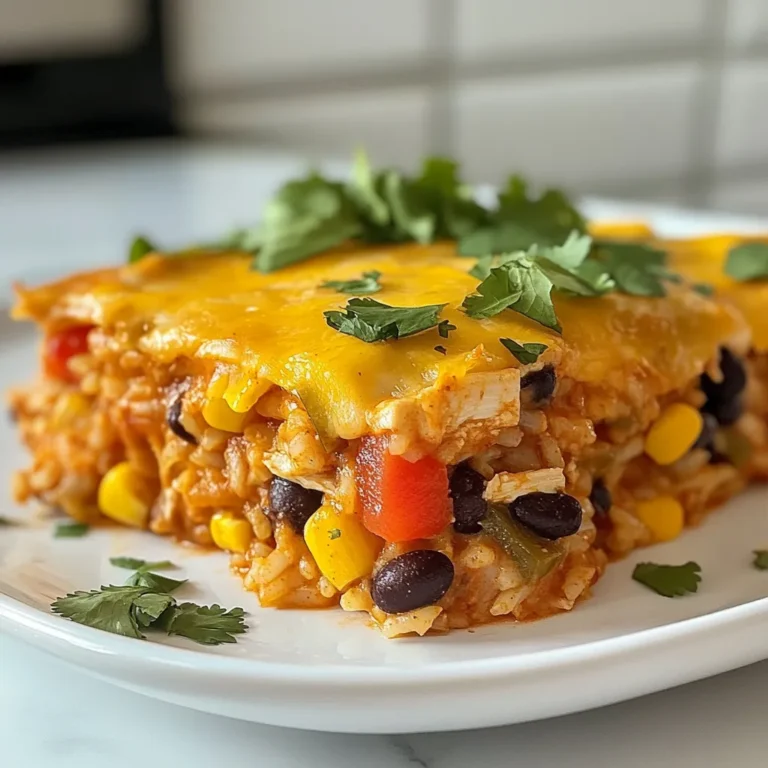
Chicken Enchilada Rice Casserole Tasty Weeknight Meal

- 1 cup plain Greek yogurt - 1/2 cup granulated sugar - 1/4 cup vegetable oil - 2 large eggs - 1 tablespoon lemon zest - 1/4 cup fresh lemon juice - 1 teaspoon vanilla extract - 1 1/2 cups all-purpose flour - 1 teaspoon baking powder - 1/2 teaspoon baking soda - 1/4 teaspoon salt - 1 cup fresh blueberries (or frozen) - 1 tablespoon flour (for tossing the blueberries) To make blueberry lemon yogurt bread, gather these simple ingredients. Each one plays a key role. The Greek yogurt gives the bread moisture and tang. The sugar adds sweetness, while the vegetable oil helps keep the bread soft. Eggs bind the mixture and add richness. Lemon zest and lemon juice bring a bright, fresh flavor. Vanilla extract adds depth to the taste. The flour forms the base of the bread. Baking powder and baking soda help it rise. Salt enhances all the flavors. Blueberries add fruity bursts in every bite. Tossing them in flour keeps them from sinking to the bottom. Use fresh blueberries when possible, but frozen will work, too. With these ingredients, you're ready to create a delicious loaf! {{ingredient_image_1}} 1. Preheat the oven and prepare the loaf pan Set your oven to 350°F (175°C). Grease a 9x5-inch loaf pan or line it with parchment paper. This makes it easy to take the bread out later. 2. Mix wet ingredients In a large bowl, combine 1 cup of plain Greek yogurt, 1/2 cup of granulated sugar, and 1/4 cup of vegetable oil. Whisk these together until the mixture is smooth. 3. Combine dry ingredients In another bowl, whisk together 1 1/2 cups of all-purpose flour, 1 teaspoon of baking powder, 1/2 teaspoon of baking soda, and 1/4 teaspoon of salt. This step ensures your bread rises well. 4. Add dry ingredients to the wet mixture Gradually stir the dry mixture into the wet ingredients. Mix gently until just combined. Be careful not to overmix, or your bread may turn out dense. 5. Prepare the blueberries In a small bowl, toss 1 cup of fresh blueberries with 1 tablespoon of flour. This helps keep the blueberries from sinking to the bottom of the bread. 6. Fold in blueberries and pour batter Gently fold the coated blueberries into the batter. Make sure they are evenly distributed. Then, pour the batter into the prepared loaf pan and spread it out evenly. 7. Bake in the preheated oven Place the loaf pan in the oven and bake for 50-60 minutes. Check for doneness by inserting a toothpick into the center. It should come out clean when the bread is done. 8. Cooling Instructions Once baked, remove the bread from the oven. Let it cool in the pan for 10 minutes. After that, transfer it to a wire rack to cool completely. This cooling step helps set the texture and flavor. - Ensure accurate measurement of ingredients: Use measuring cups and spoons. This helps your bread turn out perfect every time. - Do not overmix the batter: Mix just until you see no dry flour. Overmixing can make the bread tough. - How to serve for the best visual appeal: After cooling, slice the loaf neatly. Serve it on a wooden board or a bright plate. This makes it look fresh and inviting. - Ideal garnishes to enhance presentation: Dust the top with powdered sugar. Add a few fresh blueberries and a lemon slice. This adds color and charm to your dish. - Preventing blueberries from sinking: Toss the blueberries in a tablespoon of flour first. This helps keep them suspended in the batter while baking. - Signs of doneness for perfect bread: Check with a toothpick. If it comes out clean, your bread is ready. Also, the edges should be golden brown. Pro Tips Use Room Temperature Ingredients: Allow your eggs and yogurt to come to room temperature before mixing. This helps create a smoother batter and ensures even baking. Don’t Overmix: When combining wet and dry ingredients, mix just until combined. Overmixing can lead to a dense texture in your bread. Fresh vs. Frozen Blueberries: If using frozen blueberries, do not thaw them before adding to the batter. This helps maintain their shape and prevents the color from bleeding into the bread. Storage Tips: Store any leftovers in an airtight container at room temperature for up to 3 days, or refrigerate for a week. For longer storage, slice and freeze the bread, wrapping each slice individually. {{image_2}} You can switch up the flavors in your blueberry lemon yogurt bread. Adding nuts or seeds gives your bread a nice crunch. Think walnuts or sunflower seeds for a tasty twist. You can also change the yogurt flavor. Try vanilla or even lemon yogurt. Each choice adds a new taste. If you want a healthier bread, you can use whole wheat flour. It adds fiber and a nutty flavor. Reducing sugar is another great option. You can cut the sugar in half and still enjoy your bread. You might not even notice the difference. Incorporating other berries is a fun way to change the bread. Use raspberries or strawberries for a summer treat. You can also mix in spices like cinnamon or nutmeg in fall. These little changes keep the bread fresh and exciting all year round. To keep your blueberry lemon yogurt bread fresh, store it at room temperature. Wrap the bread in plastic wrap or foil. This method helps keep moisture in and prevents it from drying out. You can also use an airtight container. Just make sure the bread is completely cool before you wrap it. If you want to save some for later, freezing is a great option. First, wrap the bread tightly in plastic wrap, then in aluminum foil. This double layer protects it from freezer burn. To thaw, take it out of the freezer and let it sit at room temperature for a few hours. You can also slice it before freezing. This way, you can grab a piece whenever you want! Your blueberry lemon yogurt bread will stay fresh for about 3 to 4 days at room temperature. In the fridge, it can last up to a week. Look for signs of spoilage, such as mold or an off smell. If the bread feels dry or crumbly, it may have gone bad. Always trust your senses! Can I use frozen blueberries instead of fresh? Yes, you can use frozen blueberries. They work well in this recipe. Just toss them in a tablespoon of flour first. This helps them stay suspended in the batter. What can I substitute for Greek yogurt? You can use regular yogurt or sour cream if you don't have Greek yogurt. Both will give the bread a nice moist texture. How do I know when the bread is done baking? To check if the bread is done, insert a toothpick into the center. If it comes out clean, the bread is ready. If it has batter on it, bake for a few more minutes. Can I make this recipe dairy-free? Yes, you can make it dairy-free. Substitute Greek yogurt with a plant-based yogurt. Use almond, coconut, or soy yogurt for the best results. Can I use other citrus fruits instead of lemon? Absolutely! You can use lime or orange instead of lemon. Each will give a unique twist to the flavor of the bread. What to do if the bread is too dry? If your bread turns out dry, it might need more moisture. Next time, add a little more yogurt or oil to the batter. This will help keep it moist. Why did my bread not rise properly? If your bread does not rise, check your baking powder and baking soda for freshness. Old leavening agents may not work well. Also, make sure to mix the batter gently. Overmixing can cause it to flatten. This blog post covered how to make blueberry lemon yogurt bread. We discussed the ingredients, step-by-step instructions, tips for success, and variations. Baking can be fun and easy when you follow these clear steps. Remember to measure well and avoid overmixing. Try different flavors or seasonal fruits to keep it exciting. With the right storage, your bread will stay fresh. Enjoy your baking journey and savor every bite!

Blueberry Lemon Yogurt Bread Scrumptious and Simple Recipe

- 2 chicken breasts, sliced into thin strips - 300g fettuccine or linguine pasta - 1 tablespoon Cajun seasoning - 2 tablespoons olive oil - 1 small onion, finely chopped - 3 cloves garlic, minced - 1 cup heavy cream - 1 cup chicken broth - 1 cup cherry tomatoes, halved - 1 cup spinach leaves - Salt and pepper to taste - Fresh parsley, chopped (for garnish) - Grated Parmesan cheese (optional, for serving) The key to a great creamy Cajun chicken pasta lies in fresh ingredients. Start with chicken breasts. Slice them into thin strips. This helps them cook quickly and soak up flavors. Next, choose your pasta. Fettuccine or linguine works best. They hold the sauce well. Cajun seasoning is essential. It adds a spicy kick and depth to the dish. Olive oil helps to sauté the chicken and aromatics. You will also need a small onion and garlic. Both add sweet and savory notes to your sauce. Heavy cream makes the dish rich and creamy. Chicken broth adds flavor without making it too heavy. Cherry tomatoes brighten the dish with their sweetness. Fresh spinach leaves will add color and nutrients. Finally, don’t forget salt and pepper. They enhance all the flavors. Fresh parsley adds a nice touch at the end. If you love cheese, sprinkle grated Parmesan on top for extra creaminess. Gather these ingredients, and you’re ready to create a delicious meal. This creamy Cajun chicken pasta is sure to impress. {{ingredient_image_1}} First, fill a big pot with water and add salt. Bring the water to a boil. Add the fettuccine or linguine pasta to the boiling water. Cook it until it is al dente, which means it should be tender but still firm. This will take about 8-10 minutes. After cooking, drain the pasta and set it aside. Don’t forget to reserve one cup of the pasta water. This water will help adjust the sauce later. Now, let’s prepare the chicken. Take your chicken breasts and slice them into thin strips. In a bowl, sprinkle Cajun seasoning over the chicken. Toss the chicken well until it is coated evenly. This is where the magic starts. Heat two tablespoons of olive oil in a large skillet over medium-high heat. Once hot, add the seasoned chicken strips. Sauté the chicken for about 6-7 minutes, or until it turns golden brown and is cooked through. Remove the chicken from the skillet and set it aside. Next, let’s make a delicious sauce. In the same skillet, add the finely chopped onion. Cook it for 2-3 minutes until it becomes translucent. Then, add minced garlic and cook for one more minute until it smells amazing. Pour in one cup of chicken broth and bring it to a gentle simmer. Now, stir in one cup of heavy cream. Allow the sauce to simmer for about 3-4 minutes, letting it thicken slightly. Now, it’s time to add some color and flavor. Toss in the halved cherry tomatoes and the spinach leaves. Stir everything together until the spinach wilts and the tomatoes soften. Finally, return the cooked chicken back to the skillet and mix well with the sauce. Now, let’s bring it all together. Add the drained pasta to the skillet and toss everything to combine. If the mixture seems too thick, add some of the reserved pasta water a little at a time. This will help you reach your desired consistency. Season with salt and pepper to taste. To serve, place the creamy Cajun chicken pasta on plates. For a beautiful touch, garnish with fresh chopped parsley. If you want, sprinkle some grated Parmesan cheese on top for extra flavor. Enjoy your rich and flavorful meal! To make your creamy Cajun chicken pasta shine, adjust the spice levels. If you like heat, add more Cajun seasoning. If you prefer a milder dish, use less. Taste as you go. This step ensures your meal fits your palate perfectly. To enhance creaminess, use heavy cream. If you want a richer sauce, mix in a bit of cream cheese. You can also add a splash of lemon juice for brightness. This balance makes the dish even more delicious. The best method for sautéing chicken is to use medium-high heat. This technique gives the chicken a nice golden color. Make sure not to overcrowd the pan. Cook in batches if needed to ensure even cooking. Reserving pasta water is crucial. This starchy water helps adjust the sauce's thickness. If your sauce is too thick, add a bit of the reserved water. It will help create a silky, smooth finish. If you want alternative proteins, try shrimp or sausage. Both add a unique flavor and texture. You can also use chickpeas for a plant-based option. For dairy-free options, swap heavy cream with coconut cream or cashew cream. They provide a similar richness without dairy. Enjoy this dish without missing out on taste. Pro Tips Perfect Pasta: Always cook your pasta al dente, as it will continue to cook slightly after being added to the sauce. Customize the Spice: Adjust the amount of Cajun seasoning based on your spice tolerance for a milder or spicier dish. Add Freshness: Incorporate fresh herbs like basil or thyme for an added layer of flavor and freshness to the dish. Leftover Love: This dish stores well in the refrigerator for up to 3 days; just reheat gently on the stove with a splash of chicken broth. {{image_2}} You can easily make this dish vegetarian. Replace chicken with your favorite vegetables. Try bell peppers, zucchini, or mushrooms for great flavor. You can also add eggplant for a hearty bite. Use plant-based cream to keep it creamy. Coconut or cashew cream works well. This swap keeps the dish rich without meat. While fettuccine or linguine works best, many pasta types can shine here. Penne, rotini, or farfalle are great alternatives. They hold sauce well and add fun shapes. Cooking times vary by pasta type. Check the package for guidance. Make sure to cook until they are al dente. Want to add more flavor? Consider proteins like shrimp or sausage. Shrimp cooks quickly and adds a sweet taste. Sausage brings spice and heartiness. You can also mix in more veggies. Broccoli, peas, or kale add color and nutrients. The more, the merrier! Adjust the seasonings to ensure a balanced flavor. To keep your creamy Cajun chicken pasta fresh, follow these steps: - Cool it down: Let the pasta cool to room temperature before storing. - Use airtight containers: Store leftovers in airtight containers. This prevents moisture loss and keeps flavors intact. - Label and date: Write the date on each container. This helps you keep track of freshness. - Store for 3-4 days: Enjoy your leftovers within this time to ensure taste and safety. If you want to store your creamy Cajun chicken pasta for longer, freezing is a great option. - Cool completely: Allow the dish to cool fully before freezing. This reduces ice crystals. - Portion it out: Divide the pasta into smaller portions. This makes it easier to reheat later. - Use freezer-safe containers: Choose containers that seal tightly or use heavy-duty freezer bags. - Store for up to 3 months: Mark containers with the date and use them within this time. When you're ready to enjoy your frozen creamy Cajun chicken pasta, follow these steps: - Thaw in the fridge: Move the pasta to the fridge a day before reheating. - Reheat gently: Warm it up on the stove over low heat. Add a splash of chicken broth or cream to bring back the creamy texture. - Stir well: Mix it thoroughly as it heats to prevent sticking. Now, you can savor your delicious creamy Cajun chicken pasta any time! You can swap out regular pasta for gluten-free pasta. Look for options made from rice, quinoa, or chickpeas. These choices cook well and hold the sauce nicely. Always check the package for cooking times to get the right texture. Yes, you can make this dish ahead of time. Cook it fully and let it cool. Store it in an airtight container in the fridge for up to three days. To reheat, warm it in a skillet over low heat. Add a splash of chicken broth or cream to keep it creamy. This dish pairs nicely with a fresh salad. A simple green salad with a lemon vinaigrette works great. You could also serve garlic bread or roasted vegetables on the side for extra flavor and texture. Absolutely! To add heat, include more Cajun seasoning. You can also add crushed red pepper flakes. Start with a small pinch and taste as you go. This way, you keep the balance of flavors while ramping up the heat. In this blog post, we covered how to make creamy Cajun chicken pasta, from gathering ingredients to plating. You learned about essential components like chicken, pasta, and seasonings. We shared step-by-step instructions for cooking and tips for perfecting the dish. You can customize flavors with spices or swap ingredients as needed. Finally, we discussed smart storage methods to keep your leftovers tasty. With this knowledge, you can create a delicious meal that impresses. Enjoy your cooking adventure!

Creamy Cajun Chicken Pasta Rich and Flavorful Meal

To make chocolate dipped peanut butter pretzels, you need simple ingredients that pack a lot of flavor. Here’s what you'll need: - 2 cups pretzel rods - 1 cup creamy peanut butter - 1 cup semi-sweet chocolate chips - 1 tablespoon coconut oil (optional) - Sea salt (for garnish) These ingredients work together to create a sweet and salty treat. The pretzel rods add crunch, while the creamy peanut butter gives a rich, nutty flavor. The semi-sweet chocolate chips provide the perfect chocolatey goodness. If you want a smooth finish, adding coconut oil helps melt the chocolate nicely. Lastly, a sprinkle of sea salt gives it a delightful twist. Each ingredient plays a role in making this snack a crowd-pleaser. {{ingredient_image_1}} - Lay out pretzel rods on a baking sheet. - Line with parchment paper for easy cleanup. Start by laying your pretzel rods flat on a baking sheet. This makes it easy to dip them later. Lining the sheet with parchment paper helps prevent sticking. Plus, it makes cleanup a breeze. - Microwave peanut butter for better spreadability. Next, grab your creamy peanut butter. Put it in a bowl and microwave it for about 20-30 seconds. This makes the peanut butter warm and easy to spread. Warmer peanut butter sticks better to the pretzels. - Steps for chocolate melting and dipping pretzels. Now, let’s melt the chocolate. In a microwave-safe bowl, mix the chocolate chips with coconut oil if you want a smooth finish. Heat it in 30-second bursts, stirring each time until it’s melted and smooth. Once melted, take a chilled pretzel rod and dip it into the chocolate. Make sure to twist gently to coat it evenly. Use a fork to lift it out and tap off the extra chocolate. This gives you a nice, even coat. Finally, sprinkle a pinch of sea salt on the chocolate-dipped end. This adds a fun sweet and salty taste. Place the dipped pretzels back on the baking sheet. Repeat until all pretzels are coated. Refrigerate them for about 30 minutes to let the chocolate set. Now you have a tasty treat ready to enjoy! Using coconut oil in chocolate helps create a smoother coating. The oil thins the chocolate, making it easier to dip. This mix also helps the chocolate set with a nice sheen. Without coconut oil, your chocolate might clump or not coat well. Spread peanut butter thickly on the pretzel rods. A thicker layer gives you a great taste and texture. I suggest using a generous scoop to cover one end fully. This creates a nice balance between sweet and salty. Refrigerate the dipped pretzels for about 30 minutes. This helps the chocolate harden and keeps the treat intact. If you want a firmer bite, leave them in longer. Just make sure to keep them cool after setting for the best crunch! Pro Tips Choose the Right Chocolate: For the best flavor, use high-quality semi-sweet chocolate chips. They melt smoothly and provide a rich taste that complements the peanut butter perfectly. Experiment with Flavors: Feel free to add a dash of vanilla extract or a sprinkle of cinnamon to the melted chocolate for an extra flavor boost! Perfect the Dip: Ensure that your pretzels are completely cooled before dipping to prevent the chocolate from melting the peanut butter layer. Storage Tips: Store the chocolate-dipped pretzels in an airtight container in the refrigerator to keep them fresh and crunchy for up to a week. {{image_2}} You can change the chocolate to fit your taste! Try white chocolate for a sweet twist. Dark chocolate adds a rich flavor. If you want a fun option, use carob. Each of these choices gives the pretzels a unique taste. Add more crunch and color with toppings! Crushed nuts give an extra texture. You can also use sprinkles for a festive look. Both options make your pretzels stand out and taste even better. Need to skip nuts or dairy? You can use sun butter or soy nut butter instead of peanut butter. For a dairy-free option, choose dairy-free chocolate chips. These swaps keep the recipe tasty while meeting your needs. You can store chocolate dipped peanut butter pretzels at room temperature. Place them in a cool, dry spot away from sunlight. If it’s hot, consider refrigeration. Cold keeps the chocolate firm. Just remember, cold can change the texture a bit. When stored in an airtight container, these treats can last up to two weeks. After that, they may still taste good, but the chocolate can lose its shine. Keep checking for any off smell or change in texture. Yes, you can freeze these delicious pretzels. To freeze, place them in a single layer on a baking sheet. Once frozen, transfer them to a freezer-safe bag. They can last for up to three months. When you want to enjoy them, just thaw in the fridge. Yes, you can use crunchy peanut butter. It adds a nice texture and extra crunch. However, spreading it on the pretzel might be a bit harder than creamy peanut butter. If you choose crunchy, make sure to warm it well so it spreads easily. The flavor will still be rich and tasty! I recommend semi-sweet chocolate for a balanced taste. It melts well and mixes great with the peanut butter. You can also use dark chocolate for a richer flavor. If you prefer sweeter bites, milk chocolate works too. Just keep in mind, the taste will change based on the chocolate you pick. To make these pretzels vegan, switch to dairy-free chocolate chips. You can find many brands that offer great taste without dairy. Use natural peanut butter without added oils or sugars for the filling. Also, check the pretzel ingredients to ensure they are vegan-friendly. This way, you can enjoy the same delightful treat! This blog post has covered a fun and tasty treat you can make at home. We explored ingredients like pretzel rods and peanut butter, along with easy steps to prepare, coat, and set your treats. I shared tips for a smooth chocolate finish and options for variations. Remember, you can switch ingredients to fit your needs. Following the storage info ensures your treats stay fresh. Now, get creative, and enjoy this sweet snack with friends or family!

Chocolate Dipped Peanut Butter Pretzels Delight

- 2 lbs boneless, skinless chicken thighs - 1/2 cup low-sodium soy sauce - 1/4 cup honey - 1/4 cup rice vinegar - 3 tablespoons sesame oil - 4 cloves garlic, minced - 1 tablespoon fresh ginger, grated The main stars of this dish are the chicken thighs and the sauce. Chicken thighs stay juicy and tender when cooked. The sauce is a blend of salty, sweet, and tangy flavors that makes this dish shine. - 1 teaspoon red pepper flakes (for spice) - Sesame seeds for garnish - Sliced green onions for garnish You can add red pepper flakes if you like a bit of heat. Garnishing with sesame seeds and green onions adds color and flavor. - Cooked jasmine rice - Steamed vegetables like broccoli or snap peas I recommend serving this teriyaki chicken over a bed of fluffy jasmine rice. Adding vegetables on the side makes the meal colorful and healthy. Enjoy the mix of flavors and textures! {{ingredient_image_1}} Start by trimming any extra fat from the chicken thighs. Make sure they are even and clean. After that, pat the chicken dry with paper towels. This step helps the chicken brown better later. Next, let's make the tasty sauce. In a medium mixing bowl, whisk together these ingredients: - 1/2 cup low-sodium soy sauce - 1/4 cup honey - 1/4 cup rice vinegar - 3 tablespoons sesame oil - 4 cloves garlic, minced - 1 tablespoon fresh ginger, grated - 1 teaspoon red pepper flakes (optional for spice) Mix these well until combined. This sauce gives the chicken its sweet and savory flavor. Now, we cook the chicken. Turn on the Instant Pot and select the 'Sauté' function. Once it is hot, add a drizzle of sesame oil. Place the chicken thighs in the pot and brown them for 2-3 minutes on each side. This adds flavor. After browning, pour the teriyaki sauce over the chicken. Close the lid and make sure the vent is sealed. Set the Instant Pot to 'Manual' high pressure for 10 minutes. This cooks the chicken quickly and keeps it juicy. Once the cooking time is up, let the pressure release naturally for 5 minutes. Then, switch to a quick release to let out the rest of the steam. Now, we need to thicken the sauce. Remove the chicken from the pot and set it aside on a cutting board. In a small bowl, mix 2 tablespoons of cornstarch with 2 tablespoons of water to create a slurry. Turn the Instant Pot back to 'Sauté' and stir in the cornstarch slurry. Let it cook for a couple of minutes until the sauce thickens. This will make the sauce cling to the chicken. Finally, shred the chicken using two forks. Return the shredded chicken to the pot and mix well with the sauce. Serve the teriyaki chicken over a bed of cooked jasmine rice. For a nice touch, garnish with sesame seeds and sliced green onions. This adds color and flavor to your dish. Enjoy your meal! - Ensuring juicy chicken: Always use boneless, skinless chicken thighs. They stay moist and tender. Pat them dry before cooking to help with browning. This step adds flavor. - Flavor variations: You can add a splash of orange juice for a citrus twist. Pineapple juice works well too. For an extra kick, add more red pepper flakes. - Making ahead: You can prepare the sauce in advance. Store it in the fridge for up to three days. This saves time on cooking day. - Freezing suggestions: Cooked teriyaki chicken freezes well. Just let it cool down first. Use airtight containers to keep it fresh. Thaw in the fridge overnight before reheating. - Garnishing options: Top your dish with sesame seeds and sliced green onions. This adds a nice crunch and color. You can also sprinkle some chopped cilantro for freshness. - Pairing with side dishes: Serve teriyaki chicken over jasmine rice. Steamed broccoli or snap peas make great sides. They add texture and balance to your meal. Pro Tips Marinate for More Flavor: If you have time, marinate the chicken in the teriyaki sauce for at least 30 minutes or up to overnight in the refrigerator. This will deepen the flavors. Adjust the Sweetness: Feel free to adjust the amount of honey based on your preference for sweetness. You can also substitute brown sugar for a different flavor profile. Use Fresh Ingredients: Always opt for fresh garlic and ginger for the best flavor. Store-bought versions may lack the potent flavors that fresh ingredients provide. Serve with Variety: Try serving the teriyaki chicken with different sides like quinoa or stir-fried vegetables to mix things up. It’s versatile and pairs well with many dishes! {{image_2}} You can easily switch out chicken thighs for chicken breasts. Chicken breasts cook faster, so adjust the cooking time to about 8 minutes. You can also use pork, beef, or shrimp. Each protein brings its own flavor. If you want a plant-based option, try tofu. Press and cube the tofu, then sauté it to add texture before cooking. For gluten-free options, choose tamari instead of soy sauce. Tamari gives you that same rich taste without the gluten. If you want a low-calorie dish, use less honey or a sugar substitute. You can also cut back on sesame oil. These swaps keep the dish tasty while fitting your diet. Adding vegetables can boost flavor and nutrition. Try bell peppers, snap peas, or broccoli. Just chop them and throw them in during the last few minutes of cook time. You can also explore spices like garlic powder or five-spice powder for a twist. A little heat from red pepper flakes can also make it lively. Experiment to find what you love! After you make the teriyaki chicken, let it cool down. Store leftovers in an airtight container in the fridge. They can last up to four days. When you want to eat it again, reheat it gently. You can use a microwave or a skillet on low heat. Add a splash of water if it seems dry. You can freeze the teriyaki chicken if you want to save it for later. Place the cooled chicken in a freezer-safe bag. Remove as much air as possible to prevent freezer burn. It will stay good for about three months. When you're ready to eat, thaw it in the fridge overnight. Reheat on the stove or in the microwave. In the fridge, teriyaki chicken lasts about four days. If it smells bad or looks odd, throw it away. Always check for signs of spoilage, like a sticky texture or off color. If you see any of these signs, it's best to discard it. Cooking teriyaki chicken in an Instant Pot takes about 10 minutes under high pressure. Add an extra 5 minutes for natural pressure release. This quick method makes dinner easy and fast. Yes, you can use frozen chicken! Just add a few extra minutes to the cooking time. Make sure to separate the pieces if they are stuck together. This keeps the chicken juicy and tender. If you need a honey substitute, use maple syrup or agave syrup. You can also try brown sugar mixed with a bit of water. These options will provide sweetness without losing flavor. To make teriyaki sauce, mix together: - 1/2 cup low-sodium soy sauce - 1/4 cup honey (or a substitute) - 1/4 cup rice vinegar - 3 tablespoons sesame oil - 4 cloves garlic, minced - 1 tablespoon fresh ginger, grated This simple blend gives you a rich and tasty sauce. Yes, you can add vegetables! Sliced bell peppers, broccoli, or snap peas work well. Just layer them on top of the chicken before cooking. This adds color and nutrients to your meal. To wrap up, making teriyaki chicken in an Instant Pot is simple and rewarding. You learned about key ingredients like chicken thighs and sauce components. I shared preparation tips, step-by-step instructions, and meal prep advice. You can even customize flavors with variations. Remember, storing and reheating your leftovers properly keeps them tasty. With these tips, you can enjoy great meals anytime. Try it out and enjoy the flavors of homemade teriyaki chicken!

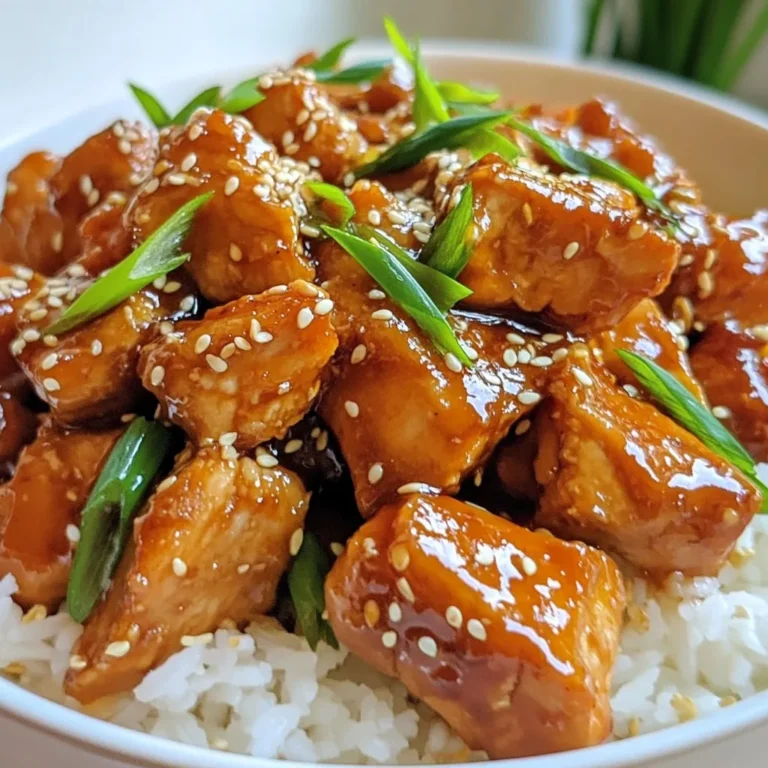
Instant Pot Teriyaki Chicken Quick and Easy Recipe

PREV 1 … 48 49 50 … 65 NEXT
tasty trail blazer

explore

DessertsDinnerAppetizersDrinks

Our Policies

  • Cookie Policy
  • Copyright Policy
  • Disclaimer
  • GDPR Policy
  • Terms Of Use
Back to Top
  • About
  • Contact Us
  • Privacy Policy
© 2025 tasty trail blazer