FREE DINNER EBOOK! Get your copy!
  • Cookie Policy
  • GDPR Policy
  • Disclaimer
  • Terms Of Use
  • Visit my other site: Fun Cookie Recipes
tasty trail blazer
  • Home
  • Dinner
  • Desserts
  • Drinks
  • Appetizers
  • Contact
  • About
  • Privacy Policy
  • Home
  • Dinner
  • Desserts
  • Drinks
  • Appetizers
  • Contact
  • About
  • Privacy Policy
  • Cookie Policy
  • GDPR Policy
  • Disclaimer
  • Terms Of Use
Visit my other site: Fun Cookie Recipes

HOME / CATEGORIES /

Latest

- 4 salmon fillets (6 oz each) - 1/4 cup honey - 1/4 cup Dijon mustard - 2 tablespoons soy sauce (low sodium) - 2 tablespoons olive oil - 2 cloves garlic, minced - Salt and pepper to taste - Fresh dill or parsley for garnish - Lemon wedges for serving The main ingredients for honey mustard glazed salmon are simple yet flavorful. You need fresh salmon fillets, honey, Dijon mustard, and low-sodium soy sauce. The honey gives it sweetness. Dijon mustard adds a nice tang, while soy sauce brings depth to the flavor. For the additional ingredients, olive oil helps the glaze stick and adds richness. Minced garlic enhances the dish with a savory note. Salt and pepper balance the flavors. Finally, fresh herbs like dill or parsley brighten up the dish, and lemon wedges give a zesty kick. This easy list of ingredients makes it fun to prepare. You can find them at your local store. Each component contributes to a tasty and healthy meal. {{ingredient_image_1}} 1. Preheat your oven to 400°F (200°C). This ensures even cooking for the salmon. 2. Line a baking sheet with parchment paper. This will make cleanup easy. 3. In a bowl, mix together the honey, Dijon mustard, soy sauce, and olive oil. Add minced garlic too. Whisk until the glaze is smooth and well mixed. 1. Place the salmon fillets skin-side down on the baking sheet. Season lightly with salt and pepper. 2. Pour the honey mustard glaze over the salmon. Make sure each fillet is covered well. 3. Bake the salmon in the oven for 12-15 minutes. It should flake easily with a fork when done. 4. For a nice caramelization, broil the salmon for 2-3 minutes. Watch it closely to prevent burning. 5. After baking, let the salmon rest for a couple of minutes. This allows the juices to settle. 6. Garnish with fresh dill or parsley. Serve with lemon wedges for a zesty touch. To get that perfect glaze on your salmon, pour it over the fillets slowly. Use a spoon to help spread it evenly across the salmon. This will give every bite that sweet and tangy taste you love. For the best salmon texture, watch the cooking time closely. Bake the salmon for 12-15 minutes. It should flake easily when done. If you want a bit of crisp, broil it for the last few minutes. Just stay nearby to avoid burning! When serving, place the salmon on a nice platter. Drizzle some extra glaze over the top for a shiny look. A sprinkle of fresh dill or parsley adds color and flavor. Pair this dish with steamed veggies or a fresh salad. These sides balance the rich taste of the salmon. Lemon wedges also add a zesty touch that brightens up the meal. Pro Tips Use Fresh Ingredients: Fresh salmon and high-quality honey and mustard will elevate the flavor of your dish significantly. Marinate for More Flavor: If time allows, marinate the salmon in the honey mustard glaze for 30 minutes before baking to enhance the taste. Check for Doneness: Salmon is perfectly cooked when it reaches an internal temperature of 145°F (63°C) and flakes easily with a fork. Customize the Glaze: Feel free to add a splash of orange juice or some chili flakes to the glaze for an extra flavor kick. {{image_2}} You can mix up the honey and mustard for fun. Here are some easy swaps: - Honey alternatives: Maple syrup gives a sweet, rich flavor. Agave nectar can work too if you want a lighter taste. - Mustard variations: Try whole grain mustard for a nutty bite. Yellow mustard adds a milder zing. These swaps keep your dish fresh and exciting. You can find new flavors that you love. You can cook salmon in different ways if you want to try something new. Here are some tasty options: - Grilling or pan-searing options: Grill the salmon for a smoky flavor. Sear it in a pan for crisp edges. Just be sure to use medium heat so it cooks evenly. - Cooking under a broiler for a different finish: Broil the salmon for a few minutes at the end. This caramelizes the glaze, giving it a nice crust. Keep an eye on it so it does not burn. These methods add variety and keep your cooking fun. Enjoy experimenting with your honey mustard glazed salmon! To store your honey mustard glazed salmon, first let it cool down. Place the salmon in an airtight container. You can keep it in the fridge for up to three days. If you want to save it longer, freeze it. Wrap each fillet tightly in plastic wrap, then put it in a freezer bag. It will stay good for about three months in the freezer. When you’re ready to enjoy leftovers, the best way to reheat salmon is in the oven. Preheat your oven to 350°F (175°C). Place the salmon on a baking sheet and cover it with foil. Heat for about 10-15 minutes until warm. You can also use a microwave. Place the salmon on a plate and cover it with a damp paper towel. Heat for one minute, then check. Repeat in 30-second intervals until warm. To keep the salmon moist and flavorful, avoid overcooking it. Always check for a warm center. If you like a crispy top, you can broil it for a minute after reheating. Just watch it closely to avoid burning. You can pair honey mustard glazed salmon with many tasty sides. Here are some ideas: - Steamed vegetables: Broccoli, green beans, or carrots add color and nutrition. - Roasted potatoes: Crispy potatoes complement the soft salmon well. - Quinoa or rice: These grains soak up the glaze and make a filling dish. For salads, consider these: - Mixed greens: Add a light vinaigrette for a refreshing touch. - Cucumber salad: This cool option contrasts nicely with the warm salmon. - Potato salad: A creamy version can enhance the meal's richness. Yes, you can make honey mustard glazed salmon in advance. Here are some tips for meal prepping: - Cook the salmon: Prepare it as normal and cool it completely. - Store properly: Keep the salmon in an airtight container in the fridge for up to two days. To reheat effectively: - Oven method: Preheat the oven to 350°F (175°C) and warm the salmon for about 10 minutes. - Microwave method: Use a microwave-safe dish and cover it. Heat in short bursts to avoid overcooking. If you need a substitute for Dijon mustard, you have options. Here are some alternatives: - Yellow mustard: It has a milder flavor but works well. - Honey mustard: This adds sweetness and complements the glaze. - Spicy brown mustard: This gives a bit more kick if you prefer heat. Feel free to experiment with these flavors to find your favorite! This blog post covers a delicious honey mustard glazed salmon recipe. We explored key ingredients like salmon, honey, and Dijon mustard. You learned step-by-step instructions for preparation and cooking. We shared tips for perfect texture and attractive presentation ideas. In conclusion, this simple recipe and helpful tips can enhance your cooking skills. Try out the variations to keep meals exciting. Enjoy your time in the kitchen while serving up tasty dishes!

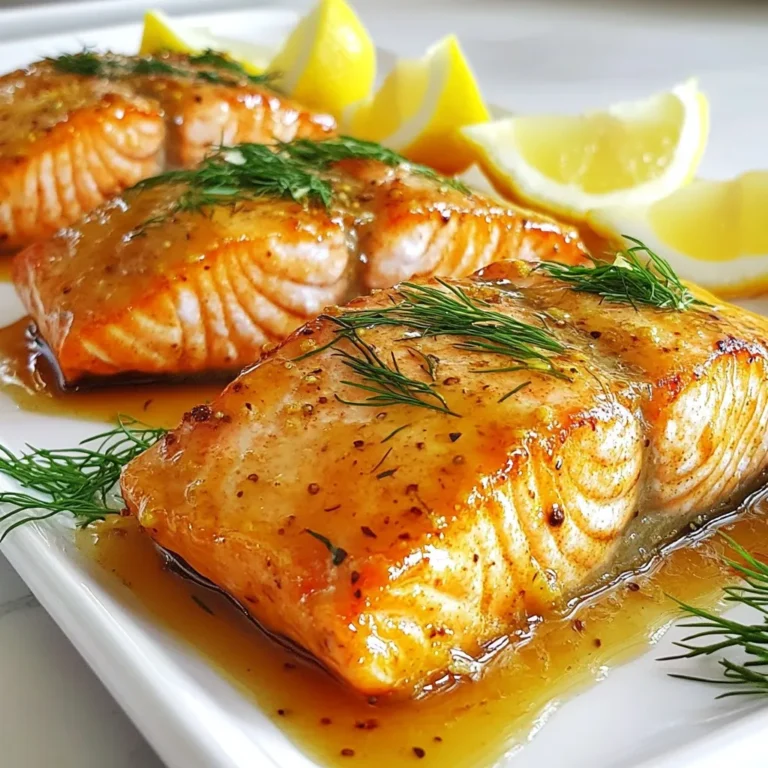
Honey Mustard Glazed Salmon Tasty and Simple Dish

For grilled veggie wraps, you want fresh, colorful vegetables. Here are the key veggies you need: - 1 large zucchini, sliced into thin rounds - 1 bell pepper (red or yellow), sliced into strips - 1 red onion, sliced into rings - 1 cup mushrooms, sliced - 1 cup cherry tomatoes, halved These vegetables add great flavor and texture. Zucchini and bell peppers bring sweetness. Red onion adds a nice bite. Mushrooms give a meaty feel, while cherry tomatoes add juicy bursts. Seasonings make your veggies shine. Here’s what to use: - 2 tablespoons olive oil - 1 teaspoon garlic powder - 1 teaspoon smoked paprika - Salt and pepper to taste Olive oil helps the veggies grill nicely. Garlic powder adds depth. Smoked paprika gives a warm, smoky flavor. Be sure to season with salt and pepper to taste, as this enhances all the flavors. The wrap base and sauces are vital for taste. Here’s what you’ll need: - 4 large whole wheat tortillas - 1 cup hummus or tzatziki sauce - Fresh arugula or spinach for extra crunch Whole wheat tortillas add fiber and flavor. Hummus or tzatziki sauce adds creaminess. Fresh arugula or spinach gives a nice crunch. You can mix and match sauces for variety. {{ingredient_image_1}} Start by heating your grill or grill pan. Set it to medium-high heat. This step is key for getting those tasty grill marks on your veggies. Wait until the grill is hot before adding any vegetables. A hot grill will help to cook the veggies evenly. In a large bowl, mix the sliced zucchini, bell pepper, red onion, mushrooms, and halved cherry tomatoes. Drizzle in the olive oil. Add garlic powder, smoked paprika, salt, and pepper. Toss everything well until the veggies are fully coated. This mix of flavors makes the wraps tasty and colorful. Grab a large tortilla. Spread a nice layer of hummus or tzatziki sauce on it. Next, add a generous amount of your grilled veggies. Top with fresh arugula or spinach for some extra crunch. Roll the tortilla tightly, folding in the sides as you go. If you want a crispy wrap, grill it for an extra 2-3 minutes on each side. Finally, slice each wrap in half diagonally. Enjoy your delicious creation with some extra dipping sauce if you like! Grilling veggies requires some care. Choose fresh and firm vegetables. Slice them evenly for even cooking. A grill basket can help keep smaller pieces from falling through. Preheat your grill to medium-high heat. This step helps to get those lovely grill marks. Brush veggies lightly with olive oil. This prevents sticking and adds flavor. Keep an eye on them. Overcooked veggies can become mushy. Aim for a tender texture with nice grill marks. For grilled wraps, start with a warm tortilla. Spread hummus or tzatziki evenly. This makes each bite flavorful. Layer your grilled veggies in the center, then add fresh arugula or spinach for extra crunch. Roll the wrap tightly. Fold in the sides as you go. This keeps filling inside. If you like, grill the wraps for a few minutes. This adds a crispy texture. Be careful not to burn them. Serve your grilled veggie wraps with extra dipping sauce. Hummus or tzatziki works well. Pair them with a fresh salad for a complete meal. You can also serve with chips or a light soup. For drinks, try homemade lemonade or iced tea. These pair nicely with the fresh flavors of the wraps. Enjoy your tasty and healthy meal! Pro Tips Grill at the Right Temperature: Make sure your grill or grill pan is preheated to medium-high heat to ensure the vegetables cook evenly and develop great grill marks. Experiment with Veggies: Feel free to mix and match your favorite vegetables! Asparagus, eggplant, or even corn can add unique flavors and textures to your wraps. Wrap It Right: When rolling your tortilla, make sure to fold in the sides before rolling tightly to prevent any filling from spilling out. Serve with a Twist: For an extra burst of flavor, drizzle some balsamic glaze or your favorite hot sauce over the wraps just before serving. {{image_2}} You can make your grilled veggie wraps more filling by adding protein. Grilled chicken or turkey adds a nice flavor and texture. For a meat-free option, try black beans or chickpeas. Both provide protein and fiber. Tofu is also a great choice. Marinate it in the same spices as your veggies for extra flavor. Just grill it until it’s golden brown. This way, your wraps become a hearty meal. While zucchini and bell peppers are great, you can mix it up. Try adding eggplant, asparagus, or squash for different tastes. Broccoli or cauliflower florets work well, too. You can even use sweet potatoes, sliced thin and grilled until soft. The more colorful your veggies, the better your wraps look and taste. Explore local markets for seasonal veggies for extra freshness. The sauce can really change your wrap's flavor. Hummus is creamy and adds a nice kick. Tzatziki brings a refreshing taste with yogurt and cucumber. You can also try pesto for a burst of herbal flavor. If you like spice, add a drizzle of sriracha or harissa. Mixing sauces can also create unique flavors. Experiment with your favorites to find what you love best. To keep leftover wraps fresh, wrap each one tightly in plastic wrap. You can also use foil for better protection. Place the wrapped wraps in an airtight container. Store them in the fridge. They stay good for up to three days. If you want to eat them later, don’t add greens until you’re ready to eat. You can freeze grilled veggie wraps for longer storage. Wrap each one in plastic wrap and then foil. This prevents freezer burn. When you’re ready to eat, thaw them in the fridge overnight. Reheat them in a pan or grill for a few minutes. This keeps them warm and crispy. You can also use a microwave if you’re short on time. Grilled veggies can last in the fridge for about five days. Store them in a sealed container. If you freeze the veggies, they can last for about three months. Just make sure to cool them first before freezing. This way, you can enjoy fresh flavors for a long time. Yes, you can use flour tortillas. They are soft and easy to roll. Whole wheat adds more fiber and nutrients. If you prefer flour, go for it! To make them gluten-free, use gluten-free tortillas. Many brands offer great options. You can also check labels to ensure no gluten ingredients. Enjoy the same taste without worry! You can add many veggies! Try eggplant, asparagus, or even sweet potatoes. Broccoli and cauliflower also work well. Mix and match to find your favorite combo! Yes, you can! Make the grilled veggies and wraps a few hours before. Just store them in the fridge. Wrap them tightly in plastic wrap to keep them fresh. Absolutely! Grilled veggie wraps are full of nutrients. They offer vitamins from the veggies and healthy fats from olive oil. When you use whole wheat tortillas, you add more fiber. It's a tasty, healthy meal! Grilled veggie wraps are easy and fun to make. We covered key ingredients, like fresh veggies, oils, and sauces. I shared step-by-step instructions for grilling and assembling the wraps. You learned tips for perfect grilling and ways to mix it up with proteins and sauces. Storing leftovers keeps your meal fresh for later. These wraps are healthy, tasty, and great for any meal. I hope you enjoy making them!

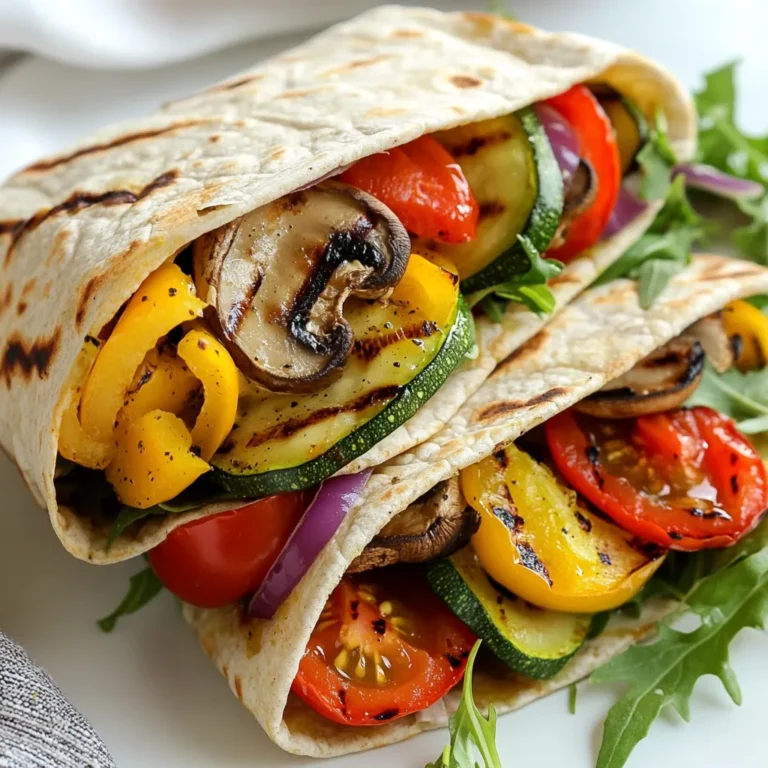
Grilled Veggie Wraps Fresh and Flavorful Delight

- 2 cups shredded cooked chicken - 1 cup BBQ sauce - 1 bag tortilla chips (about 12 oz) - 2 cups shredded cheddar cheese - 1 cup black beans, rinsed and drained - 1 cup corn kernels (canned or frozen) - 1 jalapeño, sliced (optional) - 1/2 cup red onion, finely chopped - 1/4 cup fresh cilantro, chopped - Sour cream - Guacamole Gathering the right ingredients is key. Start with shredded cooked chicken. I often use leftovers for this dish. BBQ sauce adds the sweet and tangy flavor we love. Choose your favorite brand to make it personal. Tortilla chips serve as the crunchy base. Go for a sturdy brand to hold all the toppings. Next, add black beans for protein and fiber. They pair well with the chicken. Corn kernels add sweetness and color. You can use canned or frozen corn. For a spicy kick, slice a jalapeño. This step is optional but tasty. Finally, red onion gives a nice crunch and sharpness. Don’t forget the toppings! Fresh cilantro adds brightness. Sour cream and guacamole bring creaminess and richness. These flavors blend well with the BBQ chicken. Enjoy customizing your nachos! {{ingredient_image_1}} First, gather your ingredients. You need shredded cooked chicken and BBQ sauce. In a bowl, mix the chicken with the BBQ sauce. Make sure the chicken is well coated with the sauce. This step gives the chicken great flavor. While you mix the chicken, preheat your oven to 375°F (190°C). This temperature is perfect for melting the cheese later. Now it’s time to build your nachos. On a large sheet pan, spread out the tortilla chips evenly. This helps each chip get some toppings. Next, layer the BBQ chicken mixture over the chips. Spread it out so every bite has chicken. Then, sprinkle the rinsed black beans and corn evenly over the nachos. These add texture and taste. Finally, top everything with shredded cheddar cheese. Make sure the cheese covers the chips well to melt nicely. After assembling, it’s time to bake. You can add sliced jalapeños and chopped red onion on top if you like. Place the sheet pan in the preheated oven. Bake for about 15-20 minutes. You want the cheese to melt and bubble. Keep an eye on it to avoid burning. When done, remove the pan from the oven and sprinkle fresh chopped cilantro on top. Serve immediately with sour cream and guacamole on the side for a tasty treat. - Choosing the right BBQ sauce: Pick a sauce that you love. Sweet and smoky sauces work great. If you like heat, try a spicy BBQ sauce. It adds a nice kick to your nachos. - Cheese recommendations: Cheddar cheese is a classic choice. It melts well and gives a rich flavor. You can also mix in Monterey Jack for a creamier texture. For a fun twist, try pepper jack for some spice! - Techniques for crispy nachos: To keep your nachos crisp, layer your ingredients wisely. Spread the chips evenly on the tray. Don't overload them with too many toppings at once. This helps the chips stay crunchy. - Best baking practices: Bake your nachos at 375°F for about 15-20 minutes. Keep an eye on them. You want the cheese to melt but not burn. If you see bubbling cheese, you're on the right track! - Serving suggestions: Use a large platter for serving. This makes it easy for everyone to dig in. You can also serve them right on the baking sheet for a casual vibe. - Garnishing tips: Fresh cilantro adds a pop of color. Sprinkle it on just before serving. You can also add dollops of sour cream and guacamole on top. It makes the dish look more inviting and adds extra flavor! Pro Tips Use Fresh Ingredients: Fresh cilantro and quality BBQ sauce can elevate the flavors of your nachos significantly. Customize Your Toppings: Feel free to add other toppings like diced tomatoes, avocado, or olives based on your preference. Don't Overload the Chips: Ensure even distribution of toppings to avoid soggy chips; layer thoughtfully! Serve Immediately: Nachos are best enjoyed fresh out of the oven for maximum cheese stretch and crunch. {{image_2}} You can switch the chicken for other meats. Try shredded pork or beef for a twist. You can also use tofu for a plant-based option. Beans add great flavor and texture. Use pinto beans or kidney beans instead of black beans. You can also add refried beans for creaminess. Toppings can change the game. Try diced tomatoes, green onions, or olives for extra flavor. If you like crunch, add some crushed tortilla chips on top. If you need vegan options, use jackfruit or tempeh instead of chicken. Choose a BBQ sauce that is free of animal products. For gluten-free nachos, use corn tortilla chips. Check the labels to make sure they are gluten-free. You can also make your own chips from corn tortillas. Want some heat? Add diced jalapeños or a sprinkle of cayenne pepper. You can also use a spicy BBQ sauce to kick up the flavor. For a sweet twist, try a honey BBQ sauce. You can mix in pineapple chunks with the chicken. This adds a nice tropical flavor to your nachos. To keep your nachos fresh, place them in an airtight container. This helps to seal in flavors and moisture. Store the nachos in the fridge. They will last about three days. If you have extra toppings, store them separately. This keeps everything crisp and tasty. You can reheat nachos in two main ways: microwaving and using the oven. For the microwave, place a single layer of nachos on a plate. Heat for about 30 seconds to 1 minute. This works but can make the chips soft. For the oven, preheat to 350°F (175°C). Spread the nachos on a baking sheet. Heat for about 10 minutes. This keeps them crispy and warm. If you want to freeze nachos, it's best to freeze the components separately. First, let the nachos cool. Place tortilla chips in a freezer bag. Then, store the BBQ chicken and toppings in another container. When ready to eat, thaw everything in the fridge overnight. Reheat as needed. This method keeps the taste and texture good. Yes, you can use raw chicken. First, cut the chicken into small pieces. Season them with salt and pepper. Then, cook the chicken in a skillet over medium heat. Cook for about 6-8 minutes, or until it is no longer pink. Once cooked, shred the chicken and mix it with BBQ sauce before layering it on the nachos. To add heat, try these tips: - Use spicy BBQ sauce. Look for options labeled as "hot" or "spicy." - Add sliced jalapeños. You can use fresh or pickled jalapeños. - Toss in some diced fresh chili peppers. These can add a nice kick. - Sprinkle red pepper flakes over the nachos before baking. This adds heat without changing the flavor too much. For nachos, I recommend these flavor profiles: - Sweet BBQ sauce adds a nice balance. It pairs well with cheddar cheese. - Smoky BBQ sauce gives a rich flavor. It adds depth to the dish. - Spicy BBQ sauce adds heat and excitement. This works well if you love spicy food. - Tangy BBQ sauce can brighten up the flavors. Look for sauces with vinegar for that zing. These BBQ chicken nachos come together with easy steps and tasty layers. From prepping the chicken to choosing the right toppings, each part builds flavor. You can make them your own with fun variations and swaps. Remember, presentation is key! Enjoy your nachos fresh or store them well for later. Keep experimenting to find what you love best. Nachos can be fun and delicious for any meal. Dig in and enjoy your creation!

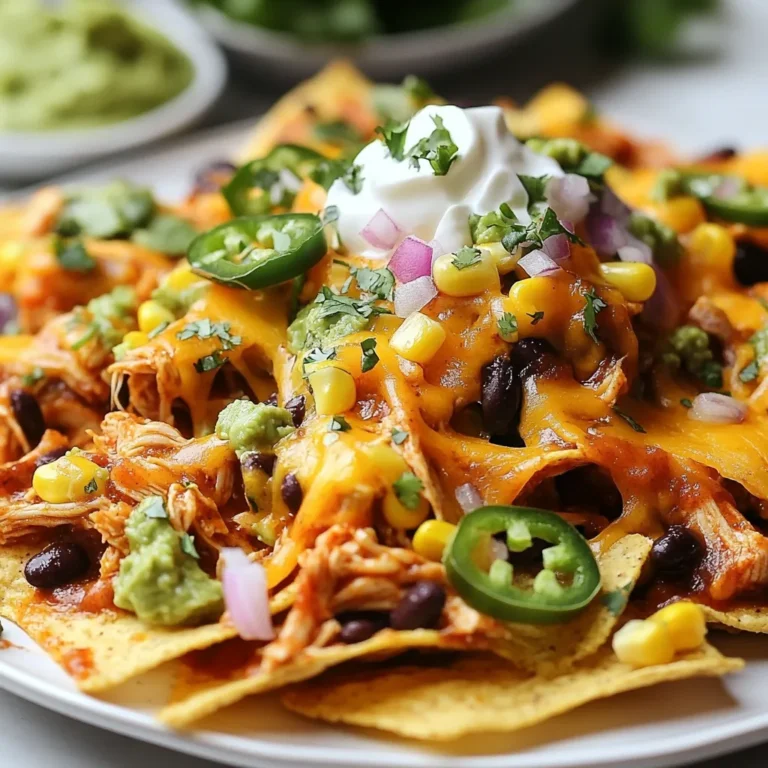
Sheet Pan BBQ Chicken Nachos Tasty and Simple Dish

- 1 cup unsalted butter, softened - 1 cup granulated sugar - 1 cup brown sugar, packed - 2 large eggs - 1 teaspoon vanilla extract - 3 cups all-purpose flour - 1 teaspoon baking soda - 1/2 teaspoon salt - 1/2 cup sprinkles (jimmies work best) - 1 cup powdered sugar (for frosting) - 2 tablespoons milk (for frosting) - 1 teaspoon vanilla extract (for frosting) - Extra sprinkles for decoration Most ingredients are common and easy to find. You can use margarine instead of butter if needed. For a lighter option, try using coconut sugar instead of brown sugar. If you want a dairy-free version, use plant-based milk in the frosting. You can also swap out regular flour for almond or gluten-free flour, but this may change the texture. - Large mixing bowl - Electric mixer or whisk - Measuring cups and spoons - Baking sheet - Parchment paper - Wire rack for cooling - Mixing spoons or spatula - Small bowl for frosting - Whisk or fork for mixing frosting {{ingredient_image_1}} Start by preheating your oven to 350°F (175°C). Line a baking sheet with parchment paper. In a large bowl, cream 1 cup of softened butter with 1 cup of granulated sugar and 1 cup of brown sugar. Mix until it feels light and fluffy, about 3-4 minutes. Next, add 2 large eggs, one at a time. Mix well after each egg. Then stir in 1 teaspoon of vanilla extract. In another bowl, whisk together 3 cups of all-purpose flour, 1 teaspoon of baking soda, and 1/2 teaspoon of salt. Slowly add this dry mix to the wet mix, stirring until just combined. Finally, gently fold in 1/2 cup of sprinkles. Scoop tablespoon-sized balls of dough onto the lined baking sheet. Leave some space between each ball for spreading. Bake the cookies for 10-12 minutes. The edges should be lightly golden, while the centers may look soft. They will firm up as they cool. Remove the baking sheet from the oven and let the cookies cool for 5 minutes. After that, transfer them to a wire rack to cool completely. While the cookies cool, prepare the frosting. In a bowl, whisk together 1 cup of powdered sugar, 2 tablespoons of milk, and 1 teaspoon of vanilla extract. Mix until the frosting is smooth. You can adjust the thickness by adding more milk or sugar if you want. Once the cookies are completely cool, frost them with the icing. Add extra sprinkles on top for a fun touch! To get the best texture, start with softened butter. This helps create a light and fluffy dough. Mix the butter and sugars until they blend well. This should take about 3-4 minutes. Add the eggs one at a time. Mix well after each egg. This step adds moisture and richness. Make sure to fold in the sprinkles gently. You want them to stay whole and colorful. Bake until the edges are golden, but the centers look soft. They will finish cooking as they cool. This keeps your cookies soft and chewy. Make sure your cookies are completely cool before frosting. If they are warm, the frosting will melt off. Mix powdered sugar, milk, and vanilla until smooth. You can adjust the frosting by adding more milk for a thinner mix. For a thicker frosting, add more powdered sugar. Use a knife or spatula to spread the frosting evenly. Don't forget to sprinkle extra sprinkles on top! This adds a fun touch and makes them look bright. Store your cookies in an airtight container. This keeps them fresh for up to a week. Add a piece of bread to keep them soft longer. You can also freeze the cookies for later. Place them in a freezer bag after they cool. They stay good for up to three months. To eat, thaw them at room temperature. Now you can enjoy your Frosted Funfetti Sugar Cookies any time! Pro Tips Chill the Dough: For thicker cookies, refrigerate the dough for at least 30 minutes before baking. This helps prevent spreading and results in a chewier texture. Use Fresh Sprinkles: Make sure your sprinkles are fresh, as old sprinkles can lose their color and texture. Store them in a cool, dry place for best results. Don’t Overbake: Keep a close eye on the cookies, as they can go from perfectly baked to overdone in a minute. Remove them when the edges are golden but the centers look slightly underbaked. Experiment with Flavors: Feel free to add different extracts like almond or lemon to the dough for a fun twist. You can also mix in chocolate chips or nuts for added texture! {{image_2}} You can play with sprinkles for fun! Use rainbow jimmies for a classic look. You can also try pastel colors for softer vibes. Go bold with neon sprinkles for a party feel. Mix and match colors to make your cookies pop. You can even use seasonal sprinkles for holidays. Try pumpkin shapes in the fall or snowflakes in winter. The choices are endless, so let your imagination run wild! Change up the frosting to match your mood! Instead of vanilla, try almond or lemon extract. Add a bit of cocoa powder for chocolate frosting. You can mix in some peanut butter for a nutty twist. For fun, add a hint of mint extract. This makes your cookies unique and delicious. You can also dye your frosting with food coloring for a colorful treat. Each bite can surprise your taste buds! You can make these cookies fit different diets! For gluten-free cookies, use a gluten-free flour blend. They still taste great and keep their soft texture. If you want vegan cookies, swap butter for coconut oil. Use flaxseed mixed with water instead of eggs. These swaps keep your cookies yummy and kind to all diets. You can enjoy the joy of baking without worry! To show off your Frosted Funfetti Sugar Cookies, consider using a colorful plate. You can stack the cookies high for a fun look. Add some extra sprinkles around the base for more color. Use cupcake liners for individual servings. This adds charm and makes them easy to grab. You can also wrap cookies in clear bags. Tie them with a ribbon for a sweet gift. These cookies go great with milk. The creaminess balances the sweetness perfectly. Try serving them with hot chocolate for a cozy treat. For a refreshing twist, pair them with lemonade. The tartness of lemonade contrasts with the sweetness. You can also enjoy them with coffee. The flavors meld nicely for a tasty snack. Frosted Funfetti Sugar Cookies fit any celebration. They are perfect for birthdays, holidays, or school parties. You can make them for a baby shower or a graduation. Add themed sprinkles to match the event. For a fun touch, let kids decorate their own cookies. This makes the dessert even more special and personal. To make thicker cookies, add more flour. Start with an extra 1/4 cup. This small amount helps. You can also chill the dough for at least 30 minutes. Chilling firms up the dough. It stops the cookies from spreading too much when baking. Yes, you can use many frostings. Cream cheese frosting adds a tangy taste. Chocolate frosting gives a rich flavor. You can also try a simple glaze. Just mix powdered sugar and milk for a quick option. Feel free to get creative with flavors! Store your cookies in an airtight container. This keeps them fresh for up to a week. You can also freeze them. Wrap each cookie in plastic wrap. Place them in a freezer bag for up to three months. Just thaw before serving for the best taste. We explored how to make Frosted Funfetti Sugar Cookies, from gathering ingredients to baking. With tips for perfect texture and frosting, you can make delicious cookies every time. Consider variations and serving ideas to keep things fun. Don’t forget to store and freeze them for later enjoyment. Happy baking! Enjoy your sweet treats with friends and family.

Frosted Funfetti Sugar Cookies Joyful Treat Recipe

To make the Keto Chicken Alfredo Bake, you'll need: - 2 cups cooked chicken, shredded - 1 cup cauliflower florets, steamed - 1 cup heavy cream - 1 cup mozzarella cheese, shredded - ½ cup Parmesan cheese, grated - 3 cloves garlic, minced - 1 teaspoon Italian seasoning - Salt and pepper to taste - 2 tablespoons olive oil - 1 tablespoon fresh parsley, chopped (for garnish) These ingredients blend well to create a rich and creamy dish. You can swap some items to keep it keto-friendly: - Use chicken thighs instead of breasts for more flavor. - Swap heavy cream with coconut cream for a dairy-free option. - Choose nutritional yeast instead of Parmesan cheese for a vegan twist. - Use broccoli or zucchini instead of cauliflower for a different texture. These changes can help match your taste or dietary needs. Fresh ingredients make a big difference in flavor. Fresh garlic gives a bright taste, while processed garlic can taste bland. Fresh herbs add vibrant notes, while dried herbs lose some flavor over time. When you use fresh chicken, it has better texture and taste. Processed chicken can be high in sodium and preservatives. Always try to use fresh ingredients when you can. They not only taste better but also keep your dish healthy and keto-friendly. {{ingredient_image_1}} Start by gathering all your ingredients. You need cooked chicken, cauliflower, heavy cream, and cheese. Measure out everything to save time. Shred the chicken into small pieces. Steam the cauliflower florets until they are tender. This dish is all about comfort, so make sure you don’t rush. 1. Preheat your oven to 375°F (190°C). This step is key for even cooking. 2. Heat olive oil in a skillet over medium heat. Add minced garlic and sauté. This should take about one minute. You want it fragrant but not burnt. 3. Pour in the heavy cream and bring it to a gentle simmer. Stir slowly to combine. 4. Add mozzarella and Parmesan cheese. Lower the heat and stir until the cheese melts. This should be smooth and creamy. 5. Season your cheese sauce with Italian seasoning, salt, and pepper. Taste to adjust the flavors. 6. In a large bowl, mix shredded chicken with steamed cauliflower. Pour in the cheese sauce and stir well. 7. Transfer the mixture to a greased baking dish. Spread it evenly so it cooks well. 8. Top with more mozzarella cheese if you like extra gooeyness. 9. Bake for 25-30 minutes in the preheated oven. Look for a bubbly and golden top. 10. Let it sit for five minutes before serving. Garnish with fresh parsley for a pop of color. To make a great cheese sauce, start with low heat. If it’s too hot, the cheese may clump. Stir constantly as you add the cheese. This helps it melt evenly. If your sauce seems too thick, add a splash of cream or water. This keeps it smooth. Always taste your sauce. Adjust the salt and pepper to your liking. A good cheese sauce should be rich and flavorful. Shredding chicken can seem tricky, but I have some easy tips. First, use warm chicken. It shreds much better than cold chicken. If you don’t have warm chicken, heat it in the microwave for a minute. Second, use two forks. Hold one fork steady and pull the chicken with the other. This method gives you nice, even shreds. You can also use your hands if you prefer. Just be careful, as it can be hot. For a perfect bake, make sure your oven is preheated to 375°F (190°C). This step is key to getting the right texture. Spread the mixture evenly in your baking dish. This helps it cook evenly. If you want a golden top, add more mozzarella cheese before baking. Keep an eye on it. Bake for 25-30 minutes until bubbly and golden. Let it rest for five minutes after baking. This waiting time helps the dish set. Storing your leftovers is easy. Let the dish cool down to room temperature first. Then, place it in an airtight container. It will stay fresh in the fridge for up to three days. If you want to keep it longer, freeze it. Use a freezer-safe container or bag. It can last for up to three months. When you're ready to eat, simply thaw it overnight in the fridge. Reheat it in the oven or microwave until hot. Enjoy your tasty leftovers! Pro Tips Use Rotisserie Chicken: For a quicker prep, use store-bought rotisserie chicken. It’s already cooked and adds great flavor. Customize Your Cheese: Feel free to mix in other cheeses like cheddar or cream cheese to enhance the flavor and creaminess. Make it Ahead: This dish can be prepared ahead of time and stored in the fridge. Just bake before serving for a quick dinner. Garnish for Freshness: Adding fresh herbs like basil or thyme as a garnish can elevate the dish and add a pop of color. {{image_2}} You can boost the health of your Keto Chicken Alfredo Bake by adding more veggies. Greens like spinach or kale work well. Just steam them lightly before mixing them in. You can also use broccoli or zucchini. These add color and nutrients. They help you feel full, too. Remember to keep the veggies low in carbs to stick to the keto plan. While the heavy cream sauce is rich, you can switch it up. Try using coconut cream for a different flavor. It adds creaminess without dairy. You can also mix in some cream cheese for a thicker sauce. For lower fat, use Greek yogurt. It gives a tangy twist and stays keto-friendly. Just be careful not to heat it too much to avoid curdling. Adding spices can elevate your dish. If you want a kick, include red pepper flakes. They add heat and flavor depth. You can also try smoked paprika for a warm, smoky taste. Fresh herbs like basil or thyme can brighten the dish. Experiment with different herbs to find your favorite combo. Each change can transform the taste, keeping your meals exciting. This Keto Chicken Alfredo Bake is low in carbs. Each serving has about 5 grams of net carbs. The main sources of carbs come from the cauliflower. Each serving also has around 30 grams of fat. This comes mostly from the heavy cream and cheese. You can enjoy a good amount of protein too, with about 25 grams per serving from the chicken and cheese. This balance of fat, protein, and low carbs makes it great for a keto diet. Using fresh ingredients gives this dish a healthy boost. Cauliflower is high in fiber and low in calories. It helps keep you full without adding many carbs. Heavy cream adds creaminess and healthy fats. Both mozzarella and Parmesan cheese provide protein and calcium. Garlic helps with flavor and has health benefits, like boosting your immune system. Olive oil is a healthy fat that can improve heart health. Together, these ingredients support a keto lifestyle while keeping the dish tasty. Traditional Chicken Alfredo is rich in carbs due to pasta. It often has more calories and fat from butter and cream. Our Keto version swaps pasta for cauliflower, which lowers the carb count. You still get that creamy, cheesy flavor without the guilt. The keto version is also more satisfying, thanks to the high protein and healthy fats. This makes it a great option for those watching their carb intake but wanting comfort food. To make Keto Chicken Alfredo Bake dairy-free, swap the heavy cream with coconut cream. Use dairy-free cheese for the mozzarella and Parmesan. Nutritional yeast can add a cheesy flavor without dairy. You can also blend soaked cashews for a creamy texture. These swaps keep the dish rich and tasty while meeting your dietary needs. Absolutely! Using rotisserie chicken saves time and adds great flavor. Just shred the chicken and mix it with the other ingredients. Look for plain or lightly seasoned rotisserie chicken to avoid extra carbs. This makes meal prep quick and easy while keeping the dish delicious. Keto Chicken Alfredo Bake pairs well with a fresh salad. A mix of greens, cucumbers, and a light vinaigrette works great. You can also serve it with steamed broccoli or zucchini noodles for extra veggies. These sides add color and nutrition to your meal while sticking to keto. In this blog post, we explored how to make a delicious Keto Chicken Alfredo Bake. We looked at key ingredients and their fresh alternatives. You learned step-by-step cooking and tips to perfect your cheese sauce. We shared best practices for shredding chicken and storing leftovers. Variations included adding veggies and trying new sauces for flavor. Lastly, we reviewed the dish's nutritional benefits. Keep these tips in mind and enjoy cooking keto meals that taste amazing!

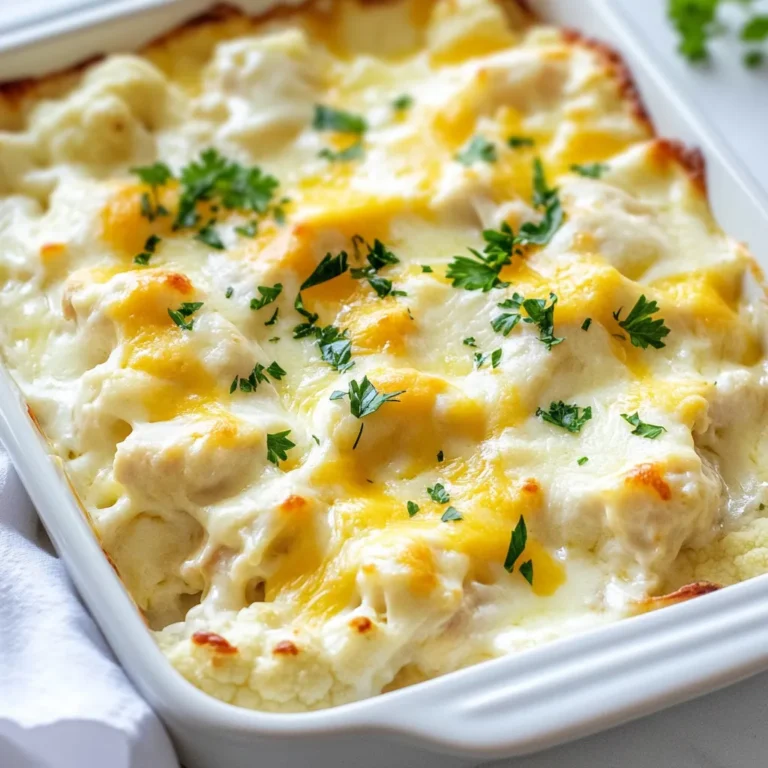
Keto Chicken Alfredo Bake Comforting and Satisfying Dish

To make homemade orange hard candy, you need a few key ingredients. These are: - 2 cups granulated sugar - 2/3 cup light corn syrup - 1/2 cup water - 1 teaspoon orange extract - Powdered sugar for dusting These ingredients create the sweet and tangy flavor we love in orange candy. The granulated sugar provides the base, while the corn syrup helps prevent crystallization. You can enhance your candy with a few optional ingredients. Consider using: - A few drops of orange food coloring Adding food coloring makes the candy visually appealing. It gives the candy a vibrant orange hue. The choice is yours, but I recommend it for a more fun look! To make this candy, you will need some specific tools. Gather these items: - A medium saucepan - A candy thermometer - A baking sheet - Parchment paper - A sharp knife These tools ensure you prepare the candy correctly and safely. The candy thermometer is vital for checking the temperature, while parchment paper helps with easy removal. {{ingredient_image_1}} Start by lining a baking sheet with parchment paper. This step keeps the candy from sticking. Lightly dust the paper with powdered sugar. This adds a nice finish and helps with easy removal. In a medium saucepan, combine the following: - 2 cups granulated sugar - 2/3 cup light corn syrup - 1/2 cup water Stir these ingredients well to mix. Place the saucepan over medium heat. Let the mixture come to a gentle boil. Stir occasionally until the sugar fully dissolves. This step is key for smooth candy. Once the mixture boils, stop stirring. Let it boil undisturbed for about 10-15 minutes. Use a candy thermometer to check the temperature. You want it to reach 300°F (150°C). Watch closely to avoid burning. This stage is crucial for hard candy. To get the best flavor, use fresh orange extract. It adds a bright taste. If you want a deeper orange hue, add a few drops of orange food coloring. This step is fun and gives your candy a pop. Always stir the mixture well before boiling to mix the ingredients. This helps the sugar dissolve evenly. One big mistake is stirring while the mixture boils. Once it starts to bubble, let it be. Stirring can cause sugar crystals to form, making the candy grainy. Another mistake is not watching the temperature. If the candy gets too hot, it will burn. Use a candy thermometer to ensure it reaches the right hard crack stage. Lastly, don’t rush the cooling process. Let it cool completely before breaking it. Here are some tools I find very helpful: - Candy thermometer: This tool is key for measuring the right temperature. - Medium saucepan: A heavy one helps heat evenly. - Parchment paper: Line your baking sheet to prevent sticking. - Sharp knife: Use this to cut the candy into pieces. - Heat-resistant spatula: It helps when mixing and pouring the hot candy. Using the right tools makes candy making easier and more fun! Pro Tips Use a Candy Thermometer: Ensuring the mixture reaches the hard crack stage (300°F or 150°C) is crucial for achieving the right texture. A candy thermometer will help you monitor the temperature accurately. Be Careful with Hot Sugar: The candy mixture can bubble and splatter when adding the extract and food coloring. Always make sure to wear long sleeves and use a long-handled spoon to prevent burns. Storage Matters: Store your candies in an airtight container to prevent them from becoming sticky. Adding a small packet of silica gel can help keep them fresh longer. Experiment with Flavors: While orange is delightful, feel free to experiment with other flavors like lemon, raspberry, or peppermint for a unique twist on your hard candy creations. {{image_2}} You can try many flavors for hard candy. If you love fruity tastes, go for lemon, cherry, or raspberry. Each fruit adds its own unique twist. For a minty kick, peppermint oil works great too. You can even mix flavors for fun combinations, like orange and lemon. Just remember to adjust the amount of extract to keep the balance right. If you don't have orange extract, you can use fresh orange juice. It will give you a nice taste, but use a bit less water in your recipe. You can also try using a combination of lemon and lime juice for a zesty flavor. For a tropical vibe, coconut extract is a tasty choice, too. Just experiment and find what you like best! You can shape your orange hard candy in many ways. Use cookie cutters to create fun shapes like hearts or stars. For a classic look, pour the mixture into a silicone mold. You can even use ice cube trays for small, bite-sized pieces. If you want to get fancy, drizzle some melted chocolate on top after the candy cools. It adds a nice touch and a burst of flavor! To keep your homemade orange hard candy fresh, store it in an airtight container. Use a metal or glass jar for best results. Avoid plastic bags, as they can trap moisture. Place a piece of parchment paper between layers to prevent sticking. This helps maintain the candy's crispness. Keep your candy away from heat and humidity. Store it in a cool, dry place. A pantry or cupboard works well. Avoid storing near the stove or oven. If you live in a humid area, consider using a dehumidifier to keep your candy dry. For a lovely gift, wrap your candy in colorful cellophane. Tie it with a ribbon for a special touch. You can also use small glass jars for a cute presentation. Fill the jars with candy and add a label. This makes a perfect gift for friends and family! Homemade orange hard candy can last for several weeks if stored correctly. Keep it in an airtight container to avoid moisture. This helps maintain its crunch and flavor. If you store it in a cool, dry place, it can last up to a month. I recommend checking it every week to ensure it stays fresh. Yes, you can make this candy without a thermometer. Use the cold water test instead. Drop a small amount of candy mixture into cold water. If it forms a hard ball, it’s ready. This method needs practice but works well. I suggest using a thermometer for more accuracy, especially for beginners. It can help you avoid mistakes. If your candy is sticky, it may not have reached the hard crack stage. To fix this, return the candy to the saucepan. Heat it again until it reaches the right temperature. If it still sticks, dust it with powdered sugar. This helps reduce the stickiness. Always store it in a cool place to avoid future stickiness. You can make tasty homemade orange hard candy with simple steps. We covered essential and optional ingredients, tools, and how to prepare your baking sheet. I shared tips for great flavor and ways to avoid common mistakes. Don't forget the fun variations and how to store your treats. With practice, you’ll create delicious candy that impresses everyone. Enjoy making and sharing your homemade treats!

Homemade Orange Hard Candy Delightful and Simple Recipe

- 1 pound ground turkey - 1/4 cup breadcrumbs - 1/4 cup grated Parmesan cheese - 1/4 cup chopped fresh cilantro - 1 large egg - 3 tablespoons Sriracha sauce (adjust for spice preference) - 2 cloves garlic, minced - 1 teaspoon ginger, grated - 1 teaspoon soy sauce (or tamari for gluten-free) - Salt and pepper to taste - 2 tablespoons olive oil (for cooking) These ingredients work together to create tasty meatballs. Ground turkey is lean and cooks nicely. Breadcrumbs add texture, while Parmesan gives a savory kick. Fresh cilantro brightens the flavor. The egg helps bind everything together. Sriracha sauce adds the spicy twist, and garlic and ginger bring depth. Soy sauce adds umami, while salt and pepper enhance the taste. Finally, olive oil keeps the meatballs moist during cooking. Feel free to adjust the Sriracha based on your spice preference. If you like it hot, use more Sriracha. If you prefer mild, use less. This flexibility makes the dish perfect for anyone. Enjoy experimenting with these ingredients to make a dish that fits your taste! {{ingredient_image_1}} In a large mixing bowl, combine the ground turkey, breadcrumbs, grated Parmesan cheese, and chopped cilantro. You want all the flavors to blend well. Next, add one large egg, two tablespoons of Sriracha sauce, minced garlic, grated ginger, soy sauce, and a little salt and pepper. Mix the ingredients gently with your hands. Be careful not to squeeze too hard. This helps keep the meatballs tender and juicy. If you overmix, they can become tough. To shape the meatballs, wet your hands with water. This makes it easier to roll the mixture without sticking. Aim for meatballs that are about 1 to 1.5 inches in size. This size cooks well and is easy to eat. Place each meatball on a parchment-lined baking sheet. First, preheat your oven to 400°F (200°C). This ensures even cooking. Once the oven is ready, drizzle olive oil over the meatballs. This adds moisture and helps them brown nicely. Bake the meatballs for 20-25 minutes. They are done when they are cooked through and browned on the outside. For an extra kick, mix the remaining Sriracha with one tablespoon of olive oil. Brush this glaze on the meatballs during the last 5 minutes of baking. After baking, let the meatballs rest for a few minutes. This helps the flavors settle before serving. To change the heat level, adjust the Sriracha in your mix. Start with 1 tablespoon of Sriracha for mild meatballs. You can add more if you like it hot. For a spicy glaze, mix 2 tablespoons of Sriracha with 1 tablespoon olive oil. Brush this on your meatballs in the last few minutes of cooking. This adds a flavorful kick and a shiny finish. To keep your meatballs tender, do not overmix the ingredients. When you combine the turkey and spices, mix gently. Overmixing can make them tough. Check the cooking time carefully. Bake them for 20-25 minutes until they are brown and cooked through. You can use a meat thermometer to check for doneness. The inside should reach 165°F (74°C). These meatballs pair well with many sides. Try serving them on skewers with a fresh cucumber salad. They also taste great on a bed of rice. Sprinkle sesame seeds and add more cilantro for a nice touch. For garnishing, you can drizzle some extra Sriracha or a squeeze of lime juice. This adds a bright flavor and makes your dish look great. Pro Tips Use Lean Turkey: Opt for lean ground turkey to keep the meatballs moist while reducing excess fat for a healthier option. Chill the Mixture: Chilling the meatball mixture for 30 minutes before shaping helps the meatballs hold their shape during cooking. Customize the Heat: Adjust the amount of Sriracha based on your spice preference; you can also try adding diced jalapeños for extra kick. Serving Suggestions: These meatballs pair beautifully with a side of sweet chili sauce or a zesty yogurt dip for added flavor. {{image_2}} You can swap turkey for chicken or beef. This change offers a new flavor and texture. Chicken gives a lighter taste, while beef adds richness. Both options work well with Sriracha's heat. For gluten-free options, use gluten-free breadcrumbs. These breadcrumbs mimic regular ones. They will keep your meatballs tender and flavorful. You can also use crushed rice cereal as an alternative. Consider adding herbs and spices to boost flavor. Fresh parsley or basil adds brightness. You can also try smoked paprika for a smoky kick. Experiment with your favorite spices to find what you love. Adding vegetables can enhance texture and nutrition. Finely chopped bell peppers or onions mix well. Carrots or zucchini also work great. They add moisture and flavor to the meatballs. You can pan-fry or bake meatballs. Pan-frying gives a crispy outside, while baking is healthier. If you choose to bake, preheat your oven to 400°F. This ensures even cooking and a nice brown color. For a slow cooker option, cook meatballs on low for 6-8 hours. This method keeps them juicy and tender. Add a sauce to the slow cooker for extra flavor. To keep your spicy Sriracha turkey meatballs fresh, store them in an airtight container. Place parchment paper between layers if you stack them. This keeps them from sticking together. In the refrigerator, they last about three to four days. Always check for any off smells before using them. Want to save some for later? You can freeze these meatballs! First, let them cool completely. Then, place them in a single layer on a baking sheet. Once frozen, transfer them to a freezer bag. They can stay good for up to three months. To enjoy later, thaw them overnight in the fridge. Reheat in the oven at 350°F until warm. These meatballs are perfect for meal prep! You can add them to salads, wraps, or bowls. Portion them out for quick lunches or dinners. Pair them with rice or veggies for balanced meals. This makes it easy to stick to healthy eating while enjoying great flavors. You can make meatballs without breadcrumbs by using these substitutes: - Cooked rice - Oats - Mashed potatoes - Ground nuts These options help bind the meatballs. Cooked rice adds texture, while oats give a hearty feel. Mashed potatoes keep them moist. Ground nuts offer a nutty taste. Mix them in the same way as breadcrumbs. Yes, you can use shrimp or pork. - Shrimp: Use chopped shrimp. You may need less cooking time. - Pork: Ground pork works well. It adds a richer flavor. Use the same amount as turkey. Adjust spices to match the protein's taste. Keep Sriracha for a spicy kick. These meatballs pair well with many sides. Here are some ideas: - Sesame cucumber salad: Refreshing and crunchy. - Rice: Perfect to soak up the sauce. - Noodles: Try them with stir-fried noodles. - Vegetables: Roasted or steamed veggies balance the meal. You can also serve them with a dipping sauce, like soy sauce or more Sriracha, for extra flavor. This blog post guides you through making Spicy Sriracha Turkey Meatballs. You learned about key ingredients, step-by-step instructions, and tips for the best results. Remember to adjust spice levels and partner these meatballs with tasty sides. You can also explore variations and storage methods for meal prep. With this knowledge, you can create a dish that suits your taste and is perfect for any occasion. Enjoy cooking and impressing others with your skills!

Spicy Sriracha Turkey Meatballs Savory and Flavorful Dish

For a vibrant Lemon Herb Couscous Salad, you need fresh and simple ingredients. Let’s break them down. - 1 cup couscous - 1 1/4 cups vegetable broth or water - 1 cup cherry tomatoes, halved - 1 cucumber, diced - 1/2 red onion, finely chopped - 1/2 cup chopped fresh parsley - 1/4 cup fresh mint leaves, chopped - Juice and zest of 1 lemon - 3 tablespoons olive oil - Salt and pepper to taste - Optional: 1/2 cup feta cheese, crumbled Couscous serves as the base of this salad. It’s light and fluffy, perfect for soaking up flavors. The cherry tomatoes add a burst of sweetness, while the cucumber brings a refreshing crunch. Fresh herbs like parsley and mint elevate the flavors. They add a garden-fresh taste that makes every bite delightful. Lemon juice and zest provide brightness and zing. They balance the richness of olive oil. Add salt and pepper to taste, enhancing all the flavors. If you want to make it richer, crumbled feta cheese is a great option. It adds creaminess and extra flavor that pairs well with the other ingredients. Gather these ingredients, and you’re on your way to a fresh and flavorful dish that everyone will love! {{ingredient_image_1}} 1. Start by boiling the vegetable broth or water in a medium pot. Use 1 1/4 cups for one cup of couscous. 2. Once the liquid boils, add the couscous. Stir it in, then remove the pot from heat. 3. Cover the pot and let it sit for about 5 minutes. The couscous will soak up the liquid. 4. After 5 minutes, fluff the couscous with a fork. Set it aside to cool for a bit. 1. In a large mixing bowl, combine the cooled couscous with the halved cherry tomatoes. 2. Add the diced cucumber, finely chopped red onion, parsley, and mint leaves. Mix well. 3. In a small bowl, whisk together the lemon juice, lemon zest, olive oil, salt, and pepper. 4. Pour this dressing over the couscous mix. Gently toss everything until it’s well combined. 1. If you like, sprinkle crumbled feta cheese over the salad for extra flavor. 2. Let the salad sit for at least 15 minutes. This time helps the flavors meld together. 3. Serve it in a large bowl, garnished with mint leaves and a lemon wedge. Enjoy the freshness! To get the best texture, fluff the couscous gently. After cooking, use a fork to separate the grains. This helps avoid clumps. Let the couscous cool before mixing it with veggies. Cooling stops the cooking process. It also helps the flavors blend better. Add depth to your salad with extra seasonings. Try a pinch of cumin or paprika. These spices can bring warmth to each bite. Lemon zest is a must for brightness. It boosts the lemon flavor without adding more liquid. Use a microplane to get fine zest. This makes it easy to mix into your dressing. Pro Tips Fresh Herbs Make a Difference: For the best flavor, use fresh herbs like parsley and mint instead of dried. They add a vibrant taste and aroma to the salad. Let it Rest: Allow the salad to sit for at least 15 minutes before serving. This resting time helps the flavors meld together for a more delicious dish. Customize Your Veggies: Feel free to swap out or add other vegetables like bell peppers, radishes, or even olives to suit your taste preferences. Perfectly Fluffy Couscous: Make sure to fluff the couscous with a fork after it has cooled to prevent it from becoming sticky and to keep the grains separated. {{image_2}} Want to make your Lemon Herb Couscous Salad heartier? Add grilled chicken or shrimp. These proteins boost the dish and make it more filling. Simply grill your chicken until golden brown or sauté shrimp until pink. Then, chop them into bite-sized pieces. Toss them in with your salad. If you prefer a vegetarian option, try chickpeas. They add protein and fiber without meat. Use canned chickpeas for quick prep. Just rinse and drain them before mixing into the salad. Fresh herbs make this salad shine. If you can't find parsley or mint, use what you have. Basil or cilantro can work well too. Just chop them fine and mix them in. Seasonal vegetables can also enhance the flavors. In summer, add bell peppers or zucchini. In fall, try roasted butternut squash or sweet potatoes. These swaps keep the salad fresh and exciting all year long. To keep your Lemon Herb Couscous Salad fresh, use an airtight container. Glass or plastic containers with tight lids work well. Store the salad in the fridge. It will stay good for about three days. Always check for any signs of spoilage before eating. You can freeze your couscous salad, but it may change in texture. To freeze, place the salad in a freezer-safe bag. Remove as much air as you can before sealing. This helps prevent freezer burn. The salad can last for up to three months in the freezer. When you're ready to eat, thaw the salad in the fridge overnight. This keeps it safe and helps maintain flavor. Once thawed, give it a gentle toss and check for freshness before serving. If needed, add a little olive oil and lemon juice to refresh the taste. You can keep lemon herb couscous salad in the fridge for about three days. After that, the veggies may lose their crunch. To enjoy the best flavor and texture, eat it within this time frame. Yes, you can make this salad ahead of time. It tastes even better after sitting for a while. Prepare the salad a few hours before serving. This allows the flavors to blend and develop. Just store it in an airtight container in the fridge. If you don’t have couscous, try quinoa or bulgur wheat. Both options work well and provide a nice texture. You can also use rice, but it may change the flavor slightly. Choose what fits your taste and pantry best! This blog post covered a fresh lemon herb couscous salad. We discussed the main ingredients, like cucumbers, tomatoes, and herbs. I guided you through step-by-step instructions on preparation and assembly. You learned tips to perfect your couscous texture and enhance flavors. We explored variations, making it protein-packed with chicken or shrimp, plus how to store leftovers. In conclusion, this salad is quick, healthy, and adaptable. Enjoy making it your own for any meal. Happy cooking!

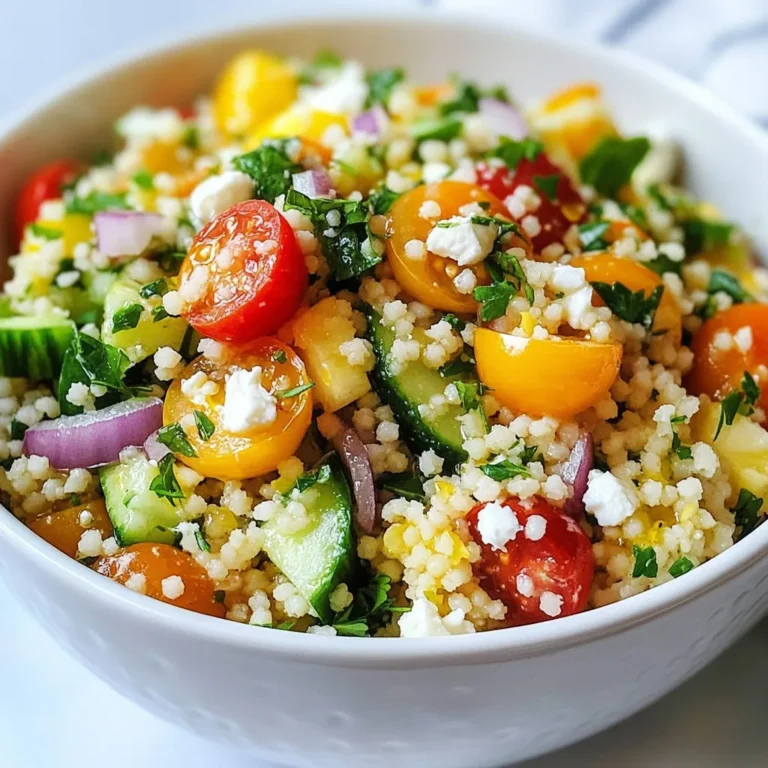
Lemon Herb Couscous Salad Fresh and Flavorful Delight

To make Garlic Butter Shrimp Zoodles, gather these simple ingredients: - 2 medium zucchinis (zoodles) - 1 pound large shrimp, peeled and deveined - 4 tablespoons unsalted butter - 4 cloves garlic, minced - 1/2 teaspoon red pepper flakes (optional) - Salt and pepper to taste - 1 tablespoon fresh lemon juice - 1/4 cup freshly grated Parmesan cheese - 2 tablespoons fresh parsley, chopped You can easily swap some ingredients for different flavors. Here are a few ideas: - Zucchini: Use yellow squash or carrots for a colorful twist. - Shrimp: Substitute with chicken or tofu for a different protein. - Butter: Olive oil works well if you want a dairy-free option. - Parmesan: Nutritional yeast gives a cheesy flavor for a vegan dish. Feel free to mix and match to suit your taste! Choosing the right shrimp is key to a tasty dish. Here are tips to find the best: - Freshness: Look for shrimp that smell clean and fresh, not fishy. - Color: Bright and translucent shrimp are ideal. Avoid discolored or dull-looking ones. - Size: Large shrimp (16-20 count) are perfect for this recipe. They hold up well in cooking. - Source: Buy from reliable markets that practice sustainable fishing. With these tips, you can ensure your Garlic Butter Shrimp Zoodles are a hit! {{ingredient_image_1}} To start, you need two medium zucchinis. Use a spiralizer to create zoodles. If you lack a spiralizer, grab a vegetable peeler. Cut the zucchinis into thin strips. Set your zoodles aside on a plate. This step gives your dish a fresh base. Grab a large skillet and melt two tablespoons of unsalted butter over medium heat. Once melted, add four cloves of minced garlic. If you like some heat, toss in half a teaspoon of red pepper flakes. Sauté for about one minute. You want the garlic to smell great but not burn. Now, add one pound of large shrimp in a single layer. Season with salt and pepper. Cook for two to three minutes on each side. The shrimp should turn pink and opaque. Once done, remove the shrimp from the skillet and set them aside. In the same skillet, add the remaining two tablespoons of butter. Let it melt, then add your zoodles. Sauté for about two to three minutes. You want them tender but still slightly crisp. Avoid overcooking to keep them from getting mushy. After that, return the shrimp to the skillet. Drizzle one tablespoon of fresh lemon juice over everything. Sprinkle with a quarter cup of freshly grated Parmesan cheese. Toss gently to mix and heat through for one to two more minutes. This step blends all the flavors beautifully. When cooking shrimp, keep these tips in mind: - Buy fresh shrimp. Look for shrimp that smell like the ocean, not fishy. - Thaw shrimp correctly. If using frozen shrimp, thaw them in the fridge overnight. For a quick thaw, place them in cold water for 15-20 minutes. - Do not overcook. Shrimp cook fast. They turn pink in just a few minutes. If they curl tightly, they are overdone. To make your shrimp zoodles even tastier, try these options: - Add spices. Throw in more red pepper flakes for heat. Try smoked paprika for a smoky flavor. - Use herbs. Fresh basil or cilantro can add a burst of flavor. - Mix in vegetables. Sauté bell peppers or cherry tomatoes with the zoodles for added color and taste. If you run into problems, here are some solutions: - Shrimp are rubbery. This means they were overcooked. Watch them closely and remove them from the heat as soon as they turn pink. - Zoodles are mushy. This happens if they cook too long. Sauté them for just 2-3 minutes. They should be tender but still crisp. - Dish lacks flavor. Ensure you season well with salt, pepper, and lemon juice. Fresh herbs can also brighten up the dish. Pro Tips Choose the Right Zucchini: Look for firm, medium-sized zucchinis that are free from blemishes for the best texture and flavor. Perfectly Cooked Shrimp: Ensure shrimp are cooked just until they turn pink and opaque; overcooking can make them rubbery. Adjust the Spice Level: Customize the heat by adding more or less red pepper flakes according to your preference. Serving Suggestions: Pair with a side salad or garlic bread for a complete meal that’s sure to impress! {{image_2}} You can easily add more veggies to your Garlic Butter Shrimp Zoodles. Consider bell peppers, spinach, or broccoli. Chop them into small pieces, and add them when you sauté the shrimp. This boosts flavor and adds vitamins. You can also use carrots, which add a nice crunch and sweetness. While shrimp is tasty, you can switch it up. Try chicken, scallops, or even tofu for a vegetarian option. If you use chicken, cut it into bite-sized pieces and cook it the same way as shrimp. For tofu, press it to remove water, then cube it and sauté until golden. Each protein brings a unique taste and texture to the dish. This dish is already gluten-free, thanks to zoodles. If you want it dairy-free, skip the Parmesan or use a dairy-free cheese. Nutritional yeast can give a cheesy flavor without dairy. Just sprinkle it on top after cooking. These small tweaks let everyone enjoy this meal while meeting dietary needs. To store leftovers, place the Garlic Butter Shrimp Zoodles in an airtight container. Make sure to cool them to room temperature first. This helps keep the flavors fresh. Store the container in the fridge. Enjoy your dish within two days for the best taste. When ready to eat, gently reheat the zoodles and shrimp. You can use a skillet over low heat. Add a splash of water or broth to keep it moist. Stir often to heat evenly. Avoid high heat, as it can make the zoodles mushy. You can also use the microwave. Heat in short bursts, stirring in between. Freezing this dish is not the best option. The zucchini can become watery when thawed. If you must freeze it, separate the shrimp and zoodles. Store shrimp in one container and zoodles in another. Use freezer-safe bags or containers. Eat within a month for the best taste. When ready to use, thaw in the fridge overnight. Then, reheat as noted above. Zucchini noodles, or zoodles, are made from fresh zucchini. You can create them using a spiralizer. This tool cuts the zucchini into long, thin strands that look like pasta. Zoodles are low in carbs and calories, making them a great choice for many diets. They have a mild flavor, which pairs well with sauces and toppings. Yes, you can use frozen shrimp for this dish. Just make sure to thaw them first. Place the shrimp in a bowl of cold water for about 15 minutes. They will thaw quickly. Pat them dry before cooking. This helps them sear nicely and not steam. To avoid watery zoodles, follow these steps: - After spiralizing, sprinkle the zoodles with salt. Let them sit for 10 minutes. This helps draw out excess moisture. - Pat them dry with a paper towel before cooking. - Cook zoodles quickly over medium heat. This keeps them tender but firm. Avoid overcooking to keep them from getting mushy. - Serve zoodles right away for the best texture. Garlic Butter Shrimp Zoodles offer a tasty and healthy meal option. We covered key ingredients, cooking steps, and smart tips to make it better. I shared ways to adapt the recipe and store leftovers. In the end, this dish is not just easy to make; it’s also flexible. You can customize it to suit your needs. Enjoy trying out different flavors and ingredients. Happy cooking!

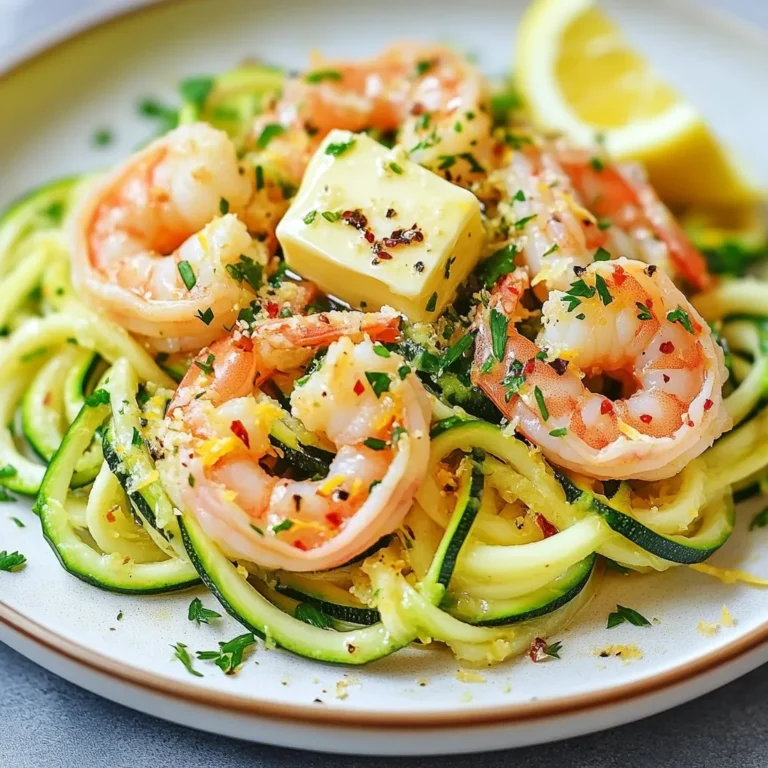
Garlic Butter Shrimp Zoodles Quick and Tasty Meal

- Olive oil - Diced onion - Minced garlic - Diced jalapeño - Black beans - Corn - Chicken or vegetable broth - Diced tomatoes with green chilies - Taco seasoning - Shredded cheddar cheese - Sour cream - Tortilla chips - Fresh cilantro - Salt and pepper These ingredients create a rich and tasty Loaded Nacho Soup. Each item adds a unique flavor. Olive oil gives a nice base to cook the onion. The onion softens and sweetens, while garlic adds a strong taste. A jalapeño adds heat, but you can remove the seeds to make it milder. Black beans and corn provide texture and protein. The broth makes the soup warm and comforting. Diced tomatoes with green chilies bring a fresh and tangy taste. Taco seasoning unites the flavors with its bold spices. As you finish the soup, add shredded cheddar cheese and sour cream. They make the soup creamy and rich. The tortilla chips add crunch on top. Fresh cilantro gives a bright finish. Adjust salt and pepper to your liking. This mix creates a delicious soup that feels like a warm hug. {{ingredient_image_1}} 1. Start by heating 1 tablespoon of olive oil in a large pot over medium heat. 2. Once the oil is hot, add 1 small diced onion. Sauté for about 4-5 minutes until the onion is soft. 3. Next, add 2 cloves of minced garlic and 1 diced jalapeño. Stir them for 1-2 minutes. This will make your kitchen smell amazing! 1. Now, stir in 1 can of drained and rinsed black beans and 1 can of drained corn. 2. Pour in 2 cups of chicken or vegetable broth. This adds depth to your soup. 3. Add 1 can of diced tomatoes with green chilies. Then, sprinkle in 1 tablespoon of taco seasoning. Mix everything well and bring it to a simmer. 1. Let the soup cook for 10-12 minutes. This allows the flavors to mix and meld. 2. After simmering, reduce the heat to low. Stir in 1 cup of shredded cheddar cheese and 1 cup of sour cream. Keep stirring until everything is melted and creamy. 3. Taste your soup and add salt and pepper as needed. Serve it hot in bowls, topped with extra cheese, a dollop of sour cream, tortilla chips, and chopped cilantro. Enjoy! For a vegan or vegetarian twist, swap chicken broth with vegetable broth. Use plant-based cheese to keep it dairy-free. You can also add more veggies, like bell peppers or zucchini, for extra texture and flavor. Perfecting the sauté is key. Cook the onion until it's soft and golden. This adds a rich flavor. When you add garlic and jalapeño, stir them for a minute or two. This will bring out their aromas. To achieve the desired soup consistency, simmer the soup long enough. If it’s too thick, add a bit more broth. If it’s too thin, let it cook longer. Stir often to blend all the flavors. The best toppings for Loaded Nacho Soup include extra cheese, a dollop of sour cream, and crispy tortilla chips. Chopped cilantro adds a fresh kick. You can also try sliced jalapeños for more heat. Pair this soup with sides like a simple salad or guacamole. A light beer or soda goes well, too. Enjoying your soup with these sides makes for a perfect meal. Pro Tips Adjust the Heat: If you prefer a milder soup, remove all seeds and membranes from the jalapeño, or substitute with a milder pepper like a green bell pepper. Mix Up the Toppings: Enhance the flavor by adding toppings like diced avocado, sliced jalapeños, or pickled red onions for an extra layer of taste. Make it Vegan: To keep this soup plant-based, use vegetable broth and substitute the sour cream and cheese with dairy-free alternatives. Batch Cooking: This soup freezes well! Make a double batch and freeze half for a quick and easy meal later on. {{image_2}} To make your soup spicy, add more heat. You can use extra jalapeños or add diced serrano peppers. If you want even more flavor, try using a dash of hot sauce. Choose peppers based on your taste. For a fun twist, add chipotle peppers for a smoky kick. Remember, the heat level is up to you! Cheese makes everything better! You can use different kinds of cheese. Try Monterey Jack or pepper jack for a nice twist. Layering flavors works great here. Use cream cheese to make the soup creamy. Mix in some queso for a cheesy explosion. Don't forget to add more cheese on top for a melty finish. For a meat-free option, omit the chicken broth. Use vegetable broth instead. This soup still has lots of flavor! Add more vegetables like bell peppers, zucchini, or even spinach. You can also throw in some avocado for creaminess. This way, you keep it hearty and delicious without meat. To store leftover Loaded Nacho Soup, let it cool first. Pour the soup into an airtight container. Make sure to close the lid tightly. This helps keep it fresh. Store the soup in the fridge for up to three days. When you are ready to reheat, pour the soup into a pot. Heat it over medium heat. Stir it often to stop it from burning. If it seems too thick, add a splash of broth or water to loosen it. You can also microwave it in a microwave-safe bowl. Cover it with a paper towel to prevent splatters. Freezing Loaded Nacho Soup is a great way to save some for later. Start by letting the soup cool completely. Then, transfer it into freezer-safe bags or containers. Remove as much air as possible before sealing. This prevents freezer burn. You can freeze the soup for up to three months. To defrost, place the soup in the fridge overnight. If you need it fast, you can use the microwave. Once defrosted, reheat it in a pot over medium heat. Add a little broth or water if needed. Stir until hot. You can enjoy your tasty soup again! Loaded Nacho Soup lasts about 3 to 4 days in the fridge. Store it in an airtight container. This soup keeps its flavor and texture well during this time. Always check for any signs of spoilage before eating. Yes, you can make Loaded Nacho Soup in advance. This dish is great for meal prep. Just cook it, let it cool, and store it in the fridge. You can also freeze it for up to 2 months. If you freeze it, thaw it overnight in the fridge before reheating. You can serve Loaded Nacho Soup with several tasty options. Tortilla chips are a must for crunch. You might also enjoy it with fresh guacamole or a simple salad. For drinks, a cold soda or a light beer pairs well too. In this article, we explored how to make delicious Loaded Nacho Soup, from essential ingredients to serving tips. You learned about preparing the base with sautéed onion, garlic, and jalapeño. We also shared techniques for combining flavors and ideas for variations, like vegetarian or spicy options. Remember, you can store leftovers easily and enjoy them later. Enjoy this fun and tasty soup with friends or family. Dive into your next cooking adventure with Loaded Nacho Soup!

Loaded Nacho Soup Savory Comfort Food Dish

PREV 1 … 49 50 51 … 65 NEXT
tasty trail blazer

explore

DessertsDinnerAppetizersDrinks

Our Policies

  • Cookie Policy
  • Copyright Policy
  • Disclaimer
  • GDPR Policy
  • Terms Of Use
Back to Top
  • About
  • Contact Us
  • Privacy Policy
© 2025 tasty trail blazer