FREE DINNER EBOOK! Get your copy!
  • Cookie Policy
  • GDPR Policy
  • Disclaimer
  • Terms Of Use
  • Visit my other site: Fun Cookie Recipes
tasty trail blazer
  • Home
  • Dinner
  • Desserts
  • Drinks
  • Appetizers
  • Contact
  • About
  • Privacy Policy
  • Home
  • Dinner
  • Desserts
  • Drinks
  • Appetizers
  • Contact
  • About
  • Privacy Policy
  • Cookie Policy
  • GDPR Policy
  • Disclaimer
  • Terms Of Use
Visit my other site: Fun Cookie Recipes

HOME / CATEGORIES /

Latest

- 1 lb ground chicken - 1 tablespoon sesame oil - 2 cloves garlic, minced - 1 tablespoon ginger, minced - 2 tablespoons Gochujang (Korean chili paste) - 1 tablespoon soy sauce (or tamari for gluten-free) - 1 tablespoon honey or maple syrup - 1 teaspoon rice vinegar - 1 cup shredded carrots - 1 bell pepper, diced (red or yellow for sweetness) - 4 green onions, chopped - 1 head of butter or romaine lettuce, leaves separated - Sesame seeds for garnish The main ingredient in this dish is ground chicken. It cooks quickly and absorbs the flavors well. Using sesame oil adds a rich, nutty taste that enhances the chicken. Garlic and ginger bring warmth and depth to the dish. Gochujang delivers that spicy kick, while soy sauce adds saltiness. For a hint of sweetness, you can use honey or maple syrup. Rice vinegar gives a tangy note that balances the flavors. Fresh vegetables, like shredded carrots and bell peppers, add crunch and color. You will need lettuce leaves to wrap everything up. These will hold the filling and make it easy to eat. Lastly, sesame seeds are optional but add a nice touch. Each ingredient plays a key role in creating a fresh and flavorful bite. {{ingredient_image_1}} 1. Heating the skillet and sautéing aromatics First, grab a large skillet. Heat 1 tablespoon of sesame oil over medium heat. Add 2 cloves of minced garlic and 1 tablespoon of minced ginger. Sauté for about 1 minute. The smell will fill your kitchen and make you hungry! 2. Cooking the ground chicken Next, add 1 pound of ground chicken to the skillet. Use a spatula to break it apart. Cook for 5 to 7 minutes until the chicken turns white and is no longer pink. This step gives your dish a nice base. 3. Adding sauces and simmering Now, stir in 2 tablespoons of Gochujang, 1 tablespoon of soy sauce, 1 tablespoon of honey, and 1 teaspoon of rice vinegar. Mix it well. Let this mixture simmer for 3 to 4 minutes. The flavors will meld together, making it rich and spicy. 4. Incorporating vegetables Finally, take the skillet off the heat. Mix in 1 cup of shredded carrots, 1 diced bell pepper, and 4 chopped green onions. Stir them in gently. This adds crunch and freshness to your dish. 1. Preparing the lettuce cups Take a head of butter or romaine lettuce. Carefully separate the leaves. You should have enough to hold the spicy chicken filling. 2. Serving suggestions and garnishing Spoon a generous amount of the spicy chicken mixture into the center of each lettuce leaf. Sprinkle some sesame seeds on top for a tasty crunch. Serve these cups right away. Let each guest roll their own. Enjoy every bite! - Ensuring chicken is cooked properly To cook the chicken right, use a large skillet. Heat it over medium heat. Add the chicken and break it up with a spatula. Cook for 5-7 minutes until it turns white and no longer pink. This step ensures safety and good texture. - Adjusting spice levels If you want less heat, reduce the Gochujang. Start with 1 tablespoon and taste the mix. You can always add more. For extra spice, try adding a pinch of red pepper flakes or more Gochujang. - Flavor enhancements For a richer taste, add more ginger and garlic. Fresh herbs like cilantro or mint can add brightness. You can also squeeze fresh lime juice for a zesty kick just before serving. - Presentation ideas Use a large platter for serving. Arrange the lettuce leaves around the spicy chicken mix. This not only looks appealing but makes it easy for guests to serve themselves. - Perfect pairings for the dish These lettuce cups pair well with a side of steamed rice or quinoa. For drinks, serve with a light beer or iced tea. You can also add a simple cucumber salad for freshness. Pro Tips Use Fresh Ingredients: Fresh garlic and ginger will enhance the flavor of your dish significantly. Always opt for fresh over pre-minced or powdered versions. Adjust Spice Level: If you prefer a milder flavor, reduce the amount of Gochujang or mix in some plain chili paste to control the heat. Prep Ahead: You can prepare the chicken mixture in advance and store it in the refrigerator for up to 2 days. Just reheat before serving! Choice of Lettuce: Butter lettuce provides a nice texture and flexibility for wrapping. However, if you want a crunchier option, try using Romaine lettuce. {{image_2}} You can change the protein in this dish. Try ground turkey for a leaner option. For a plant-based choice, swap in tofu. Just crumble the tofu before cooking. You can also play with sauces. Instead of Gochujang, use sriracha for a different heat. Try a sweet chili sauce for a milder taste. If you need gluten-free options, use tamari instead of soy sauce. This keeps the dish safe for those with gluten issues. To make the recipe vegetarian or vegan, use crumbled tempeh instead of chicken. You can also replace honey with maple syrup for a vegan touch. These swaps keep the flavors bold and exciting. To keep your spicy Korean chicken fresh, store it in the fridge. Place any leftover chicken in an airtight container. This helps keep the flavors intact and prevents spills. Use small containers for easier access. Enjoy the leftovers within three days for the best taste. If you want to save some for later, you can freeze the chicken mixture. Let it cool first, then transfer it to a freezer-safe bag. Remove as much air as possible to avoid freezer burn. Label the bag with the date. You can freeze it for up to three months. When you’re ready to eat, thaw it in the fridge overnight. Reheat it in a skillet over medium heat until it’s hot. Add a splash of water if it looks dry. This way, you can enjoy your spicy chicken lettuce cups any time! To adjust the spice, change the amount of Gochujang. For less heat, use less. You can also add more honey to balance the spice. If you want more heat, add extra Gochujang or a dash of chili flakes. This way, you can find the right level for your taste. Yes, you can use pre-cooked chicken. Just shred it and add it to the skillet with the sauces. Cook for a few minutes to heat it through. This saves time and still gives you great flavor. Some tasty sides include: - Steamed rice - Kimchi - Cucumber salad - Pickled radishes These options pair well with the spicy chicken and add more flavor to your meal. Store leftovers in an airtight container. They will last in the fridge for up to three days. You can also freeze them for up to a month. Just remember to reheat them well before serving. Enjoy! This blog post covered how to make Spicy Korean Chicken Lettuce Cups. We explored the key ingredients, like ground chicken and gochujang, along with step-by-step instructions. You learned helpful cooking and serving tips, variations for dietary needs, and how to store leftovers properly. In the end, these lettuce cups are a fun and tasty meal. They are easy to make and can fit many preferences. I hope you try them soon and enjoy the flavors they bring!

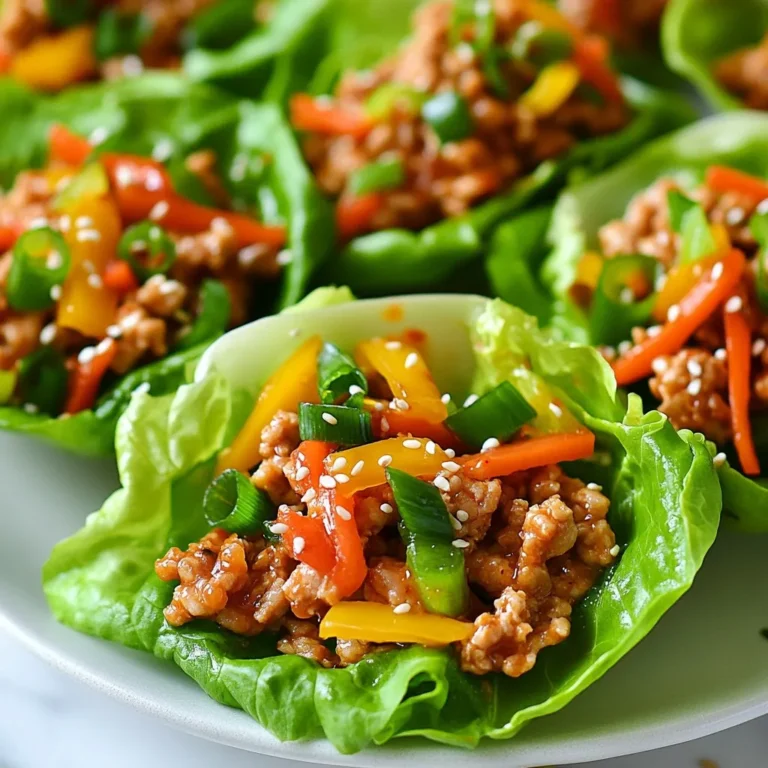
Spicy Korean Chicken Lettuce Cups Fresh and Flavorful

- Noodles: You can choose from: - 200g spaghetti - 200g udon - 200g rice noodles - Aromatics: The key flavors here are: - 6 cloves garlic, finely minced - 2 spring onions, thinly sliced - 1 tablespoon fresh cilantro, chopped - Oils and Seasoning: These add depth: - 4 tablespoons olive oil - 1 tablespoon soy sauce - 1 tablespoon sesame oil - 2 teaspoons red chili flakes (adjust this to your taste) - Garnishes: For final touches: - Salt, to taste - Lime wedges, for serving Using these fresh ingredients makes the dish vibrant and full of flavor. The noodles are the base, while garlic and spring onions add warmth and brightness. Olive oil brings richness, and soy and sesame oil give it that umami kick. The chili flakes add just the right amount of heat. Don't forget the lime; it adds a refreshing zing! {{ingredient_image_1}} To cook the noodles, fill a large pot with salted water. Bring it to a boil. Add your 200g of noodles. If you use spaghetti, cook for about 8-10 minutes. Udon noodles need about 5-7 minutes, while rice noodles only take about 3-5 minutes. Always check the package for exact times. The goal is to achieve an al dente texture. This means the noodles should be firm but not hard. To do this, taste them a minute or two before the time is up. Drain the noodles and set aside some pasta water. This water helps adjust the sauce later. In a large skillet, pour 4 tablespoons of olive oil. Heat it over medium heat. Then, add 6 finely minced garlic cloves. Stir gently and watch closely. The garlic should turn fragrant and lightly golden in about 2 minutes. Be careful not to let it burn. Burnt garlic tastes bitter, which you want to avoid at all costs. After the garlic is ready, add 2 teaspoons of red chili flakes. Stir for another minute. This step adds heat and depth to your dish. Now it’s time to combine everything. Add the cooked noodles to the skillet. Turn the heat to medium-high. Pour in 1 tablespoon of soy sauce and 1 tablespoon of sesame oil. Toss the noodles well so they are evenly coated. If the sauce looks thick, add a splash of the reserved pasta water. This helps to loosen it up. Next, stir in 2 thinly sliced spring onions and 1 tablespoon of chopped cilantro. Season with salt to taste and mix everything well. Your noodles are now ready to serve! - To boost the flavors, try adding ginger or sesame seeds. Both add depth. - Always choose fresh garlic and quality oils. Good ingredients make a big difference. - Don’t let the garlic brown too much. It can taste bitter if overcooked. - Adjust the spice to fit your taste. Start with less, then add more if needed. Pro Tips Perfect Noodle Texture: Make sure to cook the noodles al dente to maintain a pleasant bite. This prevents them from becoming mushy when tossed with the garlic chili oil. Garlic Care: Keep a close eye on the garlic while sautéing; it can quickly go from golden to burnt. Stir continuously to ensure even cooking. Adjusting Heat: Taste your garlic chili oil and adjust the chili flakes according to your heat preference. Start with less if you're unsure, as you can always add more. Fresh Garnishes: Don’t skip the spring onions and cilantro; they add freshness and elevate the dish’s flavor profile. Add them just before serving for the best taste. {{image_2}} You can add protein to garlic chili oil noodles for a heartier meal. Chicken, shrimp, or tofu work great. - Chicken: Cut chicken breast into bite-sized pieces. Sauté in the skillet until fully cooked. This takes about 5-7 minutes. Add it right after the garlic. - Shrimp: Use peeled and deveined shrimp. Cook them for 3-4 minutes until they turn pink. Toss them in with the noodles. - Tofu: Use firm tofu. Dice it and pan-fry until golden. This adds a nice texture. Add it when mixing with the noodles. Adjust cooking times based on the protein you choose. Always ensure your protein is cooked through for safety and taste. You can easily make this dish vegetarian or vegan. Here are some tips. - Substitutes: Use soy sauce or tamari for a gluten-free option. Replace any non-vegan ingredients with plant-based versions. - Noodle Choices: Rice noodles are a great gluten-free option. Udon and spaghetti also work, but check the labels for gluten. These simple swaps keep the dish tasty while meeting dietary needs. Enjoy the flexibility of this recipe! To keep your garlic chili oil noodles fresh, first let them cool down. Once cool, place them in an airtight container. This helps keep moisture in and air out. Store the container in the fridge. The noodles can last for up to three days. If you want to keep them longer, you can freeze them. Use freezer-safe bags or containers for the best results. Just remember to label them with the date. When you're ready to eat your leftovers, reheating is key. For the best taste, use the stovetop. Heat a small amount of oil in a pan over medium heat. Add the noodles and stir. This keeps them from getting sticky. If the noodles seem dry, add a splash of water or broth. You can also use a microwave. Place the noodles in a bowl and cover with a damp paper towel. Heat in short bursts, stirring in between to keep them even. Enjoy them warm and fresh! Garlic chili oil noodles are a simple yet flavorful dish. This dish blends noodles with garlic and chili oil. It has roots in Asian cuisine, often found in Chinese and Thai meals. The dish highlights the bold flavors of garlic and the kick from chili oil. You can use any type of noodle, like spaghetti, udon, or rice noodles. Each brings its own twist to the dish. To add more spice, try a few options. Increase the red chili flakes in the recipe. You can also add fresh sliced chili peppers. Another great addition is a splash of hot sauce, like sriracha. If you like it smoky, try using smoked chili powder. Mix these in while cooking the garlic. Adjust the spice to your liking for the perfect kick. Yes, you can make garlic chili oil noodles in advance. Cook the noodles and set them aside. Prepare the garlic chili oil, then mix them when ready to serve. Store the noodles in an airtight container in the fridge for up to three days. When reheating, add a splash of water to keep them moist. Enjoy your delicious noodles anytime! This blog post covered the key steps to make garlic chili oil noodles. You learned about essential ingredients, from different noodles to tasty oils and garnishes. I shared simple cooking methods and tips to avoid common mistakes. I also highlighted variations for proteins and storage advice. In conclusion, you can easily customize this dish to suit your taste. Perfect the flavors and enjoy your delicious meal. Happy cooking!

Garlic Chili Oil Noodles Flavorful and Simple Recipe

To make this tasty dish, you will need: - 12 oz ditalini pasta - 1 lb Italian sausage (sweet or spicy, casings removed) - 1 medium onion, finely chopped - 2 cloves garlic, minced - 1 cup heavy cream - 1 cup chicken broth - 1 cup diced tomatoes, canned (with juices) - 1 teaspoon dried Italian herbs (oregano, basil, thyme) - Salt and pepper to taste - ½ cup grated Parmesan cheese - 2 tablespoons olive oil - Fresh basil leaves for garnish Using good-quality ingredients makes a big difference. Choose fresh Italian sausage for better flavor. Look for firm, bright tomatoes in cans. They should have a rich, deep color. Fresh herbs add more taste than dried ones. Always use real Parmesan cheese, not the powdered kind. Heavy cream should be fresh and thick for a creamy sauce. If you have dietary needs, I have some easy swaps for you. - For gluten-free pasta, use a gluten-free ditalini or any other shape you like. - If you want a lighter version, try using half-and-half instead of heavy cream. - For a meat-free option, use plant-based sausage. It gives great flavor without meat. - You can skip the cheese or use a dairy-free alternative if you avoid dairy. These options help everyone enjoy this dish, no matter their needs! {{ingredient_image_1}} To cook ditalini pasta, start by boiling water in a large pot. Add a good amount of salt to the water. This adds flavor to the pasta. Once the water boils, add 12 ounces of ditalini pasta. Cook it according to the package directions until it is al dente, which means firm to the bite. This usually takes about 8-10 minutes. After cooking, drain the pasta in a colander. Do not forget to save a cup of pasta water. This will help adjust the sauce later. Next, it’s time to sauté the sausage. In a large skillet, add 2 tablespoons of olive oil over medium heat. Once the oil is hot, add 1 pound of Italian sausage, removing the casings first. Use a wooden spoon to break the sausage into small pieces. Cook it for about 5-7 minutes until it is browned and no longer pink. This step is key for depth of flavor. After cooking, you will have a delicious base for your dish. Now, let’s combine everything for that creamy texture. Add 1 medium finely chopped onion to the skillet. Cook it until it becomes soft and clear, about 3-4 minutes. Next, stir in 2 cloves of minced garlic and cook for another minute. Then, pour in 1 cup of chicken broth, 1 cup of heavy cream, and 1 cup of canned diced tomatoes with their juices. Add 1 teaspoon of dried Italian herbs and salt and pepper to taste. Allow this mixture to simmer gently for about 5 minutes. After simmering, add the drained ditalini pasta to the skillet. Mix everything well. If the sauce is too thick, add some of the reserved pasta water until you reach your desired creaminess. Finally, stir in ½ cup of grated Parmesan cheese. This will make everything rich and cheesy. Taste and adjust the seasoning if needed. Now, you are ready to plate your creamy pasta! If your sauce seems too thin, don't worry! You can fix this easily. First, let the sauce simmer longer. This helps it reduce and thicken. If that doesn't work, add a bit more cheese. Parmesan cheese thickens well. You can also add a tablespoon of cornstarch mixed with water. Stir it in slowly until the sauce reaches the right thickness. Leftovers can be great for lunch or dinner! Store any extra pasta in an airtight container. It keeps well in the fridge for about 3 days. If you want to store it longer, try freezing it. Use a freezer-safe container and it can last up to 3 months. Just remember to label it! Presentation matters! Serve the pasta in nice bowls for a fancy touch. Add fresh basil leaves on top for color and flavor. A sprinkle of extra Parmesan cheese looks great too. For a little crunch, add toasted breadcrumbs on the top. This will impress your guests and make your meal Instagram-worthy! Pro Tips Use Fresh Ingredients: Always opt for fresh herbs and high-quality sausage to enhance the flavor of your pasta. Save Pasta Water: The starchy pasta water can help adjust the sauce's consistency while adding extra flavor. Adjust Creaminess: If you prefer a lighter sauce, reduce the amount of cream or substitute with half-and-half. Customize Your Dish: Feel free to add vegetables like spinach or bell peppers for added nutrition and color. {{image_2}} You can change the flavor by using different types of sausage. Sweet Italian sausage gives a nice, mild taste. Spicy sausage adds a kick that wakes up your taste buds. For a twist, try chicken or turkey sausage. They are leaner but still pack a punch. You can even use chorizo for a bold, smoky flavor. Each type of sausage brings its own charm to the dish. If you want a meat-free dish, don't worry. You can use plant-based sausage instead. These options are easy to find in stores today. They mimic the texture of meat and soak up flavors well. You can also use mushrooms as a hearty base. Sauté them until they are golden and soft. Add some chopped bell peppers for sweetness and color. This gives you a rich, satisfying meal without meat. Seasonal ingredients can brighten your pasta dish. In spring, add fresh peas for a pop of color and sweetness. In summer, use ripe tomatoes straight from the garden. In fall, roasted butternut squash adds a creamy texture. In winter, hearty greens like kale or spinach can add depth. Each season brings new flavors to explore. Don't be afraid to mix and match as you go. Your pasta will always taste fresh and exciting! After enjoying your creamy ditalini pasta, store leftovers in an airtight container. Let the pasta cool to room temperature before sealing. This way, it won't steam and get soggy. Store it in the fridge for up to three days. Make sure to label the container with the date, so you know when to use it. If you want to save this dish for later, freezing is a great option. Portion the pasta into freezer-safe bags or containers. Leave some space at the top for expansion. You can freeze it for up to three months. When you're ready to eat, just thaw it overnight in the fridge before reheating. To reheat, use a skillet on low heat. Add a splash of chicken broth or cream to keep it creamy. Stir frequently until hot. You can also microwave it; just cover the bowl with a lid or plate. Heat it in short bursts, stirring in between. This helps it heat evenly and stay tasty! It takes about 30 minutes to prepare creamy Marry Me ditalini sausage pasta. You will spend around 10 minutes gathering and prepping your ingredients. Cooking the pasta and making the sauce usually takes the remaining 20 minutes. This makes it a quick and easy meal for busy days. Yes, you can make this recipe ahead of time. To do this, cook the pasta and sauce as directed. Then, let everything cool before storing it in an airtight container. It can stay fresh in the fridge for up to three days. When you are ready to eat, just reheat on the stove. You may need to add a splash of chicken broth or cream to bring back the creamy texture. Creamy Marry Me ditalini sausage pasta pairs well with a fresh salad. A simple green salad with a light vinaigrette works great. You can also serve garlic bread on the side for a tasty addition. If you want to add more veggies, roasted vegetables or steamed broccoli make excellent choices too. This blog post covered all you need for Creamy Marry Me Ditalini Sausage Pasta. We explored key ingredients and their quality, plus alternatives for dietary needs. I shared step-by-step instructions for cooking the dish perfectly. Tips on thickening sauce and storing leftovers rounded out our approach. Remember, this dish allows for creativity with variations and offers easy storage options. You can enjoy a delightful meal that fits your taste and needs. Dive in and make this recipe your own!

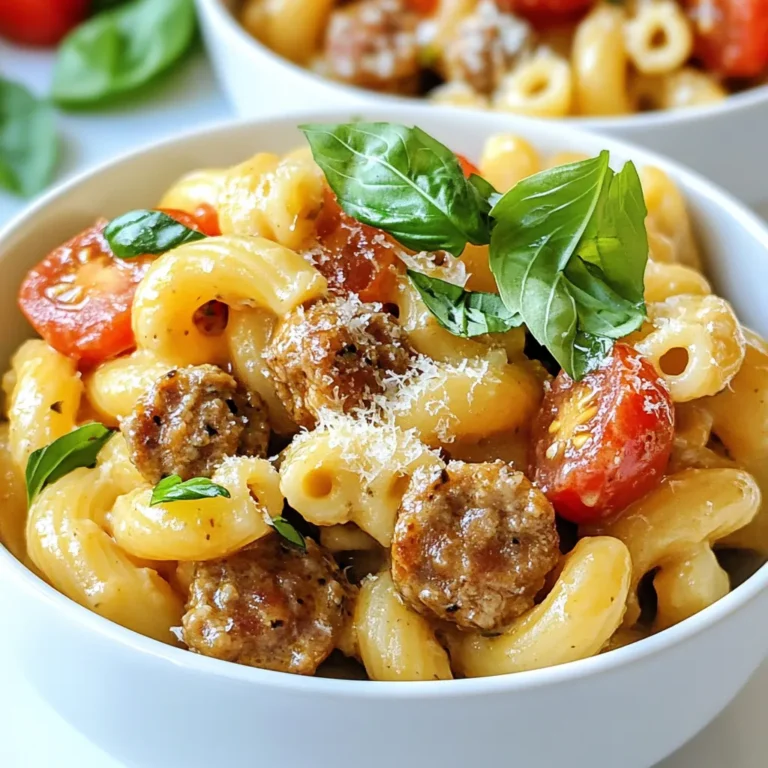
Creamy Marry Me Ditalini Sausage Pasta Delight

To make these delightful cookies, you need the following main ingredients: - 1 cup unsalted butter, softened - ½ cup powdered sugar - 2 cups all-purpose flour - ½ cup pistachios, finely chopped - 2 teaspoons rosewater - ¼ teaspoon salt - 1 tablespoon cornstarch (for tenderness) These ingredients blend to create a soft, crumbly texture with rich flavor. The pistachios add a nice crunch, while the rosewater gives a unique floral hint. You will need a few kitchen tools for this recipe: - Mixing bowls - Electric mixer or whisk - Measuring cups and spoons - Baking sheet - Parchment paper - Wire rack for cooling These tools help you mix, bake, and cool your cookies with ease. If you want to enhance your cookies, consider these optional ingredients: - Extra powdered sugar for dusting - Edible rose petals for garnish These extras add a beautiful touch and a hint of sweetness, making your cookies look and taste even better. {{ingredient_image_1}} Start by preheating your oven to 350°F (175°C). This ensures even baking. Next, line a baking sheet with parchment paper. This will help the cookies not stick. You want a clean surface for your delightful cookies. In a large bowl, add the softened butter and powdered sugar. Mix them together until it's light and fluffy. This should take about 2 to 3 minutes. Then, add the rosewater and mix. The rosewater gives a lovely floral taste. In a separate bowl, whisk together the flour, cornstarch, and salt. This step is essential for the right texture. Gradually add this dry mix to the butter mix. Stir until just combined, but do not over-mix. You want a soft dough. Finally, gently fold in the finely chopped pistachios. This adds a nice crunch and flavor. Now, take heaping tablespoons of dough and roll them into balls. Flatten them slightly with your palms. Aim for cookies about ½ inch thick. Place them on the baking sheet, leaving space between each cookie. They will spread a little while baking. Bake the cookies in the oven for 12 to 15 minutes. You want the edges to turn lightly golden. Once done, take them out and let them sit for 5 minutes. This helps them set. After that, transfer them to a wire rack to cool completely. If you like, dust them with extra powdered sugar for a sweet finish. Enjoy your homemade Pistachio Rosewater Shortbread! Using softened butter is key to great shortbread. Softened butter mixes well with sugar, making the dough light. If your butter is too cold, it won't cream properly. Let it sit out for about 30 minutes before you start. This helps your cookies turn out tender and flaky. Rosewater adds a unique taste, but too much can overwhelm. Start with 2 teaspoons, but feel free to adjust. If you prefer a sweeter cookie, add more powdered sugar, but do this slowly. Taste the dough after mixing. This way, you can find the right balance of flavors for your perfect cookie. To achieve even browning, space your cookies well on the baking sheet. Leave room for them to spread. Bake in a preheated oven at 350°F (175°C). Check them around the 12-minute mark. They should be lightly golden on the edges. If they brown too quickly, rotate the baking sheet halfway. This helps them bake evenly. Pro Tips Chill the Dough: For a firmer dough that is easier to shape, chill it in the refrigerator for about 30 minutes before rolling into balls. Use Fresh Ingredients: Ensure that your rosewater is fresh and not expired for the best flavor in your cookies. Perfect Baking Time: Keep an eye on the cookies as they bake; they should be lightly golden at the edges but still soft in the center when you take them out. Storage Tips: Store the cookies in an airtight container at room temperature for up to a week to maintain their freshness. {{image_2}} You can swap pistachios for almonds or walnuts. Almonds give a sweet crunch. Walnuts add a rich, earthy taste. Chop them finely, just like the pistachios. Use the same amount, ½ cup. Each nut brings its own charm to the cookies. For a zesty twist, add lemon or orange zest. Use about 1 teaspoon of zest. It brightens the flavor and adds freshness. Mix the zest into the butter and sugar. This change makes your cookies sing with citrus notes. To make these cookies gluten-free, swap all-purpose flour with gluten-free flour. Look for a blend that works for baking. The texture may change a bit but will still taste great. You can also use almond flour for a nutty flavor. Just remember to adjust the amount, as almond flour is denser. To keep your pistachio rosewater shortbread fresh, store them in an airtight container. This helps lock in moisture and flavor. You can place parchment paper between layers of cookies to prevent sticking. Keep them in a cool, dark place, away from heat or sunlight. This method preserves their delicate texture and taste. Freezing is a great way to extend the life of your cookies. First, let the cookies cool completely. Then, arrange them in a single layer on a baking sheet. Place the sheet in the freezer for about an hour. Once frozen, transfer the cookies to a freezer-safe bag. Remove as much air as possible before sealing the bag. They can last up to three months in the freezer. Pistachio rosewater shortbread cookies can last up to a week at room temperature. If stored properly in an airtight container, they remain fresh and tasty. When frozen, they keep well for up to three months. Just remember to thaw them at room temperature before enjoying their wonderful flavor and texture. Rosewater has a sweet and floral taste. It adds a unique flavor to desserts. When you use it in cookies, you get a lovely aroma and taste. It can remind you of a rose garden. Some find it very fragrant, while others may think it is strong. Use it in small amounts, and adjust to your taste. Yes, you can use margarine instead of butter. Margarine will change the taste a bit. It may not be as rich, but the cookies will still be tasty. Just make sure you use the same amount as the butter. Soft margarine works best for mixing. To make these cookies vegan, swap butter for a plant-based butter. You can also use coconut oil. Instead of rosewater, use a splash of vanilla extract for flavor. This will keep the cookies delicious and fun. Just follow the same steps in the recipe. Enjoy your vegan treat! In this blog post, we explored how to make delicious Pistachio Rosewater Shortbread. We covered key ingredients, tools, and optional enhancements. I provided clear steps for preparation, mixing, and baking. You learned tips on texture, flavor balance, and even baking. We discussed fun variations and how to store your cookies. These cookies offer a unique taste and can be customized to fit your needs. Try making them today for a delightful treat. Happy baking!

Pistachio Rosewater Shortbread Delightful Cookie Recipe

- 1 pound ground turkey - 1/2 cup breadcrumbs (preferably whole wheat) - 1/4 cup grated Parmesan cheese - 1/4 cup fresh parsley, chopped - 1 tablespoon fresh mint, chopped - 2 cloves garlic, minced - 1 teaspoon dried oregano - 1 teaspoon salt - 1/2 teaspoon black pepper - 1 egg, lightly beaten - 1 tablespoon olive oil (for cooking) - 1 cup plain Greek yogurt - 1/2 cucumber, grated and excess moisture squeezed out - 1 clove garlic, minced - 2 tablespoons fresh lemon juice - 1 tablespoon fresh dill, chopped - Salt to taste You can swap ground turkey for lean chicken or beef. Use gluten-free breadcrumbs if needed. For a dairy-free option, try using a plant-based yogurt. Fresh herbs add great flavor, but you can use dried herbs if fresh ones are not available. If you want more crunch, add finely chopped bell peppers to the meatball mix. For a zesty twist, add some lemon zest to your tzatziki sauce. Always taste your tzatziki before serving and adjust the salt or lemon juice as needed. {{ingredient_image_1}} To make the tzatziki sauce, start with a medium bowl. Combine 1 cup of plain Greek yogurt, 1/2 grated cucumber, 1 minced clove of garlic, 2 tablespoons of fresh lemon juice, and 1 tablespoon of fresh dill. Mix all the ingredients well. Taste it and add salt as needed. Cover the bowl and put it in the fridge. This lets the flavors blend while you work on the meatballs. Grab a large mixing bowl for the turkey meatball mixture. Add 1 pound of ground turkey, 1/2 cup of whole wheat breadcrumbs, and 1/4 cup of grated Parmesan cheese. Next, toss in 1/4 cup of chopped fresh parsley, 1 tablespoon of chopped fresh mint, and 2 minced garlic cloves. Add 1 teaspoon of dried oregano, 1 teaspoon of salt, and 1/2 teaspoon of black pepper. Finally, crack 1 egg into the bowl. Mix everything until just combined. Be careful not to over-mix, as this can make the meatballs tough. Heat 1 tablespoon of olive oil in a large skillet over medium heat. Once the oil is hot, add the meatballs. Cook them in batches to avoid overcrowding. Each batch needs about 6 to 8 minutes. Turn the meatballs occasionally. They should be golden brown and reach an internal temperature of 165°F. After cooking, place them on a serving platter. For a finishing touch, drizzle with a bit of olive oil if you like. Serve warm with tzatziki sauce for dipping. Mixing meatballs is key to their taste and texture. First, use a large bowl. This gives you space to mix well. Combine the ground turkey, breadcrumbs, cheese, herbs, and spices. I like to use my hands for this. It helps me feel the texture. Mix until everything is just combined. Over-mixing can make them tough. Aim for a light touch when forming meatballs. Cooking meatballs properly keeps them juicy. Start with a hot skillet. I use olive oil for flavor. Place the meatballs in batches, leaving space between them. This helps them brown nicely. Cook for about 6-8 minutes, turning gently. Use a meat thermometer to check doneness. You want an internal temperature of 165°F. This ensures they are safe to eat. Let them rest a minute before serving. This helps keep them moist. Tzatziki sauce is a star in this dish. For extra flavor, use fresh ingredients. Grate the cucumber well and squeeze out moisture. This keeps the sauce thick. Fresh dill and lemon juice brighten the taste. I love adding a pinch of salt for balance. If you want a kick, try a dash of cayenne pepper. Mix and let it chill in the fridge. This allows the flavors to blend. Serve it alongside the meatballs for a cool contrast. Pro Tips Use Fresh Herbs: Fresh parsley and mint elevate the flavor of the meatballs. If possible, use fresh instead of dried for a more vibrant taste. Don’t Overmix: When combining the meatball ingredients, mix until just combined. Overmixing can result in tough meatballs. Check Internal Temperature: Ensure the meatballs reach an internal temperature of 165°F for safe consumption, especially when using ground turkey. Customize Your Sauce: Feel free to add more herbs or spices to the tzatziki sauce, such as mint or garlic powder, to suit your taste preferences. {{image_2}} You can switch the ground turkey for different meats. Ground chicken works well. If you want a richer flavor, try ground lamb. For a lighter option, use ground chicken or even tofu. Each protein adds a unique taste to the meatballs. Herbs change the flavor profile of your meatballs. Instead of parsley, use cilantro for a fresh twist. Basil can add warmth and depth to the dish. You can also try using fresh thyme or rosemary for a punch of flavor. Mix and match herbs to find your favorite blend. Tzatziki is fun to customize. Add diced red onion for a crunch. A splash of hot sauce can give it a kick. For a twist, try mixing in roasted red peppers. You can even swap dill for fresh mint. Each addition brings a new taste to the classic sauce. To store leftover meatballs and tzatziki, place them in separate airtight containers. This keeps the meatballs moist and the tzatziki fresh. Store both in the fridge. They will last for about 3 to 4 days. Label the containers with dates to track freshness. When you're ready to eat, reheat the meatballs gently. You can use a skillet or the microwave. If using a skillet, add a splash of water. Cover it and heat on low. This keeps the meatballs juicy. In the microwave, heat for 1-2 minutes. Check to see if they are hot throughout. For longer storage, freeze the meatballs. Place cooked meatballs in a single layer on a baking sheet. Freeze them for about 1 hour. After they are firm, transfer them to a freezer bag. They will keep for up to 3 months. For the tzatziki, freeze it in small portions. Defrost in the fridge before using. To make Greek turkey meatballs gluten-free, simply swap out the breadcrumbs. Use gluten-free breadcrumbs or ground oats. You can also use almond flour or crushed gluten-free crackers. These options keep the meatballs moist while keeping them gluten-free. Always check labels to ensure all ingredients are safe. Yes, you can make tzatziki sauce ahead of time. It tastes even better after chilling. Prepare it up to two days in advance. Just store it in the fridge in a tight container. The flavors blend nicely, making it a great time-saver for your meal prep. Greek turkey meatballs pair well with many sides. Here are some tasty options: - A fresh Greek salad with tomatoes, cucumber, and feta - Warm pita bread for dipping - Roasted vegetables, like zucchini and bell peppers - Rice or quinoa for a hearty meal These sides balance the flavors and make for a complete meal. Enjoy mixing and matching to suit your taste! This article covered easy recipes for Greek Turkey Meatballs and Tzatziki sauce. I shared key ingredients, step-by-step instructions, and handy tips to make your dish great. You learned about different flavors and how to store leftovers. My final thought is this: these meatballs are tasty and versatile. Enjoy making them for family and friends, and try new variations. Your kitchen will become a fun place for flavors and good times. Start cooking today!

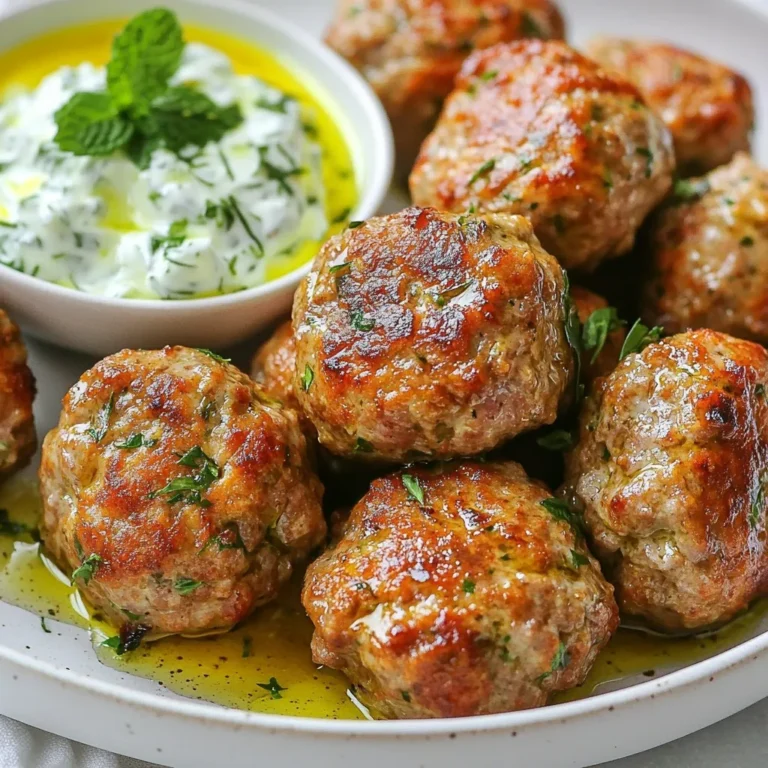
Greek Turkey Meatballs with Tzatziki Flavor Boost

- 2 cups rotini pasta - 1 can (15 oz) black beans, rinsed and drained - 1 cup corn kernels (fresh, frozen, or canned) - 1 red bell pepper, diced - 1 small red onion, finely chopped - 1 cup cherry tomatoes, halved - 1 avocado, diced - 1/2 cup cilantro, chopped - 1 cup cheddar cheese, shredded - 1/4 cup olive oil - 3 tablespoons lime juice - 1 tablespoon taco seasoning - Salt and pepper to taste - Optional: sliced jalapeños for extra heat Gathering your ingredients is the first step. Start with the rotini pasta. It is fun to cook and adds great texture. You will need a can of black beans. Rinse and drain them well. Next, grab a cup of corn. You can use fresh, frozen, or canned corn. For color, you need a red bell pepper. Dice it into small pieces. A small red onion adds a nice crunch and flavor when finely chopped. Cherry tomatoes are sweet and juicy. Halve them for the salad. Don’t forget the avocado! Dice it carefully to keep it whole. Fresh cilantro adds a nice herbal taste. You will want about half a cup. For creaminess, add shredded cheddar cheese. Now, for the dressing. Use a quarter cup of olive oil. Lime juice adds a zesty kick; you will need three tablespoons. Taco seasoning gives that fiesta flavor, so use one tablespoon. Finally, season with salt and pepper to taste. If you like heat, add sliced jalapeños. They are optional but tasty! Once you have all these ingredients, you are set to make a vibrant and delicious salad. {{ingredient_image_1}} First, cook the rotini pasta. Bring a large pot of salted water to a boil. Add the rotini and cook it for about 8 to 10 minutes. Check the package for exact time. You want it al dente, which means firm but not hard. Once the pasta is done, drain it in a colander. Rinse it under cold water. This cools the pasta quickly and stops cooking. It also helps keep it from sticking together. Grab a large mixing bowl. Add the cooled pasta, black beans, corn, red bell pepper, red onion, cherry tomatoes, avocado, and cilantro. Make sure to measure each ingredient. For the vegetables, chop them into small, even pieces. This helps all flavors blend well. When combining, gently mix everything. You want to coat the pasta and veggies without mashing the avocado. A soft touch makes the salad look nice. For the dressing, use a small bowl. Whisk together the olive oil, lime juice, taco seasoning, salt, and pepper. Whisk until it is well mixed. This will enhance the flavor of your salad. If you want to change the taco seasoning, you can try using cumin or chili powder. Both add a nice kick. You can even make your own mix with paprika, garlic powder, and onion powder for a unique taste. To boost the flavor of your Fiesta Taco Pasta Salad, add spices. You can use cumin or chili powder for warmth. A pinch of paprika can give it a nice twist too. Don’t forget salt and pepper to taste! Letting the salad rest is key. After mixing, chill it in the fridge for 30 minutes. This time lets the flavors blend well. The salad will taste even better when served cold. When serving, use colorful bowls. Bright bowls make the salad pop! Add a sprinkle of extra cilantro on top for a fresh look. Lime wedges can add a nice touch too. For the best display, serve in clear glass dishes. This lets the vibrant colors shine through. Guests will love the look and the taste! Prep your ingredients ahead of time. Chop the veggies and store them in the fridge. This makes assembly quick when you’re ready to serve. Using canned or frozen options can save time too. Canned black beans and frozen corn are great choices. They are easy to use and still taste great. Pro Tips Cook Pasta Al Dente: For the best texture, cook the rotini pasta al dente. This will keep it firm and prevent it from becoming mushy when mixed with the other ingredients. Chill Before Serving: Allow the salad to chill in the fridge for at least 30 minutes before serving. This rest time lets the flavors meld beautifully. Customize Your Veggies: Feel free to mix and match vegetables based on your preference. Substitutions like diced cucumbers or shredded carrots can add extra crunch and color. Make It Ahead: This salad is perfect for meal prep! You can make it a day in advance, just leave out the avocado until right before serving to keep it fresh. {{image_2}} You can easily adapt this salad for different diets. If you're vegetarian, simply skip the cheese or use a plant-based version. For vegan options, swap out the cheddar cheese for a vegan alternative. You can also use tofu or chickpeas for extra protein. If you are gluten-free, choose gluten-free pasta. Look for pasta made from rice or corn to enjoy the same great taste. Don't hesitate to get creative with the ingredients. You can use other legumes, like kidney beans or pinto beans, instead of black beans. If you want more crunch, add diced cucumbers or peppers. For cheese, try feta or queso fresco for a different flavor. You can also top your salad with crunchy tortilla strips or nuts for added texture. Add more flavor by including proteins like grilled chicken or shrimp. Simply cook them ahead of time and mix them into the salad. You can also switch up the dressing. Try a ranch or a spicy chipotle dressing for a new twist. Adding fresh herbs like basil or dill can also enhance the taste. Choose what excites your palate and enjoy! To keep your Fiesta Taco Pasta Salad fresh, use airtight containers. Glass containers work well because they do not stain or absorb smells. Plastic containers are also fine. Make sure the container fits snugly to reduce air exposure. Store your salad in the fridge. It will stay good for about 3 to 5 days. Pasta salad is best served cold, but you can warm it if you prefer. If you want to reheat, use the microwave. Heat it in short bursts, stirring in between. This helps keep the pasta from getting too mushy. If you choose the stovetop, use low heat. Stir gently to keep the salad fresh and tasty. You can freeze Fiesta Taco Pasta Salad, but some ingredients may change texture. To freeze, pack the salad in an airtight container. Leave some space for expansion. When you want to eat it, thaw it in the fridge overnight. Avoid refreezing after thawing. For best results, eat it within a month to keep the flavor fresh. You can use several pasta types if you lack rotini. Here are some good options: - Penne - Fusilli - Farfalle - Macaroni These types will hold the dressing well. They also mix nicely with the other ingredients. Choose a pasta that you enjoy. You can store Fiesta Taco Pasta Salad in the fridge for up to three days. Make sure to keep it in an airtight container. This helps maintain freshness and flavor. If you see any signs of spoilage, it’s best to throw it out. Yes, you can definitely make this salad ahead of time. Here are some tips to keep it fresh: - Prepare the salad a day before serving. - Add the avocado and cheese just before serving to avoid browning. - Let the salad sit in the fridge for at least 30 minutes before serving. This allows the flavors to mix well. These steps enhance the taste and make meal prep easier! This blog post covers the delicious Fiesta Taco Pasta Salad. We explored key ingredients, like rotini and black beans, and easy steps for preparation. I shared tips for boosting flavor and presented variations for dietary needs. You learned how to store leftovers safely and even answered common questions. In conclusion, making this salad is simple and fun. With a few fresh ingredients, you can create a dish that impresses everyone. Enjoy mixing and matching flavors to make it your own!

Fiesta Taco Pasta Salad Flavorful and Easy Recipe

To make rice meatballs with veggies, gather these ingredients: - 1 cup cooked rice (white or brown) - 1 lb ground beef or turkey - 1/2 cup grated zucchini (excess moisture squeezed out) - 1/4 cup grated carrot - 1/4 cup finely chopped onion - 2 cloves garlic, minced - 1 egg - 1/2 cup breadcrumbs - 1 teaspoon Italian seasoning - Salt and pepper to taste - 2 tablespoons olive oil (for frying) - 1 cup marinara sauce (for serving) - Fresh parsley, chopped (for garnish) Using high-quality ingredients makes a big difference. Fresh veggies add great taste and nutrition. Choose lean ground meat for a healthier option. Fresh garlic packs a punch and enhances flavor. Opt for good quality marinara sauce; it elevates the dish. When you use fresh and quality ingredients, your rice meatballs taste amazing. They become a meal your family will love and ask for again. You can swap some ingredients if needed. If you want a vegetarian option, use lentils or chickpeas instead of meat. Cauliflower rice can replace regular rice for a low-carb meal. Any ground meat can work, like chicken or pork. If you don’t have zucchini, try spinach or bell peppers. These swaps keep your meal fun and interesting while maintaining great flavor. {{ingredient_image_1}} 1. Start by gathering all your ingredients. This makes the process easy and fun. 2. In a large mixing bowl, combine cooked rice, ground meat, and veggies. 3. Add grated zucchini, grated carrot, chopped onion, and minced garlic. 4. Crack the egg into the bowl and add breadcrumbs, Italian seasoning, salt, and pepper. 5. Mix everything well with your hands. Make sure all ingredients combine nicely. 1. Preheat a large skillet over medium heat. This is key for good browning. 2. Once hot, add olive oil to the skillet. Let it heat up for a minute. 3. Form the meat mixture into balls, about the size of a golf ball. 4. Place the meatballs in the skillet, but don’t crowd them. Cook each side for 4-5 minutes. 5. The meatballs should be golden brown and cooked through. You can do this in batches if needed. 6. While cooking, warm marinara sauce in a separate saucepan over low heat. 1. Once cooked, place the meatballs on a serving platter. 2. Pour the warm marinara sauce over the meatballs. This adds great flavor! 3. Garnish with chopped fresh parsley for a pop of color. 4. For a hearty meal, serve on a bed of spaghetti or cooked quinoa. 5. Top with extra parsley and Parmesan cheese for an elegant touch. When making rice meatballs, avoid overmixing the ingredients. This can make them tough. Also, do not skip squeezing out the moisture from the zucchini. Too much water can make the meatballs soggy. Lastly, make sure your skillet is hot before adding the meatballs. If the pan is cold, they will stick and not brown well. To get a great texture, use a mix of cooked rice and ground meat. The rice adds moisture and keeps the meatballs tender. Adding breadcrumbs also helps bind everything together. Don’t forget the egg; it acts as a binder too. If the mixture feels too wet, add more breadcrumbs. If it's too dry, a splash of water can help. To boost the flavor, use fresh herbs like parsley or basil. They add a nice brightness. Garlic and onion are must-haves for depth. You can also mix in some cheese, like Parmesan, for extra richness. Adjust the Italian seasoning to your taste. If you like heat, add a pinch of red pepper flakes for a kick. Pro Tips Use Fresh Ingredients: Opt for fresh vegetables and herbs to enhance the flavor of your meatballs. Fresh ingredients make a significant difference in taste. Don't Overmix: When combining the ingredients, mix just until everything is incorporated. Overmixing can lead to tough meatballs. Ensure Even Cooking: If cooking in batches, make sure to leave enough space in the pan for even browning. Overcrowding can result in steaming instead of frying. Customize Your Veggies: Feel free to mix and match vegetables based on your preference. Spinach, bell peppers, or mushrooms can add unique flavors and textures. {{image_2}} You can easily make rice meatballs without meat. Use cooked lentils or chickpeas instead of ground meat. They add protein and fiber. Combine them with the same veggies and spices. For a binding agent, use flaxseed meal mixed with water. This mix works well as an egg replacement. You can switch up the meat in this recipe. Ground turkey is a lean choice. It keeps the meatballs moist while reducing fat. Ground chicken is another option. It has a milder flavor and cooks quickly. If you enjoy beef, ground beef brings a rich taste. Spices can transform your meatballs. Adding chili powder gives a nice heat. For a fresh twist, include fresh herbs like basil or cilantro. You can mix in smoked paprika for a smoky flavor. Don’t be shy to experiment with different spices. Each will create a unique taste profile. Store leftover rice meatballs in an airtight container. This helps keep them fresh. They last about 3 to 4 days in the fridge. Before storing, let them cool completely. This prevents excess moisture inside the container. To freeze rice meatballs, wrap them tightly in plastic wrap or aluminum foil. Place them in a freezer-safe bag afterward. This keeps them safe from freezer burn. They stay fresh for about 2 to 3 months. When you’re ready to eat, thaw them in the fridge overnight. You can reheat rice meatballs in several ways. The microwave is quick and easy. Heat them on medium power for about 1 to 2 minutes. You can also use the oven. Preheat it to 350°F (175°C) and bake for about 10 minutes. This keeps them crispy. Another option is to warm them in a skillet. Add a splash of marinara sauce and heat on low. Enjoy them hot! Yes, you can use leftover rice. It adds great flavor and texture. Just make sure the rice is cold and not sticky. This helps the meatballs hold their shape while cooking. If your rice is fresh, let it cool first. Using leftover rice saves time and reduces waste. It's a win-win! These meatballs last about 3 to 4 days in the fridge. Store them in an airtight container. For best taste, eat them within this time. If you want to keep them longer, consider freezing them. Proper storage keeps your meatballs tasty and safe to eat. Rice meatballs pair well with many sides. You can serve them on a bed of spaghetti or quinoa. A fresh salad or steamed veggies also makes a great side. For extra flavor, add some marinara sauce on top. Don't forget to sprinkle some cheese or herbs for a nice touch! This blog post covered essential ingredients for tasty meatballs. You learned that quality matters and substitutions can work well. I provided step-by-step cooking tips, common mistakes to avoid, and ways to enhance flavors. We also explored variations for different diets and storage tips to keep your meatballs fresh. Remember, cooking is fun and helps you grow. Keep experimenting and enjoy your meals!

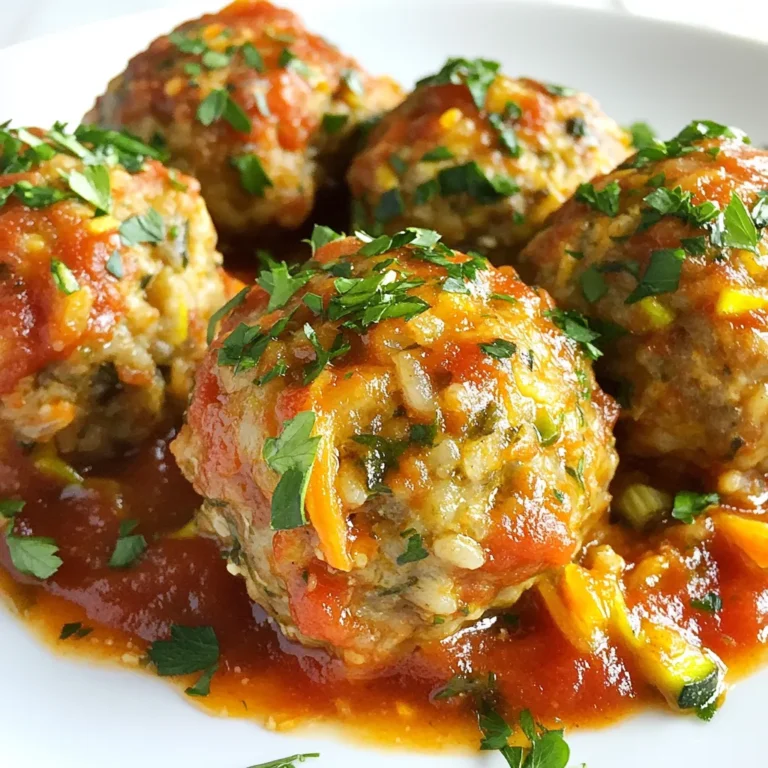
Rice Meatballs with Veggies Flavorful and Easy Recipe

- 1 pound baby carrots (or regular carrots, peeled and cut into sticks) - 2 tablespoons olive oil - 3 tablespoons honey - 3 cloves garlic, minced - ¼ teaspoon salt - ¼ teaspoon black pepper - 1 teaspoon fresh thyme leaves (or ¼ teaspoon dried thyme) - Sesame seeds for garnish (optional) You can swap baby carrots for regular carrots. Just cut them into sticks. Use any oil you prefer if you don't have olive oil. Maple syrup works great instead of honey. If you lack fresh thyme, use dried thyme. Just reduce the amount since dried herbs are stronger. Fresh ingredients make a big difference in flavor. Fresh carrots are crisp and sweet. They add a nice texture to the dish. Fresh garlic gives a strong taste that really shines in this recipe. Using fresh thyme adds a bright note that pairs well with honey. Always choose quality ingredients for the best results. This will enhance your cooking and impress your guests. {{ingredient_image_1}} Start by washing your carrots well. If you use regular carrots, peel them. Cut them into sticks about 2-3 inches long. If you prefer baby carrots, you can keep them whole. This ensures even cooking and makes them easy to eat. Next, bring a pot of salted water to a boil. Carefully add the carrots to the boiling water. Cook them for about 5 minutes. You want them tender but still crisp. After cooking, drain the carrots and set them aside. This step helps keep the bright color and crunch. Now, grab a large skillet. Heat 2 tablespoons of olive oil over medium heat. Once the oil is hot, add 3 minced garlic cloves. Sauté the garlic for about 30 seconds. You want it fragrant but not burnt. This step adds a rich flavor to the glaze. Then, stir in 3 tablespoons of honey. Add ¼ teaspoon of salt, ¼ teaspoon of black pepper, and 1 teaspoon of fresh thyme leaves. If you don't have fresh thyme, you can use dried thyme instead. Cook this mixture for 1-2 minutes. You want it to bubble and thicken slightly. Finally, add your cooked carrots to the skillet. Toss them gently in the honey garlic glaze. Cook for an additional 3-4 minutes. This allows the carrots to soak up the flavors. Once they are well coated and heated through, you are ready to serve. If you like, sprinkle some sesame seeds on top for extra crunch and flavor. Enjoy your delicious honey garlic glazed carrots! To make the glaze shine bright, you want to use fresh garlic. Mince the garlic finely. This helps it blend well with the honey. Sauté it in olive oil until fragrant. But watch it closely; burnt garlic tastes bitter. Once it’s ready, stir in the honey. Let it bubble for a few minutes. This thickens the glaze and enhances the flavor. For the best texture, start with fresh carrots. Baby carrots work well, but cut regular ones into sticks. Make sure they are about 2-3 inches long. Boil them for just 5 minutes. This keeps them crisp. After boiling, drain and toss them in the glaze quickly. This way, they soak up all that sweet and savory goodness. Honey garlic glazed carrots shine as a side dish. They pair well with roasted meats. Try them with chicken or pork for a complete meal. For a fun twist, add sesame seeds on top. This adds a nice crunch. You can also serve them over rice or quinoa for a hearty option. Enjoy these carrots warm for the best flavor! Pro Tips Choose Fresh Carrots: Select firm, vibrant carrots for the best flavor and texture. Fresh carrots will have a sweeter taste and will hold up better during cooking. Adjust Sweetness: If you prefer a less sweet glaze, reduce the amount of honey or add a splash of vinegar to balance the flavors. Use Different Herbs: Experiment with different herbs like rosemary or parsley to give the dish a unique twist that complements the honey and garlic. Perfect Cooking Time: Be careful not to overcook the carrots when boiling; they should be tender but still crisp to maintain their color and nutrients. {{image_2}} You can customize honey garlic glazed carrots by adding fresh herbs. Thyme gives a nice flavor. Try fresh dill or parsley for a bright touch. Rosemary adds a strong taste, while basil offers a sweet note. Experimenting with different herbs can change the dish completely. To heat things up, add a pinch of red pepper flakes. This spice will contrast with the sweet honey. You can also use black pepper for a bit more kick. If you love heat, try a dash of chili powder. These spices will make your glazed carrots pop. If you want less honey, try maple syrup. It has a great flavor and works well. You can also use agave nectar for a vegan option. Brown sugar adds sweetness but changes the glaze's texture. Choose your sweetener based on your taste and dietary needs. To store leftover glazed carrots, let them cool completely. Place the carrots in an airtight container. Make sure the lid seals well to keep air out. Store the container in the fridge. The carrots will stay fresh for up to four days. When you are ready to eat the leftovers, take them out of the fridge. You can reheat the carrots in a skillet or the microwave. If using a skillet, add a splash of water to help steam them. Heat on medium until warm, stirring often. If using the microwave, place them in a bowl. Cover with a microwave-safe lid and heat in 30-second intervals, stirring in between. You can freeze glazed carrots if you want to save some for later. First, let them cool completely. Then, place them in a freezer-safe bag. Squeeze out as much air as possible before sealing. Label the bag with the date and contents. Frozen glazed carrots can last for up to three months. To use, thaw them in the fridge overnight and reheat as mentioned above. Yes, you can use regular carrots. Just peel and cut them into sticks. Aim for pieces about 2-3 inches long. This helps them cook evenly and look nice on the plate. These carrots pair well with many dishes. Try them with roasted chicken or grilled steak. They also go nicely with rice or quinoa. Their sweet and savory flavor adds a great touch to any meal. These carrots can last for about 3-5 days in the fridge. Store them in an airtight container. When you're ready to enjoy them, just reheat and serve! Yes, you can make these carrots ahead of time. Prepare them and keep them in the fridge. Just reheat them on the stove or in the microwave before serving. This makes meal prep easy and fun! In this blog post, I covered how to make honey garlic glazed carrots. We discussed key ingredients, cooking steps, and helpful tips to perfect your dish. Fresh ingredients make a big difference in flavor. I also shared ways to change the recipe and store leftovers. Remember, with easy swaps and fun variations, you can customize this recipe. Get creative, enjoy the cooking process, and serve up a dish that impresses everyone. Happy cooking!

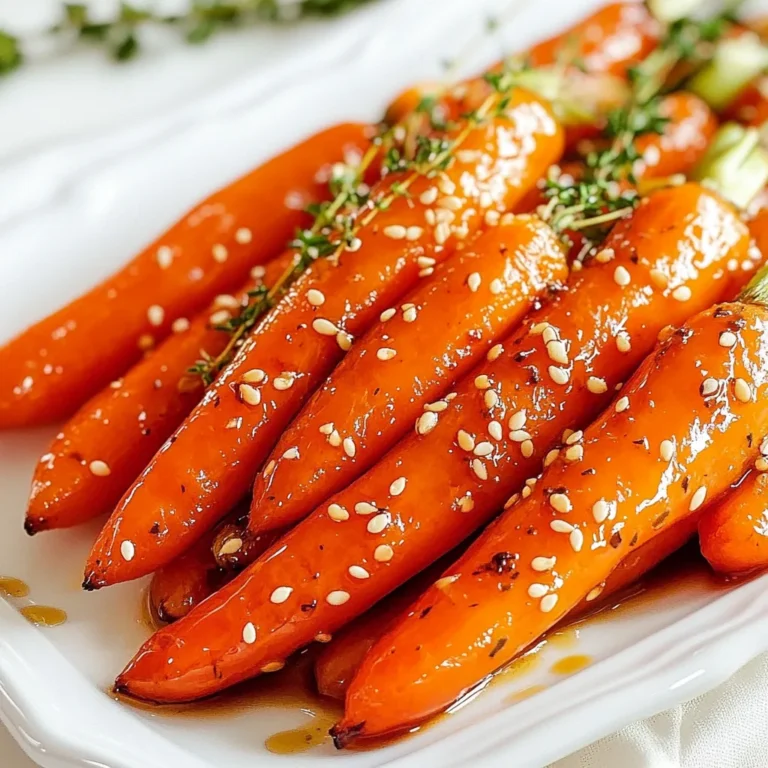
Honey Garlic Glazed Carrots Tasty Side Dish Recipe

- 2 large apples, peeled, cored, and diced - 1 tablespoon lemon juice - 1 teaspoon ground cinnamon - 1/4 cup brown sugar - 1 tablespoon all-purpose flour - 1 package refrigerated pie crusts (2 crusts) - 1 egg, beaten (for egg wash) - Sprinkling of coarse sugar (for garnish) When making these hand pies, the choice of apples matters. I prefer tart apples like Granny Smith. They balance the sweetness of the brown sugar. The lemon juice keeps the apples fresh and adds a nice zing. Ground cinnamon gives the filling a warm, cozy flavor. The refrigerated pie crusts save time and give a great texture. If you like, you can make your own crust, but store-bought works well. The egg wash makes the pies shiny and golden. A sprinkle of coarse sugar on top adds a sweet crunch. By gathering these ingredients first, you set yourself up for success. Each item plays a role in creating delicious hand pies. So, let’s get cooking! {{ingredient_image_1}} Start by mixing diced apples with lemon juice, ground cinnamon, brown sugar, and flour. This blend makes a tasty filling. Toss the apples well so they get coated evenly. Let this mixture rest for about 10 minutes. This helps the flavors meld and the apples soften a bit. Next, roll out one pie crust on a floured surface. Cut the crust into four equal squares. Each square will hold the apple filling. Spoon about 2 tablespoons of the apple mixture onto the center of each square. Be sure to leave some space around the edges. Then, fold the square over to form a triangle. Press the edges to seal them. Use a fork to crimp the edges. This step keeps the filling from leaking out. Now, it's time to cook! Transfer the hand pies to the air fryer basket. Line it with parchment paper for easy cleanup. Brush the tops with the beaten egg for a nice golden color. Sprinkle them with coarse sugar for a little crunch. Set your air fryer to 320°F (160°C) and cook for 10-12 minutes. Be sure to flip the pies halfway through for even cooking. When they turn golden brown, they are ready! Let them cool for a few minutes before enjoying. To get the best crispiness from your air fryer apple hand pies, preheat your air fryer. Preheating helps the pies cook evenly and get that perfect golden color. It only takes a few minutes, so don’t skip this step. Another key tip is to flip the pies halfway through cooking. This ensures both sides get crispy and brown. You can easily enhance the flavor of your apple filling. Try adding spices like nutmeg or ginger for a warm kick. Adjust the spices to your taste; a little more or less can change the whole pie. You can also think about using other fillings. Mix in some nuts, raisins, or even a bit of caramel sauce for a fun twist. Compotes made from berries can add a burst of flavor, too! Pro Tips Chill Your Dough: Keeping the pie crust cold will help ensure that your hand pies are flaky and tender once cooked. Mix and Match Apples: For a more complex flavor, consider using a mix of sweet and tart apples, such as Granny Smith and Honeycrisp. Don’t Overfill: Be careful not to overfill the hand pies. A little filling goes a long way, and this will help prevent any leaks during cooking. Brush with Butter: For an extra rich flavor, you can brush the crusts with melted butter instead of egg wash before air frying. {{image_2}} You can change up the filling for your hand pies. Try using pears instead of apples. They add a sweet and juicy twist. Berries work well too! You can use blueberries or raspberries for a burst of flavor. Mixing different fruits creates a fun medley. Combine apples, pears, and berries for a unique taste experience. This variety keeps your snacks exciting and fresh. If you need a gluten-free option, look for gluten-free pie crusts. Many brands offer tasty choices that work well. You can find these in most grocery stores. For vegan options, skip the egg wash. Instead, use a plant-based milk like almond or soy. This keeps your hand pies golden without using eggs. These small changes make the recipe more inclusive for everyone. Enjoy making your hand pies even if you have dietary needs! To keep your apple hand pies fresh, store them in the refrigerator. Use an airtight container. This helps prevent them from drying out. You can keep them for up to three days. For longer storage, freeze them. Wrap each pie in plastic wrap, then place them in a freezer bag. They will last for up to three months in the freezer. When you want to enjoy your hand pies again, reheating is key. The best method is to use the air fryer. Set it to 300°F (150°C) for about 5 minutes. This method keeps the crust crispy. Avoid using the microwave, as it can make the pies soggy. If you do use a microwave, heat them in short bursts and enjoy quickly. Air fryer apple hand pies can last 3 to 4 days in the fridge. Store them in an airtight container to keep them fresh. If you want to keep them longer, you can freeze them. They will stay good for up to 3 months in the freezer. Just remember to let them cool completely before storing. Yes, you can use homemade pie crust. Making your own crust can make the pies taste even better. Homemade crust gives you control over the ingredients and texture. You can add your own flavors, like a bit of sugar or spice. This can make your apple hand pies extra special. You can serve apple hand pies with a scoop of vanilla ice cream. It adds a nice creaminess to the sweet pies. Caramel sauce is also a great option for drizzling on top. You can even offer whipped cream or a side of warm apple sauce. These pairings make the hand pies even more delightful. Making air fryer apple hand pies is simple and fun. You learned about the list of ingredients and how to prepare the filling and crust. We explored tips for crispiness, like preheating, and swapping fruits or adjusting flavors. You found out how to store and reheat these treats for the best taste. Try making these tasty hand pies today. They are a great treat for everyone.

Air Fryer Apple Hand Pies Easy and Delightful Snack

- 4 medium sweet potatoes - 2 cups cooked chicken, shredded - 1 cup barbecue sauce (homemade or store-bought) - 1/2 cup red onion, finely chopped - 1 cup corn (fresh or frozen) - 1/2 cup black beans, rinsed and drained - 1 cup shredded cheddar cheese - 1 tablespoon olive oil - Salt and pepper to taste - Fresh cilantro, for garnish - 1 avocado, diced (optional) For this recipe, you need sweet potatoes as your base. They bring a natural sweetness and are packed with nutrients. Next, cooked chicken adds protein and heartiness. I love using barbecue sauce for its rich flavor. You can make your own or buy it at the store. Next, red onion adds a nice crunch and bite. Corn and black beans bring texture and color. Cheddar cheese, when melted, gives that creamy finish. Olive oil helps enhance the flavor and keeps things moist. Season with salt and pepper to taste. Finally, fresh cilantro and diced avocado are great for garnishing, adding freshness and creaminess. Gather these ingredients, and you are ready to create a tasty meal! {{ingredient_image_1}} 1. Preheating the oven: Start by setting your oven to 400°F (200°C). This heat helps cook the sweet potatoes evenly. 2. Washing and poking holes: Next, wash the sweet potatoes well. Use a fork to poke holes in them. This step allows steam to escape as they bake. 3. Baking time and method: Place the sweet potatoes on a baking sheet. Bake them for about 45-60 minutes. They should feel tender when finished. 1. Combining chicken and barbecue sauce: While the sweet potatoes bake, grab a medium saucepan. Mix shredded chicken and barbecue sauce in it. 2. Adding vegetables and beans: Add chopped red onion, corn, and black beans to the chicken. This mix adds color and flavor. 3. Heating and seasoning the mixture: Heat the saucepan over medium heat. Stir everything well for about 5-7 minutes. Season with salt and pepper to taste. 1. Scooping out sweet potatoes: When the sweet potatoes cool slightly, cut them in half lengthwise. Scoop out some flesh to make room for the filling. 2. Filling and topping the potatoes: Drizzle olive oil inside the sweet potatoes. Fill each potato with the BBQ chicken mix. 3. Second bake for cheese melting: Top each stuffed potato with shredded cheddar cheese. Bake them again for 10-15 minutes. The cheese should melt and bubble beautifully. To ensure your sweet potatoes are tender, always poke holes in them. This lets steam escape as they bake. I recommend baking them at 400°F for 45-60 minutes. When they are soft, they’re ready. You want a fluffy inside, not a rock-hard potato. Avoid overcomplicated fillings. Simple is best! The BBQ chicken mix has great flavor. Stick to the main ingredients: chicken, BBQ sauce, and a few veggies. Don’t add too many extras. It can make the dish heavy and hard to eat. For presentation, serve the stuffed sweet potatoes on a rustic wooden board. It adds a fun touch. You can also use individual plates for each guest. They look nice garnished with fresh cilantro. A slice of lime on the side adds freshness too. Garnishing options include diced avocado, which adds creaminess. You can also sprinkle extra cheese on top for a cheesy finish. This makes the dish look appetizing and gives added flavor. For spice, try adding paprika or cumin to the BBQ chicken mix. A little heat goes a long way. You can also add garlic powder for depth. These spices will boost the flavor without overwhelming the dish. If you want to switch up the sauce, try different types of BBQ sauce. A sweet sauce pairs well with the potatoes. A smoky sauce gives a nice twist. You can even use a spicy sauce if you love heat. Pro Tips Use Fresh Ingredients: Fresh corn and homemade barbecue sauce can elevate the flavors of your stuffed sweet potatoes significantly. Perfectly Cooked Sweet Potatoes: To ensure your sweet potatoes are perfectly tender, use a fork to poke holes and bake them until they are soft to the touch. Customize Your Fillings: Feel free to add more vegetables like bell peppers or zucchini to the BBQ chicken filling for added nutrition and flavor. Cheese Options: Try different types of cheese such as pepper jack for a spicy kick or mozzarella for a milder flavor. {{image_2}} You can switch the chicken for other proteins. Turkey works great for a leaner option. If you want a plant-based choice, tofu is perfect. Just press the tofu to remove water, then cube it. Sauté the cubes until golden before mixing them with barbecue sauce. This keeps the taste bold and delicious. To make this dish vegan or vegetarian, skip the chicken and cheese. You can use mushrooms or lentils for a hearty filling. They soak up flavor well and make it filling. For gluten-free options, check your barbecue sauce. Some sauces may contain gluten, so choose a certified gluten-free brand. Explore different barbecue sauces to change the taste. A spicy sauce can add a kick, while a sweet sauce brings a nice balance. You can also add spices like smoked paprika or cumin for depth. Fresh herbs like cilantro or green onions can brighten the dish. Mix and match until you find your favorite flavor profile! To keep your BBQ chicken stuffed sweet potatoes fresh, follow these tips: - Let the stuffed sweet potatoes cool completely. - Wrap each one in plastic wrap or aluminum foil. - Store them in an airtight container in the fridge. I recommend using glass containers. They don’t stain and keep food fresh. Your leftovers will last for about 3 to 4 days in the fridge. You can freeze these tasty stuffed sweet potatoes for later. Here’s how: - Allow them to cool completely before freezing. - Place each stuffed sweet potato in a freezer-safe bag. - Squeeze out excess air and seal tightly. When you're ready to eat, thaw them in the fridge overnight. To reheat, preheat your oven to 350°F (175°C). Bake for about 20-25 minutes, or until heated through. You can also microwave them, but the oven keeps the skin nice and crispy. You can use other vegetables for stuffing. Here are some great options: - Butternut squash - Acorn squash - Regular potatoes - Zucchini These choices provide a nice base. Each has its own flavor and texture. You can even mix and match! Yes! Rotisserie chicken works well here. It saves time and effort. You just shred it and mix it with the sauce. Using pre-cooked chicken also adds great flavor. Plus, it makes this dish even faster to prepare. Sweet potatoes are done when they are soft. You can test them by poking with a fork. If it goes in easily, they’re ready. The skin should look a bit wrinkled. This means they are perfectly baked. To sum up, this blog explores how to create delicious stuffed sweet potatoes. We covered the key ingredients like sweet potatoes, chicken, and barbecue sauce, plus tasty add-ins. You learned step-by-step instructions, tips for cooking, and variations to try. Lastly, I shared ways to store your leftovers for future meals. Now, get creative and make your own version. Experiment with flavors and enjoy each bite!

BBQ Chicken Stuffed Sweet Potatoes Tasty and Simple

PREV 1 … 52 53 54 … 65 NEXT
tasty trail blazer

explore

DessertsDinnerAppetizersDrinks

Our Policies

  • Cookie Policy
  • Copyright Policy
  • Disclaimer
  • GDPR Policy
  • Terms Of Use
Back to Top
  • About
  • Contact Us
  • Privacy Policy
© 2025 tasty trail blazer