FREE DINNER EBOOK! Get your copy!
  • Cookie Policy
  • GDPR Policy
  • Disclaimer
  • Terms Of Use
  • Visit my other site: Fun Cookie Recipes
tasty trail blazer
  • Home
  • Dinner
  • Desserts
  • Drinks
  • Appetizers
  • Contact
  • About
  • Privacy Policy
  • Home
  • Dinner
  • Desserts
  • Drinks
  • Appetizers
  • Contact
  • About
  • Privacy Policy
  • Cookie Policy
  • GDPR Policy
  • Disclaimer
  • Terms Of Use
Visit my other site: Fun Cookie Recipes

HOME / CATEGORIES /

Latest

- 1 cup unsalted butter, softened - 1/4 cup pure maple syrup - 1 cup finely chopped pecans - 2 cups all-purpose flour These main ingredients create a rich base for the cookies. The unsalted butter gives a creamy texture. Pure maple syrup adds a sweet, earthy flavor. The pecans provide a delightful crunch. All-purpose flour binds everything together for a perfect cookie shape. - 1/2 teaspoon ground cinnamon - Additional powdered sugar for dusting Cinnamon adds warmth to your cookies. It complements the maple flavor well. Dusting with powdered sugar creates a beautiful finish. This gives the cookies their signature snowball look. - How to measure ingredients accurately: Use dry measuring cups for flour and sugar. Spoon flour into the cup and level it off. Avoid packing it down. For liquids, use a clear measuring cup for accuracy. - Best substitutes for butter and maple syrup: If you need a dairy-free option, use coconut oil instead of butter. For maple syrup, agave syrup works as a good alternative. However, the flavor will change slightly. {{ingredient_image_1}} 1. First, preheat your oven to 350°F (175°C). This ensures even baking. 2. Next, line a baking sheet with parchment paper. This helps the cookies not stick. 3. In a large mixing bowl, cream together 1 cup of softened butter and 1/2 cup of powdered sugar. Mix until it looks light and fluffy. This step is key for texture. 1. In a separate bowl, combine 2 cups of all-purpose flour, 1/4 teaspoon of salt, and 1/2 teaspoon of ground cinnamon. The cinnamon is optional but adds nice flavor. 2. Gradually add the dry mix to the wet mixture. Stir until just combined. Don’t overmix, as this can make the cookies tough. 3. Now, fold in 1 cup of finely chopped pecans. Make sure they are evenly spread throughout the dough. 1. Using a tablespoon or cookie scoop, roll the dough into small balls, about 1 inch in diameter. Place them on the prepared baking sheet, leaving about 1 inch between each ball. 2. Bake in the preheated oven for 12-15 minutes. Look for lightly golden bottoms as a sign they are done. 3. Once baked, let the cookies cool on the sheet for 5 minutes. Then, move them to a wire rack to cool completely. 4. After cooling, dust the cookies with more powdered sugar. This gives them a lovely snowball look. Enjoy this delightful treat! To get the right dough consistency, cream the butter and sugar well. This step adds air and makes the cookies light. If your dough seems too dry, add a touch of maple syrup. For a fluffy cookie, do not overmix once you add flour. Just mix until combined. Using high-quality ingredients makes a big difference. Choose pure maple syrup for the best taste. If you want to add more flavor, consider using vanilla bean paste or a splash of orange zest. Both options can brighten up the cookies! For special occasions, present your cookies in a festive tin. You can layer them with parchment paper. For a colorful touch, add whole pecans or mint leaves on top. These little details make your cookies truly shine. Pair your cookies with a cup of hot cocoa or warm tea for a cozy treat. Pro Tips Chill the Dough: For a firmer dough that is easier to roll, chill it in the refrigerator for 30 minutes before shaping into balls. Use Fresh Pecans: Opt for freshly toasted pecans to enhance the nutty flavor, making your cookies even more delicious. Perfect Baking Time: Keep an eye on the cookies as they bake; they should be lightly golden on the bottom but not browned on top. Storage Tips: Store the cookies in an airtight container at room temperature to maintain their texture and flavor for up to a week. {{image_2}} If you want to make nut-free cookies, it is easy! You can substitute pecans with sunflower seeds. You can also use pumpkin seeds for a fun twist. These seeds add a nice crunch without the nuts. Just chop them finely like you would with pecans. This way, everyone can enjoy the cookies without worry. Want to mix it up? Try adding chocolate chips! Dark chocolate chips will give a sweet twist. Milk chocolate chips also work well for a richer taste. You can also add dried fruits like cranberries or raisins for a chewy texture. If you want to play with nuts, try walnuts or almonds. Each nut gives a different flavor, making your cookies unique. You can create themed cookies for any holiday! For Christmas, add red and green sprinkles on top. For Thanksgiving, use pumpkin spice instead of cinnamon. These small changes make a big difference. You can also use festive shapes, like stars or hearts, for the cookie dough. Adapting the recipe for different seasons keeps it fun and fresh. To keep your maple pecan snowball cookies fresh, store them in an airtight container. Use parchment paper between layers to prevent sticking. Keep the cookies at room temperature, away from heat and moisture. This will help maintain their soft texture and flavor. Ideally, store them at a cool room temperature. Avoid placing them in the fridge, as cold air can dry them out. You can freeze these cookies for later enjoyment. First, let the cookies cool completely. Then, place them in a single layer on a baking sheet and freeze for one hour. Once frozen, transfer them to a zip-top bag or airtight container. This method prevents the cookies from sticking together. To thaw, leave them at room temperature for about 30 minutes. You can also reheat them in the oven at 350°F for a few minutes to restore their warmth. These cookies can last about one week at room temperature. Check them for signs of spoilage, such as a dry texture or off smell. If they start to taste stale, it's best to toss them. Proper storage can extend their freshness, so be mindful of how you keep them. Enjoy your cookies while they are at their best! What is the best way to roll the cookie dough? To roll the cookie dough, use your hands. Scoop a tablespoon of dough. Roll it into a ball about one inch wide. Keep your hands slightly damp to avoid stickiness. This method helps shape the cookies smoothly. Can I make the dough ahead of time? Yes, you can make the dough ahead of time. Just wrap it tightly in plastic wrap. Chill it in the fridge for up to three days. When you're ready to bake, scoop and roll the dough into balls. How can I tell when the cookies are done baking? Check the bottoms of the cookies. They should be lightly golden. The tops may look pale, which is normal. If they are firm to the touch, they are likely done. Can I substitute other syrups for maple syrup? You can use other syrups, like agave or corn syrup. However, these will change the flavor. Maple syrup gives a unique sweetness and richness. What kind of flour works best for these cookies? All-purpose flour works best for these cookies. It gives the right balance of texture and flavor. Avoid using whole wheat flour, as it can make the cookies dense. What to do if the dough is too crumbly? If the dough is crumbly, add a bit of maple syrup or softened butter. Mix until the dough holds together. Be careful not to add too much liquid at once. Can I make these cookies in different shapes? Yes, you can shape the cookies as you like. Try flattening them slightly for a different look. You could also use cookie cutters for fun shapes. Just adjust the baking time if needed. These Maple Pecan Snowball Cookies are easy to make and delicious. We covered the key ingredients, preparation steps, and useful tips to perfect your batch. You can even explore variations to suit your taste. Don't forget how to store and freeze them for later enjoyment. Baking is fun and rewarding. Experiment to make these cookies your own. You’ll impress friends and family with every bite! Enjoy this tasty treat at any gathering or just for yourself.

Maple Pecan Snowball Cookies Delightful Holiday Treat

- 1 bunch of fresh asparagus, trimmed - 4 cloves of garlic, minced - 2 tablespoons olive oil - Zest of 1 lemon - Juice of 1 lemon - 1 teaspoon red pepper flakes (optional) - Salt and pepper to taste - Fresh parsley, chopped (for garnish) Gathering the right ingredients is key to making garlic lemon asparagus. Start with a fresh bunch of asparagus. Choose bright green spears with firm ends. Next, grab four cloves of garlic. Mince them finely for a strong flavor. You will also need two tablespoons of olive oil to add richness. The zest and juice of one lemon bring brightness. If you like some heat, add red pepper flakes. Adjust salt and pepper to your taste. Finally, fresh parsley adds a nice pop of color. This simple list makes a delightful dish that shines at any meal. - Calories per serving: Approximately 80 calories - Macronutrient breakdown: - Carbohydrates: 9g - Protein: 2g - Fat: 4g Each serving of garlic lemon asparagus packs about 80 calories. It is low in calories yet full of flavor. The carbohydrates mainly come from the asparagus. You also get a bit of protein and healthy fats from olive oil. This dish is not just tasty; it is also a healthy choice. The vibrant colors and fresh flavors make it a perfect side for any plate. {{ingredient_image_1}} First, I trim the asparagus. I remove about one inch from the tough ends. Next, I wash the spears under cold water. This cleans off any dirt. After washing, I pat them dry with a clean towel. Now, it’s time to prepare the garlic and lemon. I take four cloves of garlic and mince them finely. The garlic adds a strong flavor. Then, I zest one lemon. The zest gives a bright taste. I also squeeze the lemon to get the juice. This mix of garlic and lemon will elevate the asparagus. In a large mixing bowl, I combine the asparagus, minced garlic, and olive oil. Then, I add the lemon zest and juice. If you like some heat, sprinkle in red pepper flakes. I season the mix with salt and pepper to taste. Next, I toss the asparagus gently. I want to ensure each spear gets an even coat of the mixture. This step is key for flavor. I preheat my oven to 425°F (220°C). A hot oven helps the asparagus roast well. Once preheated, I spread the asparagus in a single layer on a lined baking sheet. I roast the asparagus for 12 to 15 minutes. I check for doneness by looking for tender spears that are slightly caramelized. When they are done, I take them out and place them on a serving dish. The bright green color looks amazing! To get your asparagus just right, focus on timing and temperature. I suggest roasting at 425°F for 12-15 minutes. This heat gives you a nice caramelized finish. If you notice the asparagus starting to brown too quickly, lower the temperature slightly. Avoid overcooking by checking for doneness. You want it tender but still crisp. A fork should slide in with just a little resistance. If you leave it too long, it will turn mushy. To boost flavor, consider adding herbs like thyme or rosemary. These herbs pair well with garlic and lemon. You can also switch up the garlic. Try using roasted garlic for a sweeter taste. For lemon, use both zest and juice. The zest adds a bright aroma while the juice brings a tangy kick. If you want to spice things up, add a dash of cayenne pepper or smoked paprika. Garlic lemon asparagus pairs well with many sides. It goes great with grilled chicken or fish. Serve it alongside a light pasta dish for a fresh meal. For presentation, arrange the asparagus neatly on a platter. Drizzle with a little extra lemon juice and sprinkle fresh parsley on top. This adds color and makes your dish pop! Pro Tips Choose Fresh Asparagus: Look for bright green spears with firm, closed tips for the best flavor and texture. Minimize Overcooking: Keep an eye on the asparagus in the oven; it should be tender but still crisp when done. Add More Flavor: Experiment with different herbs like thyme or dill, or add a sprinkle of Parmesan cheese before serving for extra taste. Perfect Lemon Zest: Use a microplane to zest the lemon for finely grated zest that infuses more flavor into the dish. {{image_2}} You can change how you cook your garlic lemon asparagus. Grilling adds a smoky flavor. It gives a nice char. To grill, heat your grill to medium-high. Place the asparagus on the grill. Cook for about 5-7 minutes. Turn the spears often for even cooking. Roasting is another great option. It caramelizes the spears and enhances the flavor. Follow the recipe's oven temperature. Spread the asparagus on a baking sheet. Roast until tender, about 12-15 minutes. Stovetop sautéing is quick and easy. Heat olive oil in a pan over medium heat. Add the asparagus and garlic. Cook for 5-7 minutes, stirring often. This method keeps the asparagus crisp and bright. Feel free to swap the asparagus for other veggies. Broccoli or green beans work well. You can also try Brussels sprouts for a different taste. Just adjust the cooking time based on the vegetable you choose. For a dairy-free or vegan option, skip the butter. Stick with olive oil for sautéing or roasting. This keeps your dish light and fresh while still tasty. You can change the citrus in the recipe. Try lime or orange instead of lemon. Each will bring a unique twist to the dish. If you like a bit of heat, add different pepper varieties. Jalapeños or crushed red pepper can spice it up. Adjust the amount based on your heat preference. This adds depth and excitement to your garlic lemon asparagus. To keep garlic lemon asparagus fresh, store it in the fridge. Use an airtight container to avoid moisture loss. It should last about three days in the fridge. If you notice any wilting, use it quickly. For best results when reheating, use the oven. Place the asparagus on a baking sheet and heat at 350°F (175°C) for about 5-7 minutes. This method helps keep the texture crisp. Avoid the microwave, as it can make the asparagus soggy. Yes, you can freeze garlic lemon asparagus! First, blanch the asparagus in boiling water for 2-3 minutes. Then, cool it in ice water. Drain and pat dry before placing it in a freezer bag. This method helps preserve flavor and texture. Use within three months for the best taste. To trim asparagus, hold a spear in your hands. Bend it gently until it snaps. This shows you where the tough part ends. You can also cut off about an inch from the bottom. Make sure you wash the spears well before cooking. Yes, you can use frozen asparagus. However, the texture will change when cooked. Frozen asparagus often becomes softer. This can make the dish less crunchy. If you use frozen, reduce the cooking time by a few minutes. Look for bright green color and slight browning. The asparagus should be tender but still crisp. You can test it by piercing a spear with a fork. If it goes in easily, it’s done! Garlic lemon asparagus is very healthy! Asparagus is low in calories and high in nutrients. It has vitamins A, C, E, and K. Garlic adds flavor and has health benefits too. It may boost your immune system and heart health. Enjoy this dish for a tasty and healthy side! This blog covered how to make garlic lemon asparagus, from ingredients to cooking tips. You learned step-by-step instructions for prepping and roasting. I also shared helpful variations and storage advice. Remember, you can play with flavors and techniques. Enjoy your delicious asparagus as a healthy side dish. With these tips, you can impress anyone at your next meal. Happy cooking!

Garlic Lemon Asparagus Delightful and Simple Recipe

- 300g pasta (fusilli or penne works well) - 1 can (400g) crushed tomatoes - 200ml heavy cream (or coconut cream for a dairy-free option) - 2 tablespoons olive oil - 3 cloves garlic, minced - 1 teaspoon dried basil - 1 teaspoon dried oregano - Salt and pepper to taste - Fresh basil leaves for garnish - Grated Parmesan cheese for serving (optional) You need these simple items to create your creamy tomato pasta. Start with the pasta. I like fusilli or penne, but you can choose any shape you like. The crushed tomatoes provide a rich, tangy base for the sauce. Heavy cream adds that creamy touch. If you want a dairy-free dish, coconut cream works too! Olive oil helps sauté the garlic, giving it a nice flavor. Minced garlic brings a strong aroma and taste to the dish, while dried basil and oregano add depth. Don't forget salt and pepper to enhance all the flavors. For garnish, fresh basil leaves add a pop of color and freshness. If you enjoy cheese, sprinkle some grated Parmesan on top for extra richness. With these ingredients, you are on your way to a delicious meal in just 20 minutes! {{ingredient_image_1}} First, fill a large pot with water. Add a good amount of salt. Bring the water to a boil. This takes about 5–10 minutes. Once boiling, add 300g of pasta. You can use fusilli or penne. Cook the pasta for the time on the package. Aim for al dente, which means it should be firm to the bite. To check, taste a piece a minute or two before the time is up. When done, drain the pasta and set it aside. While the pasta cooks, let’s make the sauce. Heat 2 tablespoons of olive oil in a large skillet over medium heat. Add 3 minced garlic cloves. Sauté for about 1 minute. You want it fragrant but not browned. Next, pour in one can (400g) of crushed tomatoes. Add 1 teaspoon of dried basil and 1 teaspoon of dried oregano. Stir well. Let it simmer for about 5 minutes. This helps all the flavors mix together. Now, lower the heat and add 200ml of heavy cream to the sauce. If you want a dairy-free option, use coconut cream. Stir until it’s all mixed. Let the sauce simmer for 3 to 5 more minutes. Make sure it’s heated through. Then, season with salt and pepper to taste. Finally, add the drained pasta to the skillet. Toss the pasta gently to coat it with the creamy tomato sauce. Serve right away with fresh basil leaves and grated Parmesan cheese if you like. To boost flavor, try adding spices like red pepper flakes for heat or smoked paprika for depth. If you love herbs, fresh basil or parsley adds a bright taste. You can also use a splash of balsamic vinegar to add sweetness and acidity. When cooking, always sauté garlic until fragrant but not browned. This method keeps it sweet and mild. Let your sauce simmer longer for richer flavors. A simple tip is to mix in a bit of the pasta water to thin the sauce, creating a silkier texture. Prep your ingredients before cooking. Chop garlic and measure out spices ahead of time. This way, you save minutes while cooking. Keep your workspace tidy to stay focused. Use kitchen tools like a garlic press or a measuring cup to save time. A large skillet is perfect for this dish. It allows you to cook and mix everything in one pan, cutting down on dishes. For plating, use a large bowl to give your pasta space to shine. Twirl the pasta with a fork for a beautiful presentation. Garnish with fresh basil leaves for a pop of color. If you're using Parmesan, sprinkle it on just before serving. A drizzle of olive oil adds a nice finish. This makes the dish look fancy and tastes great! Pro Tips Choose the Right Pasta: For this creamy sauce, pasta shapes like fusilli or penne work best as they hold the sauce well. Don’t Overcook the Pasta: Cook the pasta until al dente, as it will continue to cook slightly when mixed with the sauce. Add Fresh Herbs: For an extra burst of flavor, consider adding fresh herbs like basil or parsley right before serving. Customize Your Cream: You can use heavy cream for richness or coconut cream for a dairy-free alternative, both giving a deliciously creamy texture. {{image_2}} You can adjust this creamy tomato pasta to fit your diet. For a dairy-free option, use coconut cream instead of heavy cream. It gives a rich taste without dairy. For those needing gluten-free meals, choose gluten-free pasta like rice or corn pasta. Both adjustments keep the dish tasty. You can add protein to make the dish heartier. Cooked chicken, shrimp, or tofu work well. Just stir them in with the sauce. This makes the meal filling and boosts flavor. You can also add veggies like spinach or bell peppers. They add color and nutrition. Toss them in during the last few minutes of cooking to keep them fresh. The type of pasta you use makes a difference. Fusilli and penne are great for this creamy sauce. They hold the sauce well and offer good texture. You can also try spaghetti or farfalle for a fun twist. Each shape changes the feel of the dish, so experiment to find your favorite! To keep your creamy tomato pasta fresh, store it in an airtight container. Let it cool completely before sealing. This helps keep the flavors intact. It’s best to eat the leftovers within 3 days. After that, the sauce may not taste as good. When reheating creamy sauces, use low heat. You can use the stove or microwave. Stir the sauce gently to keep it creamy. If it seems too thick, add a splash of water or cream. This will help regain the smooth texture. If you want to freeze your pasta, use a freezer-safe container. Leave some space at the top for expansion. You can freeze it for up to 3 months. When you are ready to eat, thaw it overnight in the fridge. Reheat it slowly on the stove, adding a bit of cream to revive the sauce. You can easily make this dish vegan by swapping some ingredients. Here are some simple swaps: - Use 200ml coconut cream instead of heavy cream. - Replace Parmesan cheese with a vegan cheese alternative or nutritional yeast. - Make sure the pasta is egg-free; look for vegan pasta options. These changes keep the flavor rich and delicious without dairy. Yes, you can prepare this dish ahead of time. Here are some tips: - Cook the pasta and sauce separately. - Store the sauce in the fridge for up to three days. - Keep the pasta in an airtight container. When ready to eat, just reheat the sauce and mix with pasta. This keeps everything fresh. Pairing dishes can enhance your meal. Here are some great options: - A simple green salad with vinaigrette. - Garlic bread for a crunchy side. - Roasted vegetables for extra flavor. These sides balance the creamy pasta and make your meal more exciting. In this post, we covered how to make creamy tomato pasta. We discussed the ingredients and cooking steps, along with useful tips to enhance flavor. You learned how to adapt the dish for dietary needs and variations. Remember to store leftovers properly and reheat them effectively. Making creamy tomato pasta is fun and rewarding. With practice, you'll create a dish that impresses everyone. Enjoy the process and share your tasty results!

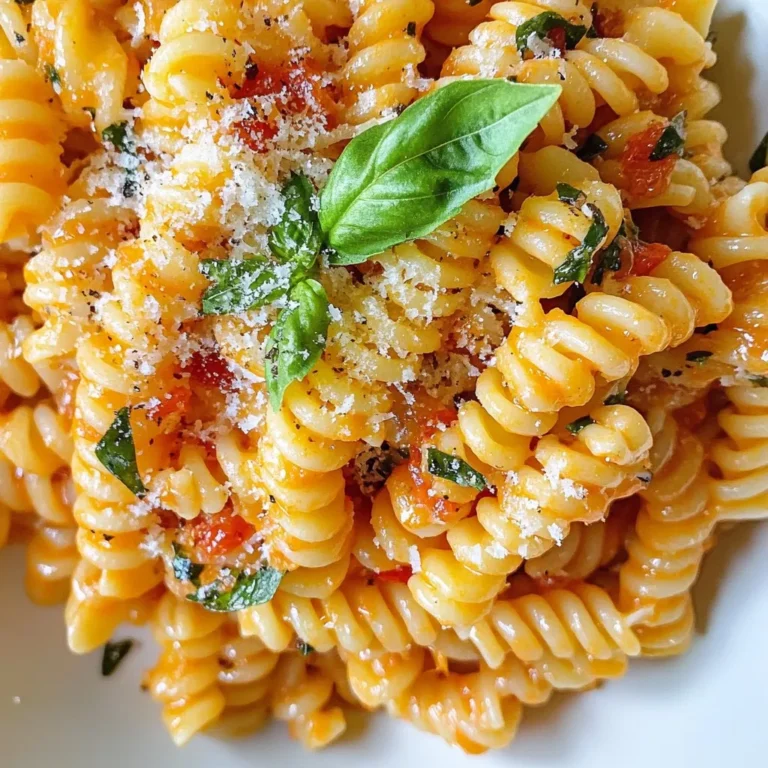
Creamy Tomato Pasta in 20 Minutes Quick Recipe

To make the meatballs, you need: - 1 pound ground beef or turkey - 1/2 cup breadcrumbs - 1/4 cup grated Parmesan cheese - 1 large egg - 2 cloves garlic, minced - 1 teaspoon Italian seasoning - Salt and pepper, to taste These ingredients create a tasty base for your meatballs. The meat gives protein, while the breadcrumbs add texture. Parmesan cheese brings a nice flavor. The egg helps bind everything together. Garlic and Italian seasoning add a savory touch. For the stew, you will need: - 1 medium onion, diced - 2 carrots, sliced - 2 stalks celery, diced - 1 cup green beans, trimmed and halved These veggies add color and nutrition. Onions bring sweetness when cooked. Carrots add a bit of crunch, while celery gives a fresh taste. Green beans add a nice pop of color and flavor. You will also need: - 4 cups low-sodium beef broth - 1 can (14.5 oz) diced tomatoes, with juice - 2 tablespoons fresh parsley, chopped (for garnish) The beef broth forms the stew's base. Diced tomatoes add acidity and sweetness. Fresh parsley gives a bright finish. Salt and pepper help enhance all the flavors. {{ingredient_image_1}} To make the meatballs, gather a large mixing bowl. Add 1 pound of ground beef or turkey. Then, mix in 1/2 cup of breadcrumbs and 1/4 cup of grated Parmesan cheese. Next, crack in 1 large egg and add 2 cloves of minced garlic. Sprinkle in 1 teaspoon of Italian seasoning, plus salt and pepper to taste. Combine all the ingredients well. Now, roll the mixture into small meatballs, about 1 inch wide. Set these aside on a plate. In a large pot or Dutch oven, heat 1 tablespoon of olive oil over medium heat. Add 1 medium diced onion, 2 sliced carrots, and 2 diced celery stalks. Sauté the vegetables for 5 to 7 minutes until they soften. You want the onion to turn translucent. After this, gently add the meatballs to the pot. Cook them for about 5 minutes, turning until they are browned on all sides. They do not need to be fully cooked yet. With the meatballs browned, pour in 4 cups of low-sodium beef broth and a can of diced tomatoes with their juice. Stir well to mix everything together. Bring the stew to a simmer, then reduce the heat to low. Add 1 cup of trimmed and halved green beans. Cover the pot and let it cook for about 20 minutes. This allows the flavors to meld and the meatballs to finish cooking. After cooking, taste the stew and adjust the seasoning with salt and pepper if needed. To make your meatballs juicy, use a mix of ground beef and turkey. The beef adds flavor, while turkey keeps them moist. Adding breadcrumbs helps too. They act like little sponges, soaking up liquid. Also, don’t overmix the meat. Just combine the ingredients until mixed. This keeps the meatballs tender. Seasoning is key for great flavor. Use garlic, Italian seasoning, salt, and pepper. Fresh herbs add a nice touch. Try using parsley or basil for brightness. Taste the meatball mix before you shape them. Adjust the seasoning if needed. Remember, the broth and tomatoes will add more flavor as well. When cooking the stew, be gentle. Stir the pot carefully to keep meatballs intact. After adding broth and tomatoes, bring it to a simmer. This helps the flavors blend. Keep the pot covered while it cooks. This traps steam and cooks the meatballs through. Check the stew near the end to adjust seasoning. Enjoy your warming, hearty dish! Pro Tips Use Fresh Herbs: Fresh parsley adds a vibrant flavor. Consider adding basil or oregano for an extra aroma. Create Flavor Depth: Sautéing the vegetables before adding the broth enhances the stew's overall flavor. Adjust Consistency: If you prefer a thicker stew, mix a tablespoon of cornstarch with water and stir it in during the last few minutes of cooking. Make Ahead: This stew can be made in advance and tastes even better the next day as the flavors meld together. {{image_2}} You can use beef or turkey for this stew. Ground beef gives a rich taste. It is hearty and filling. Ground turkey is a light option. It has less fat and fewer calories. Both meats work well in the recipe. If you want a unique twist, try mixing them. This blend adds flavor and keeps it juicy. You can swap out veggies to match your taste. Try using bell peppers for a sweet kick. Zucchini adds a nice texture and flavor too. If you like greens, spinach or kale works well. Just add them in the last few minutes of cooking. This keeps them fresh and vibrant. Use what you have at home. It's a great way to reduce waste. Spices can change the whole dish. Add a pinch of red pepper flakes for heat. A dash of smoked paprika gives a nice depth. If you like herbs, fresh basil or thyme can brighten it up. You can even add a splash of Worcestershire sauce for a tangy kick. Experiment with spices to find your perfect blend. Each addition can create a new favorite version of this stew. To keep your meatball stew fresh, store it in an airtight container. Let it cool first. Place it in the fridge for up to three days. When ready to eat, check for any signs of spoilage. If it smells off, toss it out. If you want to save your stew for later, freezing works great. Use freezer-safe containers or bags. Leave some space at the top, as the stew will expand. You can freeze it for up to three months. When you are ready to eat, thaw it in the fridge overnight before reheating. Reheat your meatball stew on the stove or in the microwave. For the stove, use low heat and stir often. This helps to heat it evenly. If using a microwave, cover the bowl and heat in short bursts. Stir between each burst. Make sure it's hot throughout before serving. Yes, you can make One-Pot Meatball Stew ahead of time. Cook the stew fully and let it cool. Store it in the fridge for up to three days. The flavors will get better overnight. Just reheat it on the stove or in the microwave. You can serve meatball stew with many sides. Here are a few ideas: - Crusty bread for dipping - Rice or pasta to soak up the sauce - A fresh green salad for crunch - Mashed potatoes for a cozy touch To make this dish healthier, try these tips: - Use ground turkey instead of beef. - Add more vegetables like spinach or zucchini. - Choose whole grain breadcrumbs for added fiber. - Use low-sodium broth to cut down on salt. Yes, you can use frozen meatballs. Just add them to the pot while cooking. They will thaw and heat up in the stew. This option saves time and works well if you're in a hurry. This blog post covers how to make a delicious one-pot meatball stew. We talked about the main ingredients, vegetables, and needed liquids. I shared step-by-step instructions, tips for juicy meatballs, and ways to spice things up. You learned storage methods, reheating tips, and answers to common questions. When you make this stew, you can enjoy a warm, tasty meal. Keep experimenting with your ingredients to make it your own. Cooking should be fun and creative!

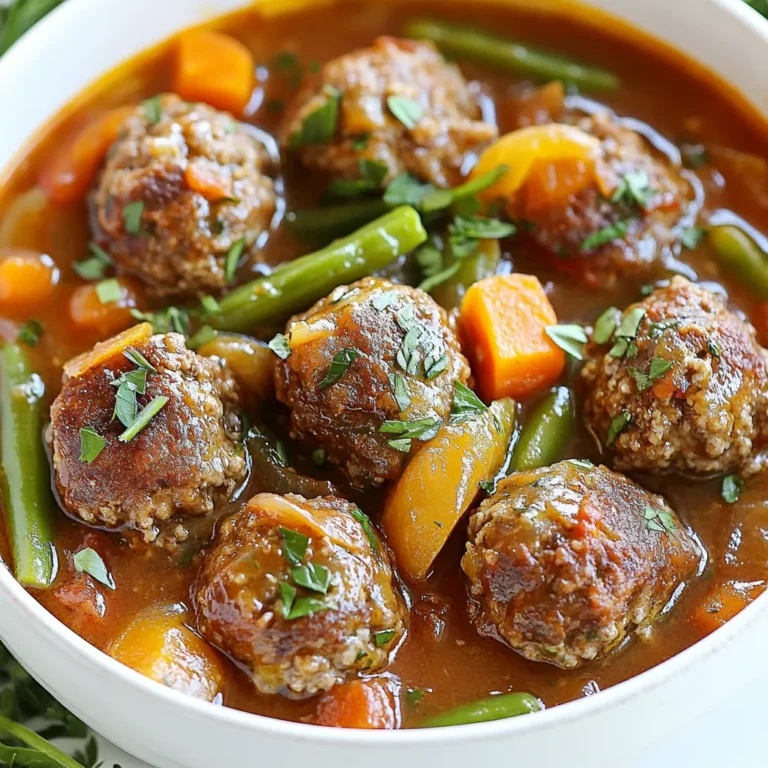
Savory One-Pot Meatball Stew Easy Comfort Food

- 1 package (16 oz) potato gnocchi - 1 zucchini, sliced - 1 bell pepper (any color), chopped - 1 cup cherry tomatoes, halved - 1 yellow onion, sliced - 3 cloves garlic, minced - 2 tablespoons olive oil - 1 teaspoon Italian seasoning - Salt and pepper, to taste - Fresh basil leaves, for garnishing - Grated parmesan cheese, for serving (optional) When I create my sheet pan gnocchi, I start with my key ingredients. The potato gnocchi is soft and pillowy. The zucchini adds a nice crunch. The bell pepper brings a burst of color and taste. Cherry tomatoes give a juicy sweetness that balances the dish. - You can use other vegetables like broccoli, asparagus, or carrots. - If you want gluten-free, look for gluten-free gnocchi. - For cheese lovers, try goat cheese or feta instead of parmesan. Feel free to mix and match with these options. It makes the dish fun and personal. You can create a new twist every time you make it! {{ingredient_image_1}} Preheating the oven First, set your oven to 425°F (220°C). This high heat helps the gnocchi and veggies cook well. Preheating is key for getting that nice crispy texture. Preparing the vegetables Next, grab a large baking sheet. Spread out the sliced zucchini, chopped bell pepper, halved cherry tomatoes, and sliced onion. This mix adds color and flavor. Drizzle two tablespoons of olive oil over the veggies. Sprinkle one teaspoon of Italian seasoning, plus salt and pepper. Toss everything so it coats well. Arranging gnocchi and vegetables on the sheet pan Now, add one package of potato gnocchi to the baking sheet. Mix the gnocchi in with the veggies. Make sure everything is in a single layer. This helps them roast evenly. Roasting time and tips Place the baking sheet in the preheated oven. Roast for 20-25 minutes. The veggies should be tender, and the gnocchi lightly golden. Stir halfway through. This ensures even cooking and prevents sticking. Adding garlic after roasting Once the dish is done, take it out of the oven. Toss in three cloves of minced garlic. Let it sit for about five minutes. This allows the garlic to flavor the dish without burning. Serving suggestions Serve the gnocchi hot. Garnish with fresh basil leaves for a pop of color. You can also drizzle grated parmesan cheese on top if you like. Enjoy this simple yet tasty meal! Roasting at 425°F (220°C) works best for this dish. This temperature helps the vegetables cook evenly and the gnocchi turn crispy. Roast for 20-25 minutes. Stir halfway through to ensure even cooking. For crispy gnocchi, make sure they are spread out in a single layer on the pan. This prevents them from steaming and keeps them golden. Italian seasoning is a great start. It adds warmth and depth to the dish. You can also mix in some garlic powder or paprika for extra flavor. Fresh herbs like basil add a nice touch at the end. Toss them in right before you serve to keep their bright flavor. To serve more, double the ingredients. Use two baking sheets to keep everything spread out. You can also make this dish ahead. Roast the vegetables and gnocchi, then store them in the fridge. Reheat in the oven at 350°F (175°C) until warm. This keeps everything tasty and fresh. Pro Tips Use Fresh Vegetables: Fresh seasonal vegetables not only enhance the flavor but also provide the best texture for roasting. Don't Overcrowd the Pan: Ensure the gnocchi and vegetables are spread out in a single layer for even roasting and optimal crispiness. Customize Your Seasoning: Feel free to experiment with different herbs and spices to match your flavor preferences or the season. Add a Zesty Kick: Incorporate a splash of lemon juice or zest before serving for an added brightness that complements the dish. {{image_2}} You can switch up the vegetables in this dish. Try using seasonal veggies for a fresh taste. Here are some great options: - Asparagus - Carrots - Broccoli - Sweet potatoes - Kale Mix bright colors to make your meal pop! A mix of red, green, and yellow veggies looks great. It also makes your dish more inviting. Adding protein enhances the meal's heartiness. You might try: - Grilled chicken - Italian sausage - White beans For a vegetarian or vegan option, add chickpeas or lentils. These proteins not only add flavor but also make the dish more filling. You can play with spices to change the taste. Here are some ideas: - Smoked paprika - Red pepper flakes - Fresh rosemary For a lighter version, swap out olive oil for vegetable broth. This keeps the dish moist without added fat. Experiment with flavors to find your favorite! To keep your sheet pan gnocchi fresh, use airtight containers. Glass or plastic containers work well. Make sure the dish cools before sealing. This helps prevent moisture build-up. You can store leftovers in the fridge for up to three days. For longer storage, freeze the dish. Use freezer-safe bags or containers. Remove as much air as possible to avoid freezer burn. Your gnocchi will stay good for about three months in the freezer. When it’s time to enjoy leftovers, the oven works best. Preheat your oven to 350°F (175°C). Spread the gnocchi and veggies on a baking sheet. Heat for about 15 minutes or until warm. You can also use the microwave, but it may make the gnocchi soggy. To avoid this, heat in short bursts and stir in between. Adding a splash of olive oil can help keep them crispy. In the fridge, your sheet pan gnocchi lasts about three days. If frozen, it will stay good for three months. Always check for signs of spoilage. If you see mold or smell something off, do not eat it. Fresh gnocchi should taste good and smell nice. Trust your senses to keep your meals safe. Yes, you can use frozen gnocchi. Just add them directly to the baking sheet without thawing. They will cook well with the vegetables. The cooking time might be a bit longer, so check for doneness. I love using zucchini, bell peppers, and cherry tomatoes. You can also try broccoli, cauliflower, or asparagus. Choose any seasonal vegetables you like. The more colors, the better it looks! You can prep the veggies and gnocchi ahead. Just store them in the fridge in a sealed container. When you’re ready to cook, toss them on the sheet pan and roast as directed. To make this dish vegan, skip the parmesan cheese. You can add nutritional yeast for a cheesy flavor. Use vegetable oil instead of olive oil if you prefer. This dish pairs well with a green salad or garlic bread. A light vinaigrette adds freshness. You can also serve it with a glass of white wine for a lovely meal. This dish combines simple ingredients like gnocchi, veggies, and garlic for a tasty meal. You can customize it with different veggies, cheeses, and proteins. I shared tips to ensure your gnocchi turns out crispy and flavorful. Finally, consider how to store leftovers for later. You can enjoy this sheet pan gnocchi in many ways. It’s easy, fun, and perfect for any gathering or weeknight dinner. Enjoy your cooking adventure!

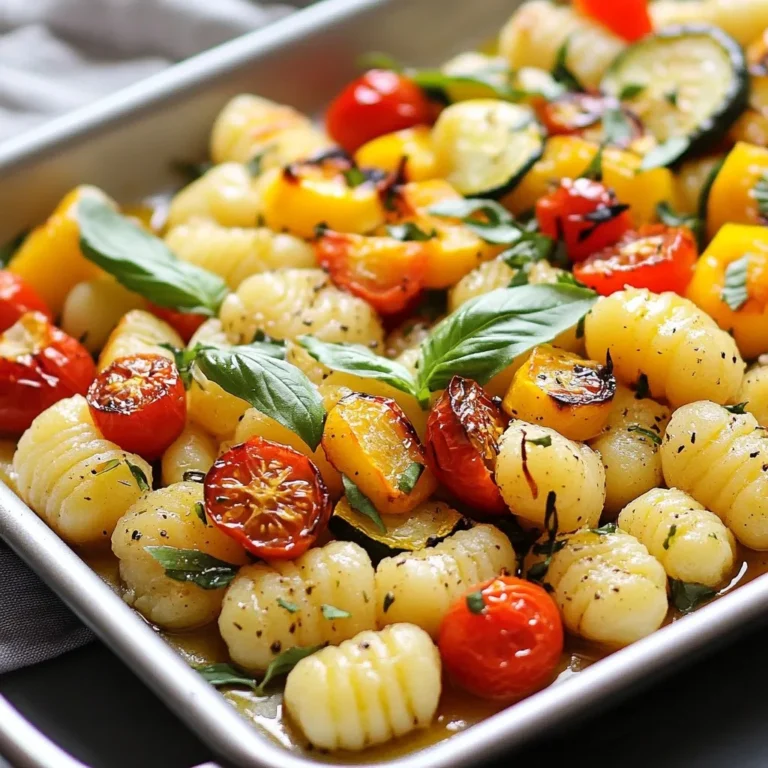
Sheet Pan Gnocchi with Roasted Vegetables Delight

- 8 oz (about 225g) pasta (penne or fusilli works great) - 2 cups broccoli florets - 2 tablespoons olive oil - 1 clove garlic, minced - 3 cups vegetable broth - 1 cup sharp cheddar cheese, grated - 1 teaspoon onion powder - 1/2 teaspoon paprika - Salt and pepper to taste These ingredients create a creamy, cheesy dish. The pasta forms the base. Broccoli adds color and nutrition. The garlic gives a nice flavor. Vegetable broth helps the pasta cook well. Cheddar cheese brings the creaminess. Onion powder and paprika add depth. Salt and pepper round it all out. - 2 tablespoons cream cheese Adding cream cheese makes the dish even richer. It blends well with the cheddar. This step is not required, but it enhances texture. If you like creamier pasta, I suggest using it. - Fresh parsley, chopped Garnishing with fresh parsley adds a pop of color. It also brightens the flavor. Just sprinkle some on top before serving. This simple step makes your dish look and taste great! {{ingredient_image_1}} First, grab a large pot. Heat 2 tablespoons of olive oil over medium heat. Add 1 clove of minced garlic. Sauté for about 30 seconds. You want the garlic to smell nice, not burn. Now, it's time for the pasta. Add 8 ounces of your chosen pasta to the pot. Pour in 3 cups of vegetable broth. Add 1 teaspoon of onion powder, 1/2 teaspoon of paprika, and some salt and pepper. Stir it all up. Bring this mixture to a boil. Once boiling, lower the heat to a simmer. Cook for about 5 minutes. Stir occasionally. The pasta should be halfway done. Next, add 2 cups of broccoli florets to the pot. Cook for another 4-5 minutes. Check the pasta; it should be al dente, and the broccoli should be tender. Once done, take the pot off the heat. Stir in 1 cup of grated sharp cheddar cheese. If you like it creamy, add 2 tablespoons of cream cheese. Mix until everything melts and blends well. Taste and add more salt and pepper if needed. Serve hot, and sprinkle fresh parsley on top for a nice touch. To get the best pasta texture, cook it al dente. Al dente means the pasta is firm but not hard. This keeps it from getting mushy in the pot. Stir the pasta often while it cooks. This helps it cook evenly. If you like your pasta softer, cook it a minute longer. Seasoning makes a big difference in taste. Use salt and pepper to bring out the flavor. Add a teaspoon of onion powder for depth. Paprika adds a nice warmth. If you want more zing, try adding a pinch of red pepper flakes. You can also use fresh herbs like thyme or basil for added flavor. One-pot meals save time and make cleanup easy. Start with a large pot to fit everything. Heat the oil before adding garlic. This helps release its flavor. Add the pasta and broth together. This way, the pasta cooks in the broth's flavor. When you finish cooking, stir in the cheese off the heat. This keeps it creamy and smooth. Pro Tips Perfect Pasta: Ensure you cook the pasta al dente for the best texture; it will continue to cook slightly after you remove it from the heat. Cheesy Goodness: For an extra cheesy flavor, consider mixing in a blend of different cheeses like mozzarella or gouda along with the cheddar. Broccoli Boost: To enhance the flavor of the broccoli, you can briefly steam it before adding it to the pasta, ensuring it retains its vibrant color and nutrients. Spice It Up: Feel free to add a pinch of crushed red pepper flakes for a bit of heat, or experiment with other spices like Italian seasoning for a unique twist. {{image_2}} You can change up the cheese to add new flavors. Try mozzarella for a milder taste. Gruyère gives a nutty flavor. For a sharp bite, use pepper jack. Each cheese melts differently, so pick one you enjoy. Want to make this dish heartier? Add protein! Cooked chicken, shrimp, or sausage works great. Tofu is a good choice for a vegetarian option. Simply add it when you mix in the cheese for best results. You can boost nutrition with more veggies. Spinach or kale adds color and health. Carrots or bell peppers bring crunch and sweetness. Just chop them small and add them with the broccoli for even cooking. After you enjoy your one-pot broccoli cheddar pasta, let it cool. Place leftovers in an airtight container. This keeps the pasta fresh and tasty. Store it in the fridge for up to three days. If you want to keep it longer, freezing is a great option. To reheat, scoop out the pasta into a pot. Add a splash of water or broth. Heat over low until warm. Stir often to prevent sticking. You can also use a microwave. Heat in short bursts, stirring in between. This helps it heat evenly. If you want to freeze the pasta, use a freezer-safe container. Make sure to leave some space at the top. The pasta will expand as it freezes. You can freeze it for up to three months. When you're ready to eat, thaw it overnight in the fridge before reheating. Yes, you can use frozen broccoli. It saves time and cuts prep work. Simply add it in when you add the pasta to the pot. Cook it for the last few minutes. This gives it time to heat through and soften. Frozen broccoli is a great choice for busy days. You can use many pasta types. Penne and fusilli work well because they hold sauce nicely. You can also try rotini, shells, or even elbow macaroni. Just make sure to adjust cooking times based on the pasta you choose. Look for pasta that cooks in about 10-12 minutes. This dish is already vegetarian when you use vegetable broth. To keep it vegetarian, skip the cream cheese if you prefer a lighter dish. You can also add more veggies like bell peppers or spinach. This adds flavor and nutrition without losing any of the taste. This blog post covered everything you need to know for a great dish. We started with a list of ingredients, including options for creaminess and garnishes. I shared step-by-step instructions for cooking, from sautéing garlic to adding broccoli. You learned tips for perfect pasta, how to enhance flavor, and easy storage methods. Lastly, we explored variations to suit your taste. Try these ideas to make your meals fun and tasty! Happy cooking!

One-Pot Broccoli Cheddar Pasta Quick and Easy Meal

- 2 cups rolled oats - 1 cup unsweetened shredded coconut - 1 cup raw almonds, chopped - 1/2 cup honey or maple syrup - 1/4 cup coconut oil, melted - 1/2 teaspoon vanilla extract - 1/2 teaspoon cinnamon - 1/4 teaspoon salt - 1/4 cup mini dark chocolate chips (optional) Coconut and almonds are stars in this recipe. Coconut brings a sweet, tropical flavor and healthy fats. It also has fiber that helps digestion. Almonds add crunch and protein, which keeps you full. They also contain vitamin E, great for your skin. Honey or maple syrup sweetens the granola. Both options add flavor and energy. Coconut oil keeps everything moist and adds a hint of coconut taste. Cinnamon gives warmth, while salt enhances all the flavors. You can swap out almonds for other nuts. Walnuts or pecans work well if you want a new twist. For a nut-free option, try sunflower seeds or pumpkin seeds. If you want less sugar, use agave syrup instead of honey. You can also use maple syrup if you prefer its taste. {{ingredient_image_1}} Start by preheating your oven to 325°F (160°C). This ensures even cooking. While the oven heats, line a baking sheet with parchment paper. This step keeps your granola from sticking. It makes cleanup easy too. In a large bowl, mix together 2 cups of rolled oats, 1 cup of unsweetened shredded coconut, and 1 cup of chopped raw almonds. These ingredients bring great flavor and crunch. Next, take a small saucepan. Over low heat, whisk together 1/4 cup of melted coconut oil, 1/2 cup of honey or maple syrup, 1/2 teaspoon of vanilla extract, 1/2 teaspoon of cinnamon, and 1/4 teaspoon of salt. Mix until smooth. Pour this mixture over your dry ingredients. Stir well to coat everything. Spread the granola mixture onto your lined baking sheet. Press it down slightly to help form clusters. Bake for 20-25 minutes, stirring halfway through. This ensures even browning. Keep an eye on it. It can burn quickly. When it turns golden brown, take it out of the oven. Let it cool completely. If you like, sprinkle in 1/4 cup of mini dark chocolate chips while it's warm. Gently press them in. Once cool, break the granola into clusters. Store them in an airtight container. Enjoy your healthy treat! To get those perfect clusters, press the granola down firmly on the baking sheet. This helps the mixture stick together as it bakes. When baking, stir the granola halfway through to ensure even cooking. Keep your eyes on it near the end. It can turn from golden to burnt quickly. Once your granola cools, store it in an airtight container. This keeps it fresh and crunchy. You can also place it in a glass jar for a fun look. If you store it right, it can last for up to two weeks. For longer storage, consider freezing it. Just make sure to separate it into portions. Coconut almond granola is great on its own, but it shines when paired with yogurt. Layer it with fresh fruits for a tasty breakfast. You can also sprinkle it on smoothie bowls for added crunch. Another fun idea is to enjoy it as a snack with milk or plant-based options. The options are endless! Pro Tips Use Fresh Ingredients: Opt for fresh, high-quality almonds and coconut for the best flavor and texture in your granola. Customize Your Sweetener: Experiment with different sweeteners like agave or brown rice syrup to find your perfect taste. Cluster Control: For larger clusters, press the mixture firmly into the baking sheet before baking. Storage Savvy: Store granola in an airtight container at room temperature to maintain freshness for up to two weeks. {{image_2}} You can easily switch up the flavor of your granola. Adding dried fruits like cranberries or raisins gives it a sweet touch. Seeds like pumpkin or sunflower add crunch and nutrition. Try mixing in different nuts, too. Walnuts and pecans can add unique flavors. You can even add spices like nutmeg for warmth. Get creative and find what you love! If you need gluten-free granola, use gluten-free oats. They are safe and tasty. Most rolled oats are naturally gluten-free but check the label. You can also add chia seeds or flaxseeds for extra fiber. These swaps keep your granola delicious and healthy. To make vegan granola, swap honey for maple syrup or agave. Both are sweet and plant-based. You can also try date syrup for a rich flavor. This change keeps your granola vegan-friendly while still being sweet. Enjoy your treat without worry! To keep your granola clusters fresh, store them in an airtight container. This prevents air from making the clusters soft. You can use glass jars or plastic bins. Make sure they are clean and dry before you fill them. For added freshness, place a piece of parchment paper between layers of granola. This keeps the clusters from sticking together. Your coconut almond granola clusters will last about two weeks at room temperature. If you want to keep them longer, you can freeze them. To freeze, place the clusters in a zip-top freezer bag. Remove as much air as possible before sealing. They can last up to three months in the freezer. When you’re ready to enjoy, let them thaw at room temperature. Reheating granola clusters isn't usually needed. They taste best when eaten fresh. If you prefer them warm, spread the clusters on a baking sheet. Heat them in a 300°F oven for about 5-10 minutes. This will help restore some crunch. Enjoy them as a snack or sprinkle them over yogurt for a tasty treat! Yes, you can make no-bake granola clusters. To do this, mix the dry and wet ingredients as usual. Then, shape the mixture into clusters and chill them in the fridge. They will firm up without the oven. This method keeps things simple and quick. To get crunchy granola clusters, use enough wet ingredients. This helps bind the oats together. Press the mixture down on the baking sheet. This creates nice clusters. Bake it until golden brown while stirring halfway. Let it cool completely before breaking it apart. Cooling is key to getting that perfect crunch. You can add many tasty things to your granola. Dried fruits like cranberries, apricots, or raisins add sweetness. Nuts like walnuts or pecans give extra crunch. Spice it up with nutmeg or cardamom for warmth. You can also try adding seeds like chia or flax for more nutrition. Feel free to experiment and find your favorite mix! In this post, we covered how to make delicious coconut almond granola clusters. We explored the key ingredients, their health benefits, and even substitutions. You learned step-by-step instructions, plus tips for perfect clusters and storage. I shared variations for different tastes and dietary needs. Granola can be a fun snack or breakfast. Now, you have all the tools to create your own tasty batches. Enjoy experimenting with flavors and find what you love best. Happy baking!

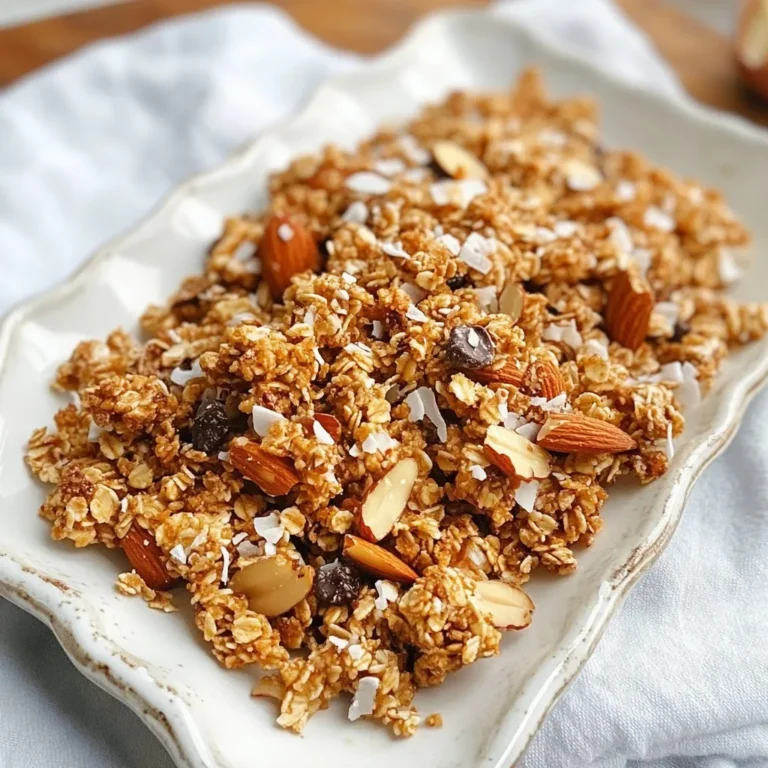
Coconut Almond Granola Clusters Crunchy and Healthy Treat

- 12 oz cheese tortellini - 2 tablespoons olive oil - 3 cloves garlic, minced - 1 cup cherry tomatoes, halved - 1 cup spinach, roughly chopped - 1 cup heavy cream - 1 teaspoon Italian seasoning - 1/2 teaspoon red pepper flakes (optional) - 1/2 cup grated Parmesan cheese - Salt and pepper to taste - Fresh basil leaves - Optional toppings When I make Marry Me Tortellini, I start with some key ingredients. First, I grab cheese tortellini. It gives a nice, soft bite. Next, I use olive oil for flavor. Garlic adds a great smell and taste. Cherry tomatoes bring a sweet touch. Spinach adds some green and healthy vibes. I also like to include heavy cream. It makes the dish rich and creamy. Italian seasoning gives the dish warmth. Red pepper flakes can add heat if you want. I finish with Parmesan cheese for a savory kick. Salt and pepper round out the taste. For garnishing, I pick fresh basil leaves. They look pretty and taste fresh. You can also add any other toppings you like, such as extra cheese or nuts. These ingredients come together to make a meal that is simple yet full of flavor. {{ingredient_image_1}} 1. Fill a large pot with water and add salt. 2. Bring the water to a boil over high heat. 3. Add 12 oz of cheese tortellini to the boiling water. 4. Cook the tortellini according to the package instructions. 5. Once cooked, drain the tortellini in a colander. 6. Set the tortellini aside for later use. 1. Take a large skillet and heat 2 tablespoons of olive oil over medium heat. 2. Add 3 cloves of minced garlic to the skillet. 3. Sauté the garlic for about 1 minute until it smells nice. 4. Then, add 1 cup of halved cherry tomatoes. 5. Cook the tomatoes for 3 to 4 minutes until they soften. 6. Stir in 1 cup of roughly chopped spinach. 7. Let the spinach cook until it wilts, which takes about 2 minutes. 1. Pour in 1 cup of heavy cream and add 1 teaspoon of Italian seasoning. 2. If you like spice, add 1/2 teaspoon of red pepper flakes. 3. Stir well and let the sauce simmer for 2 to 3 minutes. 4. Once bubbling, add the cooked tortellini to the skillet. 5. Mix in 1/2 cup of grated Parmesan cheese. 6. Toss gently to coat the tortellini in the creamy sauce. 7. Taste and season with salt and pepper. 8. Cook for another minute and serve hot. 9. Garnish with the remaining Parmesan cheese and fresh basil leaves. - Cook the tortellini until it is al dente. This means it should have a slight bite. - You can change the creaminess by adding more or less heavy cream. Taste as you go. - Fresh herbs like basil or parsley make a big difference. They add bright notes to the dish. - Try using different cheeses, like mozzarella or feta. Each cheese gives a unique taste. - Prep ingredients in advance. Chop garlic, tomatoes, and spinach before cooking. - Use quick cooking methods, like sautéing. This cuts down on time while keeping flavors fresh. Pro Tips Use Fresh Ingredients: Fresh cherry tomatoes and spinach will enhance the flavor and texture of the dish, making it more vibrant and delicious. Adjust the Heat: If you enjoy a little kick, feel free to increase the amount of red pepper flakes or add a pinch of cayenne pepper to the sauce. Mix Up the Cheese: Consider using a blend of cheeses, like mozzarella or fontina, along with Parmesan for added creaminess and flavor depth. Garnish with Fresh Herbs: Fresh basil not only adds color but also a fragrant aroma that elevates the dish, so don't skip this final touch! {{image_2}} You can easily make Marry Me Tortellini vegetarian. Start by swapping the spinach with other veggies. Try bell peppers, zucchini, or mushrooms. These add great taste and color. If you want a vegan option, replace the cheese tortellini with a plant-based type. Use coconut cream instead of heavy cream. This keeps the dish rich and creamy without dairy. Want to make this dish heartier? Add protein like chicken or shrimp. Cook the protein in the skillet after sautéing the garlic. When it's done, add the tomatoes and spinach. This adds a nice depth to the flavor. For a plant-based choice, use tofu. Press and cube the tofu, then sauté it until golden. Mix it in with the tortellini for a healthy twist. You can change the flavor profile easily. Experiment with spices like thyme or oregano. These can bring new life to the dish. If you love sauces, add pesto or Alfredo for a twist. A splash of lemon juice can brighten the taste. Don't be afraid to play around and make it your own! After you cook Marry Me Tortellini, you might have leftovers. To store them, place the tortellini in an airtight container. You can keep it in the fridge for up to three days. For reheating, the best method is to use a skillet. Add a splash of water or cream to prevent sticking. Heat over low until warm, stirring gently. If you want to save some for later, freezing is a great option. To freeze cooked tortellini dishes, allow them to cool first. Then, put them in a freezer-safe container. You can keep it frozen for up to three months. When you're ready to eat, thaw it in the fridge overnight. Reheat on the stove or in the microwave until hot. Marry Me Tortellini lasts about three days in the fridge. Keep an eye for signs of spoilage. If you see mold or an off smell, it’s time to toss it. Always check before eating leftovers. Safe storage helps you enjoy this tasty dish longer without worry. Marry Me Tortellini is a creamy pasta dish that many love. It combines cheese tortellini, garlic, and fresh tomatoes. The story goes that a chef made this dish for a special person. The flavors were so good, they said, "Will you marry me?" It’s a fun name that hints at romance. Yes, you can make Marry Me Tortellini ahead of time. Cook the tortellini and sauce separately. Store them in airtight containers in the fridge. When ready to eat, combine and heat them in a skillet. This way, you keep the flavors fresh. Enjoy it within three days for the best taste. You can easily change the spice level in Marry Me Tortellini. To increase heat, add more red pepper flakes. For less heat, reduce or skip the red pepper flakes. You could also add a pinch of black pepper or a dash of hot sauce for more flavor. Yes, you can make a gluten-free version of Marry Me Tortellini. Use gluten-free tortellini, which is available in stores. There are many options made from rice or chickpeas. Just follow the same cooking instructions. The dish will still be creamy and tasty! Marry Me Tortellini combines cheese tortellini, fresh veggies, and creamy sauce for a delicious meal. You can cook it easily by following the steps outlined. Remember to test for al dente tortellini and adjust flavors to your liking. This dish shines with fresh herbs and toppings. Whether you go vegetarian or add protein, the options are endless. Lastly, store leftovers carefully for future meals. Enjoy this dish with your loved ones, and you might just get proposed to!

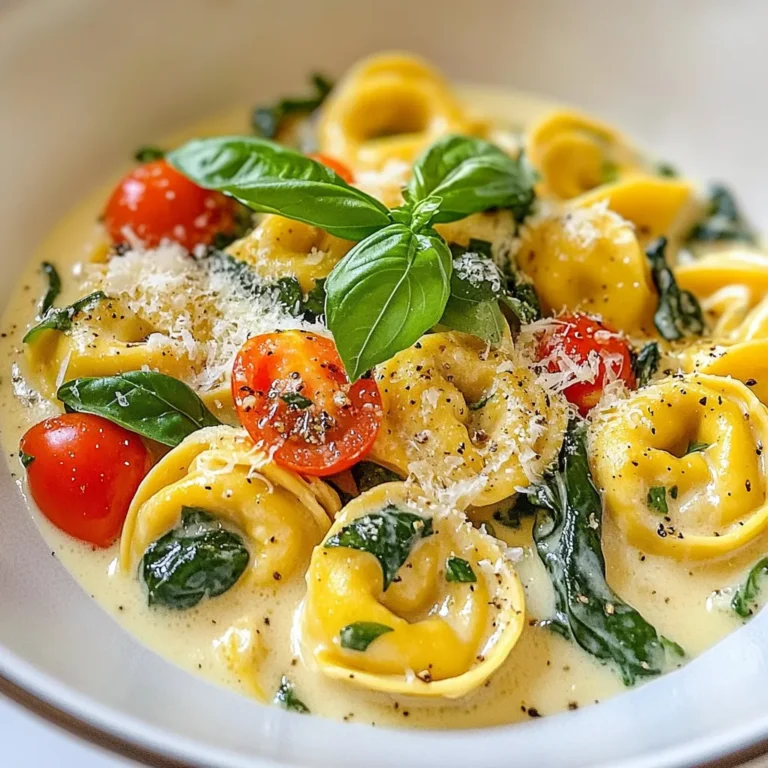
Marry Me Tortellini Simple and Flavorful Dinner Recipe

- 1 lb ground turkey - 1/2 cup breadcrumbs - 1/4 cup grated Parmesan cheese - 1/4 cup finely chopped onion I love using ground turkey for these meatballs. It’s lean, tasty, and works well with honey and garlic. The breadcrumbs help keep the meatballs fluffy. Grated Parmesan adds a nice, cheesy flavor. Finely chopped onion gives them sweetness and moisture. - 2 cloves garlic, minced - 1/4 cup honey - 1/4 cup soy sauce - 1 tablespoon apple cider vinegar Garlic is a must-have for flavor. I use minced garlic to ensure it blends well. Honey brings a sweet touch that balances the saltiness of soy sauce. The apple cider vinegar adds a bit of tang, making the sauce lively. - 1 large egg - 1/4 cup fresh parsley, chopped - 1/4 teaspoon black pepper - 1/2 teaspoon salt - 1 teaspoon sesame oil - 1 teaspoon cornstarch mixed with 1 teaspoon of water (optional, for thickening) The egg binds everything together, making the meatballs hold their shape. Fresh parsley adds color and a hint of freshness. Black pepper and salt are key for seasoning. Sesame oil gives a nutty flavor. If you want a thicker sauce, mix cornstarch with water to get that perfect texture. {{ingredient_image_1}} Preheat your oven to 400°F (200°C). This step is key for cooking the meatballs evenly. Line a baking sheet with parchment paper. This makes cleanup easy and helps the meatballs cook better. In a large bowl, combine the ground turkey, breadcrumbs, Parmesan cheese, chopped onion, minced garlic, egg, parsley, black pepper, and salt. Mix everything well with your hands or a spoon. Make sure all ingredients are evenly mixed for great flavor. Shape the mixture into meatballs that are about 1 inch in diameter. Place them on the lined baking sheet. You should get about 20 meatballs. Bake the meatballs for 20-25 minutes. They should turn golden brown and be cooked all the way through. While the meatballs bake, make the honey garlic sauce. In a small saucepan over medium heat, mix honey, soy sauce, apple cider vinegar, and sesame oil. Stir until everything combines well. Bring the mix to a gentle simmer. For a thicker sauce, add the cornstarch mixed with water. Stir until it thickens, which takes 1-2 minutes. Once the meatballs are done baking, take them out of the oven. Toss the hot meatballs in the honey garlic sauce. Make sure they are well coated. Serve them hot, and if you like, drizzle extra sauce on top for a sweet finish. To get the best meatballs, size matters. Make all meatballs about 1 inch wide. This helps them cook evenly. If they are different sizes, some will be overcooked and others undercooked. Uniformity is key for a great texture and taste. For a beautiful presentation, arrange the meatballs on a platter. You can nestle them in fresh spinach or a bed of cooked rice. Add a sprinkle of sesame seeds or more parsley on top. This adds color and makes the dish pop. Serve with toothpicks for easy eating. You can swap ground turkey with ground chicken for a lighter taste. If you need a gluten-free option, use gluten-free breadcrumbs. For a dairy-free version, skip the Parmesan cheese or use a plant-based alternative. Don’t have honey? Maple syrup works great as a sweet substitute. Pro Tips Use Fresh Ingredients: Fresh parsley and garlic will enhance the flavor of your meatballs, making them more aromatic and delicious. Adjust the Sauce: Feel free to tweak the honey and soy sauce ratio in the honey garlic sauce to suit your taste preference—more honey for sweetness or more soy sauce for saltiness. Experiment with Spices: Add spices such as ginger or red pepper flakes to the meatball mixture for an extra kick of flavor. Meal Prep Friendly: These meatballs freeze well! Make a double batch and freeze extras for a quick meal later. {{image_2}} You can easily make these meatballs fit your diet. For a gluten-free version, swap out regular breadcrumbs for gluten-free ones. You can also use ground oats or crushed rice crackers. If you want a low-calorie option, try using lean ground turkey breast. This change cuts down on fat while keeping the meatballs tasty. Want to kick up the flavor? Consider adding red pepper flakes for some spice. You can also mix in fresh herbs like basil or cilantro for a fresh twist. If you love smokiness, try adding a bit of smoked paprika. These small changes can make your meatballs stand out. Pair these meatballs with a variety of sides. Serve them over rice or quinoa for a hearty meal. You can also add them to a fresh salad for a lighter option. Drizzle extra honey garlic sauce over veggies for a sweet side dish. Don’t forget to garnish with sesame seeds or chopped parsley for extra flair. To keep your honey garlic turkey meatballs fresh, place them in an airtight container. Make sure the meatballs are cool before sealing. Store the container in the fridge. They can last for up to 3 days. If you want to enjoy them later, freezing is a great option. To freeze the meatballs, let them cool completely first. Then, place them in a single layer on a baking sheet. Freeze them for about an hour until firm. After that, transfer the meatballs to a freezer bag. Remove as much air as possible. When you're ready to eat, you can reheat them straight from the freezer. Bake them at 350°F (175°C) for about 25-30 minutes. They will be delicious and ready to enjoy. When stored properly, cooked honey garlic turkey meatballs last about 3 days in the fridge. In the freezer, they can last up to 3 months. For the best taste, try to eat them within this time. Always check for any off smells or changes in texture before consuming. This ensures your meal is safe and tasty. You can serve many side dishes with honey garlic turkey meatballs. Here are some great options: - Steamed broccoli - Rice or quinoa - Mashed potatoes - Stir-fried vegetables - A fresh garden salad These sides balance the sweet and savory flavors of the meatballs. They also add texture and color to your plate. Yes, you can use ground chicken in place of turkey. Ground chicken has a similar texture and taste. It will still work well with the honey garlic sauce. Just ensure you follow the same mixing and cooking steps. To check if the meatballs are done, use a meat thermometer. The internal temperature should reach 165°F (74°C). You can also cut one in half to check for doneness. The meat should be no longer pink and juices should run clear. Yes, you can make the sauce ahead of time. Store it in the fridge for up to a week. Reheat it on the stove before coating the meatballs. This saves time on busy days and keeps flavors fresh. This blog post covered how to make tasty honey garlic turkey meatballs. We discussed the main ingredients, mixing, shaping, and baking steps. You picked up helpful tips on storage, serving, and easy substitutions. Variations let you customize flavors or swap ingredients. These meatballs are simple and delicious, perfect for any meal. Enjoy making them and impressing your family!

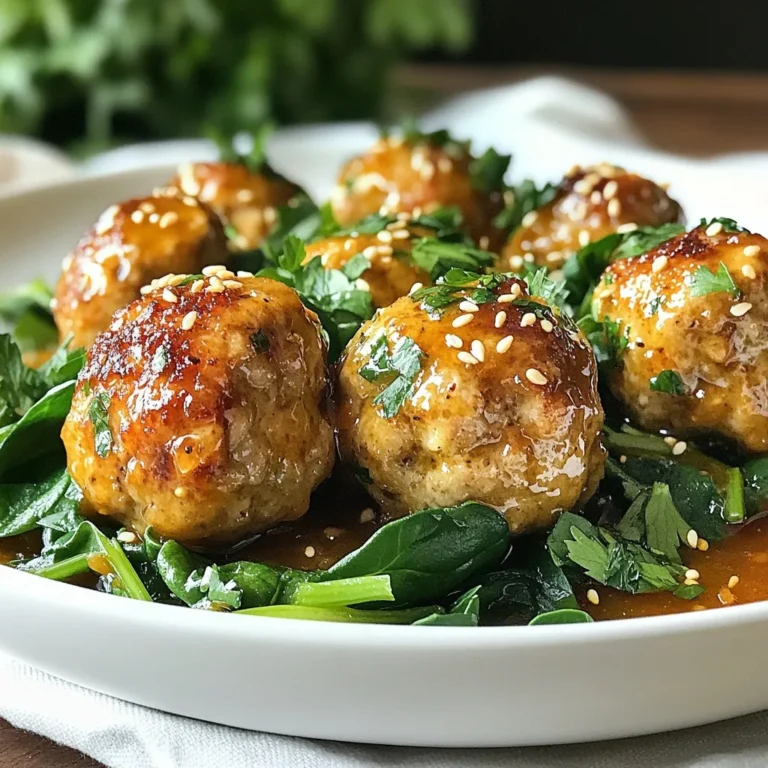
Honey Garlic Turkey Meatballs Flavorful and Easy Meal

PREV 1 … 77 78 79 … 86 NEXT
tasty trail blazer

explore

DessertsDinnerAppetizersDrinks

Our Policies

  • Cookie Policy
  • Copyright Policy
  • Disclaimer
  • GDPR Policy
  • Terms Of Use
Back to Top
  • About
  • Contact Us
  • Privacy Policy
© 2026 tasty trail blazer