FREE DINNER EBOOK! Get your copy!
  • Cookie Policy
  • GDPR Policy
  • Disclaimer
  • Terms Of Use
  • Visit my other site: Fun Cookie Recipes
tasty trail blazer
  • Home
  • Dinner
  • Desserts
  • Drinks
  • Appetizers
  • Contact
  • About
  • Privacy Policy
  • Home
  • Dinner
  • Desserts
  • Drinks
  • Appetizers
  • Contact
  • About
  • Privacy Policy
  • Cookie Policy
  • GDPR Policy
  • Disclaimer
  • Terms Of Use
Visit my other site: Fun Cookie Recipes

HOME / CATEGORIES /

Latest

To make the best Salted Caramel Pretzel Brownies, you'll need these simple ingredients: - 1 cup unsalted butter - 1 cup granulated sugar - 1 cup brown sugar, packed - 4 large eggs - 1 teaspoon vanilla extract - 1 cup all-purpose flour - 1/2 cup unsweetened cocoa powder - 1 teaspoon baking powder - 1/2 teaspoon salt - 1 cup crushed pretzels - 1 cup salted caramel sauce - Sea salt flakes for topping Each ingredient plays a key role in creating rich, chewy brownies. The butter gives moisture and flavor. The sugars add sweetness and help form a crust. Eggs bring structure and richness. Flour and cocoa create that fudgy texture we love. Baking powder helps the brownies rise just right. Crushed pretzels add a delightful crunch and saltiness. The salted caramel sauce ties everything together with sweetness and smoothness. Finally, sea salt flakes on top enhance the flavor, making these brownies truly irresistible. Don't shy away from mixing in your own flair. Feel free to tweak the recipe, but stick to these base ingredients for the best results. Each bite will be a perfect blend of sweet and salty. Enjoy the process and get ready for a treat that will wow everyone! {{ingredient_image_1}} Start by preheating your oven to 350°F (175°C). This step is key. While the oven heats, grease a 9x13 inch baking pan. You can use butter or cooking spray. This helps the brownies come out easily. In a large bowl, mix the melted butter, granulated sugar, and brown sugar. Whisk them together until smooth. The mix should look shiny. Next, add the eggs one at a time. Mix well after each egg. Finally, stir in the vanilla extract. This adds a nice flavor to the brownies. In a separate bowl, mix the flour, cocoa powder, baking powder, and salt. Whisk them together well. Gradually add this dry mix to the wet mix. Stir gently until just combined. Now, fold in the crushed pretzels. Be careful not to overmix. You want to keep the pretzel crunch. Pour half of the brownie batter into the greased pan. Spread it evenly with a spatula. Next, drizzle half of the salted caramel sauce over the brownie layer. Add the rest of the brownie batter on top. Smooth it out again. Drizzle the remaining caramel sauce on top. Use a knife to swirl the caramel into the batter. This creates a beautiful marbled effect. Now, sprinkle sea salt flakes over the top. Bake in the preheated oven for 25-30 minutes. Check with a toothpick; it should come out with a few moist crumbs. Once done, let the brownies cool in the pan for at least 15 minutes. This helps them set before you cut them into squares. To get the best sweet and salty taste, use good-quality salted caramel. This enhances the flavor of the brownies. Add a pinch of sea salt on top after baking. This step brings out the caramel taste. Feel free to adjust the salt based on your taste. Remember, a little salt can make the sweetness pop! Store your brownies in an airtight container. This keeps them fresh for up to a week. You can also wrap them in plastic wrap. For longer storage, freeze them in a freezer-safe bag. They can last for up to three months in the freezer. Just thaw them in the fridge before enjoying! For neat cuts, cool the brownies completely. Use a sharp knife to slice them. Dip the knife in hot water for extra clean edges. Wipe the knife after each cut to avoid mess. This way, you get perfect squares every time! Pro Tips Use Room Temperature Eggs: Using eggs at room temperature helps them incorporate better into the batter, leading to a smoother texture. Don’t Overmix the Batter: Overmixing can lead to dense brownies. Mix just until the dry ingredients are combined for a fudgy result. Let Them Cool: Allow the brownies to cool in the pan for at least 15 minutes before cutting. This helps them set and makes slicing easier. Drizzle Extra Caramel: For an indulgent touch, serve brownies warm with an additional drizzle of caramel sauce and a sprinkle of pretzel crumbs. {{image_2}} You can easily mix in nuts or chocolate chips. Walnuts or pecans add a nice crunch. If you love chocolate, add semi-sweet or dark chocolate chips. Use about 1 cup for a rich taste. Just fold them into the batter after adding the crushed pretzels. This will give the brownies more texture and flavor. If you need gluten-free brownies, swap the all-purpose flour. Use almond flour or a gluten-free blend. Make sure the blend has a good balance of starch and flour. This keeps the brownies moist and chewy. Also, check that your caramel sauce is gluten-free. Many store-bought options are safe, but always read the label. You can use various caramel sauces for your brownies. Store-bought sauce is quick and easy. If you want a homemade touch, try making it from scratch. Use sugar, butter, cream, and a pinch of salt. For a twist, try flavored sauces like vanilla or sea salt caramel. Each type will change the taste and add unique notes to your brownies. To keep your salted caramel pretzel brownies fresh, store them in an airtight container. Make sure the brownies are completely cool before sealing them. This helps avoid moisture build-up. They can stay fresh at room temperature for up to five days. If you want them to last longer, refrigeration is an option. Just note that refrigeration can change their texture slightly. If you want to save brownies for later, freezing is the way to go. First, cut the brownies into squares. Wrap each square tightly in plastic wrap. Then, place them in a freezer-safe bag or container. Make sure to remove as much air as possible. You can freeze them for up to three months. When you're ready to enjoy, just thaw them in the fridge overnight or at room temperature for a few hours. To enjoy your brownies warm, preheat the oven to 350°F (175°C). Place the brownies on a baking sheet and cover them with foil. Heat for about 10 minutes. This method keeps the brownies moist and brings back that fresh-baked taste. If you prefer a quicker method, a microwave works too. Heat each square for about 10-15 seconds. Just be careful not to overheat them. Enjoy your delicious treats! You can tell the brownies are done by using a toothpick. Insert it in the center. If it comes out with a few moist crumbs, they are ready. Avoid wet batter on the toothpick. Bake for 25-30 minutes at 350°F (175°C). Every oven is different, so keep an eye on them. Yes, you can use homemade caramel sauce. It adds a personal touch to your brownies. Just ensure it is thick enough to drizzle. If it is too thin, it may not create the marbled effect you want. If you don't have pretzels, try using crushed crackers or nuts. Both can give a nice crunch. You could also use cookie crumbs for a sweeter flavor. The key is to keep the texture similar to pretzels. These brownies last about 3-4 days at room temperature. Store them in an airtight container to keep them fresh. If you want to keep them longer, consider refrigerating or freezing them. This blog post gave you all you need to make delicious, salty-sweet brownies. You learned about the key ingredients and followed step-by-step instructions. I shared helpful tips for great results and easy storage options. You also explored fun variations to try. Now, you can bake your brownies with confidence. Enjoy sharing them with others or savoring them yourself! Happy baking!

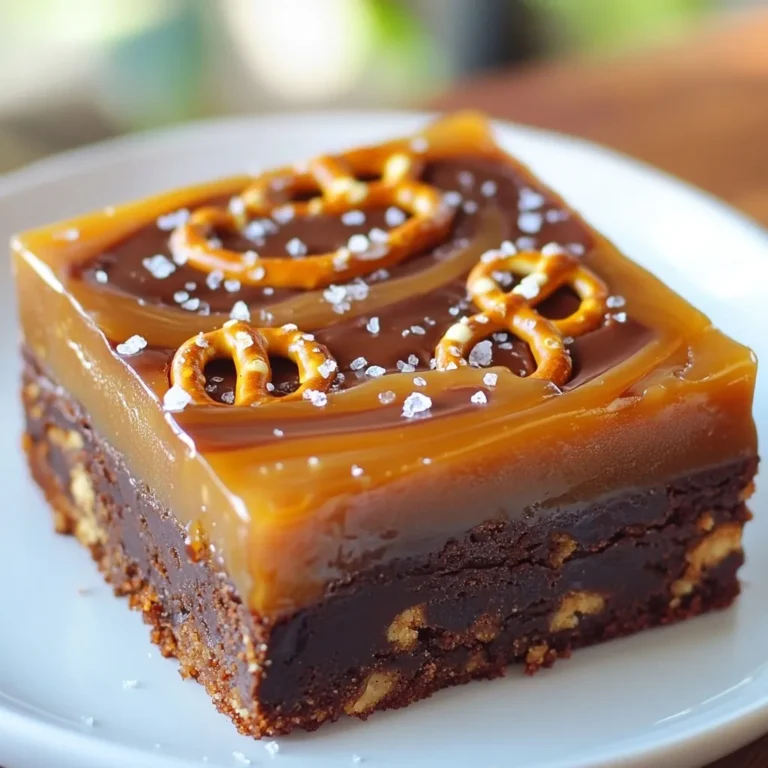
Salted Caramel Pretzel Brownies Irresistible Treat

- 1 lb large shrimp, peeled and deveined - 1 cup orzo pasta - 4 tablespoons unsalted butter - 4 cloves garlic, minced - 1 cup cherry tomatoes, halved - 1 cup baby spinach, roughly chopped - 1 lemon, zested and juiced - 1 teaspoon red pepper flakes (optional) - Salt and black pepper to taste - Fresh parsley, chopped, for garnish The star of this dish is the shrimp. When you choose shrimp, look for large, fresh ones. They add a sweet, briny flavor. The orzo pasta acts like tiny rice, soaking up all the tasty garlic butter. Garlic brings a strong aroma and deep flavor. Use fresh cloves for the best taste. Cherry tomatoes add a burst of sweetness, while baby spinach gives a nice green touch. Lemon zest and juice brighten the dish. They balance the richness of the butter. Red pepper flakes add a hint of heat, but you can leave them out if you prefer. Lastly, fresh parsley makes your dish look pretty and adds fresh flavor. If you can't find large shrimp, medium shrimp work too. For a gluten-free option, try quinoa instead of orzo. You can swap unsalted butter with olive oil for a lighter version. If you don't have cherry tomatoes, use diced regular tomatoes. Any leafy green can replace spinach, like kale or arugula. Lastly, if you want less heat, skip the red pepper flakes or use a pinch of black pepper instead. {{ingredient_image_1}} First, bring a large pot of salted water to a boil. Add 1 cup of orzo pasta. Cook it according to the package instructions. This usually takes about 8-10 minutes. We want it to be al dente, which means it should be firm to the bite. Once done, drain the orzo and set it aside. Next, grab a large skillet. Melt 2 tablespoons of unsalted butter over medium heat. Add 4 cloves of minced garlic. Sauté for about 1-2 minutes until it smells amazing. Be careful not to burn the garlic; it can turn bitter. Now, add 1 pound of peeled and deveined shrimp. Season it with salt, black pepper, and red pepper flakes if you like some heat. Cook the shrimp for about 3-4 minutes until they turn pink and opaque. Once cooked, take the shrimp out of the skillet and set them aside. In the same skillet, add the remaining 2 tablespoons of butter along with 1 cup of halved cherry tomatoes. Sauté for about 3-4 minutes until the tomatoes soften. Then, toss in 1 cup of roughly chopped baby spinach. Cook it until it wilts, which takes about 2 minutes. Now, return the shrimp to the skillet. Add the cooked orzo, the zest of 1 lemon, and the juice from that lemon too. Toss everything together for about 2-3 minutes to heat it through. Adjust the taste with salt and black pepper if needed. Finally, remove the skillet from heat and sprinkle some chopped fresh parsley on top before serving. To get the best shrimp, start with fresh or properly thawed shrimp. I use large shrimp for this dish. They cook quickly and stay juicy. When cooking, don’t crowd your pan. This helps shrimp cook evenly. Cook them until they turn pink and opaque, about 3-4 minutes. If they cook too long, they can become rubbery. Trust me, no one wants chewy shrimp! I love adding fresh herbs to my dish. Fresh parsley brings brightness. You can also try basil or dill if you like. Red pepper flakes give a nice kick. Adjust the amount based on your taste. Don’t skip the lemon zest and juice. They add a fresh and tangy flavor that complements the shrimp perfectly! Timing is key to avoid overcooking. Cook the shrimp last, after your veggies. Once they turn pink, remove them from the pan. You can always add them back later. When combining with orzo, heat through for a few minutes. This keeps your shrimp tender and tasty. Enjoy the delicate texture of perfectly cooked shrimp! Pro Tips Fresh Shrimp: Always use fresh shrimp for the best flavor and texture. If using frozen shrimp, ensure they are fully thawed before cooking. Butter Temperature: Be careful not to let the butter brown too much when sautéing the garlic. Medium heat is ideal for releasing the garlic's aroma without burning it. Lemon Zest: For a more vibrant lemon flavor, zest the lemon before juicing it. This adds brightness to the dish. Customizable Veggies: Feel free to add or substitute with other vegetables like bell peppers or zucchini based on your preference or what you have on hand. {{image_2}} You can boost the health of your Garlic Butter Shrimp Orzo by adding more veggies. Try adding bell peppers or zucchini. These add color and taste. You can also use broccoli or asparagus for crunch. Just sauté them with the shrimp for a few minutes. This way, you keep the flavors bright and fresh. If you want to switch things up, try different proteins. Chicken or scallops work great instead of shrimp. Just cut them into small pieces and cook them like the shrimp. Tofu is also a nice choice for a plant-based meal. It soaks up the garlic and butter flavor well. Do you like heat? Adjust the spice level to fit your taste. Add more red pepper flakes for a kick. You can also try hot sauce or diced jalapeños. If you prefer mild, just skip the spice. This dish can be tasty no matter what level of heat you choose. Store your garlic butter shrimp orzo in an airtight container. Let it cool to room temperature first. This helps keep the flavors fresh. Keep it in the fridge for up to three days. If you want to enjoy it later, make sure to separate the shrimp from the orzo. Shrimp can get tough when reheated too many times. When you are ready to eat your leftovers, use a skillet for best results. Heat a bit of olive oil or butter over medium heat. Add the orzo and shrimp, stirring gently. You want it hot but not overcooked. This should take about 5-7 minutes. You can also use the microwave. Just heat in short bursts, stirring in between, until warm. To freeze your dish, pack it tightly in a freezer-safe container. Make sure to leave some space for expansion. It will last up to two months in the freezer. When you're ready to eat, thaw it in the fridge overnight. Reheat as mentioned above, but expect a slight change in texture. Enjoy your meal without worry! Yes, you can use frozen shrimp. Just make sure to thaw them first. Place the shrimp in a bowl of cold water for about 15 minutes. This helps them cook evenly. Once thawed, peel and devein if needed. If you don’t have orzo, you can use other small pasta. Options include ditalini or couscous. You can also try rice or quinoa for a gluten-free dish. Just adjust the cooking time as needed. To prepare ahead, cook the orzo and shrimp separately. Store them in airtight containers in the fridge. When ready to eat, just reheat in a skillet. Add a splash of water or broth to keep it moist. This makes dinner easy on busy nights! This blog post covered the tasty orzo and shrimp dish. We explored key ingredients and substitutions. I shared step-by-step instructions for cooking. Tips for better shrimp and flavor enhancements followed. I also included fun variations and storage tips. In summary, you can easily make this dish your own. Enjoy experimenting with ingredients and flavors. With a few simple steps, you’ll create a meal everyone loves. Enjoy your cooking!

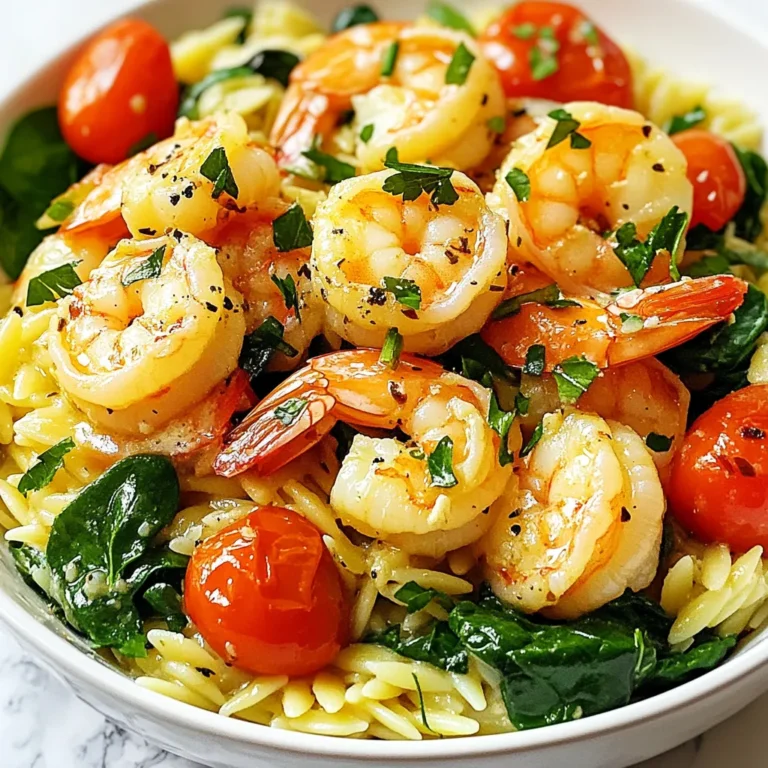
Garlic Butter Shrimp Orzo Flavorful and Simple Dish

- 2 ripe bananas, frozen - 1/2 cup unsweetened almond milk - 3 tablespoons creamy peanut butter - 1 tablespoon honey or maple syrup (optional) - 1/4 teaspoon vanilla extract - 1/4 teaspoon cinnamon To make a great Peanut Butter Banana Smoothie Bowl, start with ripe bananas. They add a natural sweetness. Frozen bananas give the smoothie a thick and creamy texture. Next, pour in unsweetened almond milk. You can use any milk you like. Creamy peanut butter adds richness and flavor. It’s the star of this bowl! If you want extra sweetness, add honey or maple syrup. A hint of vanilla extract and a sprinkle of cinnamon boosts the flavor. - Sliced bananas - Granola - Chopped nuts - Chia seeds - Shredded coconut - Extra peanut butter drizzle Toppings make the smoothie bowl fun and tasty. You can add sliced bananas for freshness. Granola adds a nice crunch. Chopped nuts give it a healthy twist. Chia seeds offer extra fiber and nutrition. Shredded coconut adds a tropical touch. Don’t forget a drizzle of extra peanut butter for more flavor! Mix and match these toppings to suit your taste. {{ingredient_image_1}} First, gather your ingredients. You need frozen bananas, almond milk, peanut butter, honey or maple syrup, vanilla extract, and cinnamon. Next, add all the ingredients to your blender. I like to start with the almond milk, as it helps the blades move easily. Then, toss in the frozen bananas. After that, add the peanut butter, honey or maple syrup, vanilla, and cinnamon. Blend everything on high speed until it's smooth and creamy. You may need to stop and scrape the sides to mix well. This ensures every bit gets blended. After your smoothie is smooth, pour it into a bowl. This is where you can get creative! Now for the fun part: adding toppings. You can use sliced bananas, granola, chopped nuts, chia seeds, or shredded coconut. Arrange them nicely on top. For an extra treat, drizzle some more peanut butter on top. This adds flavor and looks great! Serve your smoothie bowl right away for the best taste. You can add a few garnishes, like extra banana slices or a sprinkle of cinnamon, if you like. Pair this bowl with a side of toast or some yogurt. This makes a filling breakfast or snack. Enjoy the tasty mix of flavors! To get a smooth and creamy texture, use frozen bananas. They make the smoothie cold and thick. When blending, start on low speed. Gradually increase to high speed. This helps mix everything well. If your smoothie is too thick, add more almond milk. Just a splash will do. If it’s too thin, add more frozen bananas. When it comes to sweetness, pick your favorite sweetener. Honey or maple syrup works great. You can try agave nectar too. If your bananas are very ripe, you might not need extra sweetener. Taste your smoothie before adding more. Adjust the sweetness to your liking. This balance brings out the banana and peanut butter flavors. To make your smoothie bowl look great, arrange the toppings nicely. Start with sliced bananas in a circle. Next, sprinkle granola evenly on top. Add chopped nuts and chia seeds for texture. Finish with shredded coconut. A drizzle of extra peanut butter adds both flavor and style. Use colorful ingredients for a fun look. This makes your bowl more inviting and appetizing. Pro Tips Use Ripe Bananas: The riper the bananas, the sweeter your smoothie bowl will be. Look for bananas with brown spots for optimal flavor. Customize Your Milk: Feel free to substitute almond milk with any milk of your choice. Coconut milk adds a creamy texture, while oat milk gives a slight sweetness. Experiment with Toppings: Get creative with your toppings! Try different nuts, seeds, or even fresh berries to add color and nutrition. Make it Ahead: For a quick breakfast, prep your smoothie mixture the night before and store it in the fridge. Just blend in the morning for a fast and nutritious meal. {{image_2}} You can switch up the base of your smoothie bowl. If you want a dairy-free option, try coconut milk instead of almond milk. For nut-free choices, use oat milk or soy milk. You can also mix in other fruits. Berries, mangoes, or even spinach can add a fun twist to your bowl. Want to boost the nutrition? Adding superfoods can help! Consider mixing in a tablespoon of chia seeds or flaxseeds. These will give your bowl an extra health kick. You can also add spices for flavor. A pinch of nutmeg or a hint of ginger can make your smoothie bowl unique and tasty. Fresh fruits make great toppings! In summer, use berries or peaches. In fall, try apples or pears. You can also have fun with themed toppings for holidays. For Halloween, use orange slices or black sesame seeds. For Christmas, sprinkle some pomegranate seeds for a festive touch. You can store leftovers of your smoothie bowl in the fridge. Use an airtight container. It stays fresh for up to two days. If you want to freeze it, pour the smoothie into ice cube trays. This way, it keeps well for about three months. When ready to use, blend the cubes with a bit of milk. If you have extra ingredients, feel free to get creative! You can add leftover smoothie to your regular smoothies. It adds flavor and nutrition. For the toppings, use any extras in yogurt or oatmeal. They make great snacks and add crunch and taste. Yes, you can use fresh bananas. However, frozen bananas give a creamier texture. They also keep your smoothie bowl cold. If you use fresh bananas, add some ice to chill it. A smoothie bowl can last about one day in the fridge. Store it in an airtight container. The toppings may get soggy, so add them fresh when you eat. Yes, this smoothie bowl is great for meal prep. You can blend the base and store it. Just add toppings right before eating for the best taste and texture. You can use any milk you like. Options include cow’s milk, soy milk, or oat milk. Each milk gives a different taste, so choose what you enjoy most. To make this recipe vegan, use maple syrup instead of honey. Also, choose plant-based milk. All the other ingredients are already vegan-friendly. Enjoy your tasty smoothie bowl! This blog post covered how to make a delicious smoothie bowl. We discussed key ingredients, from ripe bananas to creamy peanut butter. You learned how to prepare the base, add fun toppings, and present your bowl nicely. Experiment with flavors and ingredients to make it your own. Remember, use what you have on hand and enjoy the process! With these tips and tricks, you can create the perfect breakfast or snack. Enjoy your tasty creation!

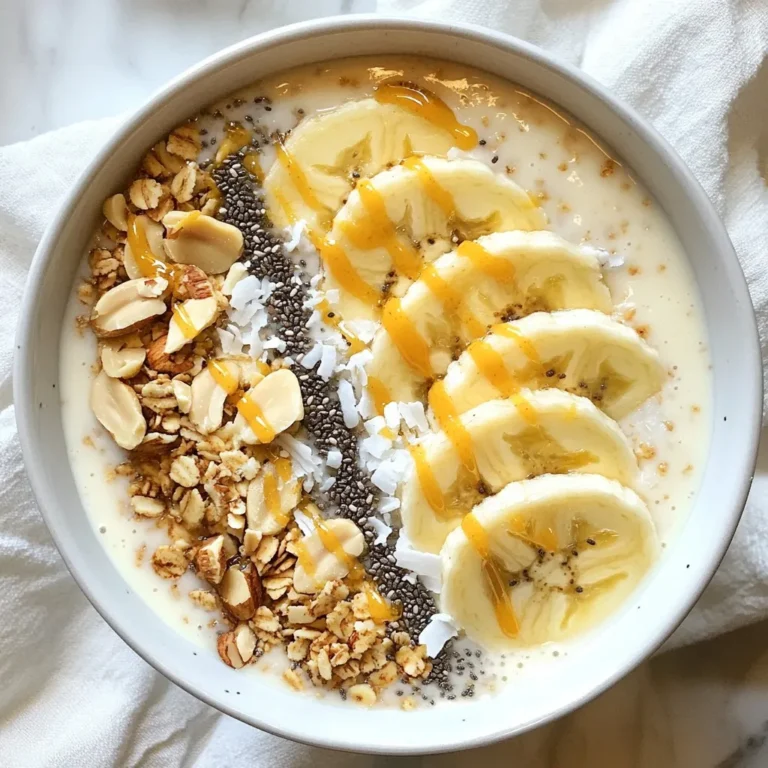
Peanut Butter Banana Smoothie Bowl Tasty and Nutritious

- 1 cup fresh blackberries - 5-6 fresh sage leaves - 1 cup freshly squeezed lemon juice (about 4-6 lemons) Fresh ingredients make all the difference in this drink. Blackberries should be ripe, juicy, and plump. Look for deep purple color for the best flavor. Sage leaves must be fresh and fragrant. They add a herbal note that brightens the drink. Lemons should be firm and heavy for their size, which means they are juicy. - 1 cup granulated sugar - 4 cups water - Ice cubes Granulated sugar is key for sweetness. You can adjust it based on your taste. Water is the base for your lemonade. It helps balance the flavors. Ice cubes keep your drink cold and refreshing on hot days. - Lemon slices - Sprigs of sage Garnishes add a nice touch. Lemon slices give a pop of color and a hint of extra zest. Sprigs of sage enhance the drink's herbal aroma. Together, they make the drink look beautiful and inviting. {{ingredient_image_1}} - Start by combining 1 cup of fresh blackberries, 1 cup of granulated sugar, and 1 cup of water in a medium saucepan. The sugar will help draw out the juice from the berries. - Heat the mixture over medium heat. Use a fork or potato masher to gently mash the blackberries. This helps them release their juices. Keep mashing until the mixture starts to simmer. - Next, add 5-6 fresh sage leaves to the saucepan. Let it simmer for an extra 5 minutes. This step lets the sage flavor seep into the syrup. - Remove the saucepan from heat. Use a fine-mesh sieve to strain the blackberry-sage syrup into a bowl. Press down on the solids to squeeze out as much liquid as you can. Discard the solids. - In a large pitcher, combine the strained syrup with 1 cup of freshly squeezed lemon juice and 3 cups of water. Stir well to mix everything together. - Now it’s time to taste! Adjust the sweetness and tartness by adding more sugar or lemon juice if you want. Everyone has their own preference. - Chill the lemonade in the refrigerator for at least 30 minutes. This step makes it refreshing and cool for hot days. - When ready to serve, fill glasses with ice cubes. Pour the chilled lemonade over the ice. - For a lovely touch, add a lemon slice and a sprig of fresh sage to each glass. This makes your drink look as good as it tastes! Choosing ripe blackberries Pick blackberries that are deep purple or black. They should feel slightly soft when you press them. Avoid ones that are red or firm, as they are not fully ripe. Ripe blackberries give the best flavor and color to your lemonade. Selecting fresh sage leaves When choosing sage, look for bright green leaves. They should feel soft and not wilted. Fresh sage adds a wonderful herbal note to your drink. Avoid any leaves that look dry or brown. Adjusting sugar and lemon ratio Taste your lemonade as you mix. Some like it sweeter, while others prefer it tart. Start with the sugar in the recipe, then add more if needed. The balance of sugar and lemon juice is key to a great drink. Adding herbs for extra flavor If you love herbs, try adding mint or rosemary. These can enhance the taste. Just a few leaves mixed in can change the whole drink. Experiment to find your favorite combo! Glassware suggestions Use clear glasses to show off the vibrant color of your blackberry sage lemonade. Mason jars or tall glasses work great. They add a fun touch and make your drink look inviting. Garnishing creatively Garnish with lemon slices and sage sprigs. This adds a pop of color and a hint of aroma. You could also add a few blackberries to each glass for a beautiful look. Don’t be afraid to get creative! Pro Tips Use Fresh Ingredients: Always opt for fresh blackberries and sage for the best flavor. Fresh herbs and fruits enhance the overall taste of your lemonade. Adjust Sweetness: Taste your lemonade after mixing in the syrup and lemon juice. You can easily adjust the sweetness by adding more sugar or lemon juice according to your preference. Chill Before Serving: Allow the lemonade to chill in the refrigerator for at least 30 minutes. This helps the flavors meld together and serves a refreshing drink. Garnish Creatively: Enhance presentation by garnishing each glass with not just lemon slices but also additional sage leaves or even a few whole blackberries for a pop of color. {{image_2}} You can change the fruit in your lemonade for fun twists. One great option is raspberry sage lemonade. Simply swap blackberries for ripe raspberries. The tartness of raspberries pairs well with sage. You will get a bright pink drink that tastes amazing! Another tasty idea is mint lemonade. Use mint leaves instead of sage. This gives a refreshing and cool flavor. Mint lemonade is perfect for hot summer days. You don’t have to use granulated sugar if you want other options. Honey or agave can add a different sweetness. Both are natural and taste great. Just remember that honey is sweeter than sugar, so use less. If you want a sugar-free drink, try using stevia or monk fruit. These sweeteners don’t add calories but still give a nice taste. Adjust the amount to fit your preference. To make a sparkling blackberry sage lemonade, start with your syrup as usual. Then, mix in sparkling water instead of regular water. The bubbles add a fun twist and make it feel more festive. This version is perfect for parties or special gatherings. Just pour it over ice and enjoy the fizz! Store your blackberry sage lemonade in a pitcher. Cover it tightly with plastic wrap or a lid. This keeps it fresh and tasty. In the fridge, it stays good for about 3-5 days. After that, the flavors may fade. You can freeze the blackberry-sage syrup for later use. Pour the syrup into ice cube trays or freezer bags. When you want some lemonade, just thaw the syrup in the fridge overnight. It will keep its flavor and make a quick drink! I love serving this lemonade cold. It tastes best over ice. However, if you prefer, it can also be enjoyed at room temperature. Just remember, cold lemonade is the ultimate summer treat! Blackberry Sage Lemonade is a sweet and tangy drink. It combines fresh blackberries and sage with lemon juice. The blackberries give a deep, fruity flavor. Sage adds a unique, herbal note that elevates the drink. Together, they create a refreshing balance. This drink is perfect for hot summer days. Yes, you can make this lemonade ahead of time. Prepare the blackberry-sage syrup a day before. Store it in the fridge until you're ready to mix. You can also combine the syrup with lemon juice and water in advance. Just chill it well before serving. This way, you save time for your summer gatherings. Blackberries are full of vitamins and antioxidants. They help support your immune system and promote good digestion. Sage has its own benefits too. It may improve memory and reduce inflammation. Together, they make a tasty and healthy drink. Enjoy this blend while sipping on a delicious refreshment. This blog covered making blackberry-sage lemonade with fresh ingredients and flavors. You learned how to prepare the syrup, mix it with lemon juice, and chill it nicely. We discussed tips for quality ingredients and shared presentation ideas. Variations like raspberry or mint lemonade add more fun. Remember to store it well for later enjoyment. This drink not only tastes great but can also boost your health. Enjoy making and sharing this refreshing beverage with friends and family!

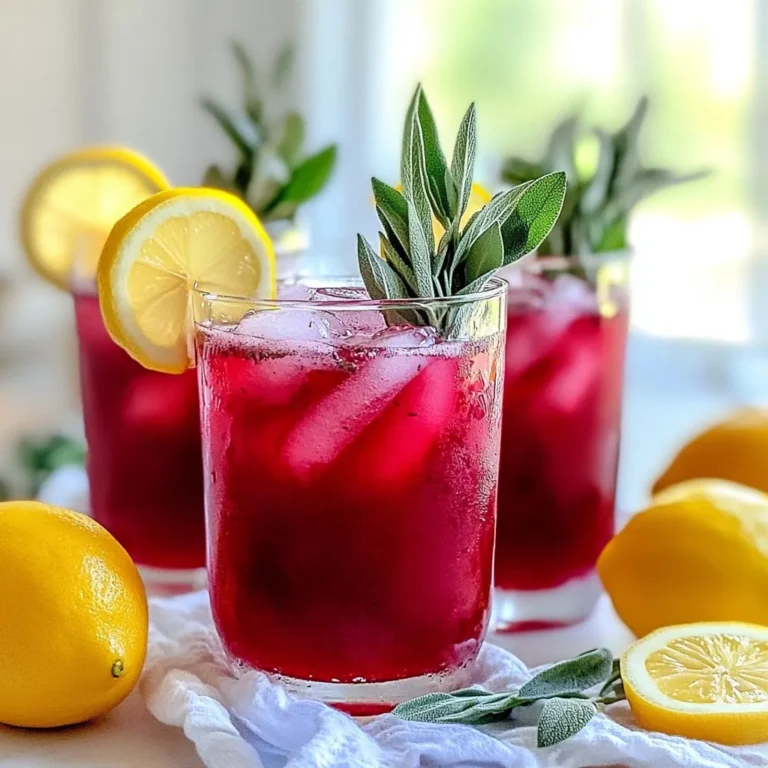
Blackberry Sage Lemonade Refreshing Summer Drink

- 2 cups cooked white or brown rice - 2 cups fresh broccoli florets - 1 cup shredded cheddar cheese - 1 cup cream of mushroom soup (canned or homemade) - ½ cup milk - ½ teaspoon garlic powder - ½ teaspoon onion powder - 1 teaspoon Dijon mustard - Salt and pepper to taste - ½ cup breadcrumbs (for topping) - 2 tablespoons olive oil I love using fresh ingredients for this dish. The bright green broccoli adds color and nutrition. You can use white or brown rice; both work well. Cheddar cheese gives it a creamy, cheesy flavor. The cream of mushroom soup ties everything together, creating a rich base. You’ll need garlic powder and onion powder for extra flavor. Dijon mustard adds a nice tang that makes this dish stand out. Don’t forget salt and pepper to taste; they enhance all the flavors. The breadcrumbs on top add a crunchy texture. Mixing them with olive oil helps them brown nicely in the oven. This blend of flavors and textures makes this cheesy broccoli rice bake a crowd-pleaser. Gather these ingredients before starting. Trust me; it makes cooking much easier and more fun! {{ingredient_image_1}} - Preheat your oven to 350°F (175°C). - Blanch broccoli florets in boiling water for 2 minutes. Start by getting your oven hot. This helps cook the dish evenly. Blanching the broccoli keeps it bright and tender. After 2 minutes, drain the broccoli well. Set it aside for later. - Combine rice, cream of mushroom soup, milk, garlic powder, onion powder, and Dijon mustard. - Stir in blanched broccoli and half of the cheddar cheese. In a large bowl, mix the cooked rice with the cream of mushroom soup. Add the milk, garlic powder, onion powder, and Dijon mustard. Stir until all the ingredients blend well. Then, add the blanched broccoli and half of the cheddar cheese. Mix again until everything is coated evenly. - Transfer mixture to a greased baking dish and spread evenly. - Prepare and sprinkle breadcrumb topping, followed by remaining cheese. - Bake for 25-30 minutes until bubbly and golden brown. Next, pour the mixture into a greased baking dish. Spread it evenly across the bottom. In a small bowl, mix breadcrumbs with olive oil. Sprinkle this over the rice and broccoli. Top it with the rest of the cheddar cheese. Bake your dish for 25-30 minutes. Look for a bubbly, golden brown top to know it's ready. To get the best color and crunch from your broccoli, blanch it. Boil water in a pot. Add the fresh broccoli florets for just 2 minutes. The bright green color will shine through in your bake. Drain the broccoli and set it aside. Mixing your ingredients well is key. In a large bowl, combine the cooked rice, cream of mushroom soup, and milk. Add garlic powder, onion powder, and Dijon mustard to this mix. Stir until everything blends smoothly. Now, gently fold in the blanched broccoli and half the cheddar cheese. This ensures each bite is full of flavor. When serving, presentation matters! Spoon the Cheesy Broccoli Rice Bake onto plates while hot. A sprinkle of fresh parsley or chives adds a nice touch. This pop of color will make the dish look great. It works well as a side or a main dish. If you have allergies, there are easy swaps. For gluten-free, choose gluten-free breadcrumbs. You can use almond milk instead of regular milk for a dairy-free option. If you want a cheese alternative, try vegan cheese or a nut-based option. These simple changes keep the dish delicious for everyone! Pro Tips Tip Title: Use Fresh Broccoli: Fresh broccoli florets provide a vibrant color and better texture compared to frozen. Blanching them briefly helps maintain their crunch. Tip Title: Cheese Variations: Feel free to mix different types of cheese, such as mozzarella or Monterey Jack, for a unique flavor profile. Tip Title: Add Protein: To make this dish more filling, consider adding cooked chicken, sausage, or beans to the rice mixture. Tip Title: Make Ahead: This bake can be prepared in advance and refrigerated for up to 24 hours before baking. Just add a few extra minutes to the cooking time. {{image_2}} You can switch out the cheddar cheese for other types. Monterey Jack adds a nice creaminess. If you want a vegan option, try vegan cheese. It melts well and tastes great. For protein, add cooked chicken or tofu. Both options pair nicely with broccoli and rice. They boost the dish and make it more filling. For more flavor, try adding herbs and spices. Paprika gives a nice smoky taste. Thyme adds earthiness, which complements the veggies well. You can also mix in other vegetables. Bell peppers and carrots add color and crunch. They make the bake more fun and tasty. Feel free to explore and make this dish your own! To store leftovers, let the Cheesy Broccoli Rice Bake cool down first. Transfer it to an airtight container. Make sure to cover the dish tightly. Store it in the fridge for up to three days. This keeps the dish fresh and tasty. You can freeze this casserole for later. First, let it cool completely. Then, wrap it well in plastic wrap. After that, put the wrapped dish in a freezer bag. It will last for up to three months in the freezer. When ready to eat, just thaw it in the fridge overnight. To reheat, preheat your oven to 350°F (175°C). Place the casserole in a baking dish. Cover with foil to keep it moist. Heat for about 20-25 minutes. Check that it is hot all the way through. You can also reheat single servings in the microwave. Just heat for 1-2 minutes, checking often. Enjoy the same great taste! Can I make Cheesy Broccoli Rice Bake ahead of time? Yes, you can prepare this bake in advance. Mix all the ingredients and place them in a greased dish. Cover it with foil and store it in the fridge for up to 24 hours. Just remember to bake it when you are ready. You might need to add a few extra minutes to the baking time if it's cold. What can I use instead of cream of mushroom soup? You can use several alternatives. Cream of chicken soup works well if you like meat flavors. If you want a veggie option, try cream of celery soup or homemade white sauce. You can also blend silken tofu with some broth for a dairy-free choice. How do I know when the casserole is done baking? Check the top of your bake. It should be golden brown and bubbly. You can also insert a knife in the center. If it comes out hot, the casserole is ready. Let it cool for a few minutes before serving. Can I use frozen broccoli in the recipe? Yes, frozen broccoli is a great option. Just make sure to thaw it first. You can also blanch it for a couple of minutes in boiling water. This helps to keep the bright green color and a nice texture. In this blog post, I shared a simple recipe for Cheesy Broccoli Rice Bake. We covered the necessary ingredients, step-by-step instructions, and helpful tips. You learned how to properly prepare the dish and explore variations for different tastes. Don’t forget to store leftovers correctly and reheating tips to maintain flavor. Cooking can be fun and easy. Enjoy making this dish for your family, and feel free to get creative with it! Happy cooking!

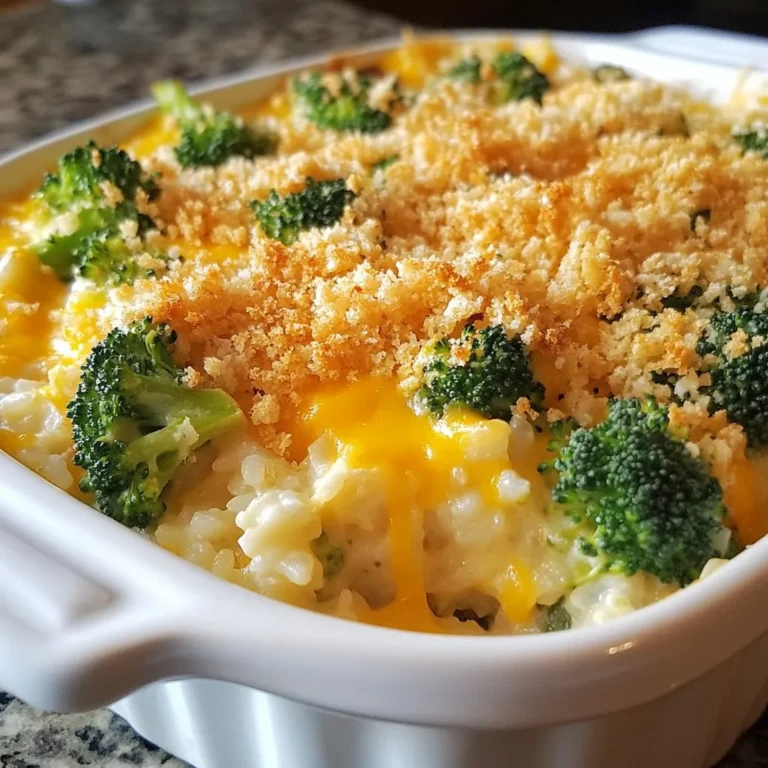
Cheesy Broccoli Rice Bake Tasty and Comforting Dish

- 2 cups all-purpose flour - 1/3 cup granulated sugar - 1 tablespoon baking powder - 1/2 teaspoon salt - 1/2 cup unsalted butter, chilled and cubed - 1/2 cup dried cranberries - Zest of 1 medium orange - 1/2 cup heavy cream - 1 large egg - 1 teaspoon pure vanilla extract - 1/2 cup powdered sugar (for glaze) - 1-2 tablespoons orange juice (for glaze) Each ingredient plays a key role in the scone's texture and flavor. Use precise measurements for best results. - Flour provides the structure. - Sugar adds sweetness. - Baking powder helps the scones rise. - Salt enhances flavor. - Butter creates flakiness. - Dried cranberries add tartness. - Orange zest gives that fresh citrus touch. - Heavy cream keeps the scones rich and moist. - Egg binds everything together. - Vanilla extract adds warmth. - Powdered sugar and orange juice make the glaze sweet and tangy. You can mix it up based on what you have at home. Here are some ideas: - Replace all-purpose flour with whole wheat flour for a nuttier taste. - Swap granulated sugar for brown sugar for a hint of caramel flavor. - Use coconut oil instead of butter for a dairy-free option. - If you don't have dried cranberries, try raisins or chopped apricots. - For a lighter glaze, substitute orange juice with lemon juice. These changes can create unique flavors while keeping the scone's basic goodness intact. {{ingredient_image_1}} First, set your oven to 400°F (200°C). While it heats, grab a baking sheet and line it with parchment paper. This step helps the scones bake evenly and prevents sticking. You want to make sure your scones come out perfectly golden and easy to serve. In a large bowl, whisk together the dry ingredients. Start with 2 cups of all-purpose flour, then add 1/3 cup of granulated sugar, 1 tablespoon of baking powder, and 1/2 teaspoon of salt. Mix well. Next, take 1/2 cup of cold, cubed butter. Add this to your dry mix. Use your fingers or a pastry cutter to combine until it looks like coarse crumbs. Now, fold in 1/2 cup of dried cranberries and the zest of one medium orange. In a separate bowl, mix your wet ingredients. Whisk together 1/2 cup of heavy cream, 1 large egg, and 1 teaspoon of pure vanilla extract. Pour this wet mix into your dry mix. Stir gently until just combined. Don’t over-mix; your dough should be shaggy but not smooth. Turn your dough onto a lightly floured surface. Knead it gently for about 30 seconds. Pat it into a circle, about 1 inch thick. Cut this into 8 wedges and place them on your prepared baking sheet. Bake the scones in your preheated oven for 15 to 18 minutes. They should turn lightly golden on top. While the scones bake, prepare the glaze. In a small bowl, whisk together 1/2 cup of powdered sugar and 1-2 tablespoons of orange juice until smooth. Once the scones cool for a few minutes, drizzle the glaze on top. Enjoy the sweet and zesty flavor of your cranberry orange scones! To make flaky scones, keep your butter cold. Cold butter creates pockets of steam in the dough. This helps the scones rise and stay light. Use a pastry cutter or your fingers to mix the butter into the flour. Aim for a crumbly texture, like sand. Do not over-mix the dough; it should be slightly shaggy. Also, make sure to handle the dough gently when shaping. This keeps the scones tender. One common mistake is overworking the dough. This can make your scones tough. Remember, mix until just combined. Another mistake is using warm butter. Always use chilled butter for the best results. Also, watch the baking time. If you bake them too long, they may dry out. Lastly, don’t forget to preheat your oven. This ensures even baking right from the start. You can boost flavors in your scones easily. Add nuts, like walnuts or pecans, for crunch. For a twist, try adding white chocolate chips. They pair well with cranberries. You can also add spices like cinnamon or nutmeg for warmth. If you love citrus, add more orange zest to enhance the flavor. Each ingredient brings a new layer to your scones. Feel free to experiment and find your favorite mix! Pro Tips Chill Your Ingredients: Ensure your butter and cream are chilled before mixing. This helps create flaky layers in your scones. Avoid Over-Mixing: Mix the dough until just combined. Over-mixing can lead to tough scones. Create Even Shapes: Use a sharp knife or bench scraper to cut the dough into wedges for uniform baking and presentation. Add Extra Zest: For a more intense orange flavor, consider adding a bit more orange zest to the dough. {{image_2}} You can make scones more fun by adding different fruits or nuts. Try using blueberries, raspberries, or chopped apples. Each fruit brings its own flavor and texture. If you love nuts, consider adding chopped walnuts or pecans. They add crunch and richness. Mix and match to find your favorite combinations. Get creative with flavors! Instead of just orange, try adding lemon zest for a tangy twist. You can also mix vanilla with almond extract for a warm note. Spices like cinnamon or nutmeg add warmth and depth. Experiment until you find a flavor you love. The possibilities are endless! While the orange glaze is delicious, you can switch it up. A lemon glaze adds a bright kick. You can also use a simple milk glaze for a sweeter taste. For a chocolate touch, melt dark chocolate and drizzle it over the scones. Each glaze gives a new twist to your treats! To keep your scones fresh, store them in an airtight container. I recommend placing parchment paper between layers to prevent sticking. This method helps maintain their fluffy texture. If you store them at room temperature, they will last for about two days. After that, they may start to lose their charm. For longer storage, freezing is the best option. Wrap each scone in plastic wrap, then place them in a freezer bag. This keeps them safe from freezer burn. They can last up to three months in the freezer. When you're ready to enjoy, just take out the desired amount. To reheat your scones, you can use the oven or microwave. If using the oven, preheat it to 350°F (175°C). Place the scones on a baking sheet and heat for about 10 minutes. This restores their crispiness. If you need a quicker method, use the microwave. Heat them for 15-20 seconds. Just be careful not to overheat them, or they may become tough. Enjoy your scones warm for the best taste! Yes, you can use fresh cranberries. Fresh cranberries will add a tart flavor. Chop them into smaller pieces. This helps them mix well into the dough. You may need to add a bit more sugar to balance the tartness. Cranberry orange scones pair well with many items. Here are some ideas: - Butter: Spread on warm scones for extra richness. - Jam: Orange marmalade or berry jam adds sweetness. - Tea or Coffee: A warm drink complements the scones nicely. - Cream Cheese: Spread for a creamy texture and flavor. Check the scones after 15 minutes. They should be lightly golden on top. You can also insert a toothpick. If it comes out clean, they are done. Avoid overbaking to keep them soft and flaky. You’ve learned how to make delicious scones with simple steps. We covered the right ingredients, measurements, and tasty substitutions. We outlined each baking step to ensure perfect scones. Plus, I shared tips to avoid mistakes and make them flaky. You can even try different flavors and store them easily. Remember, baking is fun, so experiment and find what you love. Enjoy your scones fresh and warm!

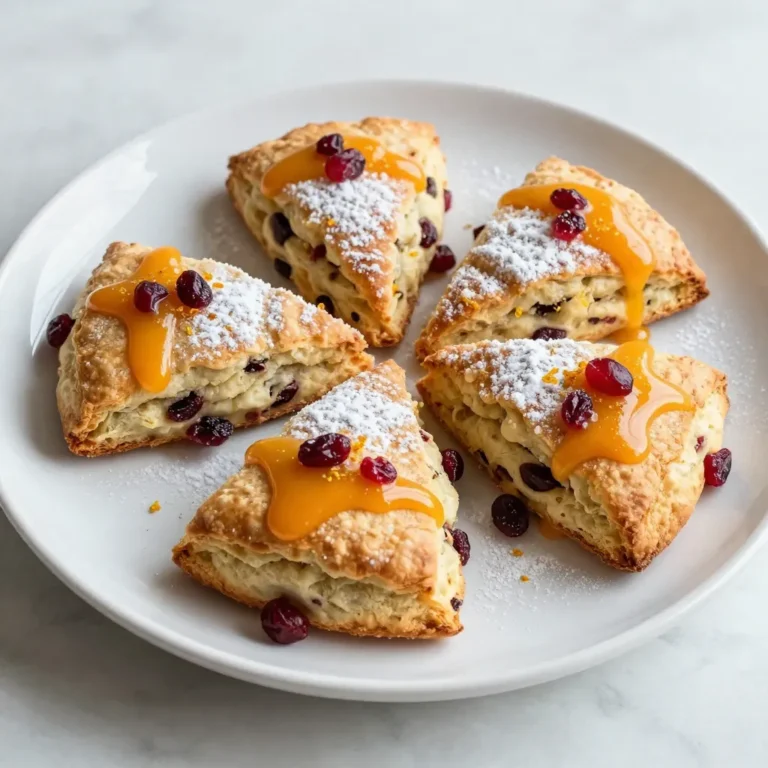
Cranberry Orange Scones Fresh and Flavorful Treat

To make Greek Lemon Chicken Soup, gather these ingredients: - 1 tablespoon olive oil - 1 medium onion, diced - 2 cloves garlic, minced - 2 large carrots, sliced - 2 celery stalks, sliced - 6 cups chicken broth - 1 pound boneless, skinless chicken breasts - 1 cup uncooked orzo pasta (or rice for a gluten-free option) - 2 large eggs - 1/4 cup fresh lemon juice (about 2 lemons) - Zest of 1 lemon - 1/2 teaspoon dried oregano - Salt and pepper to taste - Fresh dill or parsley, chopped (for garnish) When picking fresh ingredients, look for bright colors. Choose firm vegetables. For onions, select those that are smooth and dry. Garlic should feel heavy and firm. When buying chicken, ensure it is pink with no odors. Fresh lemons should feel heavy for their size. For a gluten-free version, swap orzo with rice. You can also use quinoa for a nutty taste. If you prefer a vegetarian soup, replace chicken with firm tofu or chickpeas. Use vegetable broth instead of chicken broth. This way, you maintain flavor without the meat. {{ingredient_image_1}} 1. Heat the olive oil in a large pot over medium heat. Add the diced onion and cook for about 5 minutes. The onion should look soft and clear. 2. Add minced garlic, sliced carrots, and celery. Stir and cook for another 3-4 minutes. The veggies should be tender but not mushy. 3. Pour in the chicken broth and bring it to a boil. Add the chicken breasts and orzo pasta. Lower the heat to medium-low and let it simmer for 15-20 minutes. Make sure the chicken is cooked through and the orzo is tender. 4. Remove the chicken from the pot. Shred it using two forks. Return the shredded chicken back into the pot. 5. In a small bowl, whisk together the eggs, lemon juice, and lemon zest. This mix should be smooth and well combined. 6. Tempering the egg mixture is key. Slowly add a ladle of hot soup into the bowl while whisking. This step helps prevent curdling. 7. Gradually add the tempered egg mixture back into the soup. Stir gently so everything mixes well. Avoid boiling it again. 8. Season the soup with dried oregano, salt, and pepper. Remove the pot from the heat. 9. Garnish with fresh dill or parsley before serving. - Sautéing the onion and garlic builds a strong base of flavor. This step is crucial for a tasty soup. - Tempering the eggs adds creaminess without curdling. It gives the soup a rich texture. - Fresh lemon juice and zest brighten the dish. They enhance the flavor and aroma, making it fresh and zesty. - Using homemade chicken broth elevates the soup’s taste. If you have time, make your broth for the best flavor. - Don’t skip the sautéing step. It adds depth to the soup. - Avoid boiling the soup after adding the egg mixture. This prevents curdling. - Make sure the chicken is fully cooked before shredding. Undercooked chicken can spoil the dish. - Taste and adjust seasoning before serving. Each broth can differ in saltiness, so be mindful. Store leftover Greek Lemon Chicken Soup in an airtight container. This keeps it fresh. Allow the soup to cool before sealing. It helps prevent steam buildup. Use the soup within three days for best taste. Label your container with the date for easy tracking. When reheating, use a pot on the stove. Heat it over medium, stirring gently. Avoid boiling the soup as it can change the texture. If it’s too thick, add a splash of broth or water. You can also microwave it in short bursts, stirring in between. Taste your soup before serving. Adjust the salt and pepper as needed. Fresh lemon juice brightens the flavors. Add a little more lemon juice if the soup needs zest. Use fresh herbs like dill or parsley for a burst of flavor. They add a nice touch right before serving. Pro Tips Use Fresh Ingredients: Fresh herbs and vegetables enhance the flavor of your soup significantly. Whenever possible, opt for fresh over dried. Perfectly Temper the Eggs: To avoid curdling the eggs, always temper them by slowly adding hot soup to the egg mixture while whisking continuously before adding it back to the pot. Customize Your Protein: Feel free to substitute the chicken breasts with shredded rotisserie chicken or even chickpeas for a vegetarian option. Adjust the Thickness: If you prefer a thicker soup, add more orzo or reduce the amount of broth. Conversely, for a lighter soup, use more broth or less pasta. {{image_2}} You can change the protein in Greek Lemon Chicken Soup easily. Instead of chicken, try turkey. Turkey adds a nice flavor and keeps it light. You can also use shredded rotisserie chicken for a quick option. If you want something plant-based, tofu works well too. Just make sure to add it when the soup is almost done cooking. You can make this soup your own by adding or swapping veggies. Try adding spinach or kale for a healthy boost. Zucchini or bell peppers also add great taste and color. If you want more texture, consider adding green beans. Remember, the key is to cut the vegetables into small pieces. This helps them cook evenly and blend nicely with the soup. Want to take your soup to the next level? Add a pinch of cumin for warmth. You can also stir in some fresh herbs like basil or mint for a fresh twist. If you like heat, add a dash of red pepper flakes. For a creamy version, mix in some coconut milk. These simple changes can turn your Greek Lemon Chicken Soup into a unique dish everyone will love. To keep your Greek Lemon Chicken Soup fresh, let it cool first. Once cooled, transfer it to an airtight container. Make sure to seal it well. Store it in the refrigerator for up to three days. This soup tastes better the next day. The flavors meld together nicely overnight. Freezing is a great way to save your soup. Portion the soup into smaller containers. This makes it easy to thaw just what you need. Freeze it for up to three months. When ready to enjoy, thaw it overnight in the fridge. Reheat it gently on the stove. Avoid boiling to keep the eggs from curdling. Use glass or BPA-free plastic containers for storage. Glass containers can handle heat well and are easy to clean. If you choose plastic, ensure it can withstand freezing. Look for containers with tight-fitting lids to prevent air leaks. This keeps your soup fresh and tasty. Greek Lemon Chicken Soup, or Avgolemono, has roots in ancient Greece. This dish blends a few key flavors: chicken, lemon, and egg. Many families have their own special ways to make it. It is a comforting meal, often enjoyed during colder months or when someone is sick. The soup reflects Greek culture's love for fresh ingredients and bold flavors. Yes, you can make Greek Lemon Chicken Soup in a slow cooker! Start by adding all the ingredients except the eggs, lemon juice, and herbs. Cook on low for 6-8 hours or high for 3-4 hours. When done, remove the chicken, shred it, and return it to the pot. Then, whisk the eggs and lemon juice like in the stovetop method. Stir it in gently. This way, you can enjoy the same great taste with less hands-on time. To make Greek Lemon Chicken Soup dairy-free, skip the eggs. Use a mix of lemon juice and cornstarch to thicken the soup instead. Just blend one tablespoon of cornstarch with two tablespoons of cold water. Add this mix to your soup near the end of cooking. Adjust the lemon juice to taste. This way, you get a tasty, creamy feeling without dairy! Greek Lemon Chicken Soup is a tasty dish that combines bright flavors and comfort. We covered its fresh ingredients, cooking steps, and smart tips to avoid common mistakes. You learned how to store and reheat soup while keeping it delicious. Plus, we explored variations to make it your own. Remember, cooking is about trying new things and having fun. Enjoy creating this dish and sharing it with others for a meal that warms the heart.

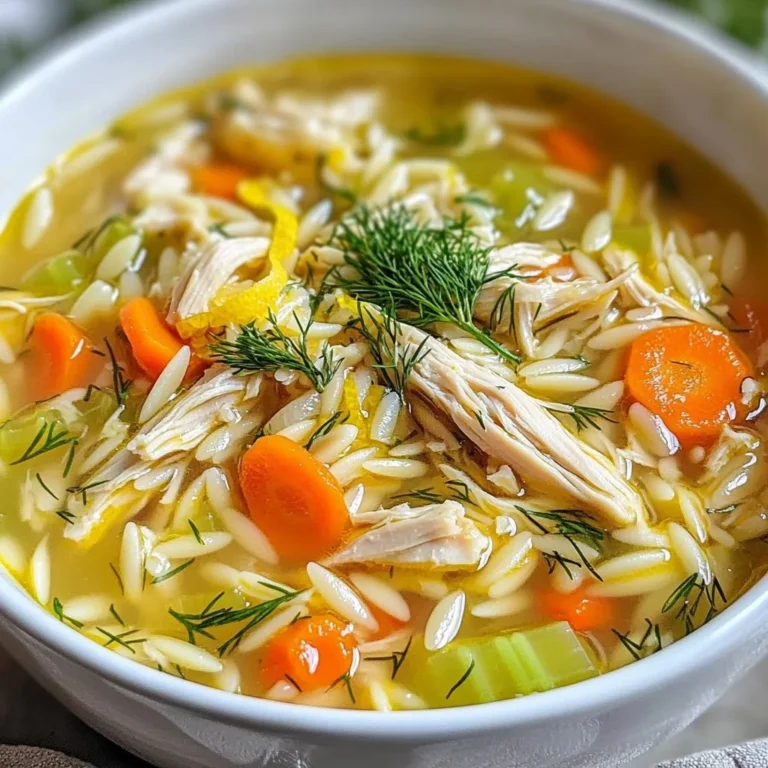
Greek Lemon Chicken Soup Savory and Fresh Delight

To make a tasty sausage rice skillet, you need these key items: - 1 lb Italian sausage (sweet or spicy, casings removed) - 1 cup long-grain white rice - 2 cups chicken broth - 1 bell pepper (red or yellow), diced - 1 medium onion, chopped - 2 cloves garlic, minced - 1 cup frozen peas - 1 teaspoon smoked paprika - 1 teaspoon dried oregano - 1 tablespoon olive oil - Salt and pepper to taste - Fresh parsley, chopped for garnish These ingredients come together to create a warm and filling dish. The sausage gives great flavor, while the rice absorbs all the tasty broth. You can change things up with some fun extras: - 1 cup corn (fresh or frozen) - 1 zucchini, diced - 1 can diced tomatoes, drained - Hot sauce for heat - Cheese for creaminess These ingredients let you make the dish your own. Try adding your favorites or whatever you have on hand. Using fresh ingredients can make your dish brighter and more flavorful. Fresh peppers, onions, or peas add a nice crunch. However, frozen veggies work great too. They save time and still taste good. In busy weeks, frozen ingredients help you whip up this meal fast. Just remember, if using frozen peas, add them towards the end to keep their color and texture. {{ingredient_image_1}} First, gather your veggies. You need a bell pepper and an onion. Chop the onion into small pieces. Dice the bell pepper into cubes. This adds color and crunch to your dish. Next, mince two cloves of garlic. Garlic gives a great flavor. In a large skillet, heat one tablespoon of olive oil over medium heat. Add the chopped onion and bell pepper to the skillet. Sauté them for about five minutes. You want them to soften. Then, add the minced garlic and cook for one more minute. The garlic should smell amazing. Now it’s time for the main star: the sausage. Remove the casings from one pound of Italian sausage. You can choose sweet or spicy based on your taste. Push the veggies to the side of the skillet. Add the sausage to the center. Cook it for about five to seven minutes. Break it up with a wooden spoon as it cooks. You want it browned and cooked through. Once the sausage is ready, mix in one teaspoon of smoked paprika, one teaspoon of dried oregano, salt, and pepper. This spices up the dish. Stir well to blend all the flavors. Next, add one cup of long-grain white rice to the skillet. Stir it in and let it toast for about two minutes. This helps the rice get a nice flavor. Now, pour in two cups of chicken broth. Bring the mixture to a gentle boil. Once boiling, reduce the heat to low. Cover your skillet and let it simmer for 15 to 20 minutes. This is when the rice cooks and absorbs the broth. After the rice is tender, add one cup of frozen peas. Stir to combine everything. Cook uncovered for an additional five minutes to warm the peas. Finally, taste your dish and adjust the seasoning if needed. For a fresh finish, sprinkle chopped parsley on top before serving. Enjoy your delicious sausage rice skillet! To cook rice well, start with rinsing it. Rinse it under cold water until the water runs clear. This helps remove excess starch. Next, add it to your skillet with the sausage and veggies. Stir it in for about two minutes. This toasting step adds flavor. Then, pour in your chicken broth. Bring it to a gentle boil, then lower the heat and cover. Let it simmer. In about 15 to 20 minutes, your rice will be fluffy and perfect. To boost flavor, use fresh herbs like parsley or thyme. Add them at the end for a fresh taste. You can also try adding a splash of lemon juice. This adds brightness to your dish. For heat, consider adding crushed red pepper or hot sauce. You can adjust these to your taste. Smoked paprika and oregano are key spices too. They add depth and warmth to the meal. If your rice is too soggy, it might have cooked too long. Next time, check the rice sooner. If it’s too dry, you can add a bit more broth or water. Stir it gently, cover, and let it sit for a few minutes. For uneven cooking, make sure to stir well. Stirring helps blend all the flavors and ensures even cooking. If the sausage isn’t browning, increase the heat slightly. Just watch it closely to avoid burning. Pro Tips Choose the Right Sausage: Select a sausage that suits your taste preference, whether sweet or spicy, as it greatly influences the dish's flavor. Toast the Rice: Toasting the rice for a couple of minutes before adding the broth enhances its nuttiness and adds extra depth to the dish. Adjust Liquid as Needed: If you prefer a creamier texture, feel free to add a little more broth or water during cooking. Garnish for Freshness: Fresh parsley not only adds color but also a bright flavor that complements the richness of the sausage and rice. {{image_2}} You can easily make this dish gluten-free. Just use gluten-free sausage. Replace regular chicken broth with gluten-free broth. This way, everyone can enjoy the meal without worry. If you want it dairy-free, you don’t need any dairy in this recipe. It’s all about the sausage, rice, and veggies, so you are safe! While Italian sausage shines in this dish, you can switch it up. Use chicken for a lighter flavor. Cook diced chicken in the same way as sausage. Tofu is another great option if you want a plant-based meal. Press and cube the tofu, then brown it in the skillet. This adds protein and keeps the meal satisfying. Boost the nutrition by adding more vegetables. Chopped carrots, zucchini, or spinach work well. You can add them when you cook the onion and bell pepper. This way, they soften and blend into the dish nicely. Extra veggies not only improve health but also add color and texture. Feel free to get creative and use what you have! To keep your Sausage Rice Skillet fresh, let it cool first. Once cool, transfer it into an airtight container. Store it in the fridge for up to three days. Make sure to label the container with the date. This way, you can track how long it has been stored. When you’re ready to enjoy your leftovers, reheat them on the stove. Add a splash of chicken broth or water to keep it moist. Heat over medium-low until warmed through. Stir occasionally to ensure even heating. You can also use the microwave. Place the rice in a microwave-safe bowl, cover with a damp paper towel, and heat in short bursts. Stir between intervals for even heating. If you want to save some for later, freezing is a great option. Allow the skillet to cool completely before freezing. Portion the rice into freezer-safe bags or containers. Remove as much air as possible to prevent freezer burn. Label with the date, and freeze for up to three months. To thaw, place it in the fridge overnight, then reheat as mentioned above. Yes, you can use brown rice. Brown rice takes longer to cook, about 40-45 minutes. Adjust the chicken broth to 2 1/2 cups to help it cook fully. The dish will have a nuttier flavor and a chewier texture. Be sure to check the rice while cooking, as it may need more time. You can use vegetable broth or water. Both options work well. If using water, add more seasonings to boost flavor. You can also use low-sodium broth for a healthier choice. Homemade broth is a great option too, adding more depth to the dish. The sausage rice skillet lasts about 3 to 4 days in the fridge. Make sure to store it in an airtight container. Reheat it on the stove or in the microwave. If you want to keep it longer, consider freezing it for up to 2 months. In this post, we explored making a tasty sausage rice skillet. You learned about key ingredients and how to customize your dish. We discussed cooking techniques, tips for perfect rice, and alternatives for different diets. Proper storage ensures your leftovers stay fresh. Now, you can enjoy this meal anytime. Remember, cooking is all about creativity and fun. Try new things and make it your own!

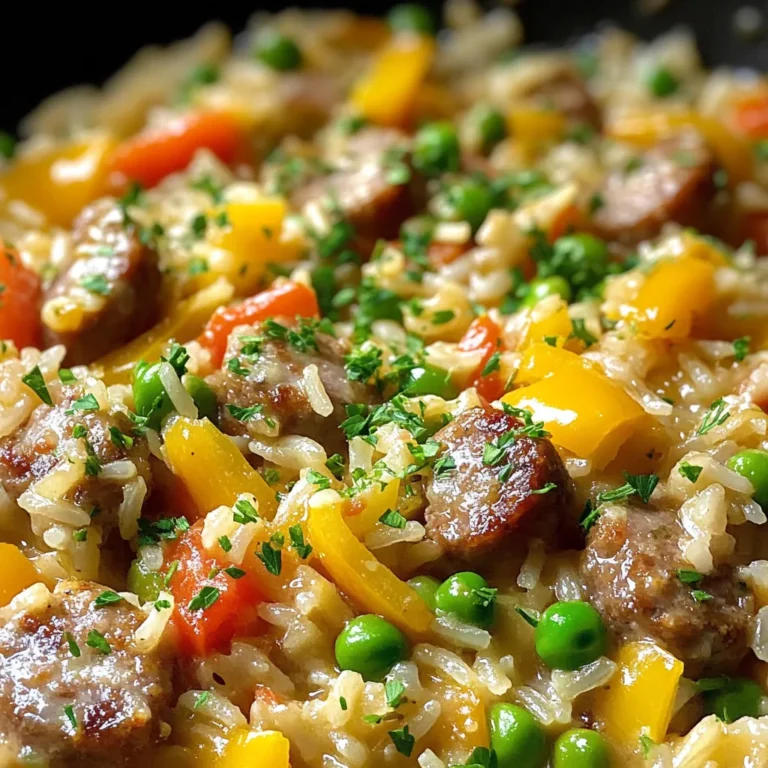
Sausage Rice Skillet Quick and Easy Weeknight Meal

- 8 oz (225 g) spaghetti or fettuccine - 1 cup sun-dried tomatoes, sliced (in oil for extra flavor) - 3 cloves garlic, minced - 1 cup heavy cream - 1/2 cup grated Parmesan cheese - 2 tablespoons olive oil - 1 teaspoon Italian seasoning - Salt and pepper to taste - Fresh basil leaves - Optional: Crushed red pepper flakes for heat The main ingredients in this dish make it truly special. I love using spaghetti or fettuccine for this recipe. Both types hold the creamy sauce well. The sun-dried tomatoes add a burst of flavor. I prefer the kind packed in oil. This adds extra taste to the dish. Garlic is a key ingredient here. It gives a strong, aromatic flavor. Minced garlic cooks quickly, so keep an eye on it. Heavy cream makes the sauce rich and thick. It brings everything together in a delightful way. Parmesan cheese adds a salty, nutty taste that enhances the dish. For cooking essentials, olive oil is my go-to. It helps to sauté the garlic. Italian seasoning adds a blend of herbs that warms the flavor. Salt and pepper are vital. They help bring out the best in each ingredient. When it comes to garnishing, I love fresh basil leaves. They add a pop of color and flavor. If you like heat, sprinkle on some crushed red pepper flakes. They give the dish a nice kick! Gather these ingredients, and you're ready to create a creamy garlic sun-dried tomato pasta that everyone will enjoy! {{ingredient_image_1}} - First, fill a large pot with water and add salt. - Bring the water to a rolling boil. - Add 8 ounces of spaghetti or fettuccine to the pot. - Cook until the pasta is al dente, which takes about 8-10 minutes. - Reserve 1/2 cup of pasta water, then drain the rest. - In a large skillet, heat 2 tablespoons of olive oil over medium heat. - Add 3 minced garlic cloves and sauté for 1 minute. - Be careful not to let the garlic burn; it should smell great. - Next, stir in 1 cup of sliced sun-dried tomatoes. - Cook for 2-3 minutes to release their flavor. - Pour in 1 cup of heavy cream and stir well. - Let the sauce simmer for 3-4 minutes until it thickens slightly. - Add 1/2 cup of grated Parmesan cheese, 1 teaspoon of Italian seasoning, and salt and pepper to taste. - If your sauce is too thick, add reserved pasta water a little at a time. - Finally, mix in the cooked pasta and toss well to coat. - Cook for another 2 minutes to warm everything through. To make a great sauce, you must avoid overcooked garlic. Cook the garlic until it’s fragrant, about one minute. If it turns brown, it will taste bitter. Keep the heat on medium to help control this. Next, adjust the cream thickness. After you add the cream, let it simmer. If it gets too thick, add a little reserved pasta water. This keeps your sauce smooth and creamy. To keep your pasta from sticking, stir it while it cooks. Use a large pot with plenty of water. This helps the pasta move freely. Always reserve some pasta water before draining. This water is starchy and helps the sauce cling to the pasta. Experimenting with herbs can boost your dish. Fresh basil adds a nice touch. You can also try oregano or thyme. Each will change the flavor in a unique way. If you like some heat, balance it with crushed red pepper flakes. Start with a pinch, and add more if you want extra spice. Pro Tips Choose Quality Tomatoes: Opt for sun-dried tomatoes packed in oil for richer flavor and a more luscious sauce. Don't Rush the Garlic: Sauté the garlic just until fragrant; burning it can lead to a bitter taste in your sauce. Reserve Pasta Water: Always save some pasta cooking water; it helps adjust sauce consistency and adds flavor. Fresh Herbs Matter: Use fresh basil for garnish; it elevates the dish's aroma and adds a vibrant touch. {{image_2}} You can add grilled chicken to make this dish heartier. Simply slice the chicken and toss it in with the pasta. Shrimp or seafood also works well. Cook them in the skillet with garlic for an extra flavor boost. Both options make the meal more filling. If you want a meatless dish, consider adding spinach or kale. These greens bring great color and nutrients. Toss them in just before adding the cream. You can also use vegan cheese in place of Parmesan. This keeps the creamy texture while making it plant-based. You can switch up the pasta if needed. Gluten-free pasta is a great choice for those with dietary needs. Whole grain pasta offers more fiber and a nutty flavor. An alternative pasta like chickpea or lentil adds protein and a unique taste. Feel free to experiment to find what you love best. Store any leftovers in an airtight container. This keeps the pasta fresh and tasty. In the fridge, your creamy garlic sun-dried tomato pasta stays good for about 3 days. After that, it may lose its creaminess and flavor. You can easily reheat your pasta in a few ways. The best method is using the stove. Place the pasta in a skillet over low heat. Add a splash of water or cream to help it stay creamy. Stir gently until warm. You can also use the microwave. Heat in short bursts, stirring in between to prevent drying out. Yes, you can freeze creamy pasta. To freeze, let it cool completely first. Then, pack it in a freezer-safe container. You can keep it for up to 3 months. To thaw, move it to the fridge overnight. Reheat gently on the stove, adding cream or water to restore its creamy texture. For this creamy garlic sun-dried tomato pasta, spaghetti or fettuccine works best. These shapes hold the sauce well. You can also try penne or rigatoni for a fun twist. Both types of pasta offer a great bite and texture. Choose one that you love! Yes, you can use fresh tomatoes. If you choose fresh, use about 2 cups, diced. You will need to cook them longer to release their juices. Add them after the garlic to allow them to soften. This will change the flavor slightly but will still taste great! To make this dish vegetarian, simply skip the Parmesan cheese. Try adding nutritional yeast for a cheesy flavor. If you want a vegan option, use coconut cream instead of heavy cream. You can also use vegan cheese for a similar taste. Enjoy a creamy dish that's plant-based! This post covers all you need to create a creamy pasta dish. You learned about the key ingredients, how to cook the pasta, and make a great sauce. I shared tips for perfecting your meal and variations to suit your taste. With proper storage and reheating methods, you can enjoy leftovers too. Pasta is versatile and fun to customize. Explore different flavors, add proteins, or try plant-based options. Enjoy cooking and make it your own!

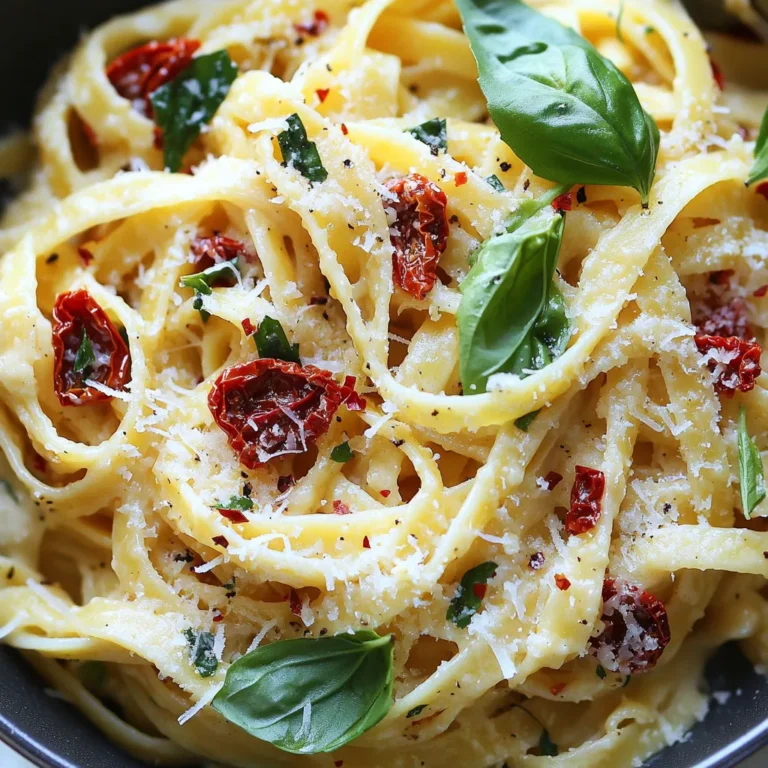
Creamy Garlic Sun Dried Tomato Pasta Delightful Dish

- 1 lb Brussels sprouts, halved - 2 tablespoons honey - 2 tablespoons soy sauce - 3 cloves garlic, minced - 1 tablespoon fresh ginger, grated - 1 red bell pepper, sliced - 1/4 teaspoon red pepper flakes - Salt and pepper to taste - Sesame seeds for garnish - Chopped green onions for garnish The first step in making this dish is gathering your ingredients. Start with fresh Brussels sprouts. Look for ones that are bright and firm. Halving them helps them cook evenly and soak up flavors. Next, honey and soy sauce create a sweet and savory base. For depth, add minced garlic and grated ginger. These give the dish a warm, fragrant touch. Sliced red bell pepper adds color and sweetness. If you want a bit of heat, toss in red pepper flakes. Adjust salt and pepper to your taste for perfect seasoning. Garnishing with sesame seeds and green onions adds a nice crunch and freshness. These ingredients make your Honey Garlic Brussels Sprout Stir Fry not just tasty but also beautiful. {{ingredient_image_1}} First, grab a small bowl. Mix 2 tablespoons of honey, 2 tablespoons of soy sauce, and 1/4 teaspoon of red pepper flakes if you want some heat. Stir well and set this sauce aside. Next, take a large skillet or wok. Heat 2 tablespoons of vegetable oil over medium-high heat. You want it hot enough to make the Brussels sprouts sizzle when added. Add 1 pound of halved Brussels sprouts to the skillet. Stir-fry them for about 5 minutes. Look for them to brown slightly. This step brings out their nutty flavor. Now, toss in 1 sliced red bell pepper. Cook for another 3 to 4 minutes. You want the pepper to become tender and sweet. The color also makes the dish pop! It's time to add some great flavors. Stir in 3 cloves of minced garlic and 1 tablespoon of grated ginger. Keep stirring for 1 to 2 minutes. The aroma will be amazing and fill your kitchen. Pour the honey-soy sauce mixture over the veggies. Toss everything to coat well. Cook for another 2 to 3 minutes. This allows the sauce to caramelize, creating a glossy finish. Finally, taste and season with salt and pepper as needed. To pick the best Brussels sprouts, look for firm, bright green ones. They should feel heavy for their size. Avoid any yellow or wilted leaves. Fresh sprouts taste sweeter and cook better. You can often find them in bags or loose in the produce section. Finding the right balance of honey and soy sauce is key to a tasty dish. You can adjust the amounts based on your sweet tooth. If you like it sweeter, add more honey. For a saltier kick, increase the soy sauce. Taste as you go to achieve your perfect flavor. Using high heat is essential for great caramelization. This helps the Brussels sprouts brown nicely and enhances their natural sweetness. Stir-fry them quickly, allowing the edges to crisp up. A hot skillet also helps the garlic and ginger release their full flavors. Pro Tips Choose Fresh Brussels Sprouts: Look for firm, bright green Brussels sprouts with no yellowing or blemishes to ensure the best flavor and texture. Customize the Spice Level: Adjust the amount of red pepper flakes according to your heat preference. You can also add a splash of sriracha for an extra kick! Caramelization is Key: Allow the sauce to caramelize slightly in the pan for a deeper flavor and a beautiful glaze on the vegetables. Garnish for Freshness: Don’t skip the sesame seeds and green onions; they add a burst of freshness and texture to the dish. {{image_2}} You can boost this stir fry with protein. Try adding chicken, shrimp, or tofu. Chicken adds a nice texture and flavor. Shrimp cooks quickly and gives a sweet taste. Tofu is a great option for vegans. Just cut it into cubes and add it when you cook the veggies. Cook until golden and heated through. Feel free to switch up the veggies. Bok choy or snap peas work well in this dish. Bok choy has a mild taste and nice crunch. Snap peas add sweetness and color. Add them when you cook the bell pepper. This keeps them crisp and fresh. If you have dietary needs, you can still enjoy this dish. Use gluten-free soy sauce for a gluten-free option. Vegan alternatives like maple syrup work for the honey. These small changes keep the flavor while meeting your needs. Always taste as you go to make sure it’s just right! Store your leftover Honey Garlic Brussels Sprout Stir Fry in an airtight container. It keeps well in the fridge for up to three days. Make sure it cools to room temperature before sealing. This helps prevent moisture buildup. For the best flavor, reheat your stir fry in a skillet over medium heat. Add a splash of water or a bit of oil to keep it moist. Stir often until heated through. You can also use a microwave. If you choose this method, cover the dish to keep the steam in. You can freeze the stir fry, but it’s best to do so without the garnish. Place it in a freezer-safe container and seal tightly. It can last up to three months. When ready to eat, thaw it in the fridge overnight. Then, reheat on the stove for the best taste and texture. Yes, you can use frozen Brussels sprouts. They save time and are easy to find. However, fresh Brussels sprouts taste better. Fresh ones have a crunch and rich flavor. If you use frozen sprouts, thaw them first. Pat them dry to remove excess moisture. This helps them brown nicely. To reduce the heat, skip the red pepper flakes. You can also cut back on ginger. Adding more honey can balance the spice. Try adding a bit of coconut sugar for sweetness without heat. Serve it with rice to tone down the spice too. To make this dish vegan, swap honey for maple syrup. Use soy sauce that is vegan-friendly. Check labels to avoid any hidden animal products. For added protein, toss in tofu or tempeh. You can also add more veggies to enhance flavors. In this post, we explored a tasty stir-fry recipe with Brussels sprouts. You learned about key ingredients like honey and soy sauce, plus optional flavors. We covered how to make the dish step-by-step and shared tips for choosing and cooking Brussels sprouts. Finally, you found variations and storage advice to suit your needs. By trying this stir-fry, you can enjoy a healthy meal that's easy to customize. Don't hesitate to experiment and make it your own!

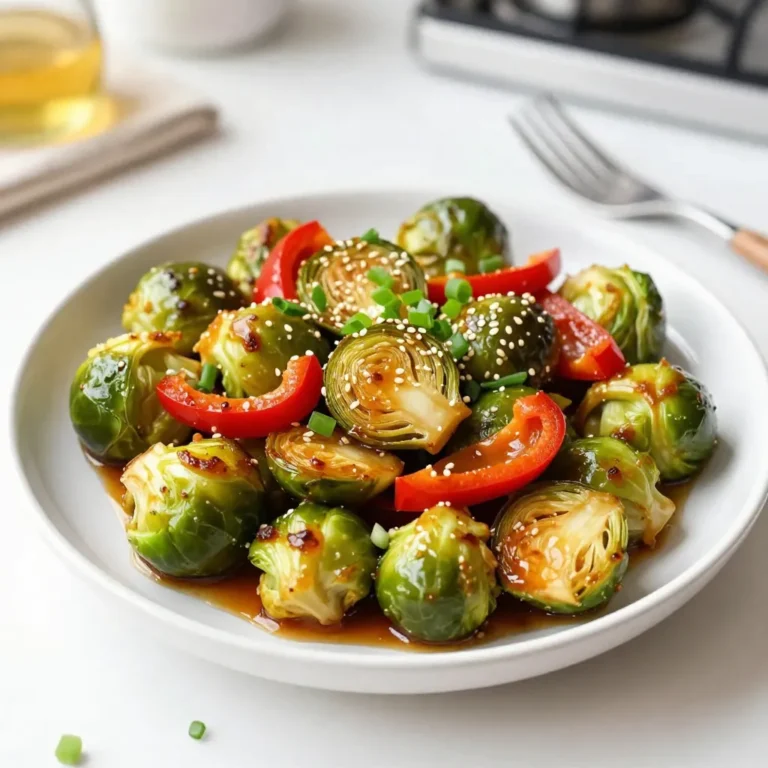
Honey Garlic Brussels Sprout Stir Fry Flavorful Dish

PREV 1 … 78 79 80 … 86 NEXT
tasty trail blazer

explore

DessertsDinnerAppetizersDrinks

Our Policies

  • Cookie Policy
  • Copyright Policy
  • Disclaimer
  • GDPR Policy
  • Terms Of Use
Back to Top
  • About
  • Contact Us
  • Privacy Policy
© 2026 tasty trail blazer