FREE DINNER EBOOK! Get your copy!
  • Cookie Policy
  • GDPR Policy
  • Disclaimer
  • Terms Of Use
  • Visit my other site: Fun Cookie Recipes
tasty trail blazer
  • Home
  • Dinner
  • Desserts
  • Drinks
  • Appetizers
  • Contact
  • About
  • Privacy Policy
  • Home
  • Dinner
  • Desserts
  • Drinks
  • Appetizers
  • Contact
  • About
  • Privacy Policy
  • Cookie Policy
  • GDPR Policy
  • Disclaimer
  • Terms Of Use
Visit my other site: Fun Cookie Recipes

HOME / CATEGORIES /

Latest

- 1 cup coconut milk - 1/2 cup almond milk - 1/4 cup chia seeds - 2 tablespoons maple syrup (or honey) - 1 ripe mango, diced - 1 teaspoon vanilla extract - 1/4 teaspoon salt - Optional garnishes: toasted coconut flakes and mint leaves To create this Coconut Mango Chia Pudding, gather all your ingredients first. You need both coconut and almond milk for creaminess and flavor. The chia seeds are the magic ingredient that thickens the pudding while adding healthy fiber. Maple syrup or honey gives a touch of sweetness. You want a ripe mango that is sweet and juicy. The vanilla extract adds depth, and a pinch of salt enhances all the flavors. If you want to make it pretty, consider adding toasted coconut flakes and fresh mint leaves as optional garnishes. With these ingredients, you can enjoy a delicious, refreshing treat that is also good for you. Each bite will be a delightful mix of creamy pudding and fruity goodness. {{ingredient_image_1}} In a mixing bowl, combine: - 1 cup coconut milk - 1/2 cup almond milk - 1/4 cup chia seeds - 2 tablespoons maple syrup - 1 teaspoon vanilla extract - 1/4 teaspoon salt Whisk until smooth and well combined. The coconut milk gives a creamy texture, while the almond milk adds a nice touch. The chia seeds will soak up the liquid and create a lovely pudding. Let the mixture sit for 5-10 minutes. This step is key! The chia seeds will begin to swell and absorb the liquid. After your timer goes off, whisk again to prevent clumping. This keeps the pudding smooth and enjoyable. Now, it's time to chill! Cover the bowl with plastic wrap or transfer the mixture to serving jars. Refrigerate for at least 4 hours, or overnight if you can wait. This chilling time allows the chia seeds to expand fully, thickening your pudding into a delightful treat. To get the right texture, you can adjust the liquid ratios. If you want a thicker pudding, use less almond milk. For a thinner pudding, add more coconut milk. This lets you control the creaminess, making it just how you like it. To change the taste, try adding spices or extracts. A dash of cinnamon can give warmth. For a tropical vibe, a hint of cardamom works well. You can also add almond or coconut extract for extra flavor. Experimenting with these can make each batch unique. There are many fun ways to serve your pudding. Layer it in clear glasses for a pretty look. Top it with fresh mango for a burst of color. You can also sprinkle toasted coconut flakes on top for some crunch. Garnish with mint leaves for a fresh touch. These ideas make your pudding not only tasty but also visually appealing. Pro Tips Choose Ripe Mangoes: Make sure to use ripe mangoes for the best flavor and sweetness in your pudding. Prevent Clumping: Whisk the mixture after 5-10 minutes to prevent the chia seeds from clumping together. Overnight Chilling: For the best texture, refrigerate the pudding overnight to allow the chia seeds to fully expand. Garnish with Freshness: Enhance the flavor and presentation by garnishing with fresh mint leaves and toasted coconut flakes. {{image_2}} You can make this pudding fun with different fruits. Berries add a tart kick. Try strawberries, blueberries, or raspberries. Bananas bring natural sweetness and creaminess. You can also mix fruits for a colorful treat. Just remember, use ripe fruits for the best flavor. If you want a dairy-free choice, swap almond milk for oat milk or soy milk. Each milk brings a unique taste. Coconut milk is rich and creamy, while oat milk adds a mild flavor. Soy milk is thick and protein-rich. These options keep your pudding smooth and tasty. You can change the sweetness to fit your taste. Maple syrup works well, but honey is another great choice. If you want less sugar, try agave or stevia. Both are natural and sweet. Just adjust the amount to find your perfect balance. To keep your coconut mango chia pudding fresh, store it in the fridge. Use an airtight container or individual jars. This helps prevent the pudding from absorbing odors. Always cover it well, so it stays fresh and tasty. Your chia pudding lasts about 4 to 5 days in the fridge. Look for changes in texture or smell. If it smells off or has a strange color, it's best to toss it. Freshness is key for the best taste. You can enjoy your leftovers cold or at room temperature. If you prefer warmth, gently heat it in the microwave. Add a splash of coconut or almond milk to refresh the texture. Just heat it for a few seconds to avoid cooking the chia seeds. Enjoy your pudding with new mango or coconut flakes on top for extra flavor! Coconut Mango Chia Pudding stays fresh for up to five days in the fridge. Store it in a sealed container. After five days, it may lose its taste and texture. Always check for any signs of spoilage, like a sour smell or changes in color. Yes, you can use other milk types! Almond milk works well, but you can try soy, oat, or even cashew milk. Each milk gives a unique flavor. Just keep the same liquid amount for the best results. Chia pudding is very healthy! Chia seeds are high in fiber and omega-3 fatty acids. Coconut milk provides healthy fats, while mango adds vitamins and minerals. This pudding is a great snack or breakfast option. It fills you up and gives you energy. Plus, it’s low in added sugars, especially if you adjust the sweetener. This blog post walked you through making Coconut Mango Chia Pudding. We covered all the ingredients, steps, tips, and variations. You learned how to get the best texture and flavor. Remember, there are many ways to mix in your favorite fruits or sweeteners. Enjoy your pudding fresh or stored for later. Using this recipe, you can create a tasty snack that is both fun and healthy. Dive in, and make it your own!

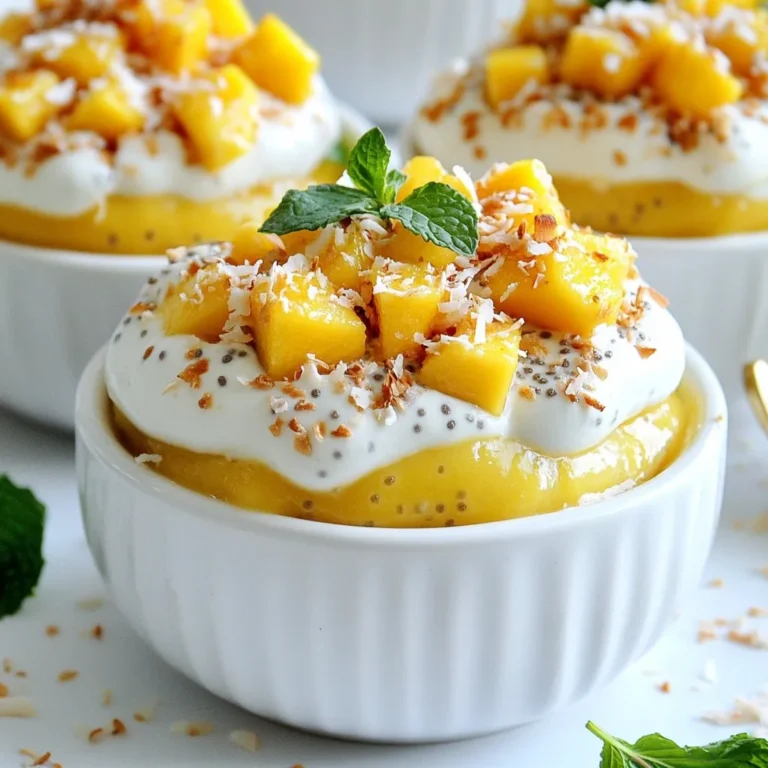
Coconut Mango Chia Pudding Refreshing and Nutritious

- 4 boneless, skinless chicken breasts - 1 cup shredded coconut - 1 cup panko breadcrumbs - 1 tablespoon garlic powder - 1 tablespoon onion powder - 1 teaspoon paprika - 1 teaspoon salt - ½ teaspoon black pepper - 2 eggs - ½ cup milk - 1 cup shredded mozzarella cheese - 1 ripe pineapple, sliced - 1 tablespoon olive oil - Fresh cilantro for garnish To make Malibu Chicken, you need fresh chicken breasts. They will be the star of your dish. For the coating, you mix shredded coconut with panko breadcrumbs. This mix gives a crunchy texture. Garlic powder and onion powder add great flavor. Paprika, salt, and pepper enhance the taste. For the topping, mozzarella cheese melts beautifully on the chicken. Pineapple slices add a sweet touch. They balance the savory flavors. Olive oil helps the pineapple roast well. Lastly, fresh cilantro brightens the dish. Each ingredient plays a role in creating a tasty meal. {{ingredient_image_1}} 1. Start by preheating your oven to 375°F (190°C). This step is key for even baking. 2. Next, grab a shallow bowl and whisk together 2 eggs and ½ cup of milk. Mix until it's smooth and well combined. 3. In another shallow bowl, mix 1 cup of shredded coconut, 1 cup of panko breadcrumbs, 1 tablespoon of garlic powder, 1 tablespoon of onion powder, 1 teaspoon of paprika, 1 teaspoon of salt, and ½ teaspoon of black pepper. This mix gives the chicken a great flavor. 4. Now, take a chicken breast and dip it into the egg mixture, letting the extra drip off. After that, coat it in the coconut-panko mix. Press lightly to make sure it sticks well. 5. Place the coated chicken breasts on a greased baking sheet. This helps prevent sticking. 6. Sprinkle a generous amount of shredded mozzarella cheese on top of each chicken piece. This will melt and add a nice touch. 7. Slice your ripe pineapple and arrange the slices around the chicken on the baking sheet. Brush them lightly with 1 tablespoon of olive oil for extra flavor. 8. It’s time to bake! Put the baking sheet in the oven and bake for 25-30 minutes. The chicken is ready when it reaches an internal temperature of 165°F (74°C) and the coating turns golden brown. 9. Once it's done, take it out of the oven and let it cool for a few minutes. 10. For a fresh finish, garnish the chicken with chopped cilantro before serving. Enjoy your flavorful Malibu Chicken! - Achieving the perfect golden crust: To get that nice, golden crust, press the coating onto the chicken. This helps it stick well. Bake until the color is a rich, golden brown. - Ensuring chicken is cooked through: Use a meat thermometer to check the chicken. It should reach 165°F (74°C). This ensures it is safe and juicy. - Suggestions for garnish: Fresh cilantro adds a bright touch. You can also use thin lime slices for zest. This will enhance the dish's tropical feel. - Side dishes that complement Malibu Chicken: Serve Malibu Chicken with rice or a fresh salad. Grilled veggies also pair well and add color to your plate. - Best sauces to pair with the dish: A sweet chili sauce works great with the coconut flavor. You can also try a honey mustard or a tangy barbecue sauce for a tasty mix. Pro Tips Perfectly Breaded: For an extra crispy coating, let the coated chicken rest for 10-15 minutes before baking. This helps the breading adhere better. Flavor Boost: Marinate the chicken breasts in a mixture of pineapple juice and soy sauce for a few hours before breading for added flavor. Cheese Options: Feel free to experiment with different cheeses such as pepper jack or cheddar for a unique twist on the flavor profile. Garnishing Tips: Add a squeeze of fresh lime juice over the chicken and pineapple before serving for a refreshing zing. {{image_2}} For a fun twist, you can change the breading. Instead of panko and coconut, try crushed cornflakes. They add a nice crunch. You can also use gluten-free breadcrumbs if you need it. If you're dairy-free, swap the milk for almond or oat milk. They work well in the egg mix. For cheese, choose a dairy-free mozzarella. It melts nicely and keeps the dish creamy. Want to spice things up? Add some cayenne pepper or chili powder to the breading. Fresh herbs like thyme or basil can brighten the flavor too. They give a fresh taste that pairs well with chicken. For cheese, mix it up! Use cheddar for a sharper flavor or pepper jack for heat. You can also try using feta. It adds a nice salty kick that works great with the pineapple. After you enjoy your Malibu Chicken, store any leftovers in the fridge. Place the chicken in an airtight container. This helps keep it fresh for up to three days. You can also wrap it tightly in plastic wrap. Make sure to cool the chicken to room temperature before sealing it up. When you’re ready to eat, reheating is simple. Preheat your oven to 350°F (175°C). Place the chicken on a baking sheet. Cover it with foil to keep it moist. Heat for about 15-20 minutes or until it's warm throughout. You can also use a microwave, but it may not keep the crust crispy. If you want to save Malibu Chicken for later, freezing is a great option. After letting the chicken cool, wrap each piece tightly in plastic wrap. Then, place them in a freezer-safe bag. Remove as much air as possible to avoid freezer burn. You can freeze it for up to two months. When you’re ready to enjoy it, defrost the chicken in the fridge overnight. This keeps it safe. After thawing, reheat it as mentioned before. For better results, bake it in the oven to restore the crispiness. Use glass or plastic containers that are safe for freezing. This helps keep your Malibu Chicken fresh and tasty. What is Malibu Chicken? Malibu Chicken is a tasty dish made with crispy chicken, coconut, and cheese. It has a tropical twist with fresh pineapple and a crunchy coating. This recipe brings flavors of the beach right to your table. Can I make Malibu Chicken ahead of time? Yes! You can prepare the chicken and the coating ahead of time. Coat the chicken and store it in the fridge for up to a day. Just bake it when you’re ready to enjoy a delicious meal. Is Malibu Chicken gluten-free? No, Malibu Chicken is not gluten-free because of the panko breadcrumbs. You can use gluten-free breadcrumbs to make it safe for those with gluten sensitivities. This swap keeps the dish tasty while avoiding gluten. What can I substitute for chicken? You can use turkey breasts or tofu if you want a different protein. Both options work well in this recipe. Adjust the cooking time if you use tofu, as it requires less time to cook. This blog post covered all you need to make Malibu Chicken. We discussed the specific ingredients, cooking steps, and tips for the best results. You learned how to make it crispy and delicious. I shared storage tips and answered common questions, too. Don’t be afraid to get creative with flavors or try different toppings. Enjoy this tasty dish with your favorite sides. Now, it’s time to gather your ingredients and start cooking!

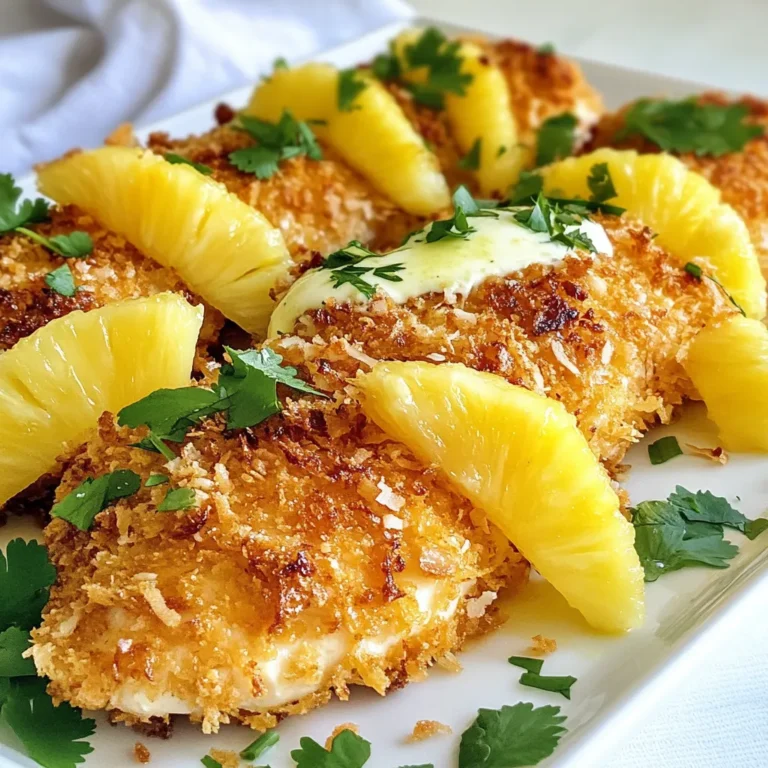
Malibu Chicken Flavorful and Easy Recipe Guide

- Pasta options You can use 12 oz of fettuccine or penne. Both work well with the sauce. - Roasted red peppers You need three large red bell peppers. Roasting them brings out their sweet flavor. - Aromatics (onion and garlic) Use one medium onion, diced, and three cloves of garlic, minced. These add depth to the sauce. - Cream and broth One cup of heavy cream gives the dish its creaminess. Use one cup of vegetable broth to balance the richness. - Seasonings and garnishes Include half a cup of grated Parmesan cheese, two tablespoons of olive oil, and one teaspoon of smoked paprika. Add salt and pepper to taste. Fresh basil leaves make a great garnish too. These ingredients work together to create a rich and delightful dish. You will enjoy how they blend to make a comforting meal. {{ingredient_image_1}} To start, preheat your oven to 400°F (200°C). This high heat helps to char the peppers. Next, slice the red bell peppers in half. Remove the seeds and place them cut-side down on a baking sheet lined with parchment paper. Roast them for 25 to 30 minutes. You want the skins to be charred and blistered. Once done, take them out and place the peppers in a bowl. Cover the bowl with plastic wrap for about 10 minutes. This steaming process will make peeling the skins easy. While the peppers roast, fill a large pot with water and add salt. Bring the water to a boil. Add your pasta and cook according to the package instructions. Aim for al dente, which means the pasta is firm to the bite. This usually takes about 8 to 10 minutes, but check your package for the exact time. Drain the pasta and set it aside. In a large skillet, heat olive oil over medium heat. Add the diced onion and sauté until it becomes translucent, around 5 minutes. Then, add the minced garlic and sauté for one more minute. Next, peel the skins off the roasted red peppers. Place them in a blender with the sautéed onion, garlic, vegetable broth, heavy cream, and smoked paprika. Blend everything until it’s smooth. Pour the sauce back into the skillet and let it simmer gently. Stir in the grated Parmesan cheese until it melts into the sauce. If it’s too thick, add a bit more vegetable broth to adjust the consistency. Season with salt and pepper to taste. Finally, add the cooked pasta to the sauce and toss until the pasta is well coated. Let it cook for an extra minute to heat through. To get the sauce just right, you can adjust its thickness. If it’s too thick, add more vegetable broth. If it’s too thin, let it simmer a bit longer. For extra flavor, try adding a pinch of red pepper flakes or a squeeze of lemon juice. These small changes can make a big difference. Common mistakes happen when blending the sauce. Make sure to blend until smooth. Lumpy sauce can ruin the creamy texture. Also, taste the sauce before serving. Adjust with salt or pepper as needed. To prevent your pasta from sticking, stir it well right after adding it to the boiling water. Use a large pot and plenty of water. This helps keep the pasta moving. Timing is key when cooking pasta. Aim to finish the pasta just before the sauce is ready. This way, you can toss them together while the pasta is hot. It helps the sauce cling better to the noodles. Garnishing can elevate your dish. Fresh basil leaves add color and flavor. You can also sprinkle extra Parmesan on top for a cheesy finish. For serving, consider using a large bowl. This allows guests to see the creamy pasta. You can also serve it on individual plates for a more elegant touch. Pro Tips Use Fresh Ingredients: For the best flavor, opt for fresh red bell peppers and high-quality heavy cream. This will enhance the overall taste of your pasta dish. Adjust the Spice: If you enjoy a bit of heat, consider adding a pinch of red pepper flakes to the sauce for a spicy kick that complements the sweetness of the roasted peppers. Save Pasta Water: Before draining your pasta, reserve a cup of the cooking water. Adding a splash can help adjust the sauce's consistency and help it cling to the pasta better. Experiment with Herbs: While fresh basil is a great garnish, feel free to experiment with other herbs like thyme or parsley for added flavor and a fresh finish to your dish. {{image_2}} You can add chicken or shrimp to this dish for a boost of protein. Cook the chicken in the skillet before adding the onion and garlic. For shrimp, add them just before mixing in the pasta. Both options make the meal more filling and tasty. If you want a vegetarian option, try chickpeas or lentils. They add protein and pair well with the sauce. If you need gluten-free options, use gluten-free pasta. Many brands make great alternatives. You can also swap heavy cream for coconut cream or cashew cream for a dairy-free choice. These substitutes keep the dish creamy while meeting dietary needs. Herbs and spices can elevate the taste of your pasta. Try adding crushed red pepper for heat or fresh thyme for earthiness. You can also mix in vegetables like spinach or cherry tomatoes. These add color, texture, and extra nutrients to your meal. After you enjoy your creamy roasted red pepper pasta, store any leftovers right away. Let the pasta cool at room temperature for no more than two hours. Use airtight containers to keep it fresh. Glass or plastic containers work well. - Refrigerator: Store the leftovers in the fridge. They last for 3 to 4 days. - Freezer: For longer storage, freeze the pasta. It can last up to 3 months in the freezer. When you’re ready to enjoy the leftovers, reheating them properly is key. You want to keep that creamy texture. - Best methods: Use a stovetop skillet over low heat. Add a splash of water or broth to help the sauce stay creamy. Stir often to heat evenly. - Avoiding overcooking: Watch the heat closely. Overheating can make the pasta tough. Aim to reheat just until warm. Knowing how long your pasta lasts is important for safety and taste. - Fridge: Creamy roasted red pepper pasta lasts 3 to 4 days in the fridge. Check it regularly. - Freezer: In the freezer, it can stay good for about 3 months. Signs of spoilage: If the pasta smells sour or looks discolored, it’s time to toss it. Always trust your senses! For creamy sauces, I recommend using fettuccine or penne. These shapes hold the sauce well. Fettuccine has a flat surface that catches the sauce. Penne, with its tubular shape, allows sauce to fill each piece. Both options create a delightful bite. Yes, you can make this dish in advance. Cook the pasta and sauce separately. Store them in airtight containers. When ready to serve, simply reheat. This way, you maintain the texture and flavor. To add spice, try these options: - Add red pepper flakes to the sauce. - Use a pinch of cayenne pepper. - Mix in diced jalapeños for a fresh kick. Experiment with these spices to find your perfect heat level. Absolutely! Jarred roasted red peppers save time. They are already cooked and ready to use. Just drain and blend them with the other sauce ingredients. You won’t lose any flavor. Serve this pasta with a fresh green salad. Garlic bread also makes a great side. For protein, grilled chicken or shrimp complements the flavors well. These pairings create a balanced meal. You’ve learned how to make a delicious Creamy Roasted Red Pepper Pasta. We covered ingredients, step-by-step cooking, and clever tips to enhance flavor. You can add proteins or modify for diets too. Storing leftovers and reheating properly keeps the dish fresh. Cooking should be fun and satisfying. With these tips, you'll impress everyone. Enjoy making and sharing this dish!

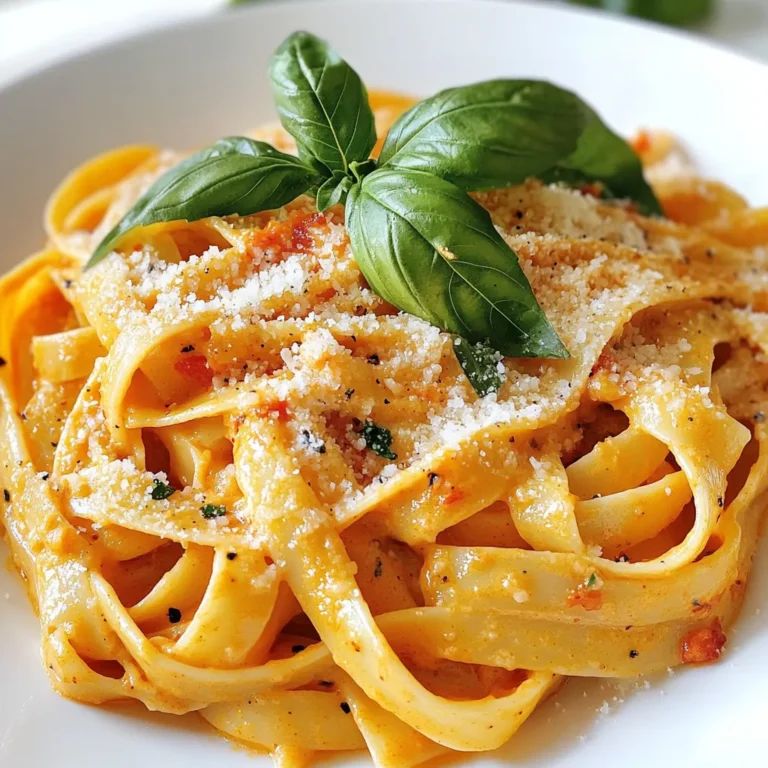
Creamy Roasted Red Pepper Pasta Flavorful Weeknight Meal

- 1 cup cottage cheese - 1 cup cooked chicken breast, shredded or diced - 1 cup marinara sauce, homemade or store-bought In this dish, cottage cheese serves as a creamy base. It adds protein and a mild taste. Cooked chicken breast gives the bowl substance and flavor. You can use store-bought rotisserie chicken for ease. Marinara sauce brings a rich, tangy flavor that complements the chicken well. - 1/2 cup mozzarella cheese, shredded - 1/4 cup grated Parmesan cheese Mozzarella cheese melts beautifully, creating a gooey texture. It adds a lovely stretch when you take a bite. Grated Parmesan cheese brings a sharp flavor that enhances the overall taste. Both cheeses make this dish extra delicious. - 1 teaspoon Italian seasoning - 1/2 teaspoon garlic powder - Fresh basil leaves, for garnish (optional) Italian seasoning adds depth with herbs like oregano and thyme. Garlic powder gives a warm, savory flavor. Fresh basil leaves add a pop of color and a fragrant touch. You can use these as a garnish for a fresh finish. {{ingredient_image_1}} To start, you need to cook your chicken. You can roast, grill, or sauté it. Each method gives a different taste. I like to season the chicken with salt, pepper, and garlic powder. This adds great flavor. If you have leftover chicken, that works too. Just shred or dice it for easy layering. Next, warm your marinara sauce in a medium saucepan. Heat it over medium heat until it's hot. Stir in Italian seasoning. This gives it a nice kick. Taste the sauce and adjust the salt and pepper as needed. You want it to be just right! Now it’s time to build your bowl. Start with a layer of cottage cheese at the bottom. This gives a creamy base. Then, add your shredded chicken on top. Pour the warmed marinara sauce over the chicken. Now sprinkle shredded mozzarella and grated Parmesan on top. If you like, add cooked whole grain pasta or quinoa around the edges. This makes the bowl hearty. Heat the whole bowl in the microwave for 1-2 minutes or bake at 375°F for 10 minutes. When it’s done, let it cool a bit. Garnish with fresh basil leaves for a lovely touch! Choosing the right chicken is key. I like to use cooked chicken breast. You can roast, grill, or sauté it. If you have leftover chicken, that works great too. For marinara, you can go homemade or store-bought. If you want a twist, try pesto or Alfredo. These options give you lots of flavor without much hassle. When it comes to melting cheese, both the microwave and oven work well. For the microwave, heat it for 1-2 minutes. Watch it closely so it does not burn. If you prefer the oven, bake at 375°F for ten minutes. To prevent clumping, add cheese while the sauce is warm. This helps it melt better and stay smooth. Garnishing can take your dish to the next level. Fresh basil leaves add great color and flavor. You can also sprinkle extra cheese for a rich look. For serving, use fun bowls or plates. This makes your meal feel special. Pair it with a simple side salad for a balanced meal. Pro Tips Use Fresh Ingredients: Fresh herbs and high-quality marinara sauce can elevate the flavor of your dish significantly. Customize Your Proteins: Feel free to substitute chicken with turkey or even plant-based proteins for a different take on this bowl. Layer for Flavor: Ensure you layer your ingredients properly to create a harmonious blend of flavors in each bite. Let It Rest: Allow the bowl to cool for a couple of minutes after cooking; this helps the flavors meld together beautifully. {{image_2}} You can switch out chicken for turkey or tofu. Turkey gives a nice flavor and is lean. Tofu is great for a vegetarian option. Just press and cube the tofu before cooking. This adds texture and flavor. You can season it like chicken for a tasty twist. Try different sauces for your bowl. You can use pesto, Alfredo, or a spicy arrabbiata. Homemade sauces let you control flavors. Store-bought sauces save time but check the label for quality. Choose sauces that match your taste. Add veggies for extra nutrition. Spinach, bell peppers, or broccoli work well. You can also sprinkle in some creative seasonings. Try smoked paprika or crushed red pepper for a kick. Experiment with what you have on hand to make it your own! To keep your Chicken Parm Cottage Cheese Bowl fresh, store it in an airtight container. Make sure to refrigerate it within two hours after cooking. This dish stays good for up to three days in the fridge. If you have pasta or quinoa in the bowl, they can dry out. To prevent this, add a splash of water or sauce when storing. For reheating, you can use either a microwave or an oven. If you choose the microwave, cover the bowl with a microwave-safe lid or wrap. Heat it for about 1-2 minutes. Check if it's hot and the cheese is bubbly. For the oven, preheat it to 375°F (190°C). Place the bowl in the oven for about 10 minutes. This method helps keep everything crispy. You can freeze your Chicken Parm Bowl for later meals. First, let it cool completely. Then, transfer it to a freezer-safe container. Make sure to use it within three months for the best taste. When you're ready to eat, thaw it in the fridge overnight. Reheat it using the methods mentioned earlier for best results. Yes, you can make this Chicken Parm Bowl ahead of time. This dish is great for meal prep. Here are some tips to help you: - Cook the chicken in advance and store it in the fridge. - Prepare the marinara sauce a day before and keep it sealed. - Layer the bowl but do not heat it until you are ready to eat. - Store in an airtight container. It will stay fresh for up to three days. - When ready to eat, just heat it in the microwave or oven. If you want a substitute for cottage cheese, there are many options. Here are a few: - Ricotta cheese has a similar texture and taste. - Greek yogurt is a great choice for a creamy base. - Silken tofu works well for a dairy-free option. - Cream cheese can also be used, but it will be richer. - Always check for allergies and dietary needs when choosing substitutes. This recipe is quick and easy to make. Here’s a breakdown of the time: - Prep time: 10 minutes. This includes cooking the chicken and gathering ingredients. - Cook time: 10 minutes. This includes heating the sauce and melting the cheese. - In total, you will spend about 20 minutes from start to finish. This makes it perfect for a busy day! This blog post covered how to create a tasty Chicken Parm Bowl. We discussed key ingredients, including cottage cheese, chicken, and marinara sauce. You learned how to prepare the chicken and heat the sauce for the best flavor. I shared tips on cheese melting and presentation. Plus, we explored variations and storage options. In conclusion, you can easily customize this dish to fit your likes. Make it your own by trying different proteins or sauces. Enjoy your delicious creation!

Chicken Parm Cottage Cheese Bowl Flavorful and Easy

To create the perfect Vegan Coconut Curry Ramen, you need some key ingredients: - 2 packets of ramen noodles (vegan) - 1 can (400ml) coconut milk - 2 tablespoons red curry paste - 1 cup vegetable broth - 1 tablespoon soy sauce or tamari - 1 tablespoon fresh ginger, grated - 2 cloves garlic, minced - 1 cup broccoli florets - 1 red bell pepper, sliced - 1 cup snap peas - 1 carrot, julienned - 2 green onions, chopped - Fresh cilantro, for garnish - Lime wedges, for serving - Salt and pepper to taste These ingredients are simple yet packed with flavor. Each item plays a role in making this dish vibrant and tasty. Garnishes can elevate your ramen experience. Consider adding: - Sliced red chili for heat - Sesame seeds for crunch - Extra lime wedges for zest - Avocado slices for creaminess These optional garnishes can add a personal touch to your ramen. They boost flavor and make your dish look stunning. If you can't find something or want to switch it up, here are some great substitutes: - Use coconut cream instead of coconut milk for a richer taste. - Swap the red curry paste for green curry paste for a different flavor. - Try other veggies like zucchini or spinach based on what you have. - If you're avoiding soy, use coconut aminos instead of soy sauce or tamari. These substitutions keep the dish delicious and allow you to use what's on hand. Cooking should always be flexible! {{ingredient_image_1}} Start by heating a drizzle of vegetable oil in a large pot over medium heat. Add minced garlic and grated ginger. Sauté these for about a minute until they smell great. Next, stir in two tablespoons of red curry paste. Cook this for another minute to let the flavors mix well. Now, pour in one can of coconut milk and one cup of vegetable broth. Stir everything together and bring the mixture to a gentle simmer. This base will give your ramen a rich and creamy flavor. While the base simmers, it’s time to add some color and crunch. Toss in one cup of broccoli florets, one sliced red bell pepper, one cup of snap peas, and one julienned carrot. Cook these veggies for about 5 to 7 minutes. You want them to be tender but still crisp. This ensures they keep their nutrients and texture. While the vegetables cook, prepare the ramen noodles. Follow the package instructions for cooking. Once done, drain the noodles and set them aside. After your veggies are ready, add one tablespoon of soy sauce or tamari to the pot. Season with salt and pepper to your liking. Finally, add the cooked ramen noodles to the pot. Gently toss everything to combine. Serve your Vegan Coconut Curry Ramen hot, garnished with chopped green onions, fresh cilantro, and a lime wedge on the side. Enjoy this savory and simple meal! To make the best ramen broth, start with fresh ingredients. Use coconut milk for creaminess and depth. Red curry paste gives it a rich flavor. Combine these with vegetable broth for a solid base. Always taste as you go. Adjust with soy sauce for saltiness. If you want a little zing, add a squeeze of lime. This brightens the flavors and makes the broth shine. Keep your veggies tender-crisp. This means they should be bright and a bit crunchy. Add them to the pot after making the broth. Broccoli, bell peppers, and snap peas cook quickly. Stir them in and watch closely. They will need about 5 to 7 minutes on medium heat. Don’t overcook them; you want them vibrant and fresh. A splash of cold water after cooking can help keep that color. To amp up the taste, use fresh ginger and garlic. They add warmth and spice to the dish. Also, fresh cilantro brings a nice finish. Don’t skip the lime wedges; they give a perfect burst of flavor. You can also add chili flakes if you like heat. Lastly, play with the broth seasoning. Try adjusting salt and pepper to your liking. Each small change can transform your ramen. Pro Tips Use Fresh Ingredients: Fresh vegetables will enhance the flavor and texture of your ramen. Always opt for seasonal produce when possible. Adjust Spice Levels: If you enjoy a bit more heat, feel free to add some chili flakes or fresh sliced chilies along with the red curry paste. Customize Your Toppings: Experiment with different toppings like avocado, bean sprouts, or toasted sesame seeds to elevate your ramen experience. Make It Ahead: This curry broth can be made in advance and stored in the fridge for up to three days. Just reheat and add the noodles when ready to serve. {{image_2}} Want a kick? Add some heat! You can make spicy vegan coconut curry ramen by adding more red curry paste. Start with two tablespoons, then taste. If you want more heat, add a bit at a time. You can also toss in some sliced fresh chili peppers. They add flavor and spice. Don't forget to adjust the salt. Use less if you add more curry paste. If you're gluten-free, don’t worry! You can still enjoy this dish. First, look for gluten-free ramen noodles. Many brands offer them now. You can also use rice noodles if you can't find gluten-free ramen. When you choose soy sauce, use tamari instead. Tamari is a great gluten-free option. Your meal will still taste amazing! Need more protein? Add tofu or chickpeas. Firm tofu works well. Cut it into cubes and sauté it before adding it to the pot. This gives it a nice texture. If you prefer chickpeas, drain and rinse a can. Toss them in with the veggies. They soak up the curry flavor. Both options make your meal filling and tasty. After you enjoy your Vegan Coconut Curry Ramen, store any leftovers in an airtight container. Make sure to let the ramen cool before sealing it. This way, it stays fresh and tasty. Leftovers can last in the fridge for up to three days. To reheat, pour the ramen into a pot. Add a splash of vegetable broth to prevent it from drying out. Heat it on medium-low, stirring often until hot. You can also use the microwave. Place the ramen in a bowl and cover it. Heat in short bursts, stirring in between, until it’s warm. You can freeze the Vegan Coconut Curry Ramen for later. First, store the broth and noodles separately. This keeps the noodles from getting mushy. Use freezer-safe bags or containers. When you’re ready to eat, thaw the broth overnight in the fridge. Heat it on the stove and add cooked noodles. Enjoy your delicious meal anytime! Yes, you can use other noodles! Rice noodles or udon noodles work well. Just make sure they are vegan. Cook them according to their package instructions. Different noodles add variety and texture. Experiment with what you have at home. Vegan Coconut Curry Ramen stays fresh for about three to four days in the fridge. Store it in an airtight container. Reheat it gently on the stove or in the microwave. Keep in mind that the noodles may soak up some broth over time. Coconut milk is key for the creamy texture. It adds a rich flavor that complements the red curry paste. If you need a substitute, try almond milk or cashew cream. But these will change the taste and creaminess. Coconut milk truly makes this dish special. In this blog post, I covered the ingredients needed for Vegan Coconut Curry Ramen, including essential items and substitutions. We walked through the steps to prepare the base, cook vegetables, and combine noodles and broth. I shared tips for a great broth and tender veggies. You can also explore spicy versions and protein options. Don’t forget storage tips for leftovers. With these simple steps, you can enjoy a warm bowl of delicious ramen any time. Cooking can be fun and rewarding!

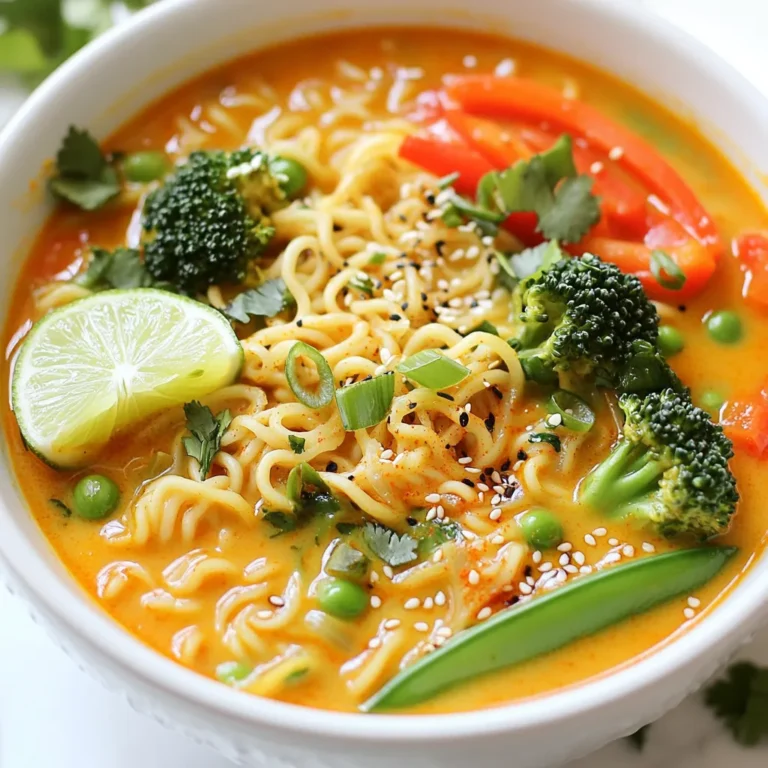
Vegan Coconut Curry Ramen Savory and Simple Meal

For a tasty Cheesy Chicken Pasta Bake, gather these main ingredients: - 2 cups rotini pasta - 2 cups cooked chicken, shredded - 1 cup broccoli florets (fresh or frozen) - 1 cup cherry tomatoes, halved - 2 cups shredded cheddar cheese - 1 cup Alfredo sauce (store-bought or homemade) - 1/2 cup cream cheese, softened - 1 teaspoon garlic powder - 1 teaspoon onion powder - 1/2 teaspoon paprika - Salt and pepper to taste - 1/4 cup fresh parsley, chopped (for garnish) These ingredients come together to create a warm, cheesy dish that the whole family loves. Each one plays a key role in building flavor and texture. The rotini pasta acts as a sturdy base. The shredded chicken adds protein, while broccoli and cherry tomatoes bring color and nutrition. The blend of cheeses and sauces creates that creamy, cheesy goodness we all crave. To make this dish, you'll need some essential tools: - Baking dish - Mixing bowls - Pot for boiling pasta - Wooden spoon or spatula Using the right tools makes cooking easier and more fun. A good baking dish helps your pasta bake cook evenly. Mixing bowls are perfect for combining ingredients without making a mess. A pot for boiling pasta ensures you get that perfect al dente texture. Lastly, a wooden spoon or spatula helps you mix everything well. With these tools, you'll be ready to create a delicious meal. {{ingredient_image_1}} First, cook the rotini pasta. Follow the package instructions. Cook until al dente. This means the pasta should be firm but not hard. Drain the pasta well and set it aside. Next, shred the cooked chicken. You can use leftover chicken or store-bought rotisserie chicken. Shredding makes it easy to mix with the pasta and sauce. In a large bowl, mix the shredded chicken, broccoli florets, and halved cherry tomatoes with the cooked pasta. Make sure everything is well combined. Now, create the cheese sauce mixture. In a separate bowl, mix the Alfredo sauce with softened cream cheese. Add garlic powder, onion powder, paprika, salt, and pepper. Stir until the mixture is smooth and creamy. Pour the cheese sauce over the chicken and pasta. Mix it well so everything is coated. Then, stir in 1 ½ cups of shredded cheddar cheese. This adds a rich flavor. Transfer the mixture to a greased 9x13 inch baking dish. Spread it evenly across the dish. Top with the remaining ½ cup of cheddar cheese. This will create a nice cheesy crust. Bake in a preheated oven at 375°F (190°C). Bake for 25-30 minutes. The cheese should be melted and bubbly. After baking, let it cool for a few minutes. Then, enjoy your cheesy chicken pasta bake! To ensure your pasta cooks just right, always boil it until it's al dente. This means the pasta should be firm but not hard. Follow the package instructions for timing. Once cooked, drain it well to prevent extra moisture in your bake. When it comes to cheese, clumping can ruin your dish. To avoid this, sprinkle cheese evenly throughout the pasta mixture. Stir gently to coat everything well. This way, you get that creamy, cheesy goodness in every bite. Garnishing with fresh parsley adds a lovely touch to your Cheesy Chicken Pasta Bake. Just chop it finely and sprinkle it on top before serving. This bright color makes the dish pop and adds a fresh flavor. For serving, pair your pasta bake with a simple salad or garlic bread. This makes a complete meal that your family will love. Feel free to switch things up with different veggies or proteins. You can use spinach, bell peppers, or even mushrooms. If you want a new protein, try using turkey or a meat substitute for a vegetarian option. Adjusting spice levels is easy too. If you like heat, add red pepper flakes. For cheese, try using mozzarella for a milder taste or gouda for a smoky flavor. Pro Tips Cook Pasta Al Dente: Make sure to cook the rotini pasta until it's al dente to avoid mushiness after baking. Mix Ingredients Thoroughly: Ensure all ingredients are well mixed in the sauce to achieve a uniform flavor in every bite. Use Fresh Ingredients: Opt for fresh broccoli and cherry tomatoes when possible to enhance the dish's flavor and nutrition. Let It Rest: Allow the dish to cool for a few minutes before serving to help it set and to avoid burns. {{image_2}} You can change the pasta type in this dish. Try using penne or fusilli for fun shapes. You can even use whole wheat or gluten-free pasta for healthier choices. For protein, shredded turkey works well, too. If you want a vegetarian version, use chickpeas or extra veggies. This keeps the bake hearty and filling. Different sauces can change the whole taste. Swap the Alfredo sauce for marinara to give it a tangy kick. Pesto adds fresh herbs and a burst of flavor. You can also add herbs like basil or thyme. A sprinkle of red pepper flakes brings heat. Feel free to play with spices to find your favorite mix. If you need a gluten-free option, use gluten-free pasta. There are many good brands available now. Check the labels to ensure they meet your needs. For a dairy-free version, try using almond cream or cashew cheese. These substitutes can give you a similar creamy texture. Don't forget to check for dairy-free cheese options for topping. To store leftovers, let the dish cool completely. Once cooled, transfer it to an airtight container. You can use glass or plastic containers with tight lids. These keep the dish fresh and prevent odors. Always label the container with the date. This helps you track freshness. For freezing, first, let the dish cool. Then, portion it into freezer-safe containers. Make sure to leave some space at the top for expansion. Wrap each container tightly with plastic wrap for extra protection. When you’re ready to eat, thaw the dish in the fridge overnight. Reheat in the oven at 350°F until hot, about 20-30 minutes. You can also microwave individual portions for quick meals. In the fridge, Cheesy Chicken Pasta Bake lasts about three to four days. If frozen, it can stay good for up to three months. After this time, the taste and texture may change. Always check for signs of spoilage before eating, like off smells or changes in texture. Yes, you can prepare this dish in advance. Here are some tips for prepping: - Cook the pasta: Make the rotini pasta and cool it before mixing. - Mix ingredients: Combine the chicken, veggies, and sauce. Store this mixture in the fridge. - Assemble: Layer the pasta mixture and cheese just before baking. - Bake later: Cover tightly and bake when ready. It might need a few extra minutes. You can lighten the dish while keeping it tasty. Here are some easy swaps: - Use whole wheat pasta: It adds fiber and nutrients. - Add more veggies: Include spinach, bell peppers, or zucchini for added vitamins. - Choose low-fat cheese: Use reduced-fat cheddar or mozzarella for fewer calories. - Swap Alfredo sauce: Try a lighter sauce or make one with Greek yogurt for creaminess. For a rich flavor and texture, here are my top picks: - Cheddar cheese: It melts well and adds a sharp taste. - Mozzarella cheese: This gives a nice stretchiness and mild flavor. - Parmesan cheese: A sprinkle on top adds a salty kick. - Blend of cheeses: Mixing different cheeses can create a complex flavor profile. In this post, I covered how to make a tasty Cheesy Chicken Pasta Bake. We went over the main ingredients, tools needed, and step-by-step instructions. I provided helpful tips for cooking, presentation, and customization. I also shared variations for different diets and how to store leftovers. This dish is simple and fun to make. Feel free to try new flavors or ingredients. Enjoy your cooking and create a meal everyone will love!

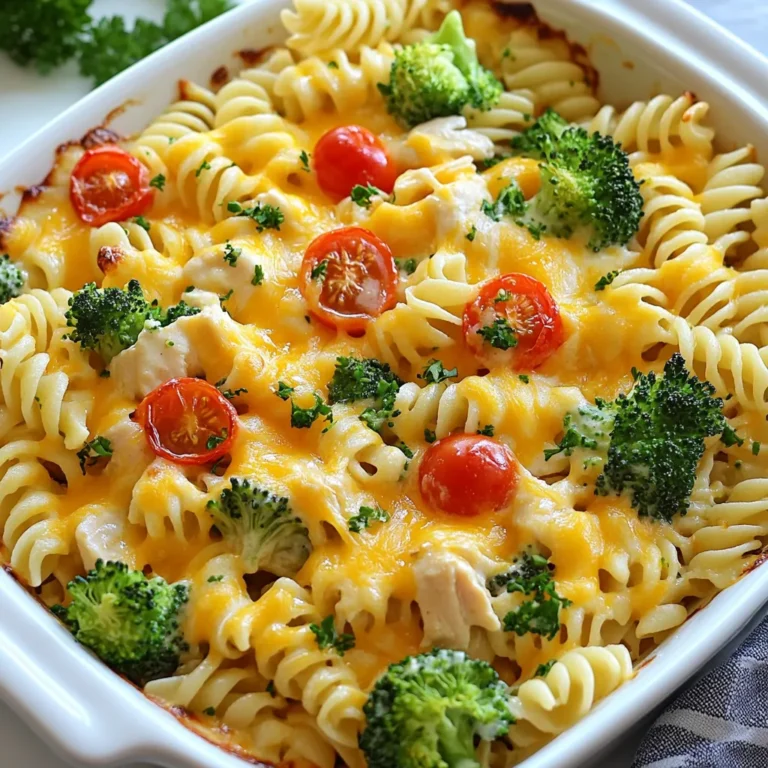
Cheesy Chicken Pasta Bake Comforting Family Favorite

For this tasty dish, gather these simple ingredients: - 1 pound Brussels sprouts, trimmed and halved - 2 tablespoons olive oil - 2 tablespoons pure maple syrup - 1 tablespoon Dijon mustard - 1 teaspoon garlic powder - Salt and pepper to taste These ingredients create a perfect balance of sweet and savory. The Brussels sprouts add crunch, while the maple syrup gives a lovely sweetness. The Dijon mustard adds tang, and garlic powder brings in a nice flavor punch. You can make this dish even better with optional add-ins: - 1/4 cup chopped pecans - Fresh parsley for garnish Pecans add a nice crunch and a nutty flavor. Parsley brightens the dish and adds color. Feel free to experiment with add-ins to suit your taste! When picking Brussels sprouts, look for these signs: - Bright green color - Firm, tight leaves - No yellowing or wilting Fresh Brussels sprouts taste better and roast nicely. Avoid any that feel soft or have brown spots. Choosing good sprouts makes your dish shine! {{ingredient_image_1}} Start by washing the Brussels sprouts. Make sure to remove any outer leaves that look bad. Trim the stem ends and cut each sprout in half. This helps them cook evenly. A pound of Brussels sprouts is perfect for about four servings. In a large bowl, mix the halved Brussels sprouts with 2 tablespoons of olive oil. Add 2 tablespoons of pure maple syrup and 1 tablespoon of Dijon mustard. Next, sprinkle in 1 teaspoon of garlic powder, and season with salt and pepper to taste. Toss everything well so the sprouts are fully coated in the tasty mix. Preheat your oven to 400°F (200°C). Spread the coated Brussels sprouts in a single layer on a baking sheet lined with parchment paper. Roast them for 20-25 minutes. Toss them halfway through to ensure even cooking. If you like, add 1/4 cup of chopped pecans during the last 5 minutes to toast them. Once done, let the sprouts cool for a couple of minutes. Garnish with fresh parsley before serving. Enjoy your sweet and tangy dish! To roast Brussels sprouts well, start with fresh ones. Look for bright green, firm sprouts. Trim the ends and cut them in half. This helps them cook evenly. Toss them with olive oil, maple syrup, Dijon mustard, garlic powder, salt, and pepper. Make sure they are well coated. Spread them out on a baking sheet. Avoid crowding them; this keeps them crispy. Roast them for 20-25 minutes. Toss halfway to ensure even cooking. You can adjust the flavors based on your taste. If you like it sweeter, add more maple syrup. For more tang, increase the Dijon mustard. Taste the mixture before roasting. This way, you can add more of what you like. Remember to balance the sweetness with salt and pepper for best results. Store leftover Brussels sprouts in an airtight container in the fridge. They will last for about 3-4 days. To reheat, place them on a baking sheet. Heat them in the oven at 350°F (175°C) for about 10 minutes. This keeps them crispy. You can also microwave them, but they may get soft. Enjoy your tasty dish again! Pro Tips Use Fresh Brussels Sprouts: Fresh Brussels sprouts will have a better texture and flavor compared to frozen ones. Look for bright green, firm sprouts for the best results. Adjust Sweetness: If you prefer a sweeter dish, you can add more maple syrup. For a tangier flavor, increase the amount of Dijon mustard. Perfect Roasting Time: Keep an eye on the Brussels sprouts during roasting. If they start to char too quickly, reduce the oven temperature slightly. Garnish for Flavor: Adding fresh parsley not only enhances the presentation but also adds a fresh flavor contrast to the sweet and savory elements of the dish. {{image_2}} You can change the flavor of Maple Dijon Brussels sprouts by adding nuts or seeds. Pecans are a great choice because they add a sweet crunch. You can also try walnuts for a more robust taste. If you prefer seeds, pumpkin seeds or sunflower seeds work well. Just sprinkle them on during the last few minutes of roasting. This adds texture and boosts nutrition. Feel free to mix in other vegetables for variety. Carrots and sweet potatoes pair nicely with Brussels sprouts. Chop them into similar sizes for even cooking. You can also add bell peppers or onions for extra flavor. Just toss them in with the Brussels sprouts before roasting. This way, all the veggies soak up the maple and Dijon flavors. For a richer taste, consider adding bacon or cheese. Cook some bacon until crispy, then crumble it over the sprouts before serving. This will give a savory twist to your dish. If you love cheese, sprinkle some feta or Parmesan on top. Add cheese in the last few minutes of roasting for a melty finish. Both options elevate the dish and make it even more delightful. One serving of Maple Dijon Brussels Sprouts has about 150 calories. Most of these calories come from healthy fats and natural sugars. The olive oil and maple syrup give it a nice boost of flavor. The pecans, if you add them, also contribute some calories but add good fats and crunch. Brussels sprouts are full of vitamins and minerals. They have vitamin C, which helps your immune system. These small veggies also have vitamin K, important for bone health. Eating Brussels sprouts can support digestion, thanks to their fiber content. They contain antioxidants that may help reduce inflammation and boost health. Each serving contains about 8 grams of carbs, 4 grams of protein, and 10 grams of fat. Here’s how that breaks down: - Carbohydrates: They provide energy and help keep you full. - Protein: This helps build and repair tissues. - Fat: The healthy fats from olive oil and pecans support heart health. Enjoy these Brussels sprouts as a tasty side dish that nourishes your body! Yes, you can easily make this recipe vegan. Just skip the honey and use maple syrup. The other ingredients are already plant-based. This will keep the dish sweet and tangy. You can enjoy all the flavors without any animal products. You will know the Brussels sprouts are done when they are tender and golden brown. After roasting for about 20-25 minutes, check them. They should be easy to pierce with a fork. If they look caramelized, they are ready. Toss them halfway through cooking for even browning. Yes, you can use frozen Brussels sprouts, but they will not be as crispy. Make sure to thaw and drain them well before cooking. This will help remove any extra moisture. You may need to roast them a bit longer to achieve the same texture. Understanding the ingredients and steps for roasting Brussels sprouts unlocks their full potential. You learned to choose fresh sprouts, prepare them, and add fun twists. You also discovered how to adjust flavors and store leftovers. Remember, these little greens pack a big health punch. With a few simple tips and add-ins, you can enjoy Brussels sprouts in many delicious ways. Dive into this recipe, and let these veggies shine on your plate. Embrace the fun of cooking and make Brussels sprouts your new favorite dish!

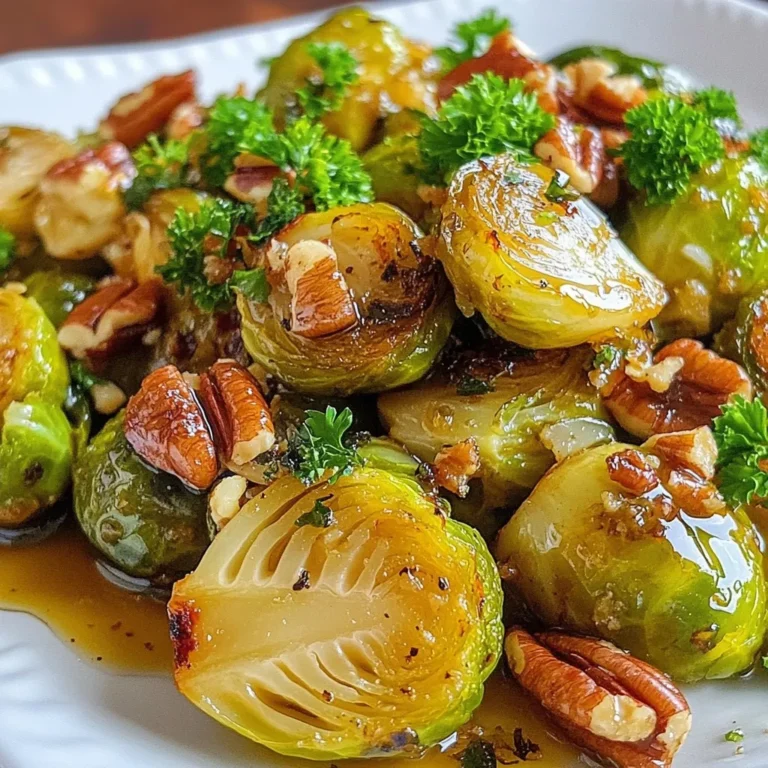
Maple Dijon Brussels Sprouts Flavorful Roasted Dish

- 1 cup all-purpose flour - 1/2 cup granulated sugar - 2 teaspoons baking powder - 1/2 teaspoon salt - 1/2 teaspoon ground cinnamon - 1/2 cup milk - 1 large egg - 2 tablespoons unsalted butter, melted - 1 teaspoon vanilla extract - 1/4 cup granulated sugar (for coating) - 2 teaspoons ground cinnamon (for coating) Using fresh baking powder helps the donuts rise well. Make sure your flour is not lumpy. The milk gives moisture and helps mix the batter smoothly. Use room temperature eggs for better mixing. Unsalted butter adds a rich flavor. Vanilla gives a sweet touch to the taste. For the coating, fresh cinnamon brings out the best flavor. You can use whole wheat flour for a healthier option. Almond milk works great if you want a dairy-free version. For a richer taste, try using brown sugar in place of white sugar. If you don't have a donut mold, a muffin tin works just fine. You can also shape them freeform if you like. {{ingredient_image_1}} Start by preheating your air fryer to 350°F (175°C). This helps the donuts cook evenly. I find it best to let it warm up for about 5 minutes. You want it hot before you add the donuts. In a medium bowl, add these dry ingredients: - 1 cup all-purpose flour - 1/2 cup granulated sugar - 2 teaspoons baking powder - 1/2 teaspoon salt - 1/2 teaspoon ground cinnamon Whisk these ingredients together well. This step mixes the flavors and ensures even baking. It’s important to break up any lumps in the flour. In another bowl, mix together: - 1/2 cup milk - 1 large egg - 2 tablespoons unsalted butter, melted - 1 teaspoon vanilla extract Stir these until smooth. Make sure the butter is not too hot, or it will cook the egg. You want a nice blend of flavors here. Now, lightly grease your donut mold. If you don’t have one, use a muffin tin or shape freeform donuts. Fill each mold halfway with the batter. This helps them rise without spilling over. Place the mold in the air fryer basket. Cook for 5-6 minutes. Check doneness with a toothpick. If it comes out clean, your donuts are ready. Once cooked, let the donuts cool slightly before rolling them in the cinnamon-sugar mix. Enjoy these warm treats! To get the best donuts, preheat your air fryer. Set it to 350°F (175°C). This helps the donuts cook evenly. A hot air fryer gives your donuts a nice, golden color. Preheating takes just a few minutes. It is a small step that makes a big difference. When you mix your batter, do it gently. Overmixing makes donuts tough. You want a light and fluffy texture. Mix until the dry and wet ingredients are just combined. Some lumps are okay. This keeps your donuts soft and airy. To coat your donuts evenly, roll them in the cinnamon-sugar mix while they are warm. This helps the sugar stick better. Use a shallow dish for the mix. Gently roll each donut to cover all sides. This gives you a tasty, sweet crust that everyone loves. Pro Tips Use Fresh Ingredients: Make sure to use fresh baking powder for the best rise and texture in your donuts. Donut Mold Alternatives: If you don't have a donut mold, consider using silicone molds or shape the donuts freeform on parchment paper. Quality Cinnamon: Use high-quality ground cinnamon for a more aromatic and flavorful coating on your donuts. Serve Warm: These donuts are best enjoyed warm right after coating them in cinnamon sugar for maximum flavor and texture. {{image_2}} You can easily change the flavor of your donuts. For a chocolate twist, add 1/4 cup of cocoa powder to your dry mix. This adds a rich taste. If you want warm spice, add 1/2 teaspoon of nutmeg. It pairs well with cinnamon. You can also mix in mini chocolate chips for extra sweetness. Be creative and try what you love! If you prefer a glaze, skip the cinnamon sugar. Mix 1 cup of powdered sugar with 2 tablespoons of milk. Stir until smooth. Dip each donut into the glaze while warm. This makes a sweet, sticky treat. You can add a splash of vanilla or almond extract for flavor. Glazed donuts are a fun twist on the classic! You can make these donuts healthier too. Swap all-purpose flour for whole wheat flour. This adds fiber and nutrients. The taste might be a bit nuttier, but it's still delicious. You can also cut back on sugar. Try using 1/4 cup of honey or maple syrup instead. These options help you enjoy a tasty treat while being mindful of health! To keep your donuts fresh, place them in an airtight container. This helps keep them soft. You can also use plastic wrap if you prefer. Store them at room temperature for up to two days. If you want to keep them longer, consider freezing. When you want to enjoy your donuts again, reheat them in the air fryer. Set the air fryer to 300°F (150°C) for about 3-4 minutes. This warms them up and keeps them soft. You can also use the microwave for 10-15 seconds, but the texture may change. If you want to save some donuts for later, freezing is a great idea. Let the donuts cool completely first. Then, wrap each one tightly in plastic wrap. Place them in a freezer bag to prevent freezer burn. They can last up to three months in the freezer. To enjoy, just thaw them at room temperature or reheat as mentioned. Yes, you can use a regular oven. Preheat your oven to 350°F (175°C). Place the donuts on a baking sheet lined with parchment paper. Bake for about 10-12 minutes, or until they are golden brown. Keep an eye on them to avoid overcooking. The texture may differ slightly, but they will still be tasty. These donuts are best enjoyed fresh. However, if you need to store them, place them in an airtight container. They will stay good for 1-2 days at room temperature. For longer storage, keep them in the fridge for up to a week. Just remember, they may lose some of their soft texture over time. Cinnamon sugar donuts pair well with many dips. You can try chocolate sauce for a sweet treat. A simple vanilla glaze works great too. If you prefer something fruity, a berry sauce adds a nice touch. For a twist, serve with maple syrup for dipping. Enjoy experimenting with your favorites! You learned how to make delicious donuts using an air fryer. We covered the key ingredients, step-by-step methods, and helpful tips. I shared easy variations and storage advice too. Remember, experimenting with flavors can make your treats even better. With this guide, you can bake tasty donuts at home. Enjoy the process and have fun sharing with others!

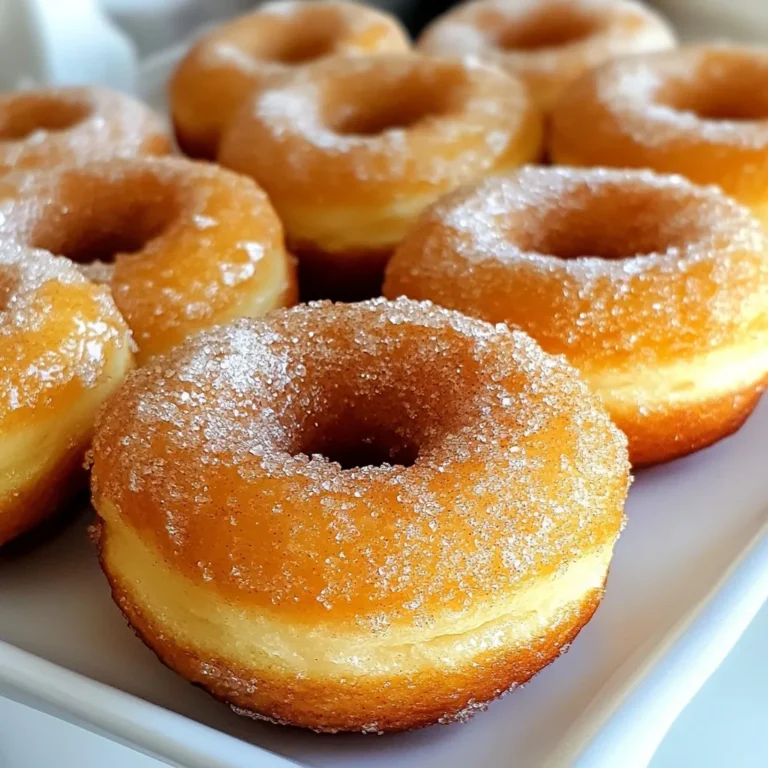
Air Fryer Cinnamon Sugar Donuts Easy and Tasty Recipe

- 8 oz rotini or penne pasta - 1 lb ground beef or turkey - 1 medium onion, diced - 2 cloves garlic, minced - 1 bell pepper (any color), diced - 1 cup diced tomatoes (canned or fresh) - 2 cups chicken broth - 1 cup corn (frozen or canned) For this Cheesy Taco Pasta Skillet, I love using rotini or penne. They hold the sauce well and make each bite flavorful. You can choose between ground beef or turkey based on your preference. Both work great! Dice a medium onion and a bell pepper to add sweetness and color. Fresh garlic gives a nice kick. For the base, use one cup of diced tomatoes and two cups of chicken broth. Add one cup of corn for crunch and sweetness. - 1 packet taco seasoning (about 1 oz) - Salt and pepper to taste The star of the show is a taco seasoning packet. It brings all the yummy taco flavors to your pasta. Season with salt and pepper to make it just right. - 1 cup shredded cheddar cheese - 1/2 cup sour cream - Fresh cilantro, chopped (for garnish) - Jalapeño slices (optional, for garnish) Finally, for toppings, you can't go wrong with one cup of shredded cheddar cheese. It melts beautifully and adds creaminess. A half cup of sour cream makes it rich and smooth. Finish it off with fresh cilantro for a burst of flavor. If you like heat, add jalapeño slices for a spicy kick. {{ingredient_image_1}} First, cook the ground beef or turkey in a large skillet over medium heat. Break it apart with a spatula. Cook it until the meat is brown and no longer pink. This should take about 5-7 minutes. Once cooked, drain any excess fat from the skillet. This helps keep the dish from being greasy. Next, add the diced onion and bell pepper to the skillet. Stir them in and sauté for about 3-4 minutes until they soften. Then, add the minced garlic and sauté for another minute. This will help release a nice flavor into the dish. Now it's time to bring everything together. Stir in the taco seasoning, diced tomatoes, chicken broth, and corn. Mix well and bring the mixture to a simmer. Once it's bubbling, add the pasta to the skillet. Stir to combine everything. Cover the skillet and reduce heat to medium-low. Let it cook for about 10-12 minutes, stirring occasionally to prevent the pasta from sticking. After the pasta is cooked, remove the skillet from the heat. Stir in the shredded cheddar cheese and sour cream. Keep stirring until the cheese melts and the mixture is creamy. Season with salt and pepper to taste. If you like, add some jalapeño slices for extra heat. Finally, garnish with fresh cilantro before serving. Enjoy your cheesy taco pasta skillet! To cook pasta just right, follow these steps. First, bring a large pot of water to a boil. Use about four quarts of water for every pound of pasta. Add a pinch of salt to the water. It helps the pasta taste better. Stir in the pasta once the water is bubbling. Cook for about 8 to 10 minutes for rotini or penne. Check the pasta a minute or two early. You want it al dente, which means it should be firm, not mushy. - Tip: Stir the pasta every few minutes. This keeps it from sticking together. Want to boost the flavor? Here are some ideas. Use garlic powder or onion powder for an extra kick. You can also add smoked paprika or chili powder for more warmth. If you love heat, try crushed red pepper flakes. They add spiciness without overpowering the dish. Fresh herbs like cilantro or parsley can make it bright and fresh. - Tip: Taste as you cook. Adjust spices to your liking. For a creamier dish, there are easy ways to achieve this. When you add cheese, make sure to stir it in well. This helps it melt evenly. You can also add more sour cream for extra creaminess. If you want a rich texture, try cream cheese or cream instead. Just melt it in with the cheese for a smooth mix. - Tip: Add some pasta water to the mix. It helps bind the sauce and pasta together. Pro Tips Use Fresh Ingredients: Whenever possible, opt for fresh vegetables and herbs to enhance the flavor of your dish. Cook Pasta Al Dente: For the best texture, cook the pasta until it's al dente. It will continue to cook slightly in the skillet after you add the cheese and sour cream. Customize Your Spice Level: Adjust the amount of taco seasoning and fresh jalapeños to suit your personal heat preference. Leftover Storage: Store leftovers in an airtight container in the fridge for up to 3 days. Reheat on the stovetop with a splash of chicken broth to restore creaminess. {{image_2}} You can easily make this dish vegetarian. Just swap the ground beef or turkey for plant-based proteins. Options like lentils, chickpeas, or crumbled tofu work well. Use the same taco seasoning packet for great flavor. This swap keeps the dish hearty and filling without meat. If you love heat, add spicy ingredients. Consider using a spicier taco seasoning or fresh jalapeños. You can also add red pepper flakes for extra kick. Adjust the amount based on your heat preference. This twist brings bold flavors to your meal. Get creative with your ingredients. Try different pasta shapes like fusilli or farfalle. Instead of bell pepper, use zucchini or mushrooms for a unique taste. You could even mix in black beans for added protein. These swaps keep the dish fun and exciting! To store your Cheesy Taco Pasta Skillet, let it cool first. Place it in an airtight container. This helps keep it fresh. Store it in the fridge for up to three days. Make sure to label the container with the date. This way, you know when to eat it by. When you reheat, the goal is to keep it creamy. I suggest using a skillet. Heat it over medium-low heat. Add a splash of chicken broth or water to help with moisture. Stir often to heat evenly. You can also use the microwave. Place it in a microwave-safe bowl, cover it, and heat in 30-second bursts. Stir between each burst for even heating. You can freeze Cheesy Taco Pasta Skillet too. First, let it cool completely. Transfer it to a freezer-safe container. It can stay good for up to three months. To thaw, place it in the fridge overnight. Reheat it in a skillet or microwave as mentioned. If you want it creamier, add a bit of sour cream or cheese while reheating. Yes, you can use other types of pasta. I love rotini and penne, but you can try elbow macaroni, farfalle, or fusilli. Just make sure the pasta can cook well in the skillet. Follow the same cooking time as listed in the recipe. You want it al dente, so don’t overcook it. To make this dish dairy-free, swap out cheese and sour cream with alternatives. For cheese, try using vegan cheese shreds made from nuts or soy. You can also use cashew cream or coconut yogurt instead of sour cream. These options give you a creamy texture without dairy. Many sides go well with Cheesy Taco Pasta Skillet. You can serve simple green salad with a light vinaigrette. Tortilla chips with salsa or guacamole are also great. If you want something warm, a side of black beans works well too. These sides add flavor and balance to your meal. This Cheesy Taco Pasta Skillet is easy and fun to make. You learned about the best ingredients, like pasta, proteins, and fresh veggies. We discussed how to cook everything step-by-step, including tips for creamy and flavorful results. You can even try fun variations to suit your taste. Now, it’s your turn. Get cooking and enjoy a tasty meal that's simple and satisfying!

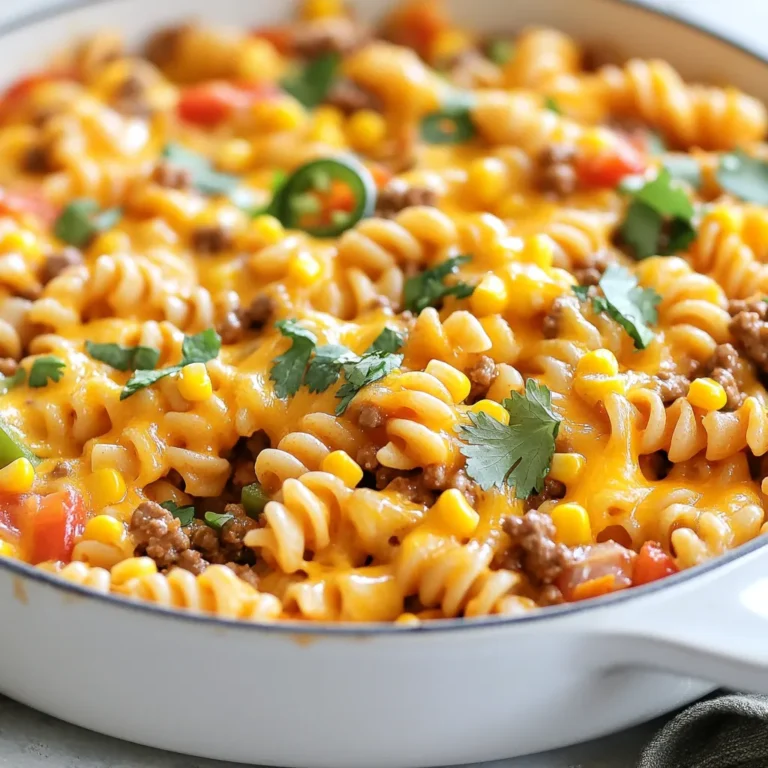
Cheesy Taco Pasta Skillet Quick and Flavorful Meal

To make the creamy sun-dried tomato orzo, gather these simple ingredients: - Orzo Pasta - Sun-Dried Tomatoes - Cream Options (Heavy Cream or Coconut Cream) - Fresh Spinach - Grated Parmesan Cheese or Nutritional Yeast - Garlic - Olive Oil - Dried Basil - Salt and Pepper - Garnish (Fresh Basil Leaves) Each ingredient plays a key role in building flavors. Orzo pasta is small and cooks quickly. It absorbs the broth and cream well. Sun-dried tomatoes add a rich, tangy taste that brightens the dish. For cream, you can use heavy cream for richness. If you prefer dairy-free, coconut cream is a great option too. Fresh spinach adds a burst of color and nutrients. Grated Parmesan cheese brings a salty depth, while nutritional yeast offers a vegan twist. Garlic adds warmth and aroma, making everything more inviting. Olive oil not only helps cook the garlic but also adds healthy fats. Dried basil enhances the dish with its herby notes, while salt and pepper balance the flavors. Lastly, fresh basil leaves make a lovely garnish, adding a pop of freshness to each bowl. These ingredients come together to create a dish that is not only tasty but also pleasing to the eye. {{ingredient_image_1}} Sautéing Garlic Start with a medium saucepan. Heat 2 tablespoons of olive oil over medium heat. Add 2 cloves of minced garlic. Sauté for about 1 minute. The garlic should smell great, but watch it closely. Don't let it burn! Adding Sun-Dried Tomatoes Next, stir in 1/2 cup of chopped sun-dried tomatoes. Make sure they are drained and in oil. Cook for about 2 to 3 minutes. This will help the flavors blend nicely. Combining Orzo and Vegetable Broth Now, add 1 cup of orzo pasta to the pan. Pour in 2 cups of vegetable broth. Stir well. Bring it all to a boil. Simmering Time Once boiling, reduce the heat to low. Cover the pan and let it simmer. Cook for 10 to 12 minutes. The orzo should be tender and most of the liquid absorbed. Adding Cream and Spinach When the orzo is ready, pour in 1 cup of heavy cream or coconut cream for a dairy-free option. Stir everything to mix it well. Then, add 1 cup of roughly chopped fresh spinach. Melting Cheese and Seasoning Now, add 1/2 cup of grated Parmesan cheese or nutritional yeast for a vegan option. Also, sprinkle in 1 teaspoon of dried basil, salt, and pepper to taste. Stir until the spinach wilts and the cheese melts. This creates a rich and creamy dish. Using Different Cream Options You can choose between heavy cream or coconut cream. Heavy cream gives a rich taste. Coconut cream offers a dairy-free option while still being creamy. Adjusting Consistency If your orzo is too thick, add more broth or cream. For a thicker dish, let it simmer longer. Stir well to combine everything evenly. Adding Herbs and Spices Fresh herbs make a big difference! Try adding parsley or thyme for extra flavor. Dried spices like oregano or red pepper flakes can also spice things up. Pairing Suggestions Serve this dish with a simple salad or garlic bread. A crisp white wine pairs nicely too. Try to match flavors for a better meal experience. Avoiding Overcooking Orzo Keep a close watch on your orzo while it cooks. Stir occasionally to prevent sticking. Cook it until al dente, so it stays firm and tasty. Storing Leftovers Store any leftovers in an airtight container. Keep it in the fridge for up to three days. Reheat gently on the stove with a splash of broth to bring back creaminess. Pro Tips Tip for Perfect Creaminess: Make sure to stir the cream in gradually to achieve a silky texture without curdling. Tip for Flavor Boost: Use the oil from the sun-dried tomatoes in your dish for an extra depth of flavor. Tip for Freshness: Add the spinach at the end of the cooking process to retain its vibrant color and nutrients. Tip for Storing Leftovers: Store any leftovers in an airtight container in the fridge for up to three days, and reheat gently to avoid overcooking the orzo. {{image_2}} You can easily make this dish vegan. Just swap the heavy cream for coconut cream. This keeps the dish rich and creamy. For cheese, use nutritional yeast instead of Parmesan. It adds a nice cheesy flavor without dairy. Adding veggies makes this dish even better. You can toss in some peas or broccoli for extra color and nutrition. Both options cook quickly and add a pop of freshness. If you want protein, consider adding chickpeas or cooked chicken. Chickpeas add fiber and plant protein, while chicken makes it heartier. If you want to change the flavor, try different sauces. Pesto gives a bright, herby taste that works great. Alfredo sauce is another rich option that pairs well with orzo. You can also use different tomato sauce variants, like marinara or arrabbiata. Each sauce gives a new spin on this creamy dish. To keep your creamy sun-dried tomato orzo fresh, store it in the fridge. Let it cool down before putting it away. Use an airtight container to prevent moisture loss. It can last about 3 to 5 days in the refrigerator. When you're ready to enjoy it again, check for any signs of spoilage before reheating. If you want to save your orzo for later, freezing is a great option. Let the dish cool completely before you freeze it. Place it in a freezer-safe container or bag. This helps keep the orzo from getting freezer burn. It can last up to 3 months in the freezer. When you want to eat it, move it to the fridge overnight to thaw. To reheat your creamy sun-dried tomato orzo, use a saucepan or microwave. If using a saucepan, add a splash of vegetable broth or cream to help it stay creamy. Heat it over low to medium heat. Stir often to ensure it warms evenly. In the microwave, heat in short bursts, stirring in between. This keeps the texture just right. Enjoy your meal as if it was fresh! Orzo is a type of pasta that looks like rice. It is small and oval-shaped. You can find orzo made from wheat or other grains. Many people use orzo in soups or salads. It cooks quickly and works well in many dishes. Yes, you can use gluten-free pasta. Look for brands that make gluten-free orzo. Cooking times may vary, so check the package. Always taste the pasta to see if it's done. Add red pepper flakes for heat. You can also mix in diced jalapeños. Another option is to use spicy sun-dried tomatoes. Adjust the amount to suit your taste. This dish pairs well with a fresh salad. You can also serve it with garlic bread. Grilled chicken or shrimp makes a great addition too. Enjoy with a side of steamed vegetables for a complete meal. This blog post showed you how to make creamy sun-dried tomato orzo. We covered key ingredients, from orzo pasta to fresh spinach. You learned step-by-step instructions to create that rich flavor and perfect texture. We also shared helpful tips for creaminess and different variations for dietary needs. With proper storage tips, your dish stays fresh and delicious. So, get creative with your ingredients and enjoy cooking. This comforting meal is simple but full of taste!

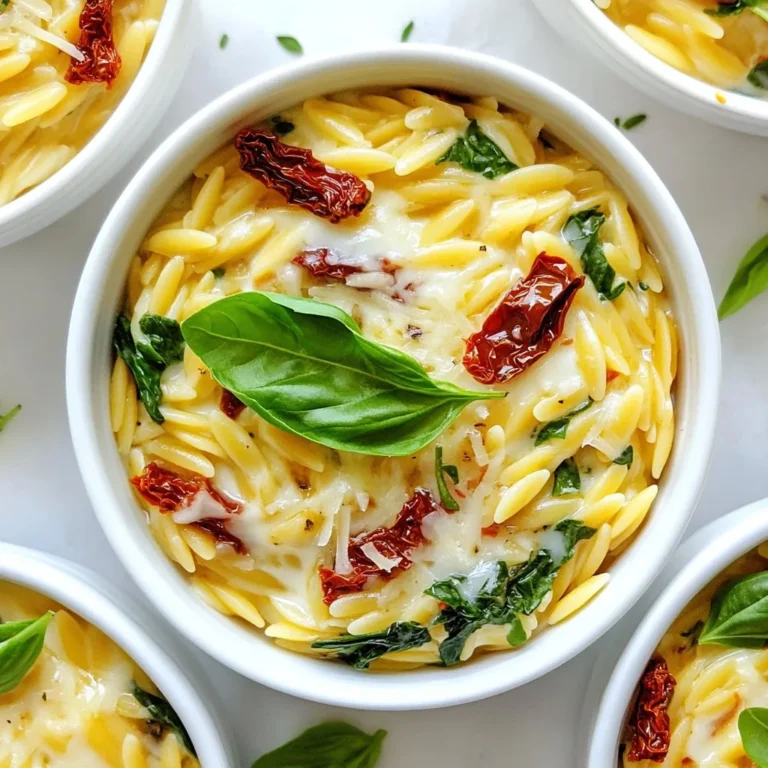
Creamy Sun-Dried Tomato Orzo Flavorful and Easy Meal

PREV 1 … 79 80 81 … 86 NEXT
tasty trail blazer

explore

DessertsDinnerAppetizersDrinks

Our Policies

  • Cookie Policy
  • Copyright Policy
  • Disclaimer
  • GDPR Policy
  • Terms Of Use
Back to Top
  • About
  • Contact Us
  • Privacy Policy
© 2026 tasty trail blazer