FREE DINNER EBOOK! Get your copy!
  • Cookie Policy
  • GDPR Policy
  • Disclaimer
  • Terms Of Use
  • Visit my other site: Fun Cookie Recipes
tasty trail blazer
  • Home
  • Dinner
  • Desserts
  • Drinks
  • Appetizers
  • Contact
  • About
  • Privacy Policy
  • Home
  • Dinner
  • Desserts
  • Drinks
  • Appetizers
  • Contact
  • About
  • Privacy Policy
  • Cookie Policy
  • GDPR Policy
  • Disclaimer
  • Terms Of Use
Visit my other site: Fun Cookie Recipes

HOME / CATEGORIES /

Latest

- 1 cup coconut milk (canned or fresh) - 1/4 cup chia seeds - 2 tablespoons maple syrup (or honey) - 1 ripe mango, diced - 1/2 teaspoon vanilla extract - A pinch of salt - Toasted coconut flakes (for topping) - Mint leaves (for garnish) This recipe makes four servings. Each serving has around: - Calories: 200 - Protein: 4 grams - Fat: 10 grams - Carbohydrates: 28 grams - Fiber: 10 grams - Sugars: 6 grams - Chia seeds: Packed with fiber, protein, and omega-3 fatty acids, chia seeds are great for digestion and heart health. - Coconut milk: This creamy milk has healthy fats that can boost energy levels and support brain health. - Mango: Rich in vitamins A and C, mangoes improve skin health and boost immunity. - Maple syrup: A natural sweetener, it has antioxidants and can help maintain healthy blood sugar levels. - Mint leaves: These add flavor and can aid digestion, making your pudding not just tasty but also good for you. {{ingredient_image_1}} To start, gather all your ingredients. You will need: - 1 cup coconut milk (canned or fresh) - 1/4 cup chia seeds - 2 tablespoons maple syrup (or honey) - 1 ripe mango, diced - 1/2 teaspoon vanilla extract - A pinch of salt - Toasted coconut flakes (for topping) - Mint leaves (for garnish) In a mixing bowl, add the coconut milk, chia seeds, maple syrup, vanilla extract, and salt. Stir the mixture well. Ensure the chia seeds are evenly mixed. This step is key for a smooth texture. After mixing, cover the bowl with plastic wrap or a lid. Place it in the fridge for at least 4 hours. You can also leave it overnight. This time allows the chia seeds to absorb the liquid. They will swell and create a thick pudding. Once the time is up, check the pudding. It should feel creamy and thick. Give it a gentle stir to mix everything again. Now it’s time to serve! Grab your favorite bowls or clear glasses. Start by adding a layer of chia pudding to each one. Then, add a layer of diced mango on top. You can repeat these layers until the bowls are full. Finish each serving with toasted coconut flakes. Add a few mint leaves for a fresh touch. This adds color and aroma to your dish. For a lovely presentation, you can place a slice of fresh mango on the rim of each glass. Enjoy your beautiful and tasty Mango Coconut Chia Pudding! To make your chia pudding just right, use the right ratio of chia seeds to liquid. I find that 1/4 cup of chia seeds to 1 cup of coconut milk works well. Stir the seeds into the milk thoroughly. This helps them soak up the liquid evenly. After refrigerating, check the texture. It should be thick and creamy, not runny. If it seems too loose, add more chia seeds and let it sit longer. Taste is key. Start with 2 tablespoons of maple syrup or honey. You can always add more later. If you want a more tropical taste, add a bit of vanilla extract. A pinch of salt can enhance the sweetness too. For a fun twist, try adding a squeeze of lime juice. This gives a nice zing to the pudding. Keep your prep simple. A mixing bowl and a whisk are all you need. Use a clear glass or bowl for serving. This shows off the beautiful layers of mango and pudding. A sharp knife will help you dice the mango easily. For topping, a small skillet works well for toasting the coconut flakes. Just heat them for a few minutes until golden. These tools will help you create a beautiful dish. Pro Tips Use Fresh Coconut Milk: For a richer flavor, opt for fresh coconut milk if available. It enhances the overall creaminess of the pudding. Adjust Sweetness: Taste the mixture before refrigerating and adjust the sweetness according to your preference. You can add more maple syrup or honey if you like it sweeter. Chill Longer for Best Texture: Letting the chia pudding sit overnight will yield the best texture, allowing the seeds to fully absorb the liquid and swell. Layer Creatively: Get creative with your layers! Try adding other fruits like kiwi or berries for a colorful and nutritious twist. {{image_2}} You can swap coconut milk with almond, soy, or oat milk. Each milk gives a unique taste. Almond milk adds a nutty flavor, while soy milk is creamier. Oat milk provides a mild, sweet taste. Just choose what you like best. Besides mango, many fruits work well in this pudding. Try strawberries, blueberries, or kiwi for color and taste. Layer different fruits to create a rainbow effect. This adds fun and makes it look great. This recipe is naturally vegan and gluten-free. All ingredients, like chia seeds and fruit, fit these diets. If you want more protein, add nuts or seeds. This keeps your pudding tasty and healthy. Enjoy it without worry! To store leftover mango coconut chia pudding, place it in an airtight container. Keep the container in the fridge. This way, it stays fresh and tasty for later. Make sure to use it within a few days for the best flavor and texture. You can freeze chia pudding for later use. Pour it into freezer-safe containers or bags. Leave some space at the top, as the pudding will expand as it freezes. When ready to enjoy, thaw it in the fridge overnight. Stir well before serving. Mango coconut chia pudding lasts about 4-5 days in the fridge. Keep it covered to prevent drying out. If you see any change in color or smell, it's best to toss it. For the best taste, eat it fresh or within a few days. Always check for signs of spoilage before enjoying. Yes, you can use other types of milk. Almond milk, oat milk, or soy milk work well. Each milk adds a unique flavor. Coconut milk gives a creamy richness, but other milks can be just as tasty. If you want a lighter pudding, try almond or oat milk. Just remember to keep the same amount, one cup. Chia pudding lasts about five days in the fridge. Make sure to store it in a sealed container. Keeping it covered helps it stay fresh and tasty. I often make a big batch for the week. It’s a great grab-and-go breakfast or snack. You can add many toppings to your pudding! Fresh fruits like berries or bananas add color and taste. Nuts or seeds give a nice crunch. You could also try yogurt for creaminess. Experiment with spices like cinnamon or nutmeg for warmth. The options are endless! This blog explored the key ingredients for delicious chia pudding. We discussed each ingredient's nutrition and health benefits. I shared simple steps to prepare, store, and enjoy your pudding. You learned tips for perfecting texture and flavor, plus other fun variations. In closing, chia pudding is easy to make and customize. Experiment with flavors to fit your taste. Enjoy your healthy treat!

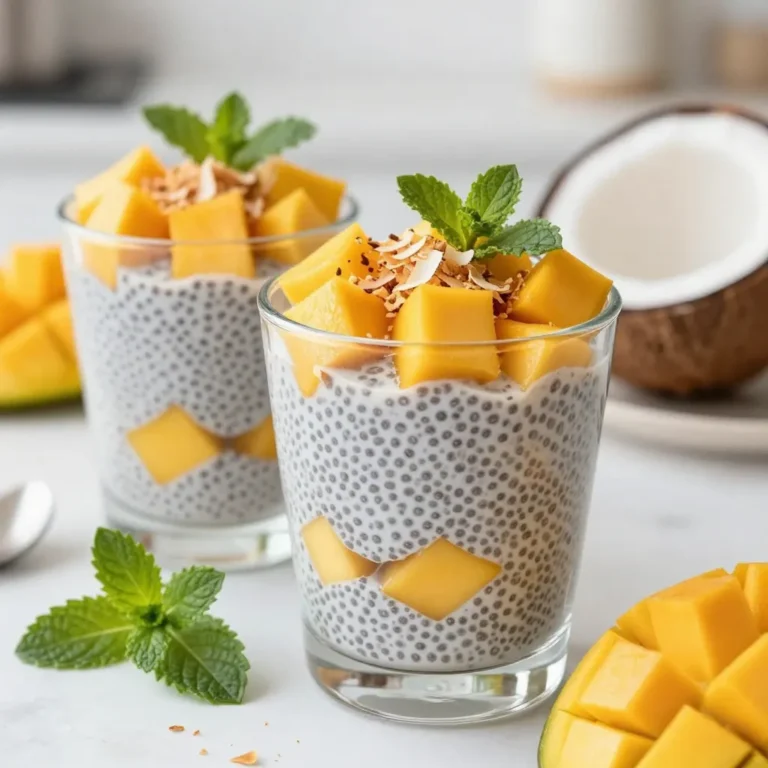
Mango Coconut Chia Pudding Tasty and Simple Recipe

To make a warm bowl of chicken noodle soup, gather these key items: - 2 tablespoons olive oil - 1 medium onion, diced - 2 cloves garlic, minced - 3 medium carrots, sliced - 2 celery stalks, sliced - 1 teaspoon dried thyme - 1 teaspoon dried oregano - 8 cups low-sodium chicken broth - 2 cups cooked diced chicken (rotisserie chicken works well) - 2 cups egg noodles - Salt and pepper to taste - Fresh parsley, chopped (for garnish) These ingredients form the base of your soup. Each one adds flavor and comfort to the dish. You can boost the taste with some extra ingredients: - 1 bay leaf - Lemon juice (for a fresh kick) - Fresh herbs like dill or rosemary - A splash of white wine for depth Adding these optional items can create layers of flavor in your soup. Feel free to experiment based on your taste. For the best results, I recommend high-quality brands. Here are my favorites: - Chicken Broth: Swanson or College Inn provide rich flavors. - Egg Noodles: Reames or Barilla are great choices for texture. Using well-made broth and noodles will enhance your soup’s overall taste. Quality matters when creating a comforting meal. {{ingredient_image_1}} To start, gather your ingredients. You need olive oil, onion, garlic, carrots, celery, thyme, oregano, chicken broth, cooked chicken, egg noodles, salt, and pepper. 1. Heat 2 tablespoons of olive oil in a large pot over medium heat. 2. Add 1 medium diced onion and 2 minced garlic cloves. Cook until the onion turns translucent, about 5 minutes. 3. Stir in 3 sliced carrots and 2 sliced celery stalks. Cook for another 5 minutes until they soften. 4. Sprinkle in 1 teaspoon of dried thyme and 1 teaspoon of dried oregano. Mix to combine the flavors. 5. Pour in 8 cups of low-sodium chicken broth and bring to a gentle boil. Now, let’s add the chicken and noodles. 6. Reduce the heat and add 2 cups of cooked diced chicken. Let it warm through. 7. Add 2 cups of egg noodles. Cook according to the package instructions, usually 7 to 10 minutes, until al dente. Your soup is almost done! 8. Season with salt and pepper to taste. Stir well. 9. Once the noodles are cooked, take the pot off the heat. 10. Ladle the soup into bowls. Garnish with fresh chopped parsley. For a great presentation, serve the soup with a slice of crusty bread. A lemon wedge adds a nice touch of flavor when squeezed over the soup before eating. Enjoy your cozy chicken noodle soup! When picking chicken for your soup, fresh is best. Look for whole chickens or parts with skin. Skin adds flavor and richness. You can also use rotisserie chicken for ease. Just shred the meat before adding it to the pot. This saves time and gives great taste. You can make your soup just how you like it. Want it spicier? Add some crushed red pepper. For a richer taste, try adding a squeeze of lemon juice. You can also mix in different herbs. Basil and dill work well with chicken. Don’t forget to taste as you go! To make a great broth, use low-sodium chicken broth. It lets you control the salt. Always heat it slowly and let it simmer. This helps the flavors blend well. If you want a deeper flavor, roast the chicken parts first. This step adds a nice color and taste to your broth. Pro Tips Use Rotisserie Chicken: For a quick and flavorful option, use pre-cooked rotisserie chicken. It saves time and adds rich flavor to your soup. Customize Your Veggies: Feel free to add or substitute other vegetables like peas or green beans to enhance the nutritional value and flavor. Perfect Noodle Texture: To achieve the best noodle texture, cook them separately and add them to each bowl just before serving. This prevents them from becoming mushy in the broth. Herb Freshness: For an extra burst of freshness, try adding a squeeze of lemon juice or a sprinkle of fresh herbs like dill or basil just before serving. {{image_2}} You can make Chicken Noodle Soup healthier by using fewer noodles and more veggies. Swap regular egg noodles for whole grain or gluten-free noodles. You can also use skinless chicken breasts for less fat. Adding more carrots, celery, and spinach increases fiber and nutrients. Using low-sodium broth also helps keep salt levels down. For those with dietary needs, there are many great swaps. Use vegetable broth instead of chicken broth for a vegan option. If someone needs gluten-free soup, choose gluten-free noodles or skip the noodles altogether. You can also add quinoa or brown rice for a hearty base. Adjust the spices to match taste and dietary needs. Explore global flavors by adding unique ingredients. For an Asian twist, try adding ginger and soy sauce. You can use rice noodles instead of egg noodles for a different texture. For a Mediterranean flair, add lemon juice, chickpeas, and fresh herbs like dill. Each variation brings new tastes and makes the soup your own. To store leftover chicken noodle soup, let it cool first. Once it’s cool, pour the soup into airtight containers. Use glass or plastic containers with tight lids. Label each container with the date. This helps you know when to use the soup. Store it in the fridge for up to three days. When you’re ready to eat the soup, reheat it on the stove. Pour the soup into a pot. Heat it over medium heat. Stir often to avoid burning. You can also use a microwave. Place the soup in a microwave-safe bowl. Cover it loosely with a lid or a paper towel. Heat it for one to two minutes, then stir and check the temperature. If you want to keep the soup longer, freezing is a great option. First, let the soup cool completely. Pour it into freezer-safe bags or containers. Leave some space at the top for expansion. Label the bags with the date and type of soup. You can freeze it for up to three months. When ready to eat, thaw it in the fridge overnight before reheating. To make chicken noodle soup from scratch, start with olive oil in a large pot. Sauté diced onion and minced garlic until the onion is clear. Add sliced carrots and celery, cooking for five more minutes. Mix in dried thyme and oregano for flavor. Pour in low-sodium chicken broth and bring to a boil. Reduce the heat and add cooked chicken. Stir in egg noodles and cook until tender. Season with salt and pepper, and enjoy! Yes, you can use both frozen chicken and pre-cooked chicken. If using frozen chicken, cook it first, then shred it for the soup. Pre-cooked rotisserie chicken works great and saves time. Just add it during the heating step to warm it up. Egg noodles are the best choice for chicken noodle soup. They cook quickly and soak up the broth well. You can use other noodles, like rotini or bowties, but egg noodles give the best taste and texture. Homemade chicken noodle soup lasts about four to five days in the fridge. Store it in an airtight container. If you want it to last longer, consider freezing it for up to three months. In this post, we explored how to make classic chicken noodle soup. We covered essential and optional ingredients, suggested brands, and preparation steps. I shared tips for choosing the best chicken and ways to customize your soup. We also discussed healthier variations, storage methods, and answered common questions. Now, you have everything you need to create a warm, comforting bowl of soup. Enjoy the process and make it uniquely yours!

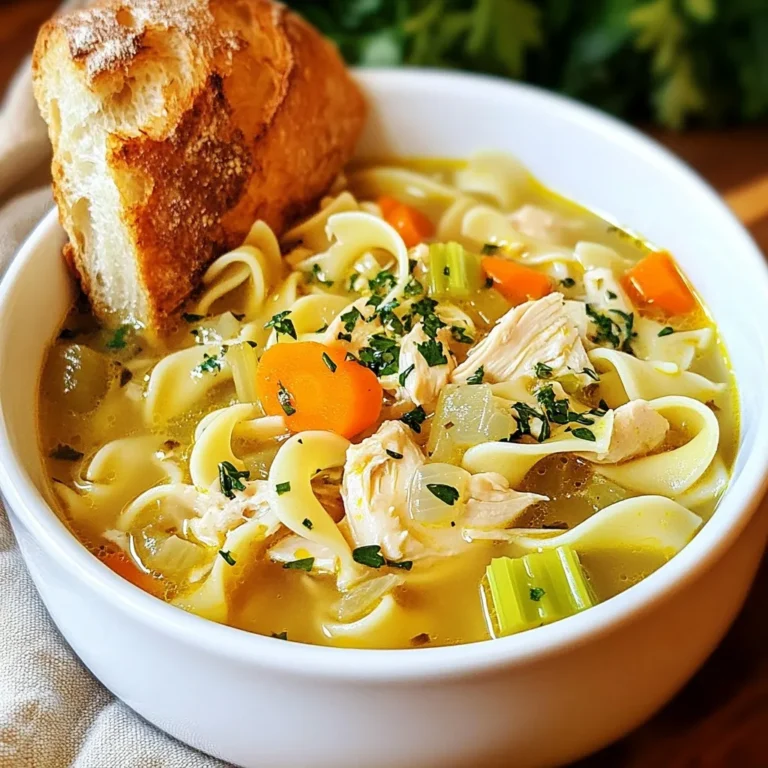
Classic Chicken Noodle Soup Hearty and Comforting Meal

- 1 cup grated zucchini - 1 cup all-purpose flour - 1/2 cup unsweetened cocoa powder The key to these muffins is the grated zucchini. It adds moisture and keeps the muffins soft. Use one small zucchini to get about one cup. All-purpose flour gives the muffins structure. You need half a cup of cocoa powder for that rich chocolate taste. - 1/2 cup semi-sweet chocolate chips - 1/4 cup chopped walnuts or pecans For extra chocolate, add semi-sweet chocolate chips. They melt nicely and make every bite delicious. If you like nuts, chopped walnuts or pecans add a nice crunch. You can skip the nuts if you prefer a softer texture. - Gluten-free flour alternatives - Using coconut oil instead of vegetable oil If you need gluten-free muffins, use a gluten-free flour blend. This will work well and keep the taste great. You can also swap vegetable oil for coconut oil. It gives a nice hint of flavor and keeps the muffins moist. {{ingredient_image_1}} - Setting the Correct Temperature Start by preheating your oven to 350°F (175°C). This warm temperature helps the muffins rise nicely. - Preparing the Muffin Tins Line a 12-cup muffin tin with paper liners. If you don’t have liners, grease the tin lightly with cooking spray. This step keeps the muffins from sticking. - Grating and Draining the Zucchini Take one small zucchini and grate it. Then place the grated zucchini in a clean kitchen towel. - Importance of Removing Excess Moisture Squeeze the towel to remove extra water. This step is key to avoid soggy muffins. Removing moisture also cuts down on bitterness. - Combining Dry Ingredients In a large bowl, whisk together the flour, cocoa powder, sugar, baking soda, baking powder, and salt. Mix until everything is well blended. - Preparing and Mixing Wet Ingredients In a separate bowl, beat the vegetable oil, eggs, and vanilla extract together until smooth. This mix adds moisture and flavor. - Folding in Zucchini and Chocolate Chips Now, pour the wet mix into the dry mix. Stir gently until just combined. It’s okay if there are a few lumps. Then fold in the grated zucchini, semi-sweet chocolate chips, and nuts if you want. Be gentle to keep the muffins light and fluffy. Preventing Overmixing To get the best texture, do not overmix the batter. Stir just until the flour disappears. A few lumps are okay. Overmixing makes the muffins tough. Using Fresh Ingredients Always use fresh zucchini. This keeps your muffins moist and tasty. Fresh cocoa powder and eggs also help improve flavor. Monitoring Baking Time Keep an eye on the muffins while they bake. Start checking them at 18 minutes. Your oven may bake faster or slower than others. Checking Muffins with a Toothpick Use a toothpick to check if muffins are done. Insert it in the center. If it comes out clean, they are ready. If not, bake for a few more minutes. Dusting with Powdered Sugar For a pretty touch, dust the muffins with powdered sugar. This adds sweetness and makes them look fancy. Drizzling with Melted Chocolate Drizzle warm muffins with melted chocolate. This adds extra richness and makes them irresistible. Enjoy them with coffee or tea for a perfect pair! Pro Tips Moisture Control: Always squeeze out excess moisture from the grated zucchini to prevent your muffins from becoming soggy. Mixing Technique: Be careful not to overmix the batter; a few lumps are fine. This will ensure your muffins stay light and fluffy. Chocolate Variations: Experiment with different types of chocolate chips, such as dark or white chocolate, for a unique flavor twist. Storage Tips: Store the muffins in an airtight container at room temperature for up to 3 days, or freeze for longer storage. {{image_2}} You can easily switch up the taste of your double chocolate zucchini muffins. Adding spices like cinnamon or nutmeg gives a warm flavor. Just one teaspoon of cinnamon can brighten the muffins. If you want a nutty crunch, try adding chopped walnuts or pecans. These will add texture and flavor, making each bite delightful. If you want to make these muffins vegan, simply swap the eggs for flax eggs. Mix one tablespoon of ground flaxseed with two and a half tablespoons of water. Let it sit for a few minutes until it thickens. For those looking for healthier options, use sugar substitutes like coconut sugar or maple syrup. These can help reduce calories while keeping the sweet taste. To add a fun twist, think about peanut butter! Swirl in some creamy peanut butter into the muffin batter. This not only adds flavor but also a nice creaminess. You can also use any nut butter you like. Almond or cashew butter works well too. This twist makes for a tasty surprise in every bite! To keep your double chocolate zucchini muffins fresh, store them in an airtight container. Place them at room temperature. They stay tasty for about three days. If you want them to last longer, consider freezing them. To freeze muffins, wrap each one in plastic wrap. Then, place them in a freezer bag. This keeps them safe from freezer burn. They can last for up to three months in the freezer. When you're ready to eat a frozen muffin, take it out of the bag. Leave it at room temperature for about an hour. You can also thaw them in the microwave for about 15-20 seconds. This keeps them soft and warm. To reheat muffins, use your oven or microwave. For the oven, preheat it to 350°F (175°C). Wrap the muffin in foil to keep it moist. Bake for about 10 minutes. For the microwave, heat for about 10-15 seconds. To keep muffins moist, cover them after reheating. This prevents them from drying out. A damp paper towel can help if you use the microwave. Enjoy your muffins warm for the best flavor! Yes, you can use carrots or squash. Both options add moisture and sweetness. Grate them just like zucchini. Carrots give a nice crunch, while squash offers a mild flavor. Feel free to experiment with these vegetables in your muffins. You can reduce sugar by using applesauce or mashed bananas. You might swap some oil for unsweetened applesauce too. Consider using whole wheat flour for added fiber. These small changes can still keep the muffins tasty while making them a bit healthier. Absolutely! Just use a mini muffin tin. Fill each cup halfway with batter. Bake for about 10-12 minutes. Make sure to check with a toothpick to see if they’re done. Mini muffins are a fun, bite-sized treat! This blog post covered everything you need to know about making delicious zucchini muffins. We explored key ingredients, optional add-ins, and substitutions. I provided clear step-by-step instructions and tips for perfect muffins. Variations like vegan options and peanut butter twists add fun to your baking. Proper storage and reheating suggestions ensure your muffins stay fresh. Now you can enjoy making these muffins with confidence and creativity. Happy baking!

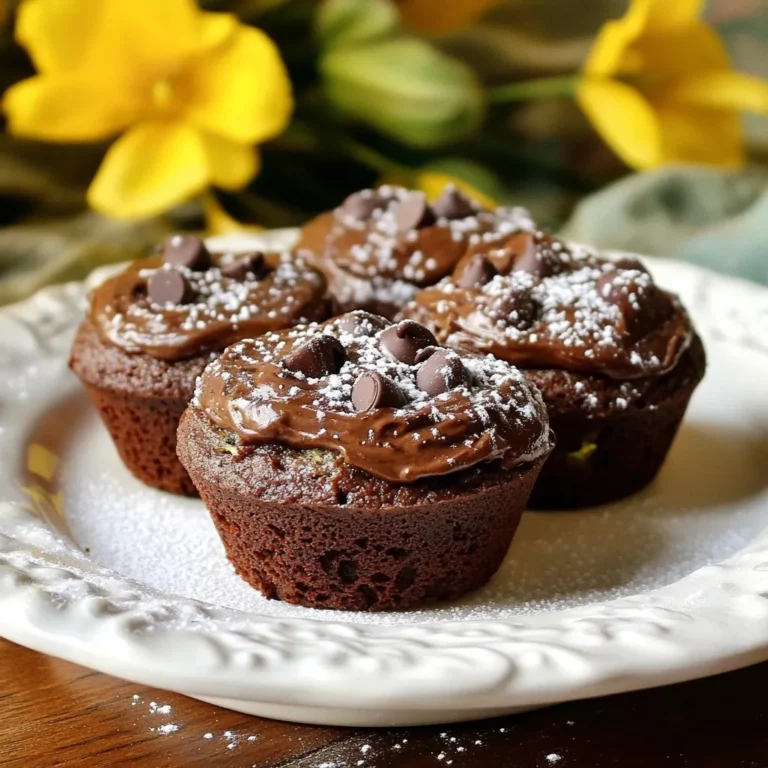
Double Chocolate Zucchini Muffins Tasty and Easy Treat

Here’s what you need for a tasty Taco Chicken Salad: - 2 cups shredded cooked chicken - 1 cup romaine lettuce, chopped - 1 cup cherry tomatoes, halved - 1/2 cup corn (canned or grilled) - 1/2 cup black beans, rinsed and drained - 1 avocado, diced - 1/2 cup shredded cheese (Cheddar or Mexican blend) - 1/4 cup red onion, finely diced - 1/4 cup fresh cilantro, chopped - 1 tablespoon taco seasoning - 1/4 cup Greek yogurt (for dressing) - 2 tablespoons lime juice - Salt and pepper to taste - Tortilla chips for garnish These ingredients make a bright and fresh salad. The chicken gives protein, while the veggies add crunch and color. You can swap some items based on what you have at home. For example, if you don’t have black beans, try kidney beans instead. Want more flavor? Add more taco seasoning or a splash of hot sauce. This salad is fun to make and easy to share! {{ingredient_image_1}} 1. Start with shredded cooked chicken. Place it in a large mixing bowl. 2. Add one tablespoon of taco seasoning. Mix well. Make sure the chicken is fully coated. 3. Next, toss in chopped romaine lettuce. Combine it with the chicken. 4. Now, gently fold in cherry tomatoes, corn, black beans, diced avocado, shredded cheese, red onion, and cilantro. Be careful not to mush the avocado. 1. In a small bowl, whisk together 1/4 cup Greek yogurt and 2 tablespoons lime juice. 2. Season with salt and pepper to taste. Adjust the flavors to your liking. 1. Drizzle the dressing over the salad. Use a gentle hand to toss everything together. 2. Make sure all flavors blend well but keep the avocado intact. 1. You can serve the salad right away. Or chill it in the fridge for about 20 minutes. 2. This chill time helps the flavors meld nicely. 3. For a lovely presentation, serve the salad in a large bowl. 4. Garnish with extra cilantro and a few whole tortilla chips on top. To make your taco chicken salad pop, try adding spices like cumin or paprika. Fresh herbs, such as cilantro or parsley, can brighten the dish. You can also mix in jalapeños for heat. For crunch, use fresh veggies like bell peppers or radishes. Adding some crispy tortilla strips on top gives a nice texture contrast. Using pre-cooked chicken cuts down your prep time. Shredded rotisserie chicken works great. For quick chopping, use a sharp knife. A good tip is to cut ingredients in uniform sizes. Try using kitchen scissors for herbs and soft items like avocado. This saves time and keeps your fingers safe. This salad pairs well with a side of rice or black beans. You could also enjoy it with a light drink like lemonade or iced tea. If you want to change it up, wrap the salad in a tortilla for a tasty wrap. You can also serve it as a bowl with rice or quinoa as a base. Pro Tips Use Fresh Ingredients: Always opt for fresh vegetables and ripe avocados to enhance the flavor and texture of your salad. Customize Your Proteins: Swap out the shredded chicken for grilled shrimp or tofu for a different protein twist, catering to various dietary preferences. Make It Ahead: Prepare the salad ingredients in advance and store them separately. Combine just before serving to keep everything fresh. Elevate with Spices: Add a pinch of cayenne pepper or smoked paprika to the dressing for an extra kick of flavor. {{image_2}} You can make this salad vegetarian by swapping chicken for tofu or tempeh. Both options provide great protein and absorb flavors well. Tofu works best when pressed and cooked until golden. Tempeh has a nutty taste and adds a nice texture. Simply season either with taco seasoning to keep that bold flavor. You can try different dressings to change the flavor. A light vinaigrette can add a fresh touch. Salsa is another fun choice for a kick. If you want a creamy option, consider using Greek yogurt or a ranch-style dressing. Both will complement the salad nicely while keeping it healthy. Want more heat? Add jalapeños for a spicy twist. They bring a nice crunch, too. You can also switch up the cheese. Feta adds a tangy taste, while pepper jack gives a creamy, spicy flavor. Both cheese types will make your salad even more delicious! To keep your Taco Chicken Salad fresh, place leftovers in an airtight container. Make sure it's sealed tightly. Store it in the fridge for up to three days. Some ingredients may last longer or shorter. For example, fresh avocado may brown quickly. You can add lime juice to slow this down. If you want to reheat the chicken, do it gently. Use a microwave or skillet. Heat it until warm, but avoid overcooking. This keeps the chicken juicy. Other salad ingredients like lettuce and tomatoes are best cold. They lose their crunch when reheated. You can prepare parts of this salad ahead of time. Cook and season the chicken, then store it in the fridge. Chop the veggies and keep them in separate containers. This helps keep them fresh. Combine all components just before serving. This way, everything stays crisp and tasty. You can use a mix of spices if you lack taco seasoning. Try combining chili powder, cumin, garlic powder, and paprika. This mix gives a similar flavor without needing store-bought seasoning. Adjust the amounts based on your taste. Yes, you can make this salad gluten-free. Ensure that your taco seasoning and any added ingredients, like canned corn or beans, are labeled gluten-free. Most fresh ingredients used in the salad are naturally gluten-free. To keep your salad light, use fresh ingredients. Add more crunchy veggies like bell peppers or cucumber. Using Greek yogurt for the dressing adds creaminess without excess fat. Lime juice also brightens the flavors. Yes, canned chicken works well in this salad. Drain and rinse it before mixing with taco seasoning. It saves time and makes prep quick. Just ensure it's shredded for a better texture. You can prepare this salad ahead of time. Mix all the ingredients except the avocado and dressing. Keep them in the fridge for up to a day. Add the dressing and avocado right before serving for the best taste and texture. This blog post covers a tasty chicken salad packed with flavor and nutrition. You learned about simple ingredients like shredded chicken, fresh veggies, and zesty lime juice. I shared easy steps for preparation and tips to save time. Many variations let you try different flavors or make it vegetarian. Storage tips help keep leftovers fresh, and I answered common questions to guide you. Enjoy making this salad your own and serving it at your next meal! Your culinary creativity can shine through every bite.

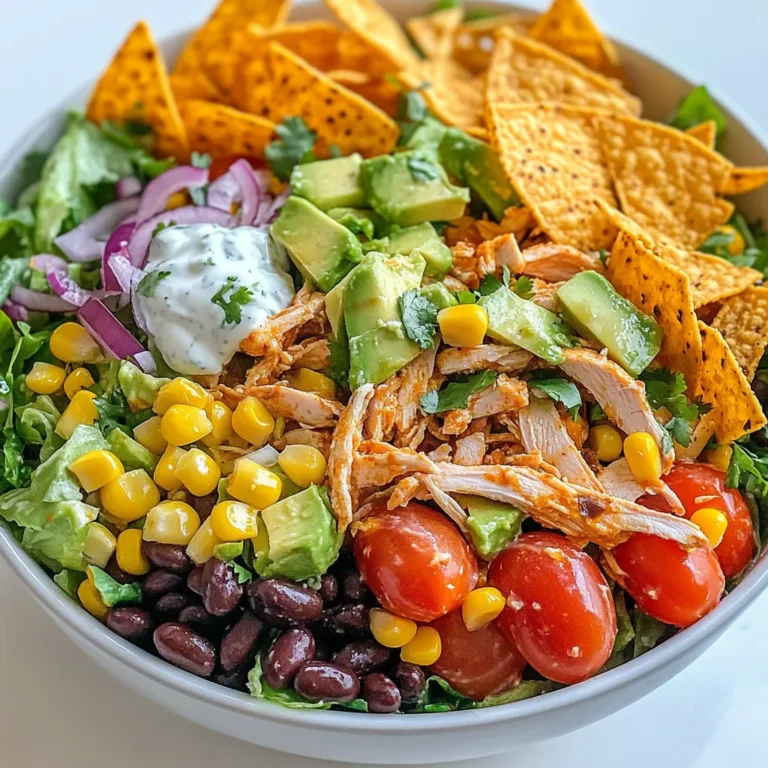
Taco Chicken Salad Fresh and Flavorful Meal Ideas

- 1 lb boneless, skinless chicken thighs, cut into bite-sized pieces - 1/4 cup honey - 2 tablespoons soy sauce (low sodium) - 1 tablespoon sesame oil - 2 cloves garlic, minced - 1 tablespoon fresh ginger, grated - 1 tablespoon cornstarch - 1 tablespoon water - 1/2 teaspoon black pepper - 1/4 cup sesame seeds - 2 green onions, sliced (for garnish) - Cooked white or brown rice (for serving) I use a scale for the chicken. One pound is about 16 ounces. For honey, use a measuring cup. The soy sauce and sesame oil need tablespoons. I recommend fresh garlic and ginger for best flavor. When using cornstarch, mix it well with water to avoid lumps. The black pepper adds warmth, while sesame seeds give a nice crunch. If you want a leaner option, use chicken breasts instead of thighs. Maple syrup can replace honey for a different taste. Tamari is a great gluten-free option instead of soy sauce. You can skip sesame oil and use olive oil instead. If you lack fresh ginger, ground ginger works too, but use less. For a nutty flavor, try adding some chopped peanuts as a garnish. {{ingredient_image_1}} To start, you need to mix the marinade. In a bowl, combine the honey, soy sauce, sesame oil, minced garlic, grated ginger, and black pepper. Stir well until all the ingredients blend smoothly. Next, add the bite-sized chicken pieces to the bowl. Make sure each piece gets coated in the marinade. Cover the bowl and let it sit for at least 30 minutes. If you have time, you can marinate it for up to 2 hours in the fridge. This step adds a lot of flavor. Now, heat a large skillet or wok over medium-high heat. Once it's hot, add the marinated chicken. Keep the marinade for later use. Cook the chicken for about 6 to 8 minutes. Stir it often to ensure even cooking. The chicken should turn golden brown and be cooked through. This step makes the chicken crispy and tasty. After the chicken is cooked, pour the reserved marinade into the skillet. Let it come to a gentle simmer. In a small bowl, mix the cornstarch and water to make a slurry. Stir this slurry into the simmering sauce. Keep cooking for 2 to 3 minutes. This will make the sauce thick and sticky. Once finished, sprinkle sesame seeds over the chicken and stir well to coat. This adds a nice crunch and flavor. To make the sauce sticky, use cornstarch. Mix it with water to form a slurry. Stir this slurry into the sauce once it simmers. This will give your sauce that perfect cling. Remember to keep stirring for even thickness. Adding fresh ginger and garlic boosts flavor. You can also add a splash of rice vinegar for tang. If you like heat, try adding red pepper flakes. A hint of lime juice can brighten the dish. These small tweaks make a big difference. Don’t skip marinating the chicken. This step infuses flavors. Avoid cooking on too high heat; it can burn the chicken. If the sauce is too thin, let it simmer longer. Always taste your sauce before serving. Adjust flavors as needed. Pro Tips Marinate for Maximum Flavor: Allow the chicken to marinate for at least 30 minutes, but for the best flavor, let it sit in the marinade for up to 2 hours in the refrigerator. Perfectly Sticky Sauce: To achieve the ideal stickiness in your sauce, ensure you bring the marinade to a gentle simmer before adding the cornstarch slurry. Garnishing Tips: For a pop of color and freshness, garnish with sliced green onions just before serving. Serving Suggestions: Serve the sticky honey sesame chicken over a bed of fluffy rice, and consider adding a side of vibrant steamed vegetables for a complete meal. {{image_2}} You can spice up your honey sesame chicken with a simple twist. Add red pepper flakes or sriracha to the marinade. Start with half a teaspoon and taste as you go. This adds heat without losing the sweet flavor. The spicy notes give the dish a nice kick. You will love the balance of sweet and spicy. For a vegetarian version, swap the chicken for tofu. Use firm or extra-firm tofu for the best texture. Press the tofu to remove extra moisture. Cut it into bite-sized cubes. Marinate just like the chicken. Cook it in the skillet until golden brown. This is a great way to enjoy the same flavors while keeping it plant-based. You can also add vegetables to make it a complete meal. Broccoli, bell peppers, and snap peas work well. Toss them in the skillet with the chicken for the last few minutes of cooking. This adds color and nutrition. Plus, it creates a beautiful dish that everyone will enjoy. Serve it over rice to soak up the yummy sauce. To keep your sticky honey sesame chicken fresh, use an airtight container. Let the chicken cool to room temperature first. Then, place it in the container and store it in the fridge. It will stay good for up to three days. If you want to store it longer, freezing is a great option. When you’re ready to enjoy the leftovers, reheat the chicken gently. You can use a skillet over low heat. Add a splash of water to keep it moist. Stir it often until heated through. You could also microwave it. Just cover it with a microwave-safe lid to trap steam. Heat in 30-second bursts until hot. If you decide to freeze the sticky honey sesame chicken, portion it out first. Use freezer bags or containers. Press out the air to avoid freezer burn. It can stay frozen for up to three months. When you want to eat it, thaw it in the fridge overnight. Then, reheat it as mentioned above. Enjoy your tasty meal! To make sticky honey sesame chicken healthier, you can use a few simple swaps. Choose skinless chicken breasts instead of thighs. This cut has less fat. Use less honey or substitute it with a natural sweetener like maple syrup. You can also add more veggies. Broccoli, bell peppers, or snap peas work well. They add color and nutrients. Serve the dish with brown rice instead of white rice for more fiber. Yes, you can use chicken breasts instead of thighs. Chicken breasts are leaner and lower in fat. They will cook quickly, so watch them closely while sautéing. Cut the breasts into bite-sized pieces for even cooking. The taste may be slightly different, but they will still soak up all the delicious flavors from the marinade. If you want juicy chicken, marinate them just like thighs. Sticky honey sesame chicken pairs well with many sides. Here are some great options: - Cooked white or brown rice - Steamed broccoli or green beans - Stir-fried mixed vegetables - A fresh salad with a light dressing - Sesame noodles for a fun twist These sides add balance and color to your meal. Enjoy mixing and matching to find your favorite combinations! This post covered all key steps for making sticky honey sesame chicken. We explored ingredients, cooking methods, and helpful tips. I shared fun variations to try, like spicy or vegetarian options. Remember, proper storage keeps your dish fresh for longer. In your kitchen, confidence grows with practice. You can create delicious meals and impress others. Enjoy making this dish your own!

Sticky Honey Sesame Chicken Flavorful Family Meal

- 2 cups cooked chicken, shredded - 1 cup cauliflower florets (fresh or frozen) - 1 cup broccoli florets - 1 cup heavy cream - 1 cup shredded cheddar cheese - 1/2 cup cream cheese, softened - 1 teaspoon garlic powder - 1 teaspoon onion powder - 1 teaspoon Italian seasoning - Salt and pepper to taste - 2 tablespoons olive oil - 1/4 cup grated Parmesan cheese (for topping) - Fresh parsley, chopped (for garnish) You will need these simple and tasty ingredients to make the casserole. Each one plays a big role in flavor and texture. The chicken gives protein, and the veggies add crunch. The cream and cheese make it rich and creamy. You can swap some ingredients if you need. Here are a few ideas: - Chicken: Use turkey or a plant-based protein for a different taste. - Cauliflower: Zucchini or mushrooms can work well too. - Heavy cream: Coconut cream or almond milk can replace it for a lighter option. - Cheese: Try mozzarella or gouda for a new flavor twist. Feel free to mix and match based on what you have on hand. This casserole is a low-carb dish. Here’s a quick look at the numbers per serving: - Carbs: About 5 grams - Calories: Around 400 - Protein: Approximately 35 grams These values help you stay on track with your eating goals. Enjoy a filling meal without too many carbs! {{ingredient_image_1}} First, set your oven to 350°F (175°C). This helps the casserole cook evenly. Next, gather all your ingredients. You will need chicken, veggies, cheese, and spices. Having everything ready makes cooking smooth and fast. In a large skillet, heat two tablespoons of olive oil over medium heat. Add one cup of cauliflower florets and one cup of broccoli florets. Sauté the veggies for about 5-7 minutes. You want them tender but still crisp. This step adds flavor and texture to your casserole. Grab a 9x13 inch baking dish and grease it lightly. Layer the sautéed veggies on the bottom. Next, add two cups of shredded chicken over the vegetables. In a bowl, mix one cup of heavy cream, half a cup of softened cream cheese, one teaspoon each of garlic powder, onion powder, and Italian seasoning. Add salt and pepper to taste. Pour this creamy mix over the chicken and veggies, making sure it covers everything. Finally, sprinkle one cup of shredded cheddar cheese and a quarter cup of grated Parmesan on top. Place the dish in your preheated oven. Bake for about 25-30 minutes. You know it's ready when the cheese is bubbly and golden brown. Once done, take it out and let it cool for a few minutes. Garnish with chopped parsley before serving. Enjoy your delicious low carb creamy chicken casserole! To boost the creaminess, use full-fat ingredients. Heavy cream gives a rich base. Cream cheese adds smoothness. Stir them well to blend. You can also add more cheese for flavor and texture. Mix in a bit of sour cream for a tangy twist. For juicy chicken, cook it slowly. You can roast or poach chicken. Season it well with salt and pepper. Let it cool before shredding. This keeps the chicken moist. Use rotisserie chicken for a quick option. It saves time and adds great flavor. To keep your casserole firm, avoid excess liquid. Drain any water from cooked veggies. Cook them until just tender. Layer them in the dish before adding the chicken. Use a thick creamy sauce. This helps bind everything together, preventing sogginess. Pro Tips Use Rotisserie Chicken: For a quicker prep time, consider using store-bought rotisserie chicken. It’s already cooked and adds great flavor to your casserole. Customize Your Veggies: Feel free to swap out the broccoli and cauliflower for your favorite low-carb vegetables, such as zucchini or spinach, for added variety. Cheese Variations: Experiment with different types of cheese, such as mozzarella or pepper jack, to change the flavor profile of the casserole. Make It Ahead: This casserole can be assembled in advance and stored in the refrigerator for up to a day. Just bake it when you're ready to serve! {{image_2}} You can make this casserole special by adding different veggies. Try bell peppers, spinach, or zucchini. These veggies add color and taste. They also boost nutrition, keeping it low-carb. Just chop them small so they cook well. You can use fresh or frozen vegetables, depending on what you have. The key is to sauté them first. This keeps them crisp and tasty in the casserole. Switching up the cheese can change the flavor. Instead of cheddar, try mozzarella or Gouda. These cheeses melt well and add unique tastes. You can also use a mix of cheeses for more depth. For a sharp kick, add some feta or blue cheese. Just remember to adjust the amount to fit your taste. Cheese makes it creamy and rich, so choose what you love. To keep it low-carb, you can swap some ingredients. Instead of heavy cream, use coconut cream for a lighter feel. You can also use Greek yogurt to cut fat while adding protein. For a veggie base, try using shredded zucchini instead of pasta or rice. This keeps the dish filling without the carbs. Always check labels to ensure everything fits your low-carb plan. These swaps give you freedom to create! To store leftovers, let the casserole cool first. Then, cover it tightly with plastic wrap or aluminum foil. You can also use an airtight container. Store it in the fridge for up to three days. This keeps the flavors fresh and tasty. To reheat, take the casserole out of the fridge. Preheat your oven to 350°F (175°C). Place the casserole in the oven for about 20-25 minutes. You want it to be hot all the way through. If you prefer, you can also use the microwave. Heat in short bursts, stirring in between. This helps it warm evenly. You can freeze the casserole for later. First, let it cool completely. Then, wrap it tightly in plastic wrap. After that, put it in a freezer-safe bag or container. It can last up to three months in the freezer. When you’re ready to eat, thaw it overnight in the fridge before reheating. No, I do not recommend using raw chicken. This recipe calls for cooked chicken. Using raw chicken can lead to undercooking. It may not get hot enough in the oven. Always use shredded, cooked chicken for best results. Yes, this casserole is gluten-free. It uses no flour or bread crumbs. All the ingredients are safe for those with gluten issues. You can enjoy this dish without worry. Great sides include a fresh salad or steamed veggies. You can also pair it with cauliflower rice. These sides balance the meal nicely and keep it low-carb. Try adding a light vinaigrette for some zing! Yes, you can make this casserole ahead. Prepare it, cover it, and store it in the fridge. Bake it the next day, adding a few extra minutes to the time. This helps flavors blend well, making it even tastier! This blog post covered how to make a delicious casserole. We explored the key ingredients, substitutions, and nutritional info. You learned step-by-step instructions for prepping, cooking, and baking. The tips and tricks section gave you ways to enhance flavor and texture. We discussed variations to suit your taste and how to store leftovers properly. In closing, this recipe is versatile and easy to make. Get creative with your ingredients and enjoy a tasty meal!

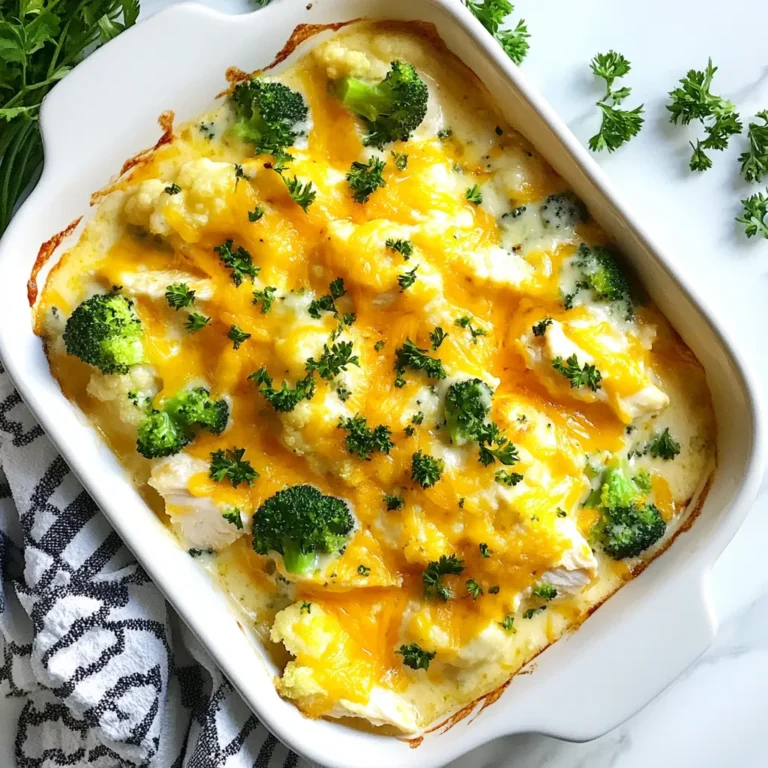
Low Carb Creamy Chicken Casserole Simple Recipe

- 1 can (15 oz) black beans, rinsed and drained - 1 can (15 oz) sweet corn, drained - 1 red bell pepper, diced - 1 small red onion, finely chopped - 1 avocado, diced - 1/2 cup cherry tomatoes, halved - 1/4 cup fresh cilantro, chopped - 2 limes (juice only) - 2 tablespoons olive oil - 1 teaspoon cumin - 1/2 teaspoon chili powder - Salt and pepper to taste To make this salad pop, you need fresh, vibrant ingredients. Black beans give a hearty base. Sweet corn adds a nice crunch. The red bell pepper brings a sweet, refreshing bite. Red onion gives a sharp contrast. Avocado adds creaminess. Cherry tomatoes add a burst of flavor. Fresh cilantro brightens everything up. For the dressing, you need lime juice, olive oil, cumin, and chili powder. These ingredients blend well. They make the salad tangy and zesty. Don't forget salt and pepper! They enhance all the flavors. - Additional cilantro - Lime wedges If you want to take it up a notch, add more cilantro. Lime wedges on the side make it fun. They add extra zest. These garnishes make your dish look festive and colorful! {{ingredient_image_1}} First, grab a large mixing bowl. Add one can of rinsed black beans and one can of drained sweet corn. Mix them well to combine. Next, chop the red bell pepper and finely chop the red onion. Add these to the bowl. Then, slice the cherry tomatoes in half and fold them into the salad. Lastly, gently add the diced avocado and chopped cilantro. Be careful not to mash the avocado. Now, let’s make the dressing. In a small bowl, squeeze the juice from two limes. Add two tablespoons of olive oil, one teaspoon of cumin, and half a teaspoon of chili powder. Season with salt and pepper. Whisk everything together until it blends well. Pour this dressing over the salad mix. Toss gently to coat all the ingredients. After mixing, let the salad sit for about 10 to 15 minutes. This helps all the flavors meld together. For a vibrant look, serve the salad in a large bowl. You can also garnish with extra cilantro and lime wedges. For a fun twist, serve in individual cups for a festive touch. Enjoy the fresh and colorful flavors! To get the best taste from your Fiesta Black Bean Corn Salad, start with seasoning. You can add salt and pepper to fit your taste. This lets you control the flavor. If you want more spice, add extra chili powder. Let the salad sit for about 10 to 15 minutes before serving. This resting time helps all the flavors blend well. The lime juice soaks into the beans and veggies, making them extra tasty. If you don't have black beans, you can use pinto beans or chickpeas instead. These options still give you great taste and texture. For corn, frozen corn works well too. Just thaw it before adding. You can swap out veggies based on the season. In summer, add fresh zucchini or cucumbers. In fall, try roasted sweet potatoes for a warm twist. These swaps keep the salad fresh and fun. For leftovers, store the salad in an airtight container. This keeps it fresh longer. Place it in the fridge, where it lasts for about 3 days. When you store it, the flavors may change a bit. The avocado can turn brown, but it will still taste good. If you want to keep it looking fresh, add the avocado just before you serve it. Pro Tips Fresh Ingredients: Using fresh ingredients, especially the lime and cilantro, will elevate the flavor of this salad significantly. Chill Before Serving: Allowing the salad to chill for a bit enhances the flavors. Make it ahead of time and refrigerate for best results. Customize Your Veggies: Feel free to add other vegetables like diced cucumbers or jalapeños for added crunch and spice! Perfect Avocado: To prevent the avocado from browning, add it just before serving, or toss it with a little lime juice for extra protection. {{image_2}} You can boost this salad's nutrition by adding proteins. Avocado adds creaminess and healthy fats. You can also add grilled chicken for a heartier meal. If you want more black beans, try using two cans instead of one. This will make the salad richer in flavor and protein. For a spicy kick, incorporate jalapeños. Just chop them finely and mix them in. You can also add hot sauce to the dressing. This will give the salad a zesty edge you’ll love. Make sure all your ingredients are vegan and gluten-free. Use a gluten-free dressing if you want to avoid gluten. You can serve this salad with corn tortillas or lettuce wraps for a fun twist. - Overall calories: Each serving has about 180 calories. - Macronutrient distribution: You get 8g of protein, 6g of fat, and 27g of carbs. Black beans are great for you. They are full of protein and fiber. This helps keep you full and aids digestion. Corn adds sweetness and vitamins. It has antioxidants that can protect your body. The veggies in the salad also provide health perks. Red bell peppers are high in vitamin C. They boost your immune system. Red onions have compounds that may lower blood pressure. Avocado gives you healthy fats and helps with skin health. You can reduce calories by using less olive oil or skipping the avocado. Instead, add more veggies like spinach or cucumbers. This keeps the salad fresh and low in calories. You can also use low-sodium black beans to cut back on salt. Fiesta Black Bean Corn Salad lasts about 3 to 5 days in the fridge. To store it properly, place it in an airtight container. Make sure to keep the salad cool, away from heat. If you see any signs of spoilage, it’s best to toss it out. Yes, you can make this salad a day ahead. Just leave out the avocado until serving. This keeps it fresh and green. You can mix all other ingredients and store them in the fridge. When you are ready to serve, add the avocado and toss. This way, the salad stays tasty and crunchy. Fiesta Black Bean Corn Salad pairs well with many dishes. Try serving it with grilled chicken or fish for a complete meal. It also goes great with tacos or quesadillas. For a lighter option, serve it with tortilla chips for a fun dip. Enjoy this salad as a side or a main dish! This blog post explores the vibrant Fiesta Black Bean Corn Salad. You learned about the fresh ingredients that create its bold flavor, how to prepare and dress the salad, and tips for the best taste. We covered storage methods and healthy options to keep it nutritious. Remember, you can customize it to fit your taste or dietary needs. Enjoy making this salad and sharing it with friends and family! Your kitchen will be filled with color and flavor. Get ready to dig in!

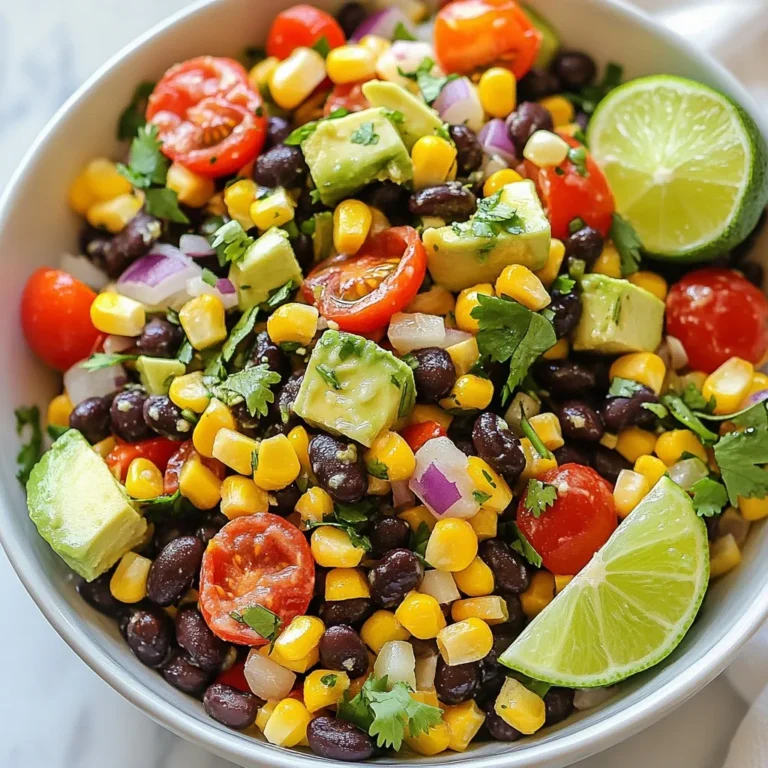
Fiesta Black Bean Corn Salad Fresh Flavorful Delight

- Cauliflower: Start with one medium head of cauliflower. Cut it into small florets. This gives you the right size for baking. - Flour options: Use one cup of all-purpose flour for a classic taste. You can swap it for chickpea flour for a gluten-free choice. This keeps the batter light and crispy. - Buffalo sauce: You need one cup of buffalo sauce. You can choose store-bought or make your own. This sauce gives the tacos their spicy kick. - Avocado: Slice one avocado. This creamy fruit adds a nice balance to the spice. - Red cabbage: Shred one cup of red cabbage. It adds crunch and color to your tacos. - Cilantro: Chop half a cup of fresh cilantro. This herb brightens up the flavors in every bite. - Tortilla types: Use either corn or flour tortillas. Eight small tortillas work best for these tacos. Warm them in a skillet for soft and pliable bites. - Optional condiments: Consider adding vegan sour cream or Greek yogurt on top. These add creaminess and help cool the heat from the buffalo sauce. {{ingredient_image_1}} First, you need to preheat your oven to 450°F (230°C). This high heat will make the cauliflower crispy. Next, make the batter. In a large bowl, mix 1 cup of flour, 1 cup of water, 1 teaspoon of garlic powder, 1 teaspoon of onion powder, 1 teaspoon of smoked paprika, and 1/2 teaspoon of salt. Stir until the batter is smooth. Now it's time to coat the cauliflower. Take each floret and dip it into the batter. Make sure every piece is well-coated. Place the coated florets on a parchment-lined baking sheet. Leave some space between the pieces so they cook evenly. Bake for 20 to 25 minutes. Check them halfway through and flip each floret for even cooking. You want them golden and crispy. While the cauliflower bakes, warm your tortillas. Heat them in a dry skillet for about 30 seconds on each side. This makes them soft and easy to fold. To assemble the tacos, take a warm tortilla and add a generous scoop of buffalo cauliflower. Top it with sliced avocado, shredded red cabbage, and fresh cilantro. Don't forget to squeeze some lime juice over the top for extra flavor. You can also add vegan sour cream or Greek yogurt if you like. Enjoy your tasty tacos! To get the perfect batter, mix flour and water well. Use a whisk to blend them. The batter should be smooth and thick enough to coat the cauliflower. If it’s too runny, add a bit more flour. If it’s too thick, add a touch more water. You want it to stick but not drip off. Crispy cauliflower is key for tasty tacos. Preheat your oven to 450°F (230°C) to start. Use parchment paper on your baking sheet. This helps with easy cleanup and crispiness. Make sure to space the cauliflower florets apart on the sheet. This allows hot air to flow around them. Flip the florets halfway through baking. This way, both sides get golden and crispy. Bake for 20-25 minutes until they look delicious. You can make these tacos your own with toppings. Try adding sliced avocado for creaminess. Shredded red cabbage adds crunch and color. Don't forget fresh cilantro for a burst of flavor. For a kick, squeeze lime juice over the top. You can also add vegan sour cream or Greek yogurt if you like. These options make your tacos even more delightful! Pro Tips Use Fresh Cauliflower: For the best texture and flavor, choose a fresh, firm head of cauliflower. This ensures your tacos will have a satisfying crunch. Experiment with Spices: Feel free to adjust the spices in the batter to match your personal taste. Adding cayenne pepper or chili powder can increase the heat level! Serve Immediately: These tacos are best enjoyed fresh out of the oven. The cauliflower stays crispy when served right away, so assemble just before serving. Make It a Meal Prep: The buffalo cauliflower can be made in advance and stored in the fridge. Reheat in the oven for a quick meal prep option during the week! {{image_2}} To make these tacos gluten-free, swap all-purpose flour for chickpea flour. Chickpea flour adds a nutty taste and protein boost. Mix it with water, garlic powder, onion powder, smoked paprika, and salt to create a thick batter. This batter coats the cauliflower well and crisps up nicely in the oven. For a vegan version, use plant-based ingredients. You can replace any dairy items with vegan options. Instead of Greek yogurt, try vegan sour cream. This keeps the flavors rich and creamy, while still being entirely plant-based. Your tacos will still taste amazing without any dairy. You can adjust the spice levels to fit your taste. If you want it hot, use extra buffalo sauce or add cayenne pepper to the batter. For a milder flavor, try using less buffalo sauce. You can also explore different sauces like BBQ sauce or a tangy ranch dressing. Each option gives your tacos a unique twist. Store leftover buffalo cauliflower in an airtight container. Keep it in the fridge for up to three days. To avoid sogginess, store the tortillas separately. Wrap them in foil or plastic wrap. This keeps them fresh and prevents them from getting hard. To reheat the cauliflower, preheat your oven to 400°F (200°C). Spread the cauliflower on a baking sheet. Bake for about 10 minutes to restore crispiness. For the tortillas, heat them on a skillet for 30 seconds each side. This keeps them soft and warm. You can freeze leftover buffalo cauliflower. Place it in a freezer-safe bag. Seal it tightly and store it for up to three months. To thaw, move it to the fridge overnight. Reheat it in the oven for the best texture. You can swap buffalo sauce with other sauces. Try BBQ sauce if you want a sweeter taste. Hot sauce with butter gives a nice kick too. If you prefer a milder flavor, ranch dressing can work well. You can also create a spicy mayo by mixing mayo with hot sauce for a creamy touch. Yes, you can prep the cauliflower ahead. Cut the florets and store them in the fridge. Keep them in an airtight container for up to 2 days. You can also make the batter in advance. Just store it in the fridge until you're ready to cook. Buffalo Cauliflower Tacos are great for meal prep. Cook the cauliflower and store it in the fridge for up to 4 days. Warm the tortillas just before serving. Pack the toppings like avocado and cabbage separately. This way, they stay fresh and crisp. You learned how to make delicious Buffalo Cauliflower Tacos. We covered ingredients like cauliflower, flour options, and sauces. You can mix and match toppings like avocado and red cabbage to suit your taste. For a crispy outcome, follow my baking and batter tips. Remember, you can make it gluten-free or vegan easily. Experiment with flavors and enjoy these tacos fresh or stored for later. Happy cooking!

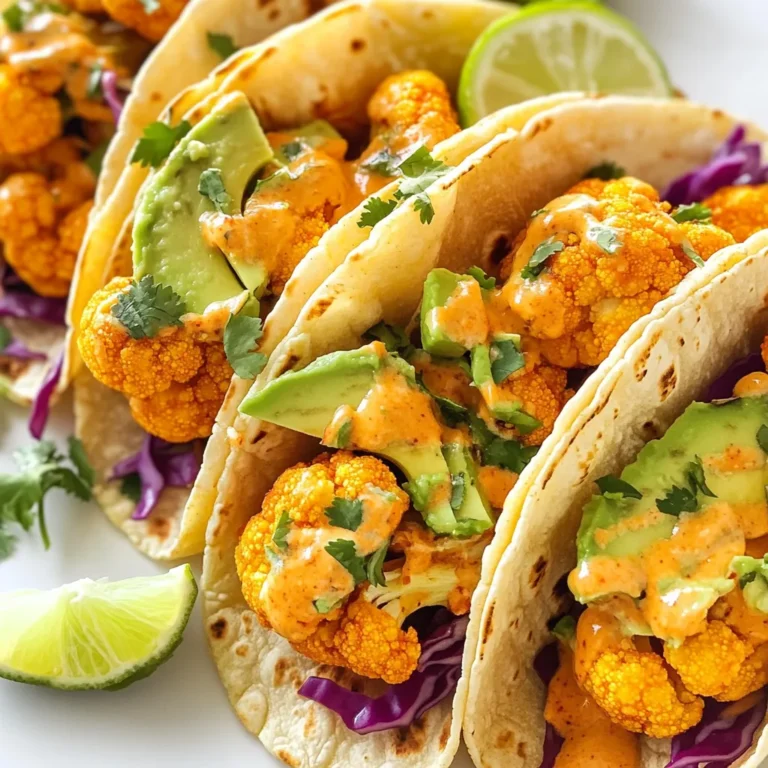
Buffalo Cauliflower Tacos Flavorful and Simple Meal

To make Greek yogurt lemon bars, gather these simple ingredients: - 1 cup graham cracker crumbs - 1/4 cup unsalted butter, melted - 1/4 cup granulated sugar - 2 cups Greek yogurt - 1 cup fresh lemon juice (about 4-6 lemons) - 1 cup granulated sugar (for filling) - 3 large eggs - Zest of 2 lemons - 1 teaspoon vanilla extract - Powdered sugar, for dusting Each of these items plays a key role in creating a zesty, creamy treat. The graham cracker crumbs form a crunchy base. The melted butter helps bind them together. Granulated sugar adds sweetness to the crust, balancing the tart filling. Greek yogurt gives the bars a rich texture and tangy flavor. Fresh lemon juice brings brightness, while lemon zest adds aromatic depth. Eggs provide structure to the filling. Lastly, vanilla extract enhances the overall taste. Don't forget the powdered sugar for a lovely finish! Now that you have your ingredients, you're ready to dive into the fun part—making these delicious bars! {{ingredient_image_1}} 1. First, preheat your oven to 350°F (175°C). This step is key to getting a nice crust. 2. In a medium bowl, combine 1 cup of graham cracker crumbs, 1/4 cup of melted unsalted butter, and 1/4 cup of granulated sugar. Mix these until they look crumbly. 3. Next, press this mixture into the bottom of a greased 9x9-inch baking dish. Make sure it is even. Bake this crust for 10 minutes. After that, remove it and let it cool slightly. 1. In a large bowl, whisk together 2 cups of Greek yogurt, 1 cup of fresh lemon juice, 1 cup of granulated sugar, 3 large eggs, the zest of 2 lemons, and 1 teaspoon of vanilla extract. Mix until it is smooth and creamy. 1. Pour the lemon filling over the cooled crust. Spread it out evenly with a spatula. 2. Bake the lemon bars for 25-30 minutes. They are done when the filling is set but jiggles slightly in the center. 3. Remove the baking dish from the oven. Let it cool to room temperature. Then, refrigerate for at least 2 hours. This chilling time helps the bars set perfectly. 4. Once chilled, dust the top with powdered sugar. Now slice into bars and enjoy! To know when your lemon bars are done, look for a slight jiggle in the center. They should not be too wobbly. The edges will firm up while the middle remains soft. This balance gives you that creamy texture. Chilling time is also very important. After baking, let them cool down to room temperature. Then, place them in the fridge for at least two hours. This step helps the filling set properly. It also enhances the flavors, making each bite refreshing. For a beautiful presentation, arrange the lemon bars on a colorful platter. Dust the top with powdered sugar just before serving. This adds a sweet touch. You can also garnish with fresh lemon slices or mint leaves. These simple touches make the bars look stunning and appealing. If you need a gluten-free option, use gluten-free graham crackers for the crust. They work just as well and taste delicious. For a dairy-free version, substitute Greek yogurt with dairy-free yogurt. Make sure to choose one that has a similar consistency. This keeps the creamy texture you love while catering to dietary needs. Pro Tips Use Fresh Lemons: For the best flavor, always use fresh lemons instead of bottled lemon juice. Freshly squeezed juice enhances the brightness of the bars. Chill Properly: Be sure to refrigerate the lemon bars for at least 2 hours after baking. This allows them to set properly, making them easier to cut into neat bars. Don’t Overbake: Keep an eye on the bars during the last few minutes of baking. They should be set but may still jiggle slightly in the center when done. Garnish Creatively: Enhance the presentation by garnishing with lemon slices or fresh mint leaves. This adds a pop of color and freshness to the dish. {{image_2}} You can easily change the taste of your lemon bars. Try mixing in fresh berries like raspberries or blueberries. These fruits add a nice pop of color and flavor. You can also use strawberries for a sweeter touch. If you want something unique, try adding herbs like basil or mint. These herbs give your bars a fresh twist. Just chop them finely and mix them in the lemon filling. If you're watching your sugar intake, you can cut back on sugar. Use just half the amount of sugar in the filling. This will still give you a nice taste. You can also try using alternative sweeteners like honey or maple syrup. These options add sweetness without all the sugar. Remember, each sweetener has a different flavor, so choose one you like! Changing the crust can make a big difference. Instead of the graham cracker crust, try a nut-based crust. Use ground almonds or walnuts mixed with a bit of butter. This gives a nice crunch. You can also use cookie crusts like vanilla wafers or Oreos for a fun twist. Just crush them up and follow the same steps to make your crust. To keep your lemon bars fresh, store them in the fridge. Place them in an airtight container. This helps prevent them from drying out or absorbing any odors. Use parchment paper between layers if you stack them. If you want to save some for later, freezing works well. Wrap each bar in plastic wrap. Then, place them in a freezer-safe bag or container. This keeps them safe from freezer burn. In the fridge, your lemon bars last about a week. After that, they may lose their flavor and texture. Check for signs of spoilage. If you see any mold or an off smell, do not eat them. If the bars become very dry or crumbly, they may not taste good anymore. Enjoy your lemon bars while they are fresh for the best flavor! Yes, you can use store-bought crust. It saves time and effort. This option works well if you're busy. However, it may lack the fresh flavor of homemade crust. Store-bought crusts can be sweeter. Make sure to taste it before adding the filling. If you want a great balance, consider using a less sweet crust. If you need a substitute, there are options. You can use regular yogurt or sour cream. For a dairy-free choice, try coconut yogurt or almond yogurt. These alternatives will change the flavor slightly. Keep in mind, Greek yogurt adds creaminess and tang. Choose a substitute that matches your taste buds. To make the bars more tart, add more lemon juice. Start with an extra tablespoon and taste. You can keep adding until it’s just right. Remember, too much juice can change the filling's texture. Use fresh lemons for the best flavor. You can also add a bit of lemon zest for extra zing. You learned how to make delicious lemon bars. We covered each step, from the crust to the filling. I shared tips for texture, presentation, and dietary needs. You can even try fun variations to make them your own. Remember to store them right for the best taste. Enjoy making this treat, and share your results with friends! You'll impress them with your skills and creativity. Happy baking!

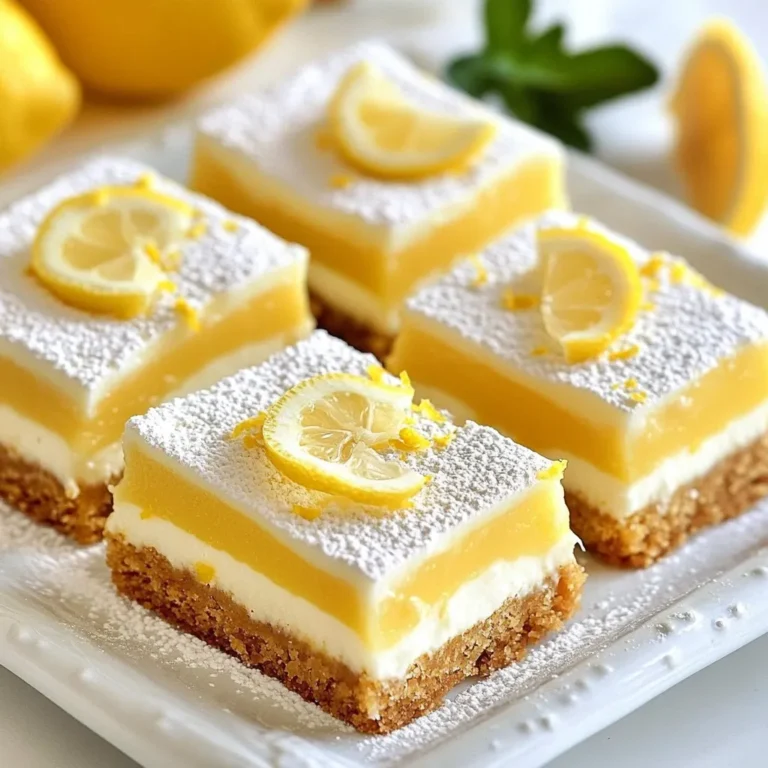
Greek Yogurt Lemon Bars Refreshing Dessert Recipe

To make cheesy spinach stuffed mushrooms, you'll need: - 12 large portobello or cremini mushrooms, stems removed - 1 cup fresh spinach, chopped - 1/2 cup cream cheese, softened - 1/2 cup shredded mozzarella cheese - 1/4 cup grated Parmesan cheese - 2 cloves garlic, minced - 1/4 teaspoon red pepper flakes (optional) - Salt and pepper to taste - 1 tablespoon olive oil - 1 tablespoon fresh lemon juice - 1/4 cup bread crumbs I recommend using high-quality cheeses for the best flavor. Cream cheese brings a rich, creamy texture. Mozzarella melts really well, giving a gooey bite. Parmesan adds a nice nutty taste. If you like more flavor, try using aged cheeses like Pecorino Romano instead of Parmesan. Fresh spinach is best for this dish. It has a bright taste and vibrant color. You can easily chop and sauté it. If you use frozen spinach, make sure to thaw it and squeeze out excess water. This way, you won't end up with soggy stuffed mushrooms. Fresh spinach also holds its texture better when baked, making your dish look and taste amazing. {{ingredient_image_1}} First, choose 12 large portobello or cremini mushrooms. These mushrooms are sturdy and hold the filling well. Remove the stems gently; you can save them for another dish. Rinse the mushrooms under cool water to clean them. Pat them dry with a paper towel. This step helps the mushrooms cook evenly and absorb flavors. Next, heat 1 tablespoon of olive oil in a skillet over medium heat. Add 2 minced garlic cloves and sauté them until they smell great, about 1 minute. Then, add 1 cup of chopped fresh spinach to the skillet. Cook it until it wilts, about 2-3 minutes. Season with salt and pepper to taste. If you like spice, add 1/4 teaspoon of red pepper flakes. Remove the skillet from heat. In a mixing bowl, combine 1/2 cup of softened cream cheese, 1/2 cup of shredded mozzarella cheese, and 1/4 cup of grated Parmesan cheese. Add the cooked spinach mixture and 1 tablespoon of fresh lemon juice. Mix everything together until it’s smooth and well combined. This filling will be creamy and packed with flavor. Now it’s time to fill the mushrooms! Carefully spoon the cheesy spinach mixture into each mushroom cap. Don’t be shy; fill them generously! After filling, sprinkle the tops with 1/4 cup of bread crumbs. This will give your stuffed mushrooms a nice, crunchy top. Place the stuffed mushrooms on a baking sheet lined with parchment paper. Preheat your oven to 375°F (190°C). Bake the mushrooms for about 20-25 minutes. They are ready when they are tender and the tops are golden brown. Once they are done, remove them from the oven. Let them cool for a few minutes before serving. Enjoy your tasty cheesy spinach stuffed mushrooms! When picking mushrooms, look for firm caps. They should have a smooth surface. Avoid any that are slimy or have dark spots. For this dish, portobello or cremini mushrooms work best. Their size holds more filling. Fresh mushrooms add flavor and texture. Want a little kick? Add red pepper flakes to the spinach mix. Start with just a pinch. You can always add more later. For a milder taste, leave out the spice. You can also add herbs like basil or oregano for extra flavor. To get that gooey cheese effect, use fresh mozzarella. It melts beautifully and adds creaminess. Mixing in cream cheese helps bind everything together. Bake until the cheese is bubbly and golden. This will give your mushrooms a nice texture. Keep an eye on them so they don’t overcook. Pro Tips Choose Fresh Ingredients: Always opt for fresh spinach and high-quality cheeses to enhance the flavor of your stuffed mushrooms. Customize Your Spices: Feel free to add different spices or herbs like thyme or oregano to the cheese mixture for a unique twist. Don’t Overcook the Mushrooms: Keep an eye on the mushrooms while baking; you want them tender but not mushy for the best texture. Make Ahead: Prepare the stuffed mushrooms in advance and store them in the fridge until you're ready to bake them for a quick appetizer. {{image_2}} You can change the cheese in this recipe. Try using goat cheese for a tangy twist. Feta can add a great salty flavor. You might also like using cheddar for a richer taste. Mix and match cheeses to find your favorite blend. Remember, the cream cheese keeps the filling creamy. This lets you get creative with flavors. If you want a meatier dish, add cooked sausage or bacon. Brown the meat in the skillet before adding garlic. The meat adds a savory depth to the filling. Ground turkey or chicken are also great choices. Just make sure to drain excess fat. This keeps the filling from becoming too greasy. You can even mix in some chopped ham for a tasty variation. For a vegan option, swap the cream cheese. Use cashew cream or tofu instead. Nutritional yeast can add a cheesy taste without dairy. For the cheese, try vegan mozzarella shreds. These melt well and taste great. Make sure to use gluten-free bread crumbs if needed. This makes the dish both vegan and gluten-free. Adjust seasoning to ensure it’s flavorful and satisfying. To store your cheesy spinach stuffed mushrooms, place them in an airtight container. Keep them in the fridge. They will stay fresh for up to three days. Make sure they cool completely before storing. This avoids condensation and sogginess. To reheat the stuffed mushrooms, preheat your oven to 350°F (175°C). Place the mushrooms on a baking sheet. Heat them for about 10-15 minutes. This will keep them crispy and warm. You can also use a microwave. Just heat them for 30 seconds, but they may not stay crispy. If you want to freeze the mushrooms, do it before baking. Stuff the mushrooms and place them on a tray. Freeze them for about an hour until solid. Then, transfer them to a freezer bag. They can stay in the freezer for up to three months. When you're ready to cook, no need to thaw. Just bake them for about 30 minutes at 375°F (190°C). Enjoy this tasty treat anytime! Yes, you can use other mushrooms. Portobello and cremini work great, but others do too. Try button mushrooms for a smaller bite. Shiitake mushrooms add a unique flavor. Just remember, the size affects cooking time. Smaller mushrooms may need less time in the oven. To make this recipe gluten-free, use gluten-free bread crumbs. You can also skip the bread crumbs altogether. If you want a crunch, try crushed nuts or seeds. They add texture without gluten. Always check labels when buying ingredients to ensure they are gluten-free. A few tasty dipping sauces work well. Marinara sauce adds a classic touch. Ranch dressing gives a creamy option. You can also try balsamic glaze for a sweet kick. Experiment with your favorite sauces to find the perfect match! In this article, we explored the tasty world of cheesy spinach stuffed mushrooms. We covered the best ingredients, from fresh cheese to assorted mushrooms. You learned how to prepare and cook your filling while ensuring the perfect cheese melt. We also shared tips to customize your dish and variations for every diet. Finally, I provided ways to store and reheat leftovers. Enjoy creating your own unique stuffed mushrooms and impressing your family and friends!

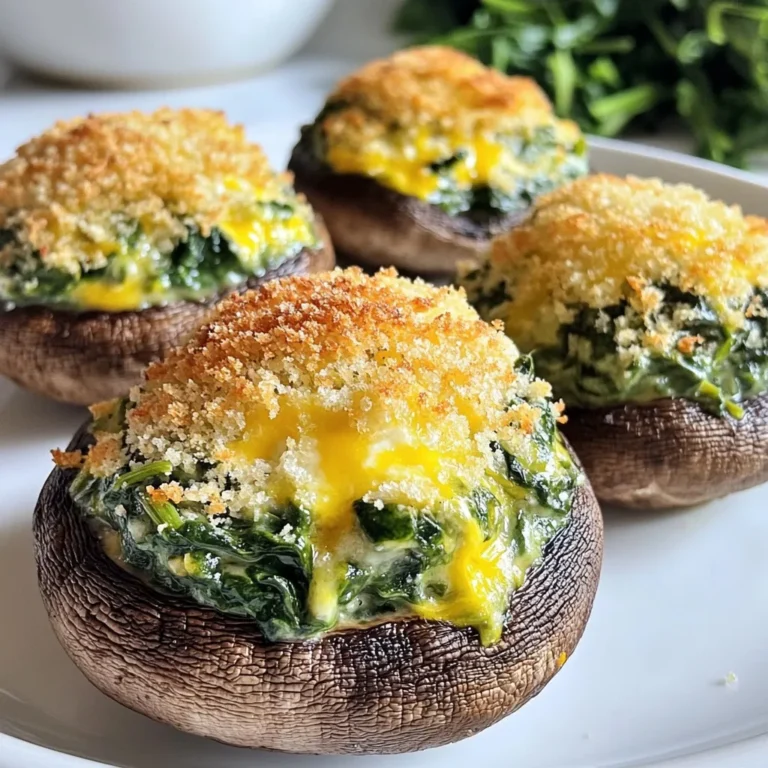
Cheesy Spinach Stuffed Mushrooms Tasty Appetizer Idea

PREV 1 … 80 81 82 … 86 NEXT
tasty trail blazer

explore

DessertsDinnerAppetizersDrinks

Our Policies

  • Cookie Policy
  • Copyright Policy
  • Disclaimer
  • GDPR Policy
  • Terms Of Use
Back to Top
  • About
  • Contact Us
  • Privacy Policy
© 2026 tasty trail blazer