FREE DINNER EBOOK! Get your copy!
  • Cookie Policy
  • GDPR Policy
  • Disclaimer
  • Terms Of Use
  • Visit my other site: Fun Cookie Recipes
tasty trail blazer
  • Home
  • Dinner
  • Desserts
  • Drinks
  • Appetizers
  • Contact
  • About
  • Privacy Policy
  • Home
  • Dinner
  • Desserts
  • Drinks
  • Appetizers
  • Contact
  • About
  • Privacy Policy
  • Cookie Policy
  • GDPR Policy
  • Disclaimer
  • Terms Of Use
Visit my other site: Fun Cookie Recipes

HOME / CATEGORIES /

Latest

To make savory ground turkey stuffed sweet potatoes, gather these key ingredients: - 4 medium sweet potatoes - 1 pound ground turkey - 1 small onion, finely chopped - 2 cloves garlic, minced - 1 red bell pepper, diced - 1 teaspoon ground cumin - 1 teaspoon smoked paprika - 1/2 teaspoon chili powder - Salt and black pepper to taste - 1 cup black beans, drained and rinsed - 1/2 cup corn (canned or frozen) - 1 cup shredded cheese (cheddar or Monterey Jack) - 2 tablespoons olive oil These toppings can add extra flavor and texture to your dish: - Fresh cilantro for garnish - Sour cream or Greek yogurt for serving This meal is not only tasty but also packed with nutrients. Sweet potatoes are rich in fiber and vitamins. Ground turkey is a lean protein source. Black beans and corn add more fiber and protein. This dish offers a balanced meal with carbs, protein, and healthy fats, making it a great choice for dinner. {{ingredient_image_1}} Start by preheating your oven to 400°F (200°C). Next, wash the sweet potatoes well. This step is key because you want to remove any dirt. Then, poke a few holes in each potato with a fork. This helps them cook evenly. Place the sweet potatoes on a baking sheet and roast them for about 45-50 minutes. You know they are done when they are soft to the touch. While the sweet potatoes roast, heat 2 tablespoons of olive oil in a large skillet over medium heat. Add 1 small chopped onion and cook it until it turns translucent, which takes about 5 minutes. Next, toss in 2 minced garlic cloves and 1 diced red bell pepper. Cook these for about 3-4 minutes until the bell pepper softens. Increase the heat to medium-high and add 1 pound of ground turkey. Cook it well, breaking it apart as it cooks. Once the turkey turns brown, stir in 1 teaspoon of ground cumin, 1 teaspoon of smoked paprika, and 1/2 teaspoon of chili powder. Add salt and black pepper to taste. Cook this mixture for another 2-3 minutes. Finally, mix in 1 cup of drained black beans and 1/2 cup of corn, heating everything through for another 2-3 minutes. After the sweet potatoes are done, take them out of the oven. Carefully slice them open lengthwise, but don’t cut all the way through. Fluff the insides with a fork. Now it’s time to fill the sweet potatoes! Spoon the ground turkey mixture generously into each potato, pressing down gently. Top each stuffed potato with 1 cup of shredded cheese. Return them to the oven for an extra 5-7 minutes, or until the cheese melts and bubbles. Let them cool slightly before serving. You can garnish with fresh cilantro and add a dollop of sour cream or Greek yogurt if you like. Enjoy your flavorful meal! To cook sweet potatoes well, I recommend roasting them. This method brings out their natural sweetness. Here’s how to do it: - Preheat your oven to 400°F (200°C). - Wash the sweet potatoes and poke holes in them with a fork. - Place them on a baking sheet and roast for 45-50 minutes. This method makes sweet potatoes soft and flavorful. You can also microwave them for a quicker option. Just cook on high for about 5-8 minutes per potato. To make your stuffed sweet potatoes pop with flavor, try these tips: - Add fresh herbs like cilantro or parsley for a fresh taste. - Squeeze some lime juice over the filling for brightness. - Experiment with spices; try adding cayenne for heat or oregano for earthiness. - A sprinkle of smoked paprika gives a nice smoky flavor. These small changes can make a big difference in taste. Cooking ground turkey can be easy if you follow these steps: - Use a large skillet over medium heat. - Make sure to break the turkey apart as it cooks. This helps it cook evenly. - Cook until it turns from pink to brown, about 6-8 minutes. - Stir in spices early to let the flavors mix well. These tips ensure your turkey is juicy and full of flavor. Pro Tips Choose the Right Sweet Potatoes: Select medium-sized sweet potatoes that are firm and free of blemishes for the best flavor and texture. Flavor Boosting: For an extra depth of flavor, try adding a splash of lime juice or a pinch of cayenne pepper to the turkey mixture. Cheese Variations: Experiment with different types of cheese like feta or pepper jack for a unique twist on the classic flavor. Meal Prep Friendly: These stuffed sweet potatoes can be made ahead of time and stored in the fridge, making them a great option for quick lunches or dinners. {{image_2}} You can easily make this dish vegetarian. Use lentils, chickpeas, or tempeh instead of ground turkey. These proteins pack a punch in flavor and nutrition. Cook them the same way as turkey. Add spices like cumin and paprika for that rich taste. You can even mix in some tofu for a creamy texture. This way, you can enjoy a hearty meal without meat. Feel free to add your favorite veggies to this recipe. Zucchini, spinach, or mushrooms work well. Just chop them up and toss them in when you cook the onion and bell pepper. These add-ins boost the meal's health and flavor. They also make each bite more colorful and fun. Be creative! You can even use leftover veggies from your fridge. If you like your food spicy, add some heat! You can include jalapeños or hot sauce to the turkey filling. Start with a small amount, then taste and adjust. You can also use spicy chili powder or cayenne pepper for extra warmth. This gives your stuffed sweet potatoes a nice kick. Just remember, you can always add more, but it’s hard to take it out! You can store leftover stuffed sweet potatoes in the fridge. Place them in an airtight container. Make sure to eat them within three days for the best taste. When you store them, keep any toppings separate. This helps retain their freshness. If you want to freeze your stuffed sweet potatoes, wrap each one tightly in plastic wrap. Place them in a freezer-safe bag or container. They can last up to three months in the freezer. When you're ready to eat, let them thaw in the fridge overnight before reheating. To reheat, use the oven for the best texture. Preheat your oven to 350°F (175°C). Place the stuffed sweet potatoes on a baking sheet. Heat for about 20 minutes or until warm. You can also use a microwave, but this may make the skin a bit soft. If you use the microwave, heat in 1-minute intervals until warm. Yes, you can use other meats. Ground chicken or beef works well. You can also try pork for a unique flavor. Just cook it the same way as ground turkey. Adjust the spices to match the meat's flavor. Each option brings a different taste to your sweet potatoes. To cook sweet potatoes evenly, wash them well. Poke holes in each potato with a fork. This helps steam escape while baking. Place them on a baking sheet in a single layer. Roast them at 400°F for 45-50 minutes. Check for softness by piercing them with a fork. If they feel tender, they are ready. Many sides go well with stuffed sweet potatoes. Consider a simple green salad for freshness. Roasted veggies add texture and color. You can also serve quinoa or brown rice for extra fiber. A light soup can balance the meal nicely too. Choose sides that complement the flavors of the stuffed sweet potatoes. This blog post covered everything you need to create stuffed sweet potatoes. We explored the ingredients, both required and optional, making sure you could customize your meal. You learned step-by-step instructions, tips for perfect cooking, and variations to suit your taste. We also discussed storage info, including how to freeze and reheat leftovers. Stuffed sweet potatoes are flexible and fun to make. Experiment with flavors and enjoy the process. Happy cooking!

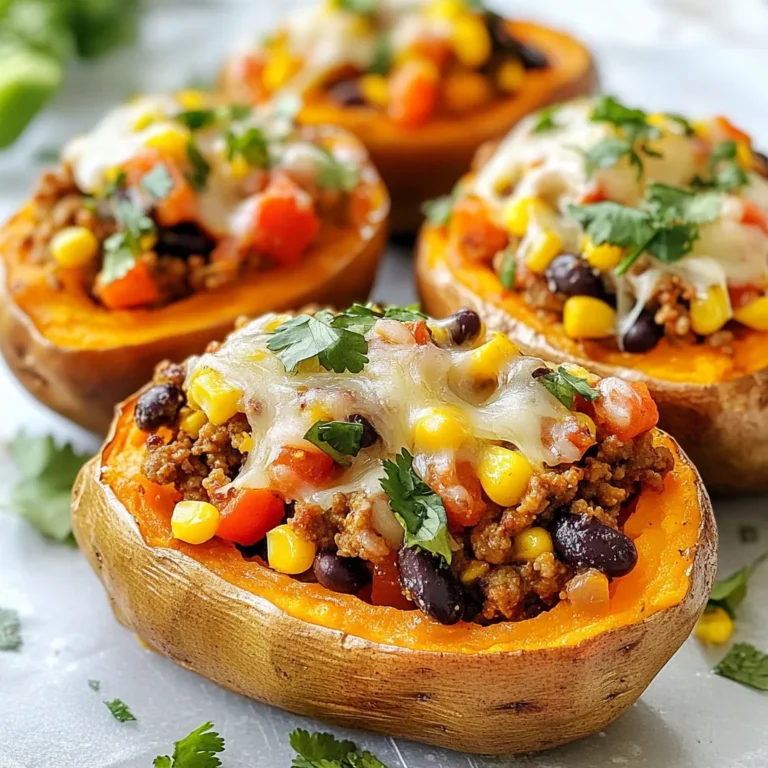
Ground Turkey Stuffed Sweet Potatoes Flavorful Meal

To make crispy air fryer apple fries, gather the following ingredients: - 3 medium apples (Granny Smith or Honeycrisp) - 1 cup all-purpose flour - 1 teaspoon cinnamon - 1/2 teaspoon salt - 2 large eggs - 1 cup breadcrumbs (preferably panko) - 2 tablespoons brown sugar - Cooking spray or oil for misting These ingredients are key to achieving that perfect crunch. The apples should be fresh to give the best flavor. Granny Smith apples offer a nice tartness, while Honeycrisp adds sweetness. The flour, cinnamon, and salt mix together to create a tasty coating that enhances the apples. Using panko breadcrumbs is important. They add an extra crunch that regular breadcrumbs can’t match. The brown sugar gives a hint of sweetness, making the fries even more delicious. Make sure you have cooking spray or oil handy. This helps the apple fries get that golden color without sticking. With these ingredients ready, you can make a fun snack that the whole family will enjoy! {{ingredient_image_1}} First, set your air fryer to 350°F (175°C). Preheating helps the apple fries cook evenly. It takes about 3 to 5 minutes. This step is key for that crispy texture we all love. Now, grab three medium apples, like Granny Smith or Honeycrisp. Peel them and cut them into matchsticks. In a medium bowl, mix 1 cup of all-purpose flour, 1 teaspoon of cinnamon, and 1/2 teaspoon of salt. Stir until mixed well. In a second bowl, whisk 2 large eggs until they are frothy. In a third bowl, combine 1 cup of breadcrumbs (panko works best) and 2 tablespoons of brown sugar. Mix these until they are evenly blended. Take a handful of apple matchsticks. First, coat them in the flour mixture. Shake off any extra flour. Next, dip the floured apple pieces into the beaten eggs. Let any excess egg drip off. Finally, coat the apples in the breadcrumb mixture. Press lightly so the crumbs stick well. Place the coated apple fries in a single layer in the air fryer basket. Spray them lightly with cooking spray or mist with oil. This helps them crisp up nicely. Air fry for 10 to 12 minutes. Make sure to shake the basket halfway through cooking. This ensures the apple fries cook evenly on all sides. When they turn golden brown and crispy, they are ready! Once done, carefully take the apple fries out. Let them cool a bit before serving. Enjoy this tasty treat with some caramel sauce or yogurt for dipping! When making crispy air fryer apple fries, the type of apple matters. I recommend using Granny Smith or Honeycrisp apples. Granny Smith apples offer a nice tartness that balances the sweetness. Honeycrisp apples have a juicy texture and a mild sweetness. Both options hold up well during cooking. To get those perfect crispy apple fries, focus on your coating method. First, ensure your apple matchsticks are dry. Excess moisture can lead to soggy fries. Next, coat the apples in flour, then dip them in egg, and finally roll them in breadcrumbs. Panko breadcrumbs work best for extra crunch. Press the crumbs onto the apples to help them stick. Finally, mist the fries lightly with oil before cooking. This ensures they fry up golden and crisp. Having the right tools makes air frying easier. You need an air fryer, of course. A good air fryer should have adjustable temperature settings. A mixing bowl will help you combine your flour, eggs, and breadcrumbs. Use a cutting board and a sharp knife for cutting apples. A shallow dish is useful for breading the apples. Lastly, a spray bottle for oil helps you coat the fries evenly without excess oil. Pro Tips Choose the Right Apples: Select firm apples like Granny Smith or Honeycrisp for the best texture and flavor. Optimal Coating Technique: Ensure each apple fry is thoroughly coated in each step to achieve maximum crunchiness. Don’t Overcrowd the Basket: Air fry in batches if necessary, as overcrowding can lead to uneven cooking and less crispiness. Experiment with Spices: Feel free to add nutmeg or ginger to the breadcrumb mixture for a unique twist on flavor. {{image_2}} For a sweet twist, add cinnamon sugar to your apple fries. After cooking, sprinkle a mix of sugar and cinnamon on top. Use about 1 tablespoon of sugar and 1 teaspoon of cinnamon. This adds a warm, sweet flavor that enhances the apples. You can serve them with caramel sauce for a nice dip. If you want a savory option, try adding herbs. Mix dried herbs like thyme or rosemary into your breadcrumb mix. Use about 1 teaspoon of dried herbs to give a new flavor. This adds a nice contrast to the natural sweetness of the apples. Serve them with a yogurt dip for a tasty snack. To make these apple fries gluten-free, swap the all-purpose flour for a gluten-free blend. You can also use gluten-free breadcrumbs instead of regular ones. This way, everyone can enjoy this crispy treat. Make sure to check the labels to avoid hidden gluten. To keep your leftover apple fries fresh, let them cool first. Place them in an airtight container. Store them in the fridge for up to three days. For best taste, eat them sooner rather than later. When you're ready to enjoy your leftover apple fries, reheating them properly makes a big difference. Preheat your air fryer to 350°F (175°C). Place the apple fries in the basket in a single layer. Heat them for about 3 to 5 minutes. This helps them regain their crispy texture. If you want to save apple fries for later, freezing is a great option. First, let them cool completely. Arrange them in a single layer on a baking sheet. Freeze them for about an hour until solid. Then, transfer the fries to a freezer bag or container. They can stay frozen for up to three months. When you're ready to eat, simply reheat them in the air fryer without thawing. For apple fries, I recommend using Granny Smith or Honeycrisp apples. These apples are crisp and firm, which helps them hold their shape during cooking. Granny Smith apples add a nice tartness, while Honeycrisp apples bring sweetness and crunch. Both types provide a great balance of flavor and texture. Yes, you can prepare these apple fries ahead of time. You can slice the apples and coat them in the flour mixture, eggs, and breadcrumbs. Place them on a baking sheet and cover them with plastic wrap. Keep them in the fridge for up to 2 hours. When you are ready, just air fry them as directed. This saves time and makes serving easier. To make air fryer apple fries without eggs, you can use a simple substitute. Mix 1 tablespoon of ground flaxseed with 2.5 tablespoons of water for each egg. Let this sit for 5 minutes to thicken. Use this mixture to coat your apple slices instead of eggs. This makes a great vegan option while still keeping the texture crunchy. You learned how to make tasty air fryer apple fries with simple ingredients. We covered steps for prepping, cooking, and storing these treats. I also shared tips for crispy fries and fun variations. Remember, choosing the right apples makes a big difference. Enjoy trying these recipes and share them with friends. Happy cooking, and enjoy your delicious apple fries!

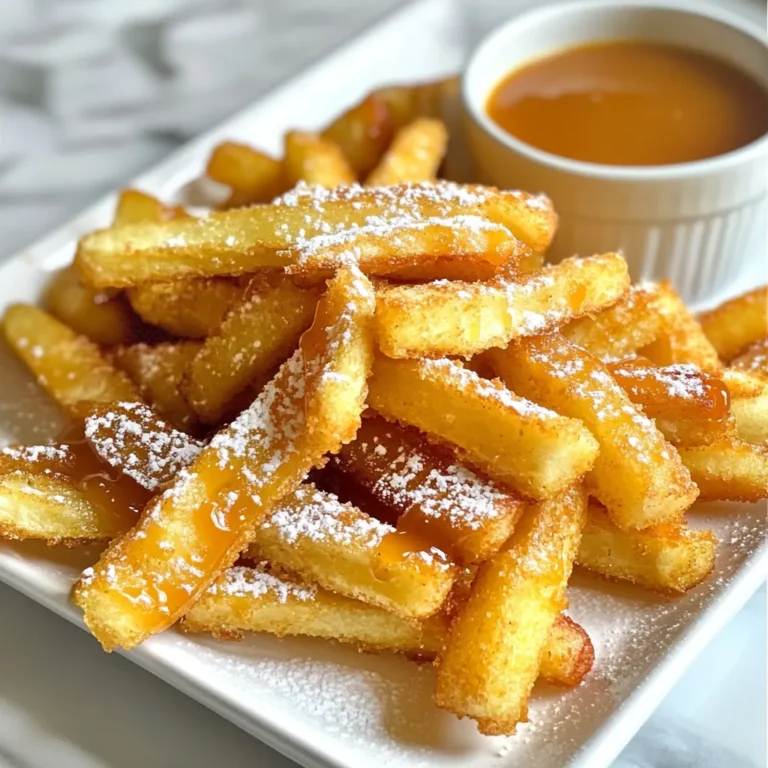
Crispy Air Fryer Apple Fries Easy and Tasty Treat

- 2 cups cooked chicken, shredded - 1/2 cup buffalo sauce - 1/2 cup ranch dressing - 4 flatbreads (store-bought or homemade) - 1 cup shredded mozzarella cheese - 1/2 cup diced celery - 1/4 cup chopped green onions - Fresh parsley for garnish (optional) Tips for selecting chicken: When choosing chicken, look for fresh or frozen options. Cooked chicken should be moist and tender. You can use rotisserie chicken or grill your own. Shredding the chicken makes it easy to mix with the buffalo sauce. Recommendations for buffalo sauce brands: Not all buffalo sauces are the same. Frank's RedHot is a popular choice. It offers a nice balance of heat and flavor. You can also try other brands like Texas Pete or Crystal for unique tastes. Substitute options for ranch dressing: If you want to change the flavor, try blue cheese dressing. It pairs well with buffalo chicken. You can also make your own ranch by mixing yogurt, garlic powder, and herbs. This adds a fresh touch to the flatbread. {{ingredient_image_1}} 1. Preheat your oven to 400°F (200°C). This helps the flatbreads cook evenly. 2. In a large bowl, mix 2 cups of shredded chicken with 1/2 cup of buffalo sauce. Stir until the chicken is well coated. 1. Place 4 flatbreads on a baking sheet lined with parchment paper. This keeps them from sticking. 2. Spread 1/2 cup of ranch dressing over each flatbread. Leave a small edge around the sides. 3. Evenly distribute the buffalo chicken mixture on top of the ranch dressing. Make sure each flatbread gets a good amount. 4. Sprinkle 1 cup of shredded mozzarella cheese over the chicken. Don’t be shy; more cheese means more flavor! 1. Bake the flatbreads in your preheated oven for about 10-12 minutes. Look for the cheese to become bubbly and slightly golden. 2. Once baked, check for doneness by ensuring the cheese is melted and the edges of the flatbread are crisp. - Ensuring chicken stays moist: To keep your chicken juicy, use cooked chicken that is not overcooked. Shred the chicken right before mixing it with the buffalo sauce. This keeps the moisture locked in. You can also add a splash of chicken broth to help retain moisture. - Achieving the perfect cheese melt: For gooey cheese, use fresh mozzarella. Shred it yourself for better melting. Spread the cheese evenly to cover the chicken. Bake until the cheese is bubbly and golden, around 10-12 minutes. - Best sides to pair with Buffalo Chicken Flatbread: This dish goes well with a fresh side salad or crunchy veggie sticks. Carrot and celery sticks bring a nice bite. You could also serve a side of sweet potato fries for a hearty touch. - Ideal beverages to complement the dish: Pair your flatbread with a cold beverage. A crisp lager or a light soda works great. If you prefer something non-alcoholic, try sparkling water with lime. - How to cut and serve flatbreads: Once baked, let the flatbreads cool for a minute. Use a sharp knife or pizza cutter to slice them into rectangles or triangles. Serve on a wooden board for a rustic touch. - Creative garnishing options: Add a pop of color with diced green onions or fresh parsley. You can also drizzle extra ranch dressing on top for a creamy finish. A sprinkle of chili flakes can add a nice kick if you like heat. Pro Tips Use Rotisserie Chicken: For a quicker meal, opt for store-bought rotisserie chicken. It saves time and adds great flavor. Customize Your Heat: Adjust the amount of buffalo sauce to suit your taste. For milder flavors, reduce the sauce or mix it with more ranch dressing. Add Extra Veggies: Include additional toppings like sliced jalapeños or bell peppers for added crunch and nutrition. Use a Pizza Stone: If you have one, bake your flatbreads on a preheated pizza stone for an even crispier crust. {{image_2}} You can mix things up by using different proteins. Shrimp works great if you like seafood. Tofu is a fantastic choice for a vegetarian option. Both can soak up flavors well. You can also swap out the sauce. Spicy garlic sauce adds a nice kick. Barbecue sauce gives a sweet twist. Each choice changes the flavor a lot! If you want to make your own flatbread, here’s a simple recipe: Combine flour, water, salt, and olive oil. Roll it out and cook it on a hot skillet. It’s easy and fresh! You can also use tortillas or pita bread instead. They cook quickly and still taste great. Just adjust the cooking time to avoid burning. For a gluten-free option, use gluten-free flatbreads. Many stores sell these. Just check the label to ensure they fit your needs. If you want a vegan version, use plant-based chicken. Substitute ranch dressing with vegan ranch. This way, everyone can enjoy this tasty meal! To keep your Buffalo Chicken Flatbread fresh, store it in the fridge. Place the flatbread in an airtight container. This helps to seal in moisture and keep it tasty. Leftovers can last up to three days in the fridge. If you want to store it longer, freezing is a great option. Wrap each flatbread in plastic wrap, then place them in a freezer-safe bag. This way, they stay safe from freezer burn. You can enjoy them for up to three months when frozen. When it's time to enjoy your leftovers, reheating is key. The best way is in the oven. Preheat your oven to 350°F (175°C). Place the flatbreads on a baking sheet and heat for about 10 minutes. This method helps keep the flatbreads crispy. You can also use a skillet. Heat the skillet over medium heat and place the flatbread in it. Cover with a lid to warm it through. This method also keeps the bottom nice and crispy. Avoid using the microwave, as it can make the flatbread soggy. Buffalo Chicken Flatbread is a tasty dish made with flatbreads, chicken, and sauce. You first coat shredded chicken in spicy buffalo sauce. Then, you spread ranch dressing on flatbreads and top them with the chicken mix. After adding cheese, you bake until bubbly. This dish combines bold flavors and is great for parties or quick meals. Yes, you can prepare this dish ahead of time. Here are some tips: - Cook the chicken in advance and store it in the fridge. - Mix the buffalo sauce with the chicken before storing. - Assemble the flatbreads and cover them well. - Refrigerate them for up to a day before baking. If you want to change the protein, here are some options: - Shrimp: Cooked shrimp works well with buffalo sauce. - Tofu: Firm tofu can be used for a vegetarian option. - Pulled pork: This adds a smoky flavor. - Beef: Shredded beef can also be a tasty choice. Yes, it can be spicy due to the buffalo sauce. If you want a milder dish: - Use less buffalo sauce when mixing with chicken. - Try a mild buffalo sauce or mix it with ranch dressing. - You can add a sour cream topping to cool it down. We explored the deliciousness of Buffalo Chicken Flatbread. You learned how to prepare it with simple ingredients like chicken and cheese. We discussed preparation steps, cooking tips, and options for storing and reheating leftovers. You now have the tools to customize and enjoy this dish in many ways, whether you prefer it spicy or mild. Embrace your cooking skills, impress your friends, and enjoy every bite of your Buffalo Chicken Flatbread!

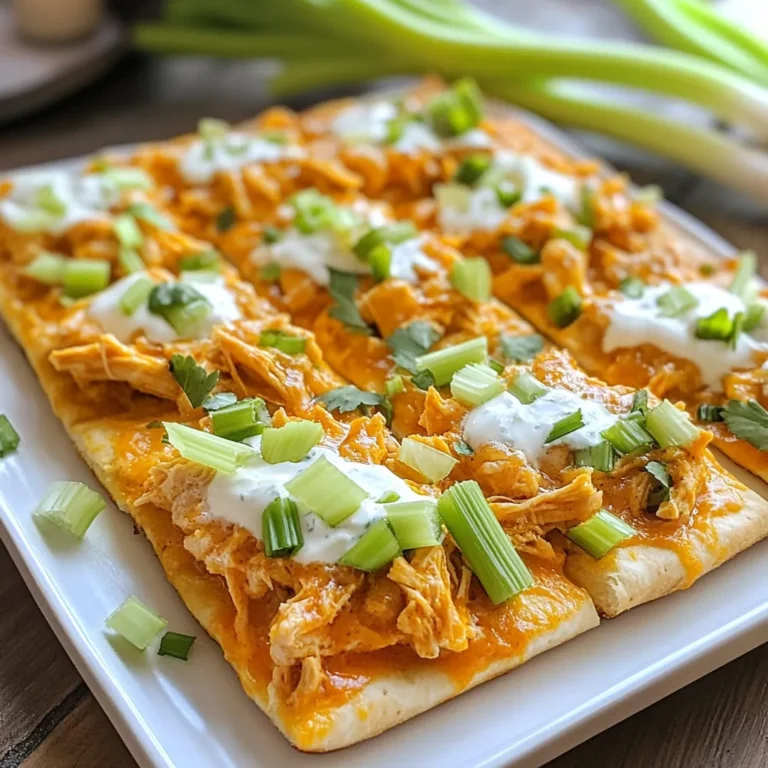
Buffalo Chicken Flatbread Flavorful Easy Recipe

For the chicken, you need: - 1 lb boneless, skinless chicken thighs - 2 tablespoons soy sauce - 1 tablespoon sesame oil - 1 tablespoon honey - 2 cloves garlic, minced - 1 teaspoon grated ginger These ingredients work together to create a bold flavor. The soy sauce adds saltiness. Sesame oil gives a nice nutty taste. Honey rounds out the flavors with sweetness. Garlic and ginger add depth and warmth. You will also need: - 1 cup cooked jasmine rice - 1 cucumber, thinly sliced - 1 cup shredded carrots - 1 cup red cabbage, thinly sliced - 2 green onions, sliced - Sesame seeds for garnish These fresh veggies add crunch and color. The jasmine rice serves as a soft base. Each topping brings its own unique taste and texture. Together, they make the bowl look vibrant and inviting. For the creamy sauce, gather: - 3 tablespoons gochujang (Korean red chili paste) - 1/2 cup sour cream - 1 tablespoon lime juice - 1 teaspoon honey The gochujang gives heat and umami. Sour cream adds creaminess to balance the spice. Lime juice brings in a tangy note. Honey sweetens the sauce, creating a perfect blend. This cream is the star of the dish, adding richness to every bite. {{ingredient_image_1}} First, start by making a tasty marinade. In a bowl, mix together: - 2 tablespoons soy sauce - 1 tablespoon sesame oil - 1 tablespoon honey - 2 cloves garlic, minced - 1 teaspoon grated ginger Add 1 pound of boneless, skinless chicken thighs to the bowl. Make sure each piece is well coated in the marinade. Cover the bowl and let it sit in the fridge for at least 30 minutes. This helps the chicken soak up all the great flavors. While the chicken is marinating, let’s make the Gochujang cream. In a small bowl, combine: - 3 tablespoons gochujang - 1/2 cup sour cream - 1 tablespoon lime juice - 1 teaspoon honey Stir everything together until you get a smooth mix. This cream will add a nice kick to your meal and balance the flavors perfectly. Now it’s time to grill the chicken. Heat a grill pan or skillet over medium-high heat. Take the chicken out of the marinade and place it on the grill. Cook each side for 5-7 minutes. You want the chicken to be cooked through and slightly charred. Check that it reaches an internal temperature of 165°F (74°C). This ensures it’s safe to eat. After grilling, let the chicken rest for a few minutes. Then, slice it into strips. To make your bowls, start with cooked jasmine rice as the base. Top it with the sliced chicken, then add: - Thinly sliced cucumber - Shredded carrots - Thinly sliced red cabbage - Sliced green onions Finally, drizzle the Gochujang cream over the top. Don’t forget to sprinkle sesame seeds for a nice finish. Enjoy your colorful and tasty Korean BBQ Chicken Bowls! To grill chicken thighs well, follow these steps. Start with a good marinade. The mix of soy sauce, sesame oil, honey, garlic, and ginger adds flavor. Let the chicken soak in the marinade for at least 30 minutes. This step is key for tender meat. When you’re ready to grill, heat your pan until it’s hot. This helps seal in the juices. Cook the chicken for 5-7 minutes on each side. Check the inside temperature; it should reach 165°F. Let the chicken rest after cooking. This helps keep it juicy. Slice it into strips for easy serving. Serving your bowls nicely makes a big difference. Use wide, shallow dishes. This gives a nice communal feel. Arrange the chicken and veggies in sections. This makes the bowl colorful and fun. Add lime wedges on the side. They bring a fresh taste to each bite. For a final touch, sprinkle sesame seeds over the top. This adds a nice crunch and looks great. You can change up flavors to suit your taste. For more spice, add chili flakes to the Gochujang cream. You can also swap out the chicken for tofu or shrimp. Both options still taste amazing. Try different grains too! Quinoa or brown rice work well in place of jasmine rice. You can add more toppings like avocado or radishes. These add creaminess and extra crunch. Mix and match to find your favorite flavors! Pro Tips Marinate Longer for More Flavor: For an even deeper flavor, marinate the chicken thighs for a few hours or overnight. This allows the marinade to penetrate the meat more thoroughly. Customize Your Veggies: Feel free to swap in your favorite vegetables or whatever you have on hand. Bell peppers, snap peas, or even avocado can add a fresh twist to your bowls. Perfect Rice Every Time: Rinse the jasmine rice under cold water until the water runs clear. This removes excess starch and helps achieve a fluffy texture. Gochujang Cream Variations: Experiment with the Gochujang cream by adding a touch of garlic powder or a splash of soy sauce for an extra layer of flavor. {{image_2}} You can easily change the protein in this bowl. Try using chicken breast for a leaner option. If you want something different, use tofu for a plant-based meal. Beef or pork also work well when marinated. Just keep the marinade time the same for best flavor. While jasmine rice is delicious, you can mix it up. Use brown rice for more fiber and nutrients. Quinoa is another great choice and adds a nutty taste. For a low-carb option, try cauliflower rice. This adds a nice crunch and keeps the dish light. Let’s add some fun toppings to your bowl. Avocado slices bring creaminess and healthy fats. Add kimchi for a spicy kick and extra texture. Fresh herbs like cilantro or mint brighten the dish. You can also sprinkle some chopped nuts for crunch and flavor. To store leftover Korean BBQ chicken bowls, first cool them down. Place the chicken and veggies in an airtight container. Keep the Gochujang cream in a separate small container. This keeps flavors fresh. You can store them in the fridge for up to three days. Make sure to consume them within this time for the best taste. When you're ready to enjoy your leftovers, take them out of the fridge. Preheat your oven to 350°F (175°C). Place the chicken and veggies on a baking sheet. Heat for about 10-15 minutes or until warm. You can also reheat them in the microwave. Cover with a damp paper towel and heat in short bursts. Stir and check the temperature until it's warm. If you want to keep your chicken bowls longer, freezing is a great choice. Pack the chicken, veggies, and rice in freezer-safe containers. Make sure to leave some space for expansion. You can freeze them for up to three months. For the Gochujang cream, freeze it in ice cube trays. This way, you can thaw just what you need later. When ready to eat, thaw in the fridge overnight and reheat as needed. If you can't find gochujang, use a mix of red pepper flakes and miso. This will give a similar heat and depth. You can also blend chili paste with a bit of honey to mimic the sweet and spicy taste. Just remember that gochujang adds unique flavor, so your dish may taste a bit different. Yes, you can make parts of this dish in advance. Marinate the chicken a day before. You can also prepare the Gochujang cream and chop the vegetables ahead of time. Just store them in airtight containers in the fridge. This will save you time on busy days. Absolutely! These bowls are great for meal prep. Cook the chicken and rice, then divide into containers with your veggies. Add the Gochujang cream right before eating for the best taste. This makes it easy to grab a healthy meal on the go. To lower the spice, use less gochujang in the cream. You can also add more sour cream to tone it down. If you want more heat, add extra gochujang or even some chili flakes to the chicken marinade. Adjust it to fit your taste! We explored a tasty chicken bowl that starts with a simple marinade. Fresh veggies and a creamy gochujang sauce add exciting flavors. I shared step-by-step instructions for marinating, grilling, and assembling. Tips for perfect grilling, presentation, and custom flavors ensure success. You can easily make this dish your own by swapping proteins or grains. Plus, knowing how to store and reheat leftovers saves time. Enjoy meal prep and share these flavors with friends. Your next meal will amaze everyone.

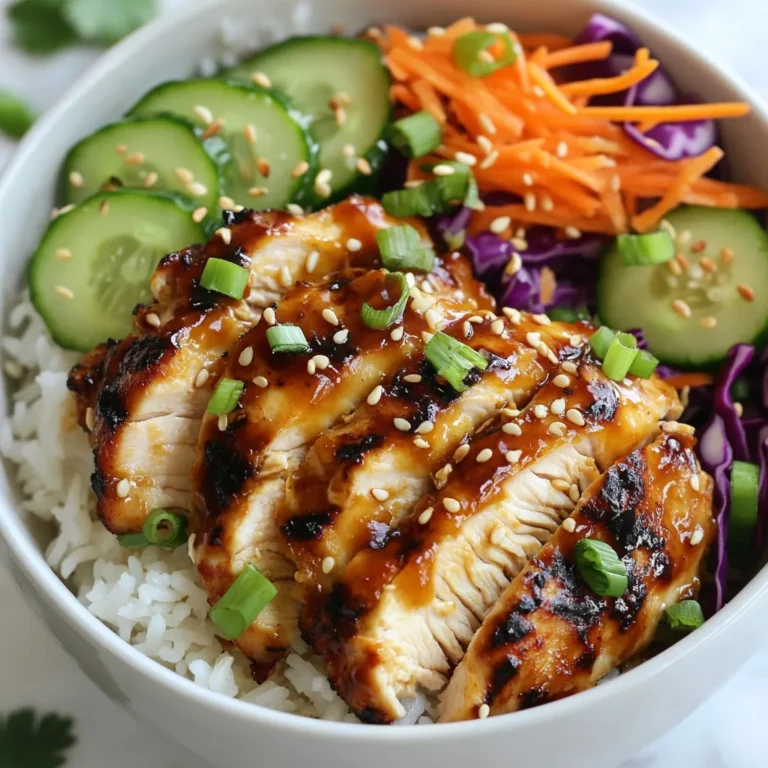
Korean BBQ Chicken Bowls with Gochujang Cream Delight

To make this Kale Caesar Salad with Crispy Chickpeas, you need: - 1 bunch of kale, stemmed and chopped - 1 can (15 oz) chickpeas, drained and rinsed - 2 tablespoons olive oil - 1/4 cup Parmesan cheese, grated (or nutritional yeast for a vegan option) - 1/4 cup tahini - 2 tablespoons lemon juice - 1 garlic clove, minced - 1 tablespoon Dijon mustard For flavor, gather these spices: - 1 teaspoon smoked paprika - 1 teaspoon garlic powder - Salt and pepper to taste - Freshly ground pepper to taste You can add these for extra crunch and taste: - Croutons for topping (optional) - Lemon wedges for garnish {{ingredient_image_1}} Start by preheating your oven to 400°F (200°C). Grab a bowl and add the drained chickpeas. Toss them with olive oil, smoked paprika, garlic powder, salt, and pepper. Mix well to coat each chickpea. Spread them in a single layer on a baking sheet. Bake for 20-25 minutes until they turn crispy and golden brown. Stir halfway for even cooking. These chickpeas add great crunch to your salad. In a large salad bowl, add the chopped kale. Sprinkle a little salt over it. Now, it's time to massage! Use your hands to gently knead the kale for about 2-3 minutes. This softens the leaves and reduces their volume. You’ll notice the color changes to a deeper green. Massaging makes the kale tender and tasty. In a separate bowl, whisk together tahini, lemon juice, minced garlic, and Dijon mustard. Add a splash of water to achieve a creamy consistency. If it's too thick, add more water until it’s just right. Taste and adjust if you need more lemon or garlic. This dressing brings the salad together with a burst of flavor. Once the chickpeas are done baking, let them cool for a minute. Pour the tahini dressing over the massaged kale. Mix well, ensuring every leaf is coated. Add the crispy chickpeas on top. Finish with grated Parmesan cheese or nutritional yeast if you prefer vegan. Sprinkle freshly ground pepper and toss in croutons if you like. Serve right away with lemon wedges on the side for an extra zesty touch. Enjoy your tasty Kale Caesar Salad! To make crispy chickpeas, start by preheating your oven to 400°F (200°C). Drain and rinse a can of chickpeas. Pat them dry with a towel. In a bowl, mix the chickpeas with olive oil, smoked paprika, garlic powder, salt, and pepper. Spread them out on a baking sheet in a single layer. Bake for 20-25 minutes. Stir them halfway through to ensure even crisping. Once golden brown, let them cool slightly. This gives a crunchy texture that adds great flavor to your salad. Massaging kale is key to a tasty salad. First, chop the kale and place it in a large bowl. Sprinkle a little salt over it. Using your hands, gently squeeze and rub the leaves for about 2-3 minutes. This softens the kale and makes it less bitter. You will notice the volume reduces. A well-massaged kale is tender, making it easier to eat and absorb the dressing. To make the dressing just right, whisk tahini, lemon juice, minced garlic, and Dijon mustard together in a bowl. If the dressing is too thick, add a splash of water. Mix until smooth. You want a creamy texture that coats the kale well. If it’s too thin, add more tahini. This lets you control the flavor and makes each bite delicious. Adjusting the dressing ensures your salad is not only tasty but also visually appealing. Pro Tips Choose Fresh Kale: Opt for vibrant, dark green kale leaves for the best flavor and texture. Avoid any yellow or wilted leaves for a fresher taste. Perfectly Crispy Chickpeas: Ensure the chickpeas are completely dry after rinsing. This will help them achieve the perfect crispiness when roasted. Massaging the Kale: Don’t skip the massaging step! This helps break down the fibers in the kale, making it more tender and easier to digest. Customize Your Dressing: Feel free to adjust the tahini dressing by adding herbs like dill or parsley, or even a touch of maple syrup for sweetness. {{image_2}} You can easily make this salad vegan by swapping Parmesan cheese for nutritional yeast. Nutritional yeast adds a cheesy flavor without dairy. It also packs in some B vitamins, making your meal more nutritious. Use a good amount for a rich taste. The tahini dressing is already vegan, so you’re all set there! If you want more protein, try adding grilled chicken or shrimp. These options add flavor and make the salad heartier. You can also use tofu or tempeh for a plant-based protein boost. Just marinate them in your favorite spices and sear them until golden. Adding these options makes your meal more filling and satisfying. Switch up the ingredients based on the season! In summer, add fresh tomatoes or cucumbers for a refreshing crunch. In fall, roasted sweet potatoes or butternut squash can add warmth and sweetness. You can also toss in fruits like apples or pears for a sweet twist. These swaps keep the salad exciting and tasty all year round. After enjoying this Kale Caesar Salad, store any leftovers in an airtight container. Keep the salad and chickpeas separate. This helps maintain freshness. You can store the salad in the fridge for up to three days. Just be aware that the kale may wilt over time. To bring back the crunch, preheat your oven to 350°F (175°C). Spread the chickpeas on a baking sheet. Heat them for about 10 minutes. This will revive their crispiness. Avoid using the microwave, as it makes them soggy. To keep your salad fresh, add the dressing just before serving. This prevents the kale from becoming soggy. If you have leftover dressing, store it in the fridge for up to a week. Always check for freshness before using it again. Yes, you can use other greens! Spinach, romaine, or arugula work well. Each green brings its own taste and texture. Mixing greens can add fun flavors to your salad. Just remember to massage them like kale for the best results. To make this salad gluten-free, skip croutons or use gluten-free bread. You can also check the Dijon mustard label. Many brands are gluten-free, but it’s good to be sure. This way, everyone can enjoy the salad without worry. Yes, you can prepare parts of the salad ahead of time. Massage the kale and store it in the fridge. Make the dressing and keep it separate. Wait to add the chickpeas and toppings until just before serving. This keeps everything fresh and crunchy. This salad pairs well with grilled chicken or shrimp for protein. You can also serve it with a side of roasted vegetables. For a lighter option, enjoy it with a soup. The salad’s crunch complements many dishes. Choose what you love! This blog post covered everything you need for a great Kale Caesar Salad. We looked at the main ingredients and spices to boost flavor. I shared tips for preparing chickpeas and massaging kale for the best texture. You can make this salad your own by adding proteins or seasonal veggies. Remember to store leftovers properly to keep your salad fresh. With these easy steps and tricks, you can create a delicious, healthy dish any time. Enjoy making this salad a new staple in your meals!

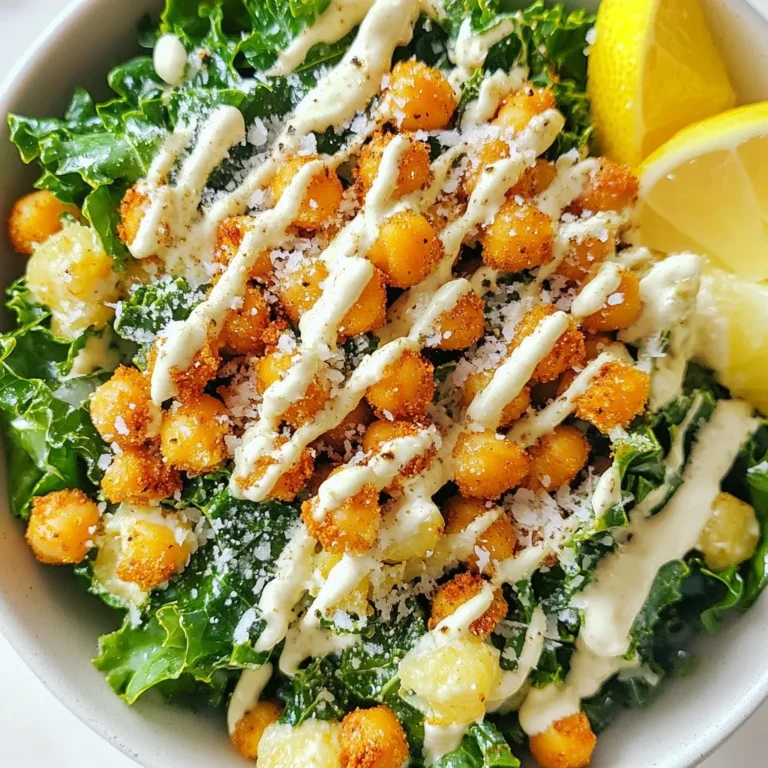
Kale Caesar Salad with Crispy Chickpeas Delight

For this dish, you need simple ingredients. Here is what to gather: - 1.5 pounds baby potatoes, halved - 4 cloves garlic, minced - 3 tablespoons olive oil These baby potatoes are perfect. Their small size ensures even cooking and a tender bite. Next, we add flavor with the right seasonings. You will need: - 2 teaspoons dried rosemary - 2 teaspoons dried thyme - 1 teaspoon paprika - Salt and pepper to taste Rosemary and thyme bring warmth and earthiness. Paprika adds a subtle kick. Garnishes can elevate your dish. Consider adding: - Fresh parsley, chopped (for garnish) Chopped parsley adds a fresh touch. It also gives a beautiful color contrast to the golden potatoes. Feel free to get creative with other garnishes too! You could try lemon wedges for a zesty twist. {{ingredient_image_1}} Start by washing 1.5 pounds of baby potatoes. Halve each potato to help them cook evenly. Place the halved potatoes in a large bowl. This step is key for good texture. Next, add 4 minced garlic cloves to the bowl. Pour in 3 tablespoons of olive oil. Sprinkle in 2 teaspoons of dried rosemary and 2 teaspoons of dried thyme. Then, add 1 teaspoon of paprika, along with salt and pepper to taste. Toss everything well until the potatoes are fully coated. This mix gives the potatoes their rich flavor. Preheat your oven to 425°F (220°C). Spread the seasoned potatoes on a baking sheet lined with parchment paper. Make sure they are in a single layer. This space helps them crisp up nicely. Roast the potatoes for 25-30 minutes. Halfway through, toss them with a spatula to ensure even browning. They are ready when they turn golden brown and crispy on the edges. After roasting, let them cool slightly and sprinkle fresh parsley on top for a bright touch. For crispy potatoes, choose the right kind. Baby potatoes work great. Cut them in half to help them cook faster. Use a good amount of olive oil. This helps them crisp up. Don’t overcrowd the baking sheet. Give them space to breathe. This way, they roast, not steam. Toss them halfway through cooking for even crispness. To boost flavor, add fresh herbs if you can. Fresh rosemary or thyme adds a nice touch. You can also sprinkle some cheese on top before serving. Parmesan works well for added taste. For a spicy kick, try red pepper flakes. You can mix flavors to match your meal. One mistake is not preheating the oven. Always make sure it’s hot before adding the potatoes. Another mistake is not seasoning enough. Don’t skimp on salt and pepper. This dish needs it to shine. Lastly, avoid using a crowded pan. If they are too close, they won’t get crispy. Give them room to roast perfectly. Pro Tips Cut Uniformly: Ensure the baby potatoes are cut into similar sizes for even cooking and roasting. Use Fresh Herbs: If available, replace dried herbs with fresh rosemary and thyme for enhanced flavor. Add Zest: For a zesty twist, add lemon juice or zest before roasting for brightness. Let Them Rest: Allow the potatoes to sit for a few minutes after roasting to develop their flavors before serving. {{image_2}} You can change the herbs to fit your taste. Try fresh herbs like basil or dill. They give a bright flavor. You can also mix dried herbs like oregano or tarragon. Each choice adds a unique touch. Experiment to find what you love best. While baby potatoes are great, you can use other kinds. Yukon Golds have a creamy texture. Red potatoes hold their shape well. Sweet potatoes will add a sweet flavor. Just cut them to the same size for even cooking. You can make this dish heartier by adding vegetables. Carrots, bell peppers, or onions roast well with potatoes. They soak up the garlic and herbs. You can also add proteins like chicken or sausage. Just ensure they are cut small for quick cooking. This way, you create a one-pan meal that is full of flavor. After enjoying your garlic herb roasted potatoes, let them cool first. Place any leftovers in an airtight container. Keep them in the fridge for up to four days. If you want to keep them longer, consider freezing. To reheat, you can use your oven or microwave. For the oven, preheat it to 350°F (175°C). Spread the potatoes on a baking sheet for even heat. Bake for about 10-15 minutes until warm. If using a microwave, place them in a safe dish and heat in short bursts. Stir in between to ensure even heating. Freezing is a great way to save your garlic herb roasted potatoes. First, let them cool completely. Then, spread them on a baking sheet in a single layer. Freeze until solid, about 2 hours. Once frozen, transfer them to a freezer bag. Remove as much air as possible. They can last for up to three months in the freezer. Yes, you can use other types of potatoes. Yukon Gold and red potatoes work well. They have a creamy texture and rich taste. Just remember to cut them into similar-sized pieces. This helps them cook evenly. You will know the potatoes are done when they are golden brown and crispy. A fork should easily pierce through them. You can also check for a nice crunch on the outside. If you toss them halfway through cooking, it helps them roast evenly. Garlic herb roasted potatoes pair well with many dishes. Try serving them with grilled chicken or fish. They also go great with a fresh salad. For a cozy meal, add them next to a warm stew. Don't forget to drizzle some extra olive oil before serving for added flavor. Garlic herb roasted potatoes are simple and delicious. We covered the key ingredients, from potatoes to seasonings and optional garnishes. I shared step-by-step instructions for perfect cooking, along with tips for crispy results. You learned variations to fit your taste and how to store leftovers. Lastly, I answered your common questions. Try this recipe and make it your own. Happy cooking!

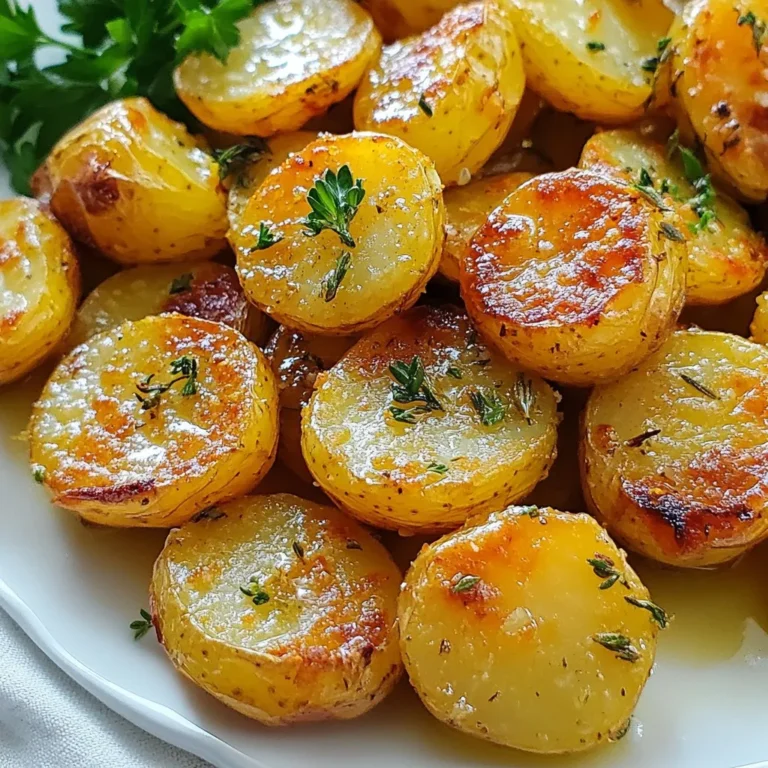
Garlic Herb Roasted Potatoes Crisp and Flavorful Dish

- 12 oz cheese tortellini (fresh or frozen) - 2 cups marinara sauce - 1 cup ricotta cheese - 1 cup shredded mozzarella cheese - 1 tablespoon olive oil - 2 cloves garlic, minced - 1 teaspoon dried basil - 1 teaspoon dried oregano - Salt and pepper to taste - Fresh basil leaves for garnish - Use any pasta you like, such as shells or penne. - For a dairy-free option, try cashew or almond cheese. - Make your marinara with fresh tomatoes, onions, and herbs. {{ingredient_image_1}} First, boil water in a large pot. Add the cheese tortellini to the boiling water. Cook it according to the package instructions until it is al dente. This means it should be firm to the bite. Drain the tortellini and set it aside in a bowl. Do not rinse it, as you want to keep the starch for better sauce adherence. In a medium pan, heat one tablespoon of olive oil over medium heat. Add two cloves of minced garlic to the pan. Sauté the garlic for about one minute until it smells great. Next, pour in two cups of marinara sauce. Add one teaspoon each of dried basil and oregano. Don’t forget to season with salt and pepper. Let this simmer for five minutes. This brings out the flavors in your sauce. In a large mixing bowl, combine the cooked tortellini and one cup of ricotta cheese. Mix well until the tortellini is well coated. In a large baking dish, spread a thin layer of the remaining marinara sauce on the bottom. Pour the tortellini mixture on top and spread it evenly. Now, sprinkle one cup of shredded mozzarella cheese and half a cup of grated Parmesan cheese over the top. Cover the baking dish with aluminum foil. Bake it in the oven at 375°F for 20 minutes. After that, remove the foil and bake for another 10 to 15 minutes. Look for the cheese to be bubbly and golden brown. Let it sit for five minutes before garnishing with fresh basil leaves. To get the best bake, focus on even cooking. Start by boiling the tortellini until it’s al dente. This means it should still have a slight bite. When you bake, cover your dish with aluminum foil for the first 20 minutes. This keeps the moisture in and helps the cheeses melt evenly. After that, remove the foil. This will let the top get nice and golden. Want to add more flavor? Try adding some veggies. Spinach or bell peppers work great. You can also mix in cooked sausage or chicken for protein. To spice up the marinara sauce, add some red pepper flakes or a splash of balsamic vinegar. This gives a nice twist to the taste. For a perfect meal, pair your baked tortellini with a fresh salad. A simple green salad with vinaigrette works well. You can also serve it with crusty bread for dipping. When it comes to presentation, serve it straight from the baking dish. This looks inviting. Offer fresh basil and extra Parmesan on the side, so guests can customize their plates. Pro Tips Use Fresh Herbs: Fresh basil or parsley can elevate the flavors of the dish. Add them just before serving for a burst of freshness. Cheese Variations: Experiment with different cheeses like fontina or gouda for a unique flavor profile. Mixing cheeses can also enhance the creaminess. Make Ahead: You can prepare the tortellini and sauce mixture ahead of time. Just assemble and refrigerate until you’re ready to bake. Perfectly Baked Cheese: For an extra crispy cheese topping, broil the dish for 1-2 minutes after baking. Just keep an eye on it to avoid burning! {{image_2}} You can mix up the cheeses in your baked tortellini. Using different types of cheese adds fun and flavor. Try adding gouda or fontina for a creamy twist. A blend of mozzarella and provolone gives a nice stretch and taste. You can also use flavored tortellini, like spinach or roasted garlic. These options bring new flavors to your dish. Adding meat can make your dish heartier. Cooked sausage adds great spice and flavor. You can also use grilled chicken for a lighter choice. If you want a meatless option, consider chickpeas or lentils. These vegetarian proteins pack a punch and keep the dish filling. Switching up the sauce can change everything. Try using pesto instead of marinara for a fresh taste. Alfredo sauce gives a rich and creamy texture. You can also add herbs like thyme or rosemary for extra flavor. Mixing in red pepper flakes adds a nice kick, while fresh herbs like parsley can brighten the dish. After you enjoy your baked tortellini, store any leftovers in the fridge. Use an airtight container to keep it fresh. Your tortellini will stay good for about 3-4 days. When you want to reheat, use the oven for the best results. Set it to 350°F (175°C). Cover the dish with foil to keep it moist. Heat for 20 minutes or until warm. You can also use the microwave, but check every minute to avoid overcooking. You can freeze baked tortellini for later. Let it cool completely first. Then, wrap it tightly in plastic wrap or foil. Place it in a freezer-safe container. It will last for up to 3 months in the freezer. To thaw, move it to the fridge overnight. When you’re ready, reheat it in the oven at 350°F (175°C). Cover with foil to keep it from drying out. Bake for about 30-40 minutes until hot. Understanding how long your baked tortellini lasts is key. When stored properly, it can stay fresh for 3-4 days in the fridge. If it sits longer, check for signs of spoilage. Look for changes in smell or color. If there’s mold or a sour scent, throw it away. Trust your senses. They help you know when your leftovers are no longer safe to eat. Yes, you can use frozen tortellini. Frozen tortellini cooks well in this recipe. Here are some tips: - Cooking Time: Frozen tortellini may need a bit more time to cook. Check the package for exact times. - No Thawing: You do not need to thaw frozen tortellini. Just add it directly to boiling water. - Texture: The texture remains great when baked. Using frozen tortellini can save time and still give you that tasty dish. Yes, you can prep this dish ahead of time. Here’s how: - Cook the Tortellini: Cook the tortellini and cool it. - Make the Sauce: Prepare the sauce and let it cool. - Assemble: Mix the tortellini, ricotta, and sauce. Place it in the baking dish. - Cover: Wrap the dish tightly with foil and store it in the fridge. When you’re ready to bake, just take it out and pop it in the oven. You may need to bake it a bit longer if it's cold. To make this dish gluten-free, follow these steps: - Use Gluten-Free Pasta: Look for gluten-free tortellini at your store. Many brands offer tasty options. - Check Sauces: Ensure the marinara sauce is gluten-free. Some brands add gluten in thickening agents. - Adjustments: You may need to adjust cooking times for gluten-free pasta. Follow the package instructions closely. With these changes, you can enjoy the same great flavors without gluten. This blog detailed how to make a delicious baked tortellini dish. We covered key ingredients like tortellini, marinara, and ricotta cheese. I shared step-by-step instructions for prepping, cooking, and baking. Tips and variations gave you options to enhance flavors and customize your meal. Whether you’re cooking for family or friends, this dish is sure to impress. Try it out and have fun with your ingredients. Enjoy the joy of cooking and creating something special!

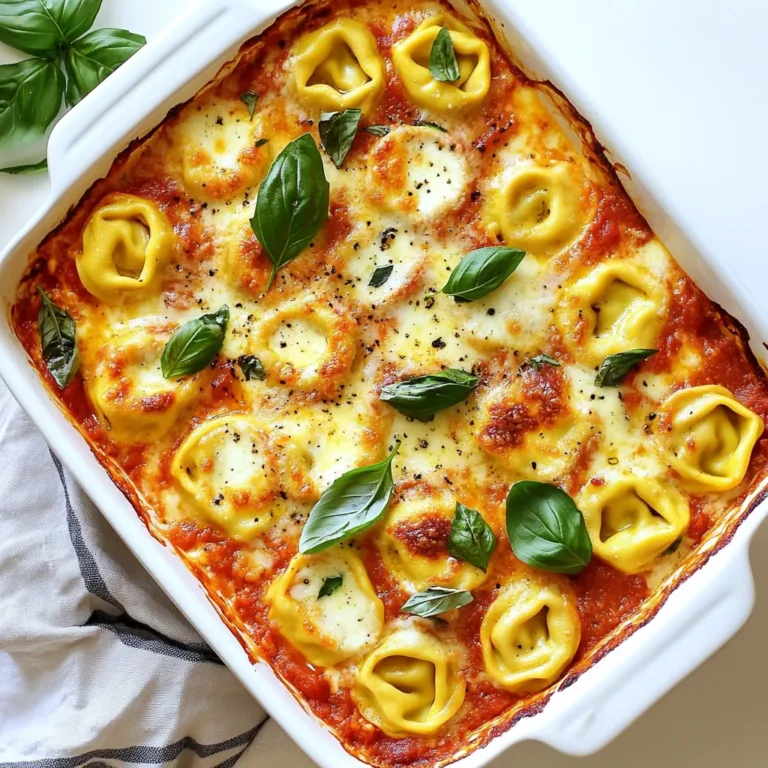
The Ultimate Baked Tortellini Tasty and Easy Recipe

This dish is simple yet packed with flavor. You will need the following items to make your spicy tahini ramen noodles: - 2 servings of ramen noodles - 3 tablespoons tahini - 2 tablespoons soy sauce - 1 tablespoon sesame oil - 1 tablespoon sriracha (adjust to taste) - 1 teaspoon ginger, grated - 2 cloves garlic, minced - 1 cup vegetable broth - 1 cup assorted vegetables (e.g., bell peppers, carrots, and snap peas) - 2 green onions, sliced - Sesame seeds, for garnish - Fresh cilantro, for garnish Each ingredient plays a key role in your dish. Ramen noodles provide the base, while tahini gives it a creamy texture. Soy sauce adds depth, and sesame oil brings a nutty flavor. Sriracha gives it a kick, and fresh veggies add crunch. Don't forget the green onions, sesame seeds, and cilantro for a fresh finish. {{ingredient_image_1}} First, bring a large pot of water to a boil. Use enough water to fully cover the noodles. Add the ramen noodles and cook them for about 4 to 5 minutes, or follow the package instructions. Once cooked, remove the pot from heat. Drain the noodles in a colander and set them aside. Now, let’s make the sauce. In a bowl, whisk together 3 tablespoons of tahini, 2 tablespoons of soy sauce, 1 tablespoon of sesame oil, 1 tablespoon of sriracha, 1 teaspoon of grated ginger, and 2 cloves of minced garlic. Mix until smooth. If the sauce is too thick, add a splash of vegetable broth to thin it out. Next, heat a teaspoon of oil in a large pan over medium heat. Once the oil is hot, add your assorted vegetables. I like bell peppers, carrots, and snap peas. Sauté the veggies for about 5 to 6 minutes. You want them tender but still crisp. Now it’s time to mix everything. Add the drained ramen noodles to the pan with the sautéed vegetables. Pour the tahini sauce over the noodles. Gently toss everything together until well coated. If the mixture looks too thick, add a bit more vegetable broth to get your desired sauce consistency. Serve it hot and enjoy! - How to adjust spiciness: Start with one tablespoon of sriracha. If you want more heat, add more sriracha a little at a time. Taste the sauce as you go. This way, you control the spice level. - Ensuring a smooth consistency: Whisk tahini with soy sauce and sesame oil. If the sauce is thick, add a splash of vegetable broth. Mix until smooth. You want a creamy texture that coats the noodles well. - Tips for maintaining crunchiness: Cook your veggies over medium heat. This keeps them crisp. Stir often and don’t overcook. Aim for about six minutes. - Best vegetable combinations: Use bell peppers, carrots, and snap peas. They add color and crunch. You can also try broccoli or bok choy for variety. - Bowl presentation tips: Use deep bowls for serving. Twirl the noodles into a nest shape. This makes them look nice. Top with green onions, sesame seeds, and cilantro for a pop of color. - Pairing with protein options: Add grilled chicken, shrimp, or tofu for protein. Cook them separately and place them on top of the noodles. This adds flavor and makes the meal heartier. Pro Tips Adjust the Spice Level: If you prefer a milder dish, start with less sriracha and gradually add more to your taste. Vegetable Variations: Feel free to mix in your favorite vegetables like broccoli, zucchini, or mushrooms for added flavor and nutrition. Perfectly Cooked Noodles: For the best texture, cook the ramen noodles just until al dente, as they will continue to soften when mixed with the sauce. Make it Vegan: Ensure your soy sauce is labeled as vegan and substitute the vegetable broth with homemade broth for a fresh taste. {{image_2}} To make this dish vegan, swap out the soy sauce for a low-sodium or gluten-free version. You can also use coconut aminos for a sweeter taste. Instead of sesame oil, try avocado oil for a light flavor. Tahini adds a creamy texture that makes this dish rich without dairy. To boost flavor, add a splash of lime juice or a sprinkle of nutritional yeast. You have many options for adding protein. Cooked chicken, tofu, or shrimp work well in this recipe. For chicken, use cooked, shredded breast meat for fast prep. If you choose tofu, press it to remove excess water, then cut it into cubes. Sauté the tofu until golden for a nice crunch. Shrimp cooks quickly and adds a sweet taste. Just sauté them for a few minutes until pink and tender. You can easily amp up the flavor with more spices or sauces. Try adding a dash of chili flakes for extra heat. You could also mix in hoisin sauce for a sweet and savory twist. For a regional flair, consider adding miso paste for depth. You can even toss in some kimchi for a Korean-inspired kick. Each twist can make your spicy tahini ramen unique! To store your spicy tahini ramen noodles, let them cool first. Place them in an airtight container. This helps keep the flavors fresh. You can store them in the fridge for up to three days. If you want to keep them longer, consider freezing them. They can last in the freezer for about a month. When you're ready to enjoy your leftovers, reheating is key. The best method is the stovetop. Add a splash of broth to a pan. Heat on medium until warm, stirring often. This keeps your noodles from getting mushy. If you use a microwave, place the noodles in a bowl with a bit of water. Cover it to trap steam and heat in short bursts, stirring in between. This way, the noodles stay nice and tasty. Yes, you can make this recipe gluten-free. Look for gluten-free ramen noodles at your store. Brands made from rice or buckwheat work well. You can also use zucchini noodles for a fresh twist. For sauces, choose gluten-free soy sauce or tamari. Both options give great flavor without gluten. You control the heat in this dish. Start with one tablespoon of sriracha for a mild kick. If you want more spice, add extra sriracha a little at a time. If sriracha is too hot, use a mild chili paste or sweet chili sauce. These options give flavor without too much heat. Absolutely! You can use any vegetables you like. Seasonal choices like broccoli, spinach, or snap peas work great. Carrots add a nice crunch, while bell peppers bring sweetness. For texture, mix soft and crunchy veggies. That way, your dish has a variety of flavors and textures. This blog post covers how to make a tasty ramen dish step by step. We discussed key ingredients like noodles, tahini, and fresh vegetables. I shared tips for cooking the noodles and whipping up the sauce. You learned how to sauté veggies and combine everything for a great meal. In conclusion, this dish is easy to adapt and store. By using different veggies or proteins, you can make it your own. Enjoy your cooking adventure and impress those you share it with!

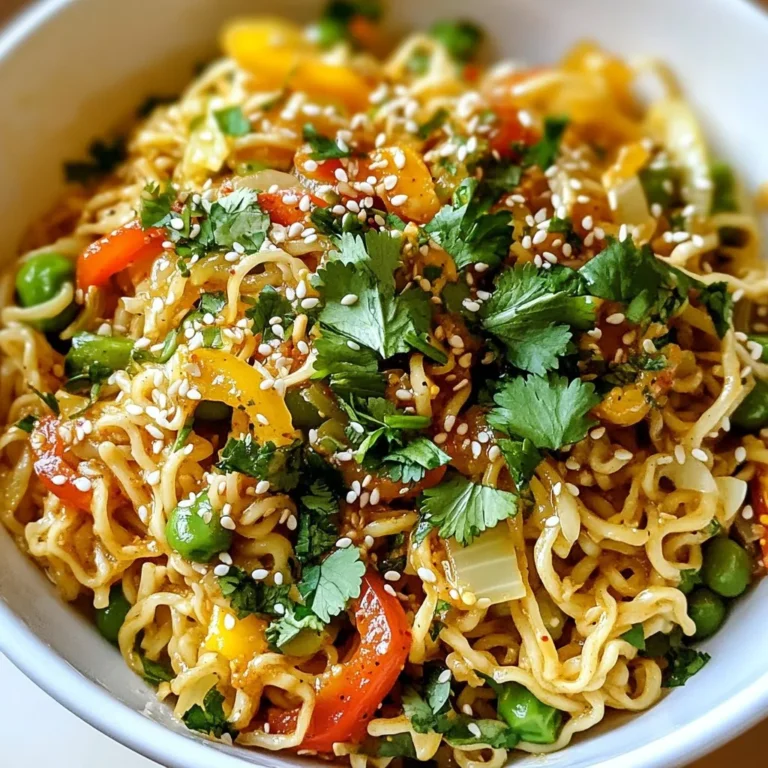
Spicy Tahini Ramen Noodles Flavorful and Easy Recipe

- 4 large bell peppers (any color) - 2 cups cooked chicken, shredded - ½ cup basil pesto - 1 cup cooked quinoa or rice - 1 cup cherry tomatoes, halved - 1 cup shredded mozzarella cheese - ½ teaspoon garlic powder - ½ teaspoon onion powder - Salt and pepper to taste - Fresh basil leaves for garnish (optional) I love using fresh bell peppers for this dish. They add color and flavor. You can use any color you like: red, yellow, green, or orange. Each has its own taste, but all work well. Next, cooked chicken is key. I usually shred rotisserie chicken for ease. It saves time and gives great flavor. Basil pesto brings a fresh taste. You can buy it or make it at home. I often make my own with fresh basil, garlic, and olive oil. Quinoa or rice adds texture. You can use either, depending on what you have. Quinoa is a great option for extra protein. Cherry tomatoes add sweetness. Halving them makes them easier to mix in. Mozzarella cheese ties it all together. It melts beautifully on top. Spices like garlic powder and onion powder enhance the flavor. Salt and pepper are essential for balance. Finally, fresh basil leaves are a nice touch for garnish. They add brightness and look great on the plate. With these ingredients, you can create a delicious meal that’s easy and fun to make! {{ingredient_image_1}} - Preheat the oven to 375°F (190°C). - Cut the tops off and remove seeds from bell peppers. Start by making your kitchen warm and inviting. Preheating the oven helps cook the peppers evenly. Next, take your bell peppers and carefully cut the tops off. Make sure to remove the seeds and any white membranes. This step is key for a tasty filling and bright color. - Combine chicken, basil pesto, quinoa or rice, cherry tomatoes, and spices. - Mix until well combined. Now it’s time for the fun part! In a big bowl, mix the shredded chicken with basil pesto. Add in the cooked quinoa or rice, halved cherry tomatoes, garlic powder, onion powder, and a pinch of salt and pepper. Stir this mixture well. You want to see all the colors blend together. - Fill each pepper with the chicken mixture. - Top with mozzarella cheese. Grab your prepared peppers and start stuffing them. Use a spoon to fill each pepper with the chicken mixture. Press down gently to pack it in. Once they are full, sprinkle mozzarella cheese on top. This will melt and create a delicious crust. - Cover and bake for 25 minutes. - Uncover and bake an additional 10-15 minutes until done. Cover your baking dish with foil and pop it in the oven. Bake for 25 minutes to let the flavors mix. After that, take off the foil and bake for another 10 to 15 minutes. You want the peppers to be tender and the cheese to be melted and bubbly. Enjoy the wonderful aroma as they cook! - Always ensure your chicken is fully cooked before mixing it into the filling. This step keeps your meal safe and tasty. - Adjust the seasoning to taste. Everyone loves food a bit different. Start with the basics and add more as needed. - I love to serve these stuffed peppers with a fresh salad or warm crusty bread. The crunch of the salad pairs well with the soft peppers. - A light white wine makes for a perfect drink option. It can elevate the meal and enhance flavors. - Allow leftovers to cool before storing. This keeps them fresh longer. - Place cooled stuffed peppers in an airtight container for the fridge. They stay tasty for up to three days. Pro Tips Choose Colorful Peppers: Using a mix of colored bell peppers not only makes your dish visually appealing but also adds a subtle variety of flavors. Cooked Quinoa or Rice: For a hearty filling, opt for cooked quinoa for added protein and fiber, or use rice for a more traditional taste. Customize Your Filling: Feel free to add any vegetables you have on hand, like spinach or zucchini, to the stuffing for extra nutrition and flavor. Make Ahead: Prepare the stuffed peppers in advance and store them in the fridge. Bake them when you're ready to serve for a quick and easy meal. {{image_2}} You can switch the chicken for turkey. Ground turkey works well and keeps it lean. You can also use plant-based protein. Try crumbled tofu or lentils for a tasty twist. Both options add great flavor and texture. Want to sneak in more veggies? Add spinach or zucchini to the mix. Spinach wilts down nicely and boosts nutrition. Zucchini adds a soft crunch and absorbs the pesto flavor well. You can even add diced carrots for extra color. If you want to try different cheeses, feta or goat cheese are great options. Feta adds a salty bite and works well with pesto. Goat cheese brings a creamy texture and tangy taste. Both can give your stuffed peppers a fresh twist. You can keep leftover pesto chicken stuffed peppers in the fridge for up to four days. Make sure to store them in an airtight container. This keeps them fresh and tasty. When you want to eat them again, just take them out and enjoy. To freeze stuffed peppers, let them cool completely first. Wrap each pepper in plastic wrap or aluminum foil. Place them in a freezer-safe bag or container. Label with the date. They will stay good for about three months in the freezer. When you're ready to cook them, take them out and thaw in the fridge overnight. To reheat stuffed peppers without drying them out, use the oven. Preheat it to 350°F (175°C). Place the peppers in a baking dish and cover with foil. Heat for about 20 minutes. If you want them hot all the way through, check with a fork. You can also reheat them in the microwave. Just cover them with a damp paper towel to keep moisture in. Heat for one to two minutes, checking to avoid overcooking. If you don't have cooked chicken, there are great options. You can use shredded turkey for a similar taste. For a vegetarian choice, try cooked lentils or chickpeas. Tofu also works well when cooked and crumbled. Each of these options gives you tasty and healthy stuffed peppers. Yes, you can prep this dish early. To do this, mix your filling and stuff the peppers. Cover them and place them in the fridge. You can do this a day in advance. When you are ready to eat, just bake them as directed. This helps save time for busy days. You will know the peppers are done when they are soft. Check for a slight bend when you press them. The cheese should be melted and bubbly on top. If you see this, your stuffed peppers are ready to enjoy! Stuffed bell peppers offer a tasty and healthy meal. We covered key ingredients, step-by-step instructions, and helpful tips. You can use different proteins, veggies, and cheeses for variety. Don’t forget to store leftovers properly! Enjoy your flavorful creation and share it with others. This dish is easy, fun, and perfect for any occasion. The possibilities are endless, so get creative in your kitchen!

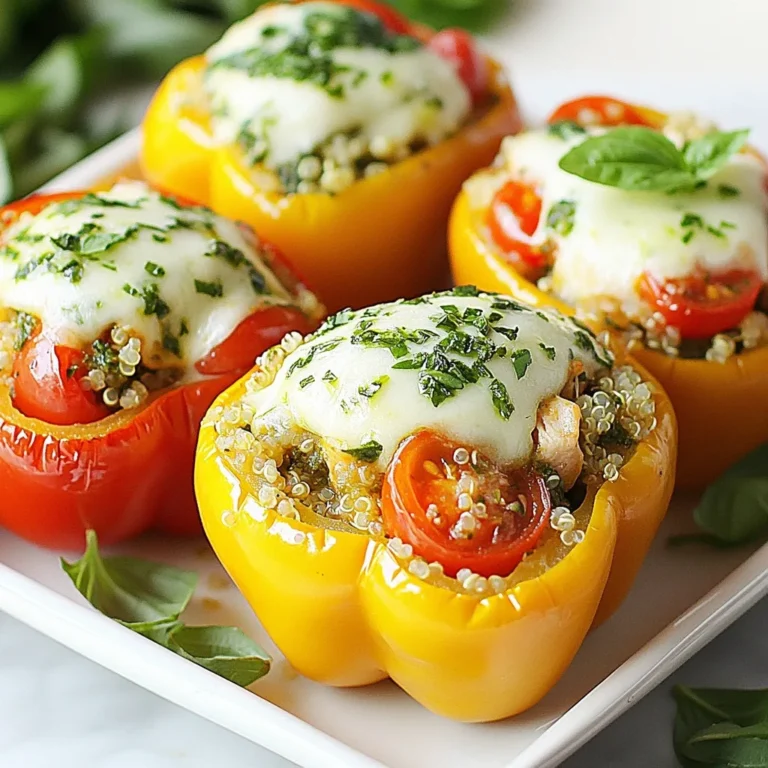
Pesto Chicken Stuffed Peppers Flavorful and Easy Meal

- 2 cups cooked chicken, shredded - 1 cup plain Greek yogurt - 1/2 cup celery, finely diced - 1/4 cup red onion, finely chopped - 1/2 cup red grapes, halved - 1/4 cup sliced almonds The base of this chicken salad comes from the cooked chicken. I prefer to use shredded chicken for a tender bite. Next, the Greek yogurt adds a creamy texture while keeping it light. For crunch, I add finely diced celery and chopped red onion. Their flavors mix well and provide a fresh taste. I also love to include halved red grapes for sweetness. They contrast nicely with the savory chicken. Lastly, sliced almonds add a lovely crunch to the dish. - 2 tablespoons fresh dill, chopped - 1 tablespoon lemon juice - 1 teaspoon garlic powder - Salt and pepper to taste To season the salad, I use fresh dill. It gives a bright herbal flavor. A splash of lemon juice brings out the other tastes. Garlic powder offers a nice depth without being too strong. I like to finish with salt and pepper, adjusting to my taste. These simple extras elevate the salad, making it fresh and flavorful. {{ingredient_image_1}} Combining the chicken and veggies Start by taking a large bowl. Add 2 cups of shredded cooked chicken. Next, toss in 1/2 cup of finely diced celery, 1/4 cup of finely chopped red onion, and 1/2 cup of halved red grapes. Don't forget to add 1/4 cup of sliced almonds for a nice crunch. Mix everything well to get a good blend of flavors. Mixing the yogurt dressing In another bowl, combine 1 cup of plain Greek yogurt with 1 tablespoon of lemon juice. Then, add 2 tablespoons of chopped fresh dill and 1 teaspoon of garlic powder. Season this mix with salt and pepper to taste. Stir until smooth and creamy. This dressing will make your salad rich and flavorful. Pouring and folding ingredients Now, pour the yogurt dressing over the chicken and veggie mix. Use a spatula to gently fold the ingredients together. Make sure every piece of chicken and veggie is coated with the dressing. This step is key to a delicious salad. Adjusting seasoning After mixing, take a moment to taste your salad. If it needs more flavor, add a bit more salt and pepper. Adjusting seasoning is important for a balanced taste. Recommended chill time Cover the bowl with plastic wrap or a lid. Place it in the refrigerator for at least 30 minutes. This chill time lets the flavors meld together, making your salad even better. Serving ideas You can serve this salad in many ways. Try it on a bed of greens for a fresh dish. You can also enjoy it in a wrap or on toasted bread. Each option is tasty and fun to eat! When it comes to chicken, the cooking method matters. You can bake, boil, or grill the chicken. I prefer boiling because it keeps the meat moist. Aim for cooked chicken that is tender and easy to shred. For shredding, use two forks or your hands. Pull apart the chicken into bite-sized pieces. This way, the chicken mixes well with the yogurt and veggies. Spices and herbs boost flavor. Try adding black pepper, paprika, or even cayenne for some heat. Fresh herbs like parsley or thyme can also add a nice touch. Serving options make this salad fun. You can serve it on greens, in a wrap, or even on toast. Each option offers a new taste experience. Creaminess is key in a chicken salad. Use full-fat Greek yogurt for the best texture. It makes the salad rich and smooth. For crunch, add nuts like sliced almonds. You can also try adding veggies like bell peppers or cucumbers. They add a fresh bite that complements the creaminess. Pro Tips Use Rotisserie Chicken: For a quick and easy option, use store-bought rotisserie chicken. This saves time and adds a delicious flavor to your salad. Add More Crunch: Feel free to add other crunchy vegetables like diced bell peppers or cucumbers to enhance the texture of your chicken salad. Herb Variations: Experiment with different herbs like parsley or chives if you want to change up the flavor profile of your salad. Chill for Flavor: Allowing the chicken salad to chill for at least an hour enhances the flavors, making it even more delicious when served. {{image_2}} You can change the protein in this salad. Swap chicken for turkey or tuna. You can even use chickpeas for a plant-based option. For fruits and veggies, try apples or cherries. You can add cucumbers or bell peppers. These options add crunch and flavor. If you want low-carb options, skip the grapes and use more veggies. You can add avocado for creaminess. It keeps the dish light and fresh. For a vegan alternative, use tofu or tempeh. Replace Greek yogurt with a plant-based yogurt. This way, you still get a creamy texture. To spice things up, add diced jalapeños or a pinch of cayenne. This gives the salad a nice kick. For a Mediterranean twist, mix in olives or feta cheese. You can also add sun-dried tomatoes. These ingredients bring bold flavors that make the dish exciting. To keep your Greek yogurt chicken salad fresh, use airtight containers. Glass or plastic containers work well. Make sure the lid seals tightly. Store the salad in the fridge right away. It stays good for about three to four days. Always check for any signs of spoilage before eating. If it smells off or looks strange, throw it away. You can freeze Greek yogurt chicken salad, but it may change texture. To freeze it, scoop the salad into a freezer-safe container. Leave some space at the top for expansion. Seal the container tightly and label it with the date. It can last in the freezer for up to three months. When you’re ready to eat, thaw it in the fridge overnight. Avoid microwaving it, as heat can change the yogurt's texture. After thawing, stir well and check the flavor. If it needs a little boost, add more seasoning before serving. Yes, you can prepare Greek yogurt chicken salad ahead of time. I suggest making it up to 24 hours before you plan to serve it. This allows the flavors to blend well. Just keep it in the fridge until you are ready to eat. If you don’t have Greek yogurt, there are good substitutes. You can use regular yogurt, sour cream, or even cottage cheese. Each option will change the taste a bit, but they still work well in this salad. The salad lasts about three to four days in the fridge. Make sure to store it in an airtight container. Check for any changes in smell or texture before eating. It’s always best to be safe! Absolutely! You can add many tasty ingredients. Try diced apples for sweetness or chopped nuts for crunch. You can also use different herbs, like parsley or basil, for a fresh twist. Use your creativity to make it your own! This blog post shared how to make Greek Yogurt Chicken Salad step-by-step. We explored key ingredients like chicken, yogurt, veggies, and tasty spices. I offered tips on picking the best chicken and enhancing flavor. You learned about tasty variations and smart storage ideas. Enjoy experimenting with these recipes and tips! This salad can fit any meal. Keep it fresh, fun, and easy. Get creative and make it your own!

Greek Yogurt Chicken Salad Fresh and Flavorful Meal

PREV 1 … 82 83 84 … 86 NEXT
tasty trail blazer

explore

DessertsDinnerAppetizersDrinks

Our Policies

  • Cookie Policy
  • Copyright Policy
  • Disclaimer
  • GDPR Policy
  • Terms Of Use
Back to Top
  • About
  • Contact Us
  • Privacy Policy
© 2026 tasty trail blazer