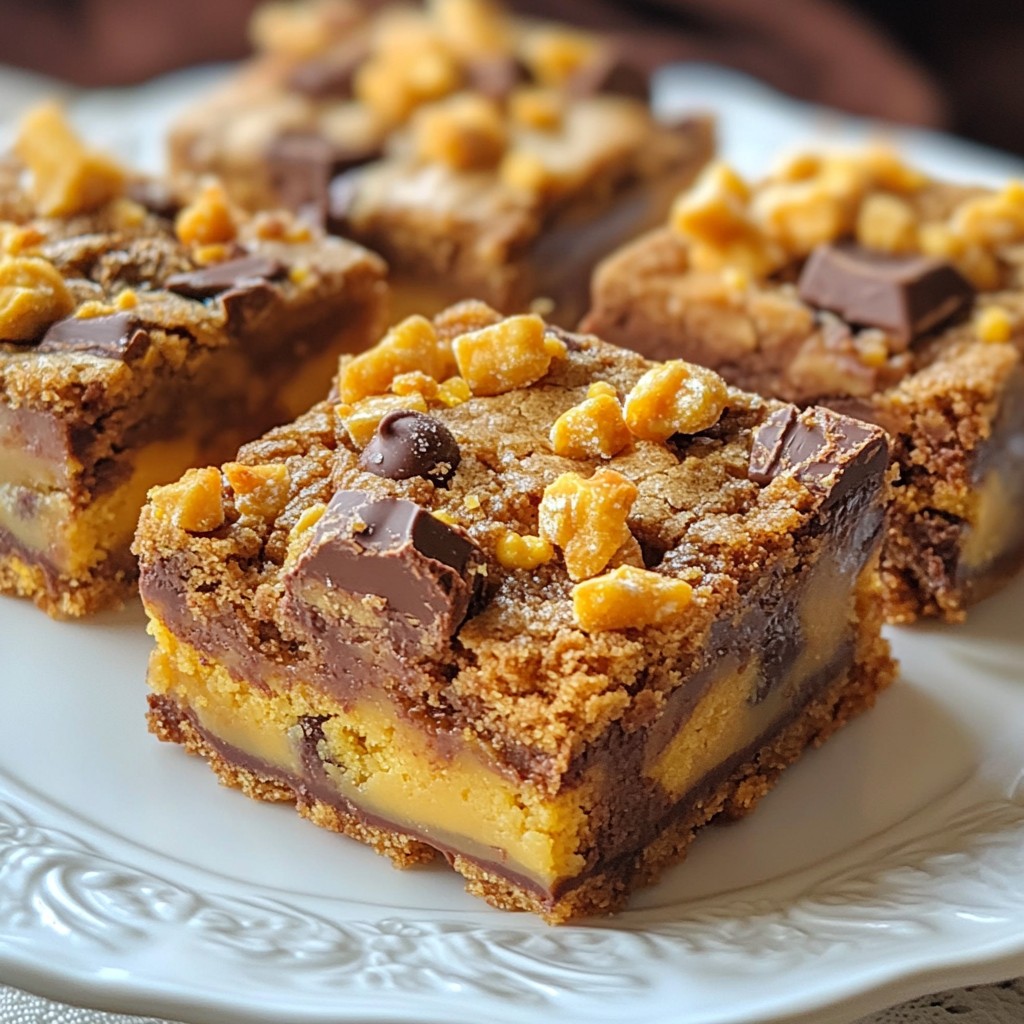
Get ready to delight your taste buds with my easy and chewy Butterfinger Cookie Bars! These treats blend the rich taste of butter, brown sugar, and crunchy Butterfinger bits into a perfect dessert. In this article, I'll guide you through simple steps and handy tips to create these bars right at home. Whether you're a baking newbie or a pro, you’ll impress everyone with this delicious recipe!
Why I Love This Recipe
- Decadent Flavor: These cookie bars combine the rich flavors of butter, brown sugar, and Butterfinger candy, creating a delightful treat that's hard to resist.
- Easy to Make: With simple ingredients and straightforward steps, this recipe is perfect for bakers of all skill levels.
- Perfect for Sharing: Cut them into squares and serve at parties, potlucks, or family gatherings—everyone will love them!
- Texture Heaven: The combination of chewy cookie bars and crunchy Butterfinger pieces gives a delightful texture in every bite.
Ingredients
List of Ingredients
- 1 cup unsalted butter, softened
- 1 cup brown sugar, packed
- 1/2 cup granulated sugar
- 2 large eggs
- 1 teaspoon vanilla extract
- 2 1/2 cups all-purpose flour
- 1 teaspoon baking soda
- 1/2 teaspoon salt
- 1 cup chopped Butterfinger candy bars (about 4 bars)
- 1 cup chocolate chips
- 1/4 cup crushed Butterfinger bars for topping
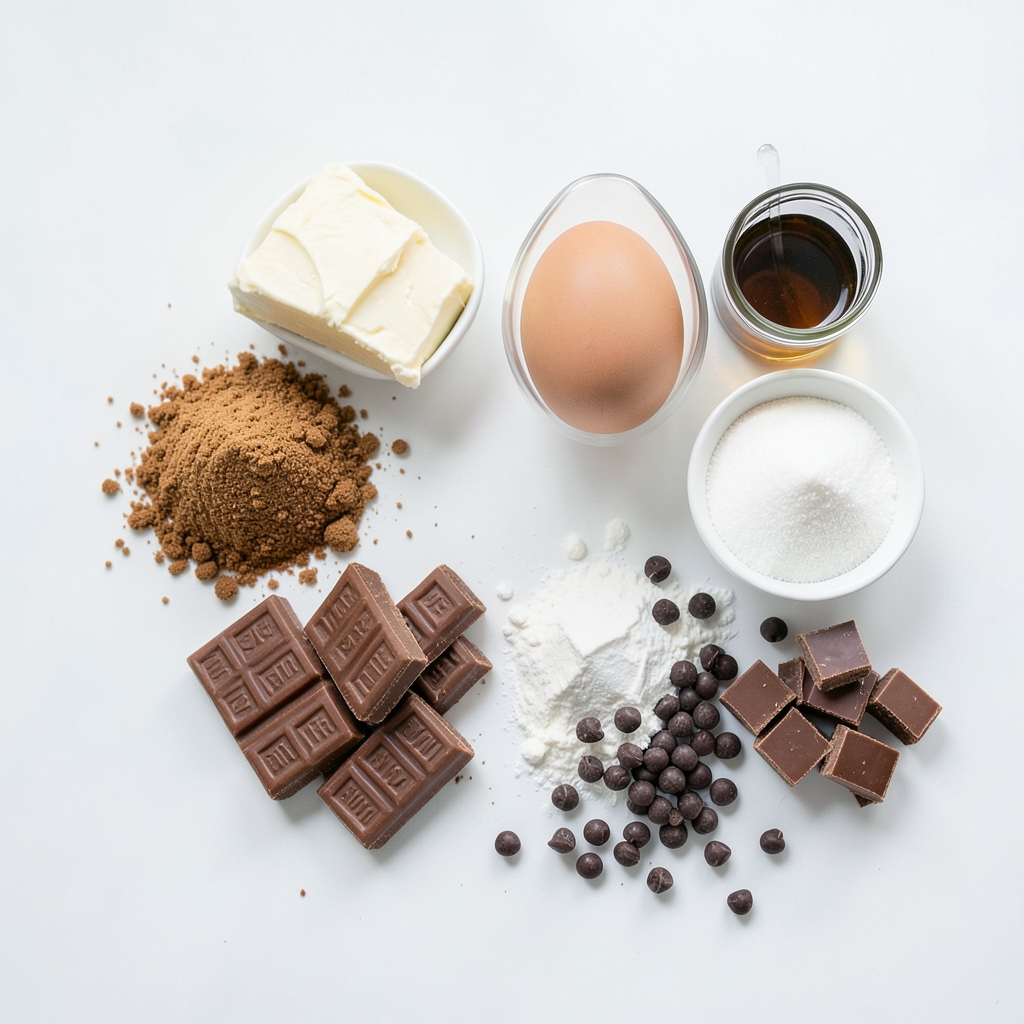
To make Butterfinger cookie bars, you need simple ingredients. Start with unsalted butter, which gives a rich taste. Brown sugar adds moisture and flavor. Granulated sugar adds sweetness. Eggs help bind the dough and keep it soft.
Vanilla extract boosts flavor. All-purpose flour is the base for the bars. Baking soda makes them rise. A touch of salt balances the sweetness. The real stars are the Butterfinger bars and chocolate chips. They create a chewy texture and sweet taste.
Finally, crushed Butterfinger bars on top add a fun crunch. This mix of flavors makes each bite special. You can’t go wrong with these ingredients!
Step-by-Step Instructions
Preheat the Oven
- Set the temperature to 350°F (175°C).
- Prepare a 9x13 inch baking dish. You can grease it or line it with parchment paper. This helps with easy removal later.
Mixing the Wet Ingredients
- In a large bowl, cream together the softened butter, brown sugar, and granulated sugar. Mix until light and fluffy, which takes about 2-3 minutes.
- Add the eggs one at a time, mixing well after each. Then, stir in the vanilla extract for extra flavor.
Combining Dry Ingredients
- In another bowl, whisk together the flour, baking soda, and salt. This helps mix the dry ingredients well.
- Gradually add the dry mix to the wet mix. Stir until just combined. Do not over-mix, or the bars will not be chewy.
Baking the Cookie Bars
- Fold in the chopped Butterfinger candy bars and chocolate chips. This makes sure every bite is sweet and crunchy.
- Spread the dough evenly in the baking dish. Smooth the top with a spatula.
- Bake in the preheated oven for 25-30 minutes. Look for golden edges and a set center. When done, remove from the oven and sprinkle crushed Butterfinger bars on top. Press them gently into the warm cookie bars.
- Allow the bars to cool for about 10-15 minutes. This makes cutting them easier. Then, transfer to a wire rack to cool completely.
Tips & Tricks
Achieving the Perfect Texture
To get your Butterfinger cookie bars just right, start with the butter. Make sure it's softened but not melted. This helps create that light and fluffy texture. When you cream the butter with the sugars, do it for about 2-3 minutes. This step is key to getting air into the batter.
Mixing is also important for chewy bars. After adding the eggs and vanilla, mix until just combined. Overmixing can lead to hard bars. Fold in the Flour mixture gently. This will keep your bars soft and chewy.
Customization Options
Feel free to play with the recipe! You can swap Butterfinger bars for other candies, like Snickers or Reese's. This gives you new flavors to try. If you want less sweetness, you can cut down on the granulated sugar. You could also use dark chocolate chips for a more intense taste.
Serving Suggestions
These cookie bars are great on their own, but you can make them even better! Serve them warm with a scoop of vanilla ice cream. Drizzle some chocolate sauce on top for extra goodness. For parties, cut the bars into fun shapes. Display them on a nice platter to impress your guests.
Pro Tips
- Use Room Temperature Butter: Ensure your butter is softened at room temperature for optimal creaming with the sugars, resulting in a lighter texture.
- Don’t Overmix the Dough: Mix the dry ingredients into the wet until just combined to keep the bars chewy and prevent them from becoming tough.
- Customize Your Toppings: Feel free to add nuts or different types of chocolate chips to the dough for additional flavor and texture variations.
- Storage Tips: Store any leftover bars in an airtight container at room temperature for up to a week for the best taste and texture.
Variations
Nutty Butterfinger Bars
You can make your Butterfinger cookie bars even better by adding nuts. Nuts like pecans or walnuts give a nice crunch. Chop them up and mix them in with the Butterfinger pieces and chocolate chips. This adds a rich flavor and texture contrast. If you want a deeper taste, try toasting the nuts before adding them. This will enhance their flavor and make your bars even more delicious.
Gluten-Free Version
If you need a gluten-free treat, you can easily change the recipe. Substitute the all-purpose flour with gluten-free flour. There are many options available, like almond flour or a gluten-free blend. This change keeps the texture chewy and tasty. Just make sure to check that your candy bars are gluten-free too. Enjoy the same great taste without gluten!
Vegan Adaptation
For a vegan option, you can replace the butter and eggs with plant-based alternatives. Use coconut oil or vegan butter for the fat. For eggs, try using flaxseed meal mixed with water or applesauce. These swaps keep your bars moist and chewy. Your vegan Butterfinger bars will still have the sweet, rich taste everyone loves. Enjoy your guilt-free treat!
Storage Info
Proper Storage Techniques
To keep your Butterfinger cookie bars fresh, store them in an airtight container. This helps keep them soft and chewy. You can choose to store them at room temperature for a few days or in the fridge for up to a week. Keeping them in the fridge may make them a bit firmer, but they still taste great.
Freezing Instructions
You can freeze your cookie bars for later enjoyment. First, let them cool completely. Then, cut them into squares or bars. Wrap each piece in plastic wrap, then place them in a freezer-safe bag. This prevents freezer burn. They will stay good for about three months.
When you want to enjoy a bar, take it out and let it thaw at room temperature. This keeps the taste and texture nice and chewy. If you're in a hurry, you can microwave them for a few seconds to warm them up. Enjoy your treat!
FAQs
Can I make Butterfinger Cookie Bars ahead of time?
Yes, you can make Butterfinger Cookie Bars ahead of time. To prepare them in advance, follow these tips:
- Bake and Cool: Bake the bars and let them cool completely.
- Store: Place them in an airtight container. They will stay fresh for up to five days.
- Refrigerate: If you want them to last longer, store them in the fridge.
- Freeze: You can also freeze the bars. Wrap them in plastic wrap, then place them in a freezer-safe bag.
How do I know when the cookie bars are done?
You can tell when the cookie bars are done by looking for these signs:
- Golden Edges: The edges should be golden brown.
- Set Center: The center should look set and not jiggly.
- Toothpick Test: Insert a toothpick. It should come out with a few moist crumbs, not wet batter.
What can I use instead of Butterfinger candy bars?
If you want to switch things up, here are some alternatives:
- Reese's Peanut Butter Cups: For a chocolate and peanut butter mix.
- Snickers Bars: For a nutty and caramel flavor.
- M&M’s: For a colorful and crunchy twist.
These options will give your cookie bars a fun new taste!
These Butterfinger cookie bars combine sweet and crunchy flavors. You learned about the ingredients, step-by-step instructions, and tips to get the best texture. I also shared fun variations and storage ideas for your treats.
With these bars, you can impress your friends and family. Enjoy making them your own with tasty toppings or add-ins. Happy baking!