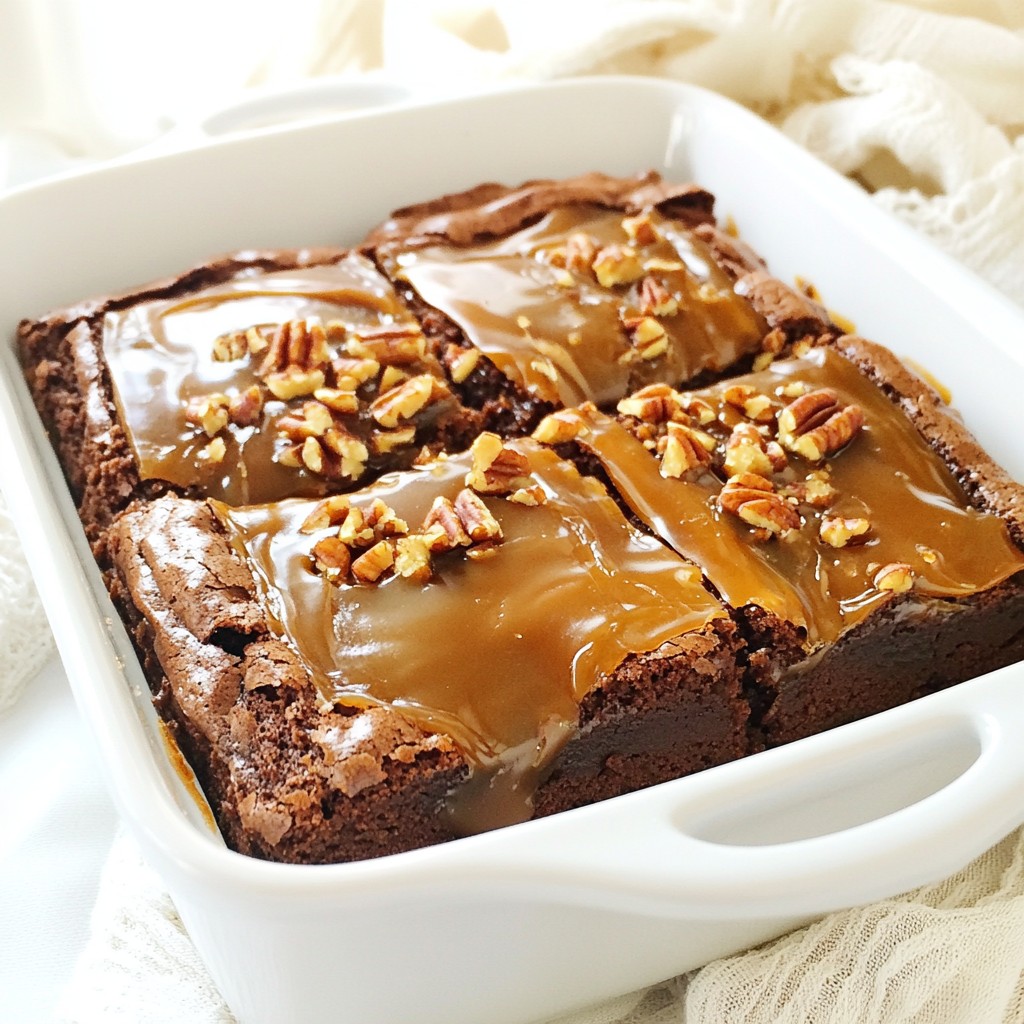
Are you ready to dive into a world of sweet indulgence? My Caramel Chocolate Turtle Brownies are the ultimate treat for chocoholics and caramel lovers alike. With a rich blend of melted chocolate, buttery caramel, and crunchy pecans, these brownies will wow your taste buds. Follow my easy step-by-step guide to make these delights, perfect for any occasion. Your dessert table won't be the same! Let’s get baking!
Why I Love This Recipe
- Decadent Flavor: The combination of rich chocolate and gooey caramel creates a dessert that's hard to resist.
- Easy to Make: With simple ingredients and straightforward steps, these brownies come together quickly.
- Perfect for Sharing: Cut into squares, these brownies are perfect for gatherings or as a treat for friends and family.
- Customizable: Feel free to add your favorite nuts or toppings to make these brownies your own!
Ingredients
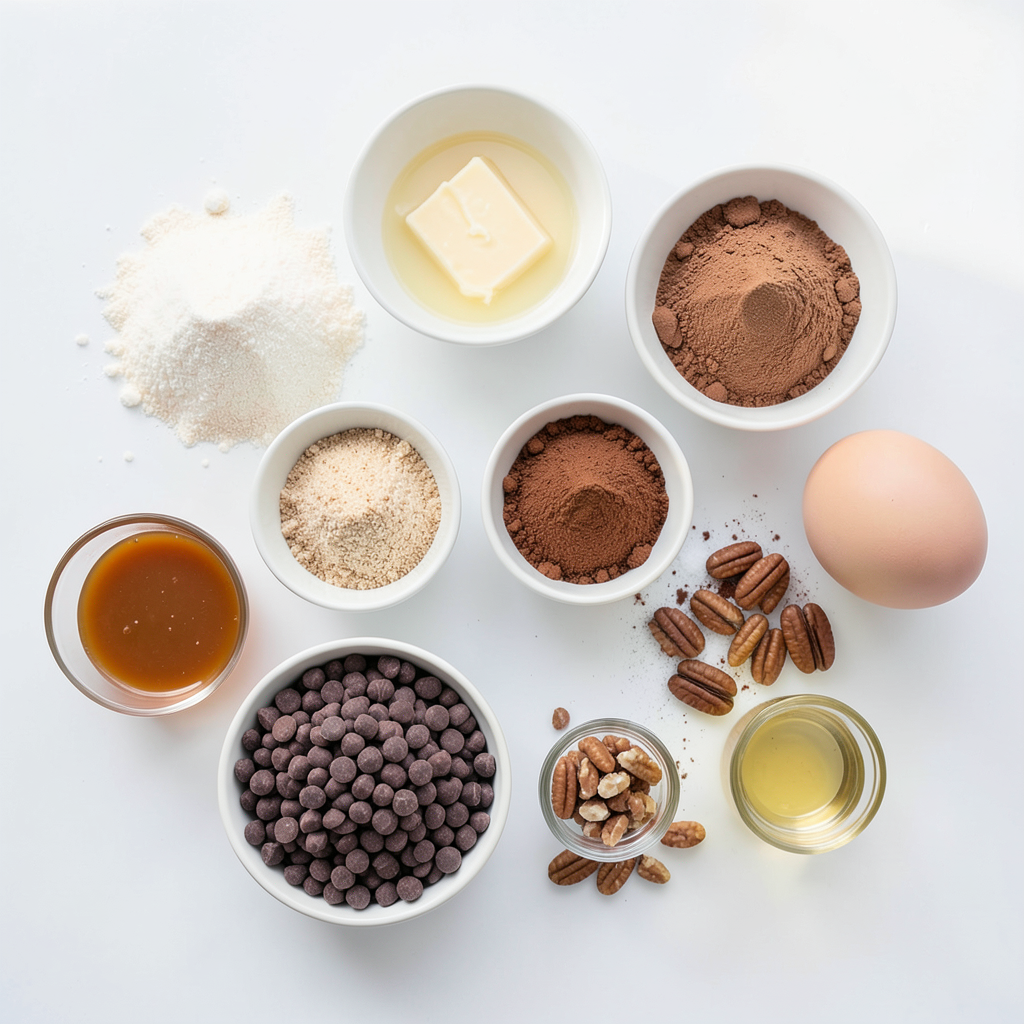
To make Caramel Chocolate Turtle Brownies, you need some simple ingredients. Here is the list of what you'll need:
- 1 cup unsalted butter, melted
- 1 1/4 cups granulated sugar
- 1 cup brown sugar, packed
- 4 large eggs
- 2 teaspoons vanilla extract
- 1 cup all-purpose flour
- 1/2 cup unsweetened cocoa powder
- 1/2 teaspoon salt
- 1 cup semi-sweet chocolate chips
- 1/2 cup pecans, chopped
- 1/2 cup caramel sauce (store-bought or homemade)
- Optional toppings: extra pecans and caramel sauce
Each ingredient plays a key role in creating rich flavors and textures. The melted butter adds moisture, while the sugars make it sweet and chewy. Eggs bind everything together, giving the brownies a nice structure.
The flour and cocoa powder give the brownies their body and chocolate flavor. The chocolate chips add delightful pockets of melted chocolate. Pecans give a nutty crunch, balancing the sweetness from the caramel sauce.
You can use store-bought caramel sauce for ease, but homemade can add a personal touch. If you want to make these brownies even more special, add extra pecans and a drizzle of caramel sauce as toppings. This will enhance the look and taste of your brownies.
Gather these ingredients, and you are ready to make a treat that is both rich and indulgent!
Step-by-Step Instructions
Preparation Steps
- Preheat your oven to 350°F (175°C). Grease a 9x13 inch baking dish or line it with parchment paper for easy removal.
- In a large bowl, combine 1 cup of melted unsalted butter, 1 1/4 cups of granulated sugar, and 1 cup of packed brown sugar. Whisk until smooth.
- Add 4 large eggs and 2 teaspoons of vanilla extract. Whisk again until everything is well mixed.
Mixing Dry Ingredients
- In another bowl, mix 1 cup of all-purpose flour, 1/2 cup of unsweetened cocoa powder, and 1/2 teaspoon of salt.
- Gradually stir this dry mix into the wet ingredients. Mix gently until just combined.
Final Assembly and Baking
- Fold in 1 cup of semi-sweet chocolate chips and 1/2 cup of chopped pecans. Make sure these are evenly distributed.
- Pour half of the brownie batter into the prepared baking dish. Spread it evenly.
- Drizzle 1/2 cup of caramel sauce over the batter. Use a knife or toothpick to swirl it gently. Be careful not to mix it too much.
- Pour the rest of the brownie batter on top of the caramel layer. Spread it evenly.
- Bake in the preheated oven for 25-30 minutes. Check with a toothpick; it should come out with a few moist crumbs.
- Remove the brownies from the oven. Let them cool in the pan for at least 10 minutes. For extra flavor, drizzle more caramel sauce and sprinkle additional pecans on top if you like.
- Once cooled, cut into squares or rectangles and serve.
Tips & Tricks
Best Practices for Perfect Brownies
- Ensuring even baking: Always preheat your oven to 350°F (175°C). This helps the brownies bake evenly. Use the center rack for the best heat distribution.
- Swirling caramel without mixing too much: After pouring the caramel sauce, use a knife or toothpick to swirl. Make sure you don’t mix it too much. You want ribbons of caramel, not a blended batter.
- Choosing the right baking dish: A 9x13 inch baking dish works best. You can use metal or glass, but metal often gives a better crust. Grease it well or use parchment paper for easy removal.
Enhancing Flavor and Texture
- Using quality chocolate chips: Choose semi-sweet chocolate chips for rich flavor. The better the chocolate, the better your brownies will taste.
- Alternatives for nuts and caramel sauce: If you want to skip pecans, try walnuts or almonds. For caramel, you can use store-bought or make your own. Both options work well in this recipe.
Pro Tips
- Use Quality Ingredients: The flavor of your brownies will significantly improve with high-quality chocolate and butter. Opt for semi-sweet chocolate chips and real butter for the best results.
- Don't Overmix: When combining the wet and dry ingredients, mix just until incorporated. Overmixing can lead to dense brownies rather than fudgy ones.
- Check for Doneness: Since every oven is different, start checking your brownies a few minutes before the recommended baking time. They should have a few moist crumbs when tested with a toothpick.
- Let Them Cool: Allowing the brownies to cool in the pan for at least 10 minutes helps them set and makes cutting easier without falling apart.
Variations
Flavor Adaptations
You can get creative with these brownies! Adding sea salt gives them a fun twist. The salt balances the sweetness of the caramel. Just sprinkle a little on top before baking.
Another tasty option is to add peanut butter or Nutella. Swirl it into the brownie batter for a rich flavor. Both options will impress your friends and family.
Dietary Adjustments
If you need gluten-free brownies, switch the all-purpose flour for a gluten-free blend. Many brands work well, so you can still enjoy this treat. Make sure to check the package for the right measurements.
For a vegan version, replace the eggs with flax eggs. Mix one tablespoon of ground flaxseed with three tablespoons of water for each egg. Use a plant-based butter and dairy-free chocolate chips. These swaps keep the brownies delicious and satisfying.
Storage Info
Short-term Storage Tips
To keep your caramel chocolate turtle brownies fresh at room temperature, place them in an airtight container. This helps to keep them moist and tasty. If you do not have a container, wrap them tightly in plastic wrap. Store them in a cool, dry place away from sunlight. This method keeps them good for up to four days.
Long-term Storage Methods
If you want to save brownies for later, freezing is a great option. First, let the brownies cool completely. Then, cut them into squares. Wrap each square in plastic wrap. Place the wrapped brownies in a freezer-safe bag or container. They will stay fresh for up to three months in the freezer.
When you're ready to enjoy a brownie, take it out of the freezer. Let it thaw in the fridge for a few hours or on the counter for about 30 minutes. To warm them up, you can microwave each piece for about 10-15 seconds. This makes them soft and gooey again. Enjoy your treat!
FAQs
Common Questions about Caramel Chocolate Turtle Brownies
Can I make these brownies ahead of time? Yes, you can make these brownies ahead of time. Bake the brownies, let them cool, and store them in an airtight container. They stay fresh for about three days at room temperature. For longer storage, freeze them for up to three months. Just thaw before serving!
What can I use instead of pecans? If you want to swap pecans, use walnuts or almonds. Both nuts add a nice crunch. You could also leave the nuts out for a nut-free version. The brownies will still taste amazing without them.
How do I know when the brownies are done baking? Check the brownies after 25 minutes. Insert a toothpick into the center. If it comes out with a few moist crumbs, they are done. If it comes out wet with batter, bake for a few more minutes.
Can I use homemade caramel sauce? Yes, homemade caramel sauce works great! It adds a personal touch to your brownies. Just make sure it is thick enough to hold its shape when drizzled.
You now have a detailed guide to making caramel chocolate turtle brownies. We covered the key ingredients, step-by-step instructions, tips for success, tasty variations, and storage tips. You can easily adapt the recipe to fit your tastes and dietary needs. Enjoy experimenting with flavors and impressing friends with these rich brownies. Soon, they will become a favorite treat. Happy baking!