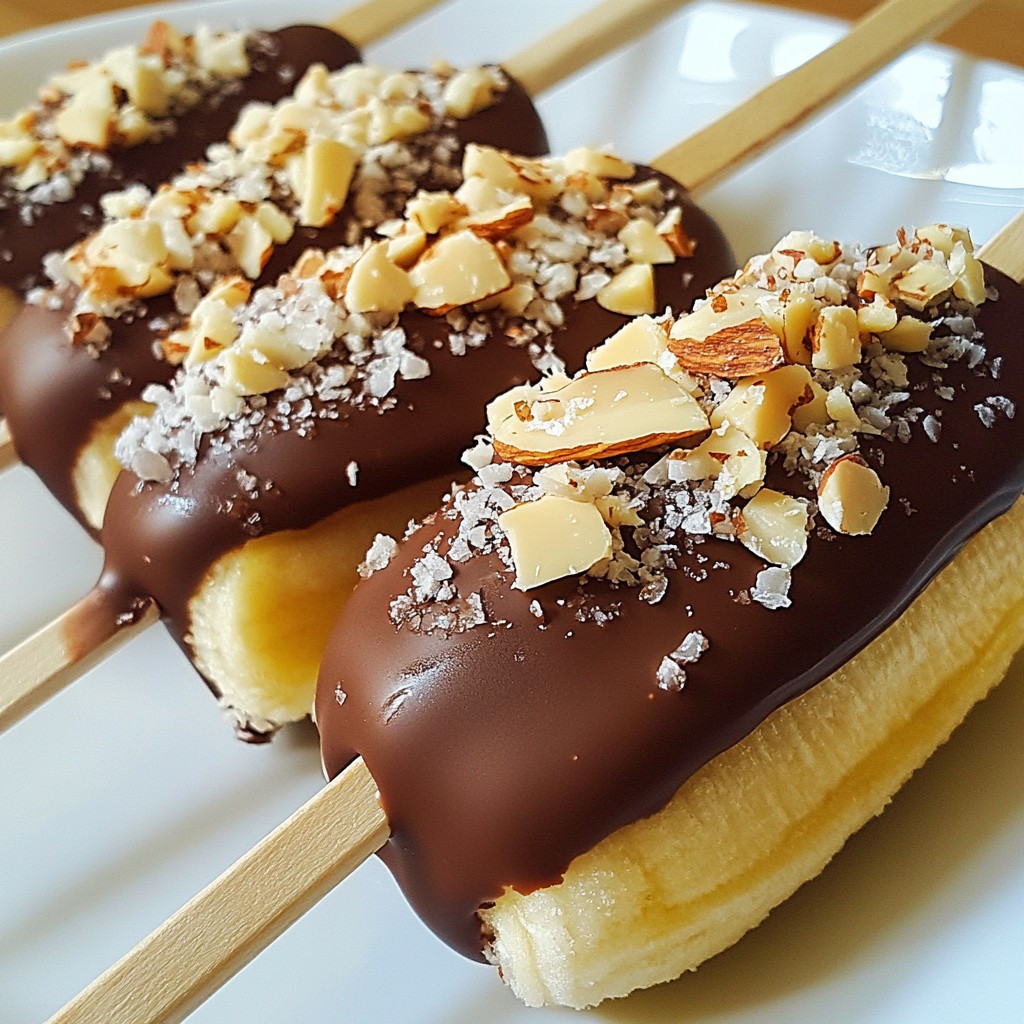
If you love sweet treats but want something easy to make, try chocolate covered banana pops! They are simple, fun, and delicious. With just a few ingredients, you can create a tasty snack that kids and adults will enjoy. I’ll guide you through the steps to make these perfect pops, plus tips and fun variations to try. Let’s dive into this delightful treat that will satisfy your sweet tooth!
Why I Love This Recipe
- Healthy Treat: These chocolate-covered banana pops are not only delicious but also a healthier alternative to regular ice cream treats.
- Easy to Make: The recipe involves simple steps and minimal ingredients, making it perfect for a quick dessert or snack.
- Customizable: You can easily customize these pops with your favorite toppings, from nuts to sprinkles, making them fun for everyone.
- Fun for Kids: This recipe is a great way to get kids involved in the kitchen, allowing them to help with dipping and decorating their own pops.
Ingredients
Complete ingredient list
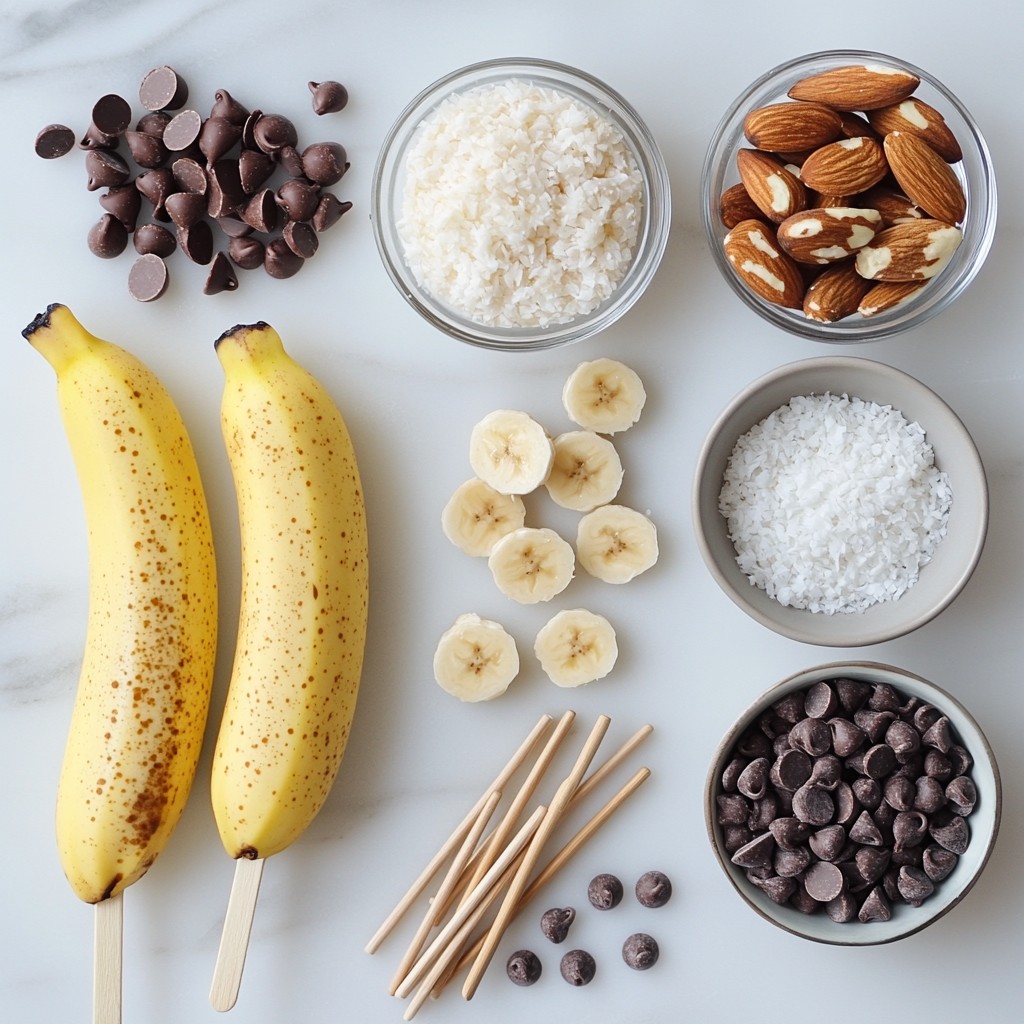
To make chocolate covered banana pops, you need a few simple items:
- 2 ripe bananas
- 1 cup dark chocolate chips
- 1 teaspoon coconut oil
- 1/4 cup crushed nuts (e.g., almonds, walnuts)
- 1/4 cup shredded coconut (unsweetened)
- 8 popsicle sticks
- Sea salt (for sprinkling, optional)
These ingredients work well together. The bananas give a sweet base. The dark chocolate adds richness. The nuts and coconut bring crunch.
Ingredient substitutions or alternatives
You can swap ingredients based on what you have:
- Bananas: Use frozen bananas for a colder treat.
- Chocolate chips: Milk chocolate or white chocolate works too.
- Coconut oil: You can use any neutral oil if you don’t have coconut oil.
- Nuts: Try different nuts like pecans or hazelnuts.
- Coconut: If you like, use crushed graham crackers instead of coconut.
These swaps keep the recipe fun and flexible. You can mix and match to fit your taste.
Optional toppings and mix-ins
If you want to get creative, consider these toppings:
- Sprinkles: Add colorful sprinkles for a party vibe.
- Dried fruit: Munch on some dried mango or raisins for a fruity twist.
- Peanut butter: Drizzle some peanut butter over the chocolate for a nutty taste.
- Sea salt: A sprinkle of sea salt enhances the sweet and salty mix.
Toppings make each banana pop unique. You can create a whole platter of flavors!
Step-by-Step Instructions
Preparing the bananas
First, peel the ripe bananas. Then, cut them in half. Take each half and insert a popsicle stick into the cut end. Make sure to push it deep enough so it holds steady. Once done, lay the banana halves on a tray lined with parchment paper. Freeze them for about 30 minutes. This step helps the bananas firm up nicely for coating.
Melting the chocolate
Next, grab a microwave-safe bowl. Add 1 cup of dark chocolate chips and 1 teaspoon of coconut oil. The coconut oil helps the chocolate melt smoothly. Microwave the bowl in 20-second intervals. Stir the chocolate between each interval. Keep going until it is completely melted and smooth. Be careful not to overheat the chocolate.
Dipping and decorating the pops
Now, take the frozen banana pops out of the freezer. Dip each banana into the melted chocolate. Make sure to cover it completely. Allow any excess chocolate to drip off. While the chocolate is still wet, sprinkle on crushed nuts or shredded coconut. You can also add a pinch of sea salt for extra flavor. Place the decorated pops back on the parchment-lined tray. Finally, return them to the freezer for about 1 hour. This helps the chocolate set perfectly. Enjoy your sweet treat!
Tips & Tricks
Best practices for melting chocolate
To melt chocolate well, use a microwave. Start with a microwave-safe bowl. Add dark chocolate chips and a teaspoon of coconut oil. This oil helps the chocolate stay smooth. Heat the chocolate in 20-second bursts. Stir after each burst. This way, you avoid burning it. When it's smooth, it’s ready for dipping!
Freezing tips for optimal firmness
Before you dip, freeze the banana pops. After cutting the bananas, place them on parchment paper. Freeze for 30 minutes. This helps them hold their shape. Firm bananas make dipping easier. If the bananas are soft, the chocolate won’t coat well. So, always freeze before dipping!
Presentation ideas for serving
Presentation makes your treats shine. Serve banana pops on a nice plate or wooden board. For a fun look, drizzle extra melted chocolate on top. You can also use colorful paper straws instead of sticks. This adds a festive touch. Everyone loves a treat that looks good!
Pro Tips
- Use Ripe Bananas: Make sure your bananas are ripe for the best flavor and sweetness. Overripe bananas work perfectly for this recipe.
- Choose Quality Chocolate: Opt for high-quality dark chocolate for a richer taste. The better the chocolate, the better the overall flavor of your pops.
- Experiment with Toppings: Feel free to mix and match toppings like mini chocolate chips, sprinkles, or dried fruits to customize your banana pops to your liking.
- Store Properly: Keep your chocolate-covered banana pops in an airtight container in the freezer to maintain their freshness and prevent freezer burn.
Variations
Different chocolate options (milk, white, etc.)
You can switch up your chocolate for fun. Dark chocolate gives a rich taste. Milk chocolate is sweeter and creamier. White chocolate adds a nice touch of sweetness. Each type will change the flavor. Try them to see which you like best.
Creative toppings to try (sprinkles, dried fruit)
Toppings make your banana pops even better. Use colorful sprinkles for a fun look. Dried fruit adds a chewy texture. You can use crushed nuts for crunch. Coconut gives a tropical feel. Let your imagination run wild with toppings!
Flavor variations (adding peanut butter, spices)
Want to spice things up? Add peanut butter for a nutty twist. A sprinkle of cinnamon or chili powder can add warmth. You can even try vanilla extract for a sweet touch. Each flavor you add will make your pops unique. Experiment and find your favorite mix!
Storage Info
How to store chocolate covered banana pops
Store your chocolate covered banana pops in an airtight container. This keeps them fresh and prevents freezer burn. You can stack them carefully, but make sure they are separated by parchment paper. This helps avoid any sticking. Place the container in the freezer.
Freezing tips for longevity
To keep your banana pops fresh for longer, freeze them right after you make them. They can last for about two months. If you want to keep them even longer, double-wrap each pop in plastic wrap before placing them in the container. This adds an extra layer of protection.
Signs of spoilage or quality loss
Check for any ice crystals on the pops. This means they have suffered freezer burn. If the chocolate looks dull or has a grayish color, it may have bloomed. This does not mean they are bad, but they may not taste as good. If the banana pops smell off or have a strange texture, it’s best to throw them away. Always trust your senses when checking for spoilage.
FAQs
Can I use frozen bananas?
Yes, you can use frozen bananas. Frozen bananas work well for this treat. They give a smooth texture when dipped in chocolate. Just remember to let them thaw a bit before dipping. This way, the chocolate sticks better to the banana.
How long do chocolate covered banana pops last?
Chocolate covered banana pops last about 1 to 2 weeks in the freezer. Keep them in an airtight container. This will help them stay fresh and tasty. If you notice any frost or ice, it's time to toss them out.
Can I make these without popsicle sticks?
Yes, you can make these without popsicle sticks. If you don't have popsicle sticks, cut the bananas into bite-sized pieces. Then, dip each piece in chocolate. You can use toothpicks for easy eating. This way, you still enjoy a fun treat!
In this article, we covered the key steps to make chocolate-covered banana pops. We discussed the right ingredients, like using ripe bananas and different chocolate options. I provided tips for melting chocolate and freezing your pops. Plus, I shared fun variations and serving ideas.
Now you know how to make these tasty treats without fuss. Enjoy experimenting with flavors and toppings. Chocolate-covered banana pops are a fun snack for everyone!