Have you ever wanted a treat that's both fun to make and delicious to eat? Look no further! Chocolate Covered Oreo Cake Pops are simple, tasty, and perfect for any occasion. With just a few basic ingredients like Oreo cookies and cream cheese, you can whip up these delightful bites in no time. Join me as we dive into this fun recipe that’s sure to impress family and friends!
Why I Love This Recipe
- Easy to Make: This recipe requires minimal ingredients and simple steps, making it perfect for bakers of all skill levels.
- Fun for Kids: Kids love helping out in the kitchen, and rolling the cake pops is a fun activity for the whole family!
- Customizable: You can easily change up the decorations with different sprinkles or even add flavorings to the chocolate coating.
- Perfect for Any Occasion: These cake pops are great for parties, celebrations, or just a sweet treat to enjoy at home.
Ingredients
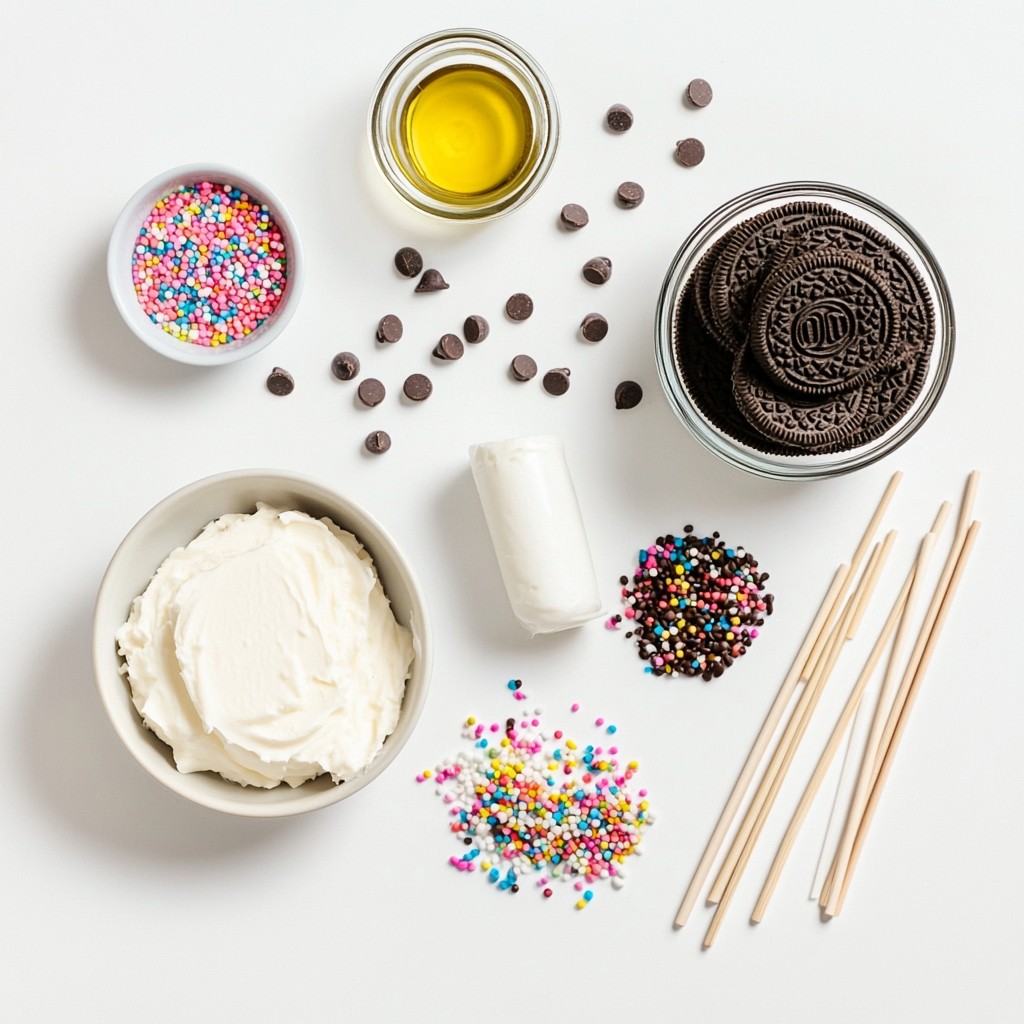
Main Ingredients
- 1 package of Oreo cookies (about 14-15 cookies)
- 4 oz cream cheese, softened
- 1 cup semi-sweet chocolate chips
These main ingredients create the base for our tasty cake pops. Oreo cookies bring a rich flavor. Cream cheese adds a creamy texture that binds everything. The semi-sweet chocolate chips give a sweet finish.
Optional Ingredients
- 1 tablespoon coconut oil (or vegetable oil)
- Sprinkles (for decoration, optional)
- Lollipop sticks
You can use coconut oil to make the chocolate smoother. Sprinkles can add fun color and style. Lollipop sticks are key for easy handling. They help you enjoy the pops without a mess.
Step-by-Step Instructions
Preparation
- Crushing the Oreo cookies: Start by crushing the Oreo cookies into fine crumbs. You can use a food processor for this. If you don't have one, place the cookies in a zip-lock bag. Use a rolling pin to crush them. Aim for a fine texture, almost like sand. This helps the cake pops hold together well.
- Mixing Oreo crumbs with cream cheese: In a large mixing bowl, combine the crushed Oreo cookies with softened cream cheese. Use a spatula or your hands to mix them well. Keep mixing until the mixture forms a dough. This dough should stick together nicely. If it is too dry, add more cream cheese.
Shaping the Cake Pops
- Rolling into balls: Once your mixture is ready, use your hands to roll it into small balls. Each ball should be about 1 inch in diameter. Place these balls on a baking sheet lined with parchment paper. This will help them not stick.
- Inserting lollipop sticks: Take a lollipop stick and insert it into the center of each ball. Be careful not to push the stick through the other side. This will help your cake pops stay intact. After inserting the sticks, place the tray in the refrigerator for about 30 minutes. This will help them set.
Coating and Decorating
- Melting chocolate with coconut oil: While the cake pops chill, melt the chocolate chips and coconut oil together. You can do this in a microwave. Heat in 30-second bursts, stirring in between, until smooth. The coconut oil helps the chocolate to coat better.
- Dipping and decorating the pops: Once the cake pops are firm, take them out of the fridge. Dip each cake pop into the melted chocolate. Make sure each pop is fully coated. Let any excess chocolate drip off. If you want, quickly add colorful sprinkles before the chocolate hardens. After decorating, place the cake pops back on the parchment-lined tray. Let them sit until the chocolate sets. You can also put them back in the fridge for faster setting.
Tips & Tricks
Perfecting the Cake Pops
To make the best cake pops, start with the right mixture. The Oreo and cream cheese blend should be thick but not too crumbly. If it's too dry, add a little more cream cheese. This helps the pops hold their shape.
When melting the chocolate, do it slowly. Use a microwave in 30-second bursts, stirring each time. This keeps the chocolate smooth and prevents burning. You can also use a double boiler for more control. Just make sure not to let any water mix with the chocolate.
Decorating Ideas
Sprinkles bring life to your cake pops! Use colorful sprinkles, chocolate jimmies, or even crushed nuts. You can mix and match to create fun looks. If you want to get creative, try a drizzle of white or colored chocolate on top. Melt some chocolate, then use a fork to drizzle it over the pops.
Serving Suggestions
Present your cake pops on a nice platter for a fun touch. You can also stick them in a piece of foam or a decorated box. This keeps them upright and makes them easy to grab. For drinks, pair them with milk, coffee, or even a sweet dessert wine. They also go great with ice cream for a delightful treat!
Pro Tips
- Crushing Oreos: For the finest crumbs, use a food processor. If you don’t have one, a zip-lock bag and a rolling pin work just as well.
- Chilling Time: Don’t skip the chilling step; it helps the cake pops maintain their shape when dipping in chocolate.
- Melting Chocolate: When melting chocolate chips, stir frequently to avoid burning and achieve a smooth consistency.
- Decorating: Apply sprinkles right after dipping while the chocolate is still wet for better adhesion.
Variations
Flavor Alterations
You can make your cake pops even more fun by changing the cookie flavor. Try using peanut butter or mint Oreos for a new twist. Each cookie adds its own taste, making every bite special. You can also use white chocolate or flavored chocolate coatings. White chocolate gives a sweet touch. Flavored chocolates, like strawberry or orange, can surprise your taste buds.
Dietary Adjustments
If you need gluten-free options, simply swap regular Oreos with gluten-free cookies. Many brands offer tasty gluten-free choices. For a vegan treat, use dairy-free cream cheese and vegan chocolate. This way, everyone can enjoy these yummy cake pops without worry.
Themed Cake Pops
Themed cake pops add joy to any event. For seasonal fun, think about decorating with colored sprinkles. Red and green for Christmas, or pastel colors for Easter are great ideas. You can also customize them for parties. Use specific colors or shapes to match your theme. Want to celebrate a birthday? Try adding colorful frosting or festive candles!
Storage Info
Storing Cake Pops
To keep your chocolate-covered Oreo cake pops fresh, store them in an airtight container. Place parchment paper between layers to prevent sticking. In the fridge, they stay good for up to one week. If you want to store them longer, put them in the freezer. They can last for about two months in the freezer.
Reheating Tips
If the chocolate on your cake pops looks dull, you can fix it. Just melt a small amount of chocolate again. Dip the pops briefly to give them a fresh coat. This helps restore that shiny look.
Transportation Tips
When taking cake pops to a party, pack them carefully. Use a sturdy container with dividers to keep them upright. If it’s hot outside, use an insulated bag to prevent melting. This way, your treats will arrive looking perfect and ready to enjoy!
FAQs
How long do chocolate-covered Oreo cake pops last?
Chocolate-covered Oreo cake pops last about one week in the refrigerator. They stay fresh when you store them in an airtight container. If you freeze them, they can last up to three months. Just remember to wrap each cake pop well to prevent freezer burn.
Can I make these cake pops in advance?
Yes, you can make these cake pops in advance! It’s best to prepare them a day or two ahead. Just follow these steps:
- Make the cake pop mixture and roll it into balls.
- Insert the sticks and chill them.
- Once set, dip them in chocolate and add sprinkles.
- Store them in the fridge until you are ready to serve.
What if I don't have lollipop sticks?
No lollipop sticks? No problem! You can use these alternatives:
- Pretzel rods make a fun, crunchy stick.
- Use toothpicks for smaller bites.
- Mini wooden skewers are also a great option.
These ideas let you enjoy the pops without missing a beat.
This blog post showed you how to make delicious chocolate-covered Oreo cake pops. We covered the main ingredients, like Oreo cookies and cream cheese. I shared tips for shaping, coating, and decorating your treats. You learned about variations, storage, and serving options too.
These cake pops are fun for any occasion. Enjoy making and sharing them with friends and family. Each bite is sure to make you smile!