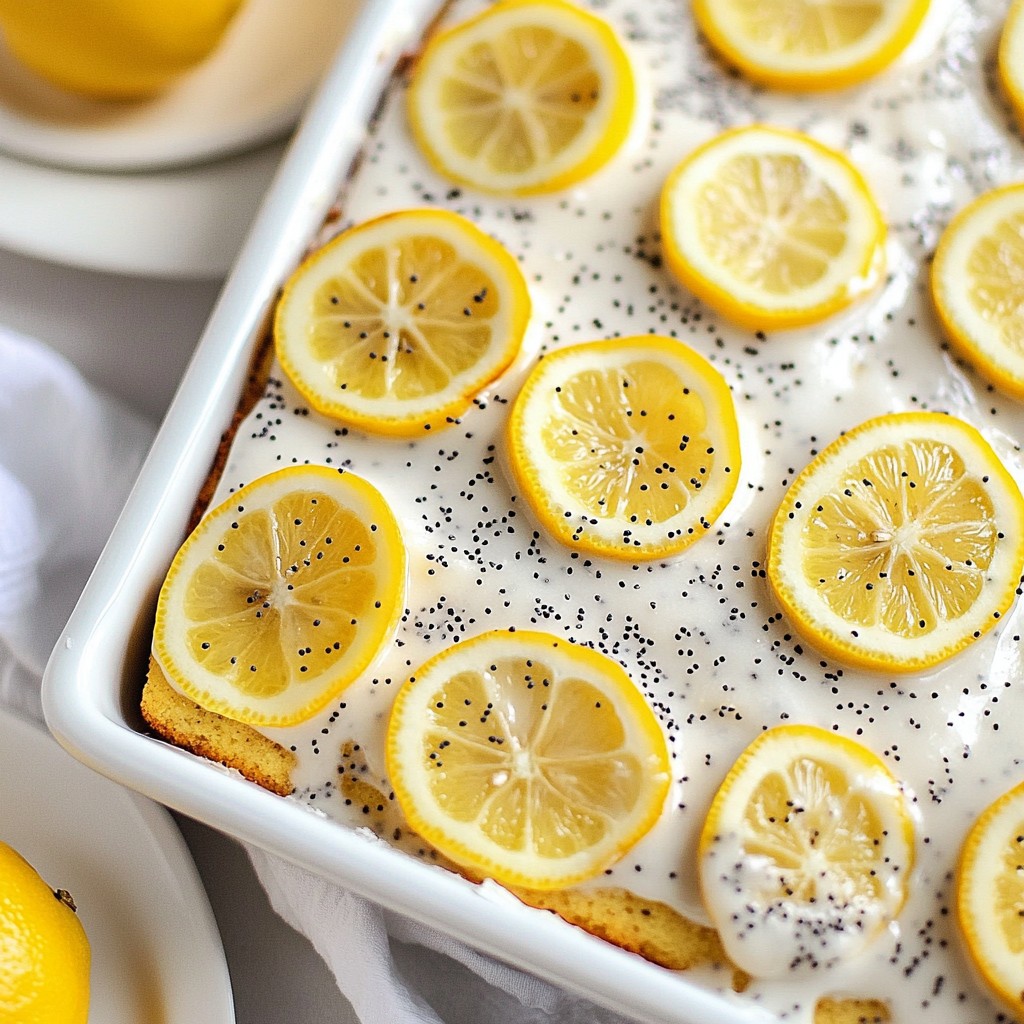
If you're searching for a bright, flavorful cake that’s simple to make, you're in the right place! This Lemon Poppy Seed Sheet Cake combines zesty lemon with nutty poppy seeds, making it a delightful dessert for any occasion. I’ll guide you through the easy steps and tips to create a cake that's moist and bursting with flavor. Ready to bake? Let’s dive into the delicious details!
Why I Love This Recipe
- Bright Flavor: This cake captures the vibrant taste of fresh lemons, making every bite a refreshing experience.
- Unique Texture: The addition of poppy seeds gives the cake a delightful crunch, adding to its overall appeal.
- Perfect for Any Occasion: Whether it’s a summer picnic or a winter gathering, this cake is versatile enough for any event.
- Simple Yet Impressive: With minimal effort, you can create a stunning dessert that looks and tastes gourmet.
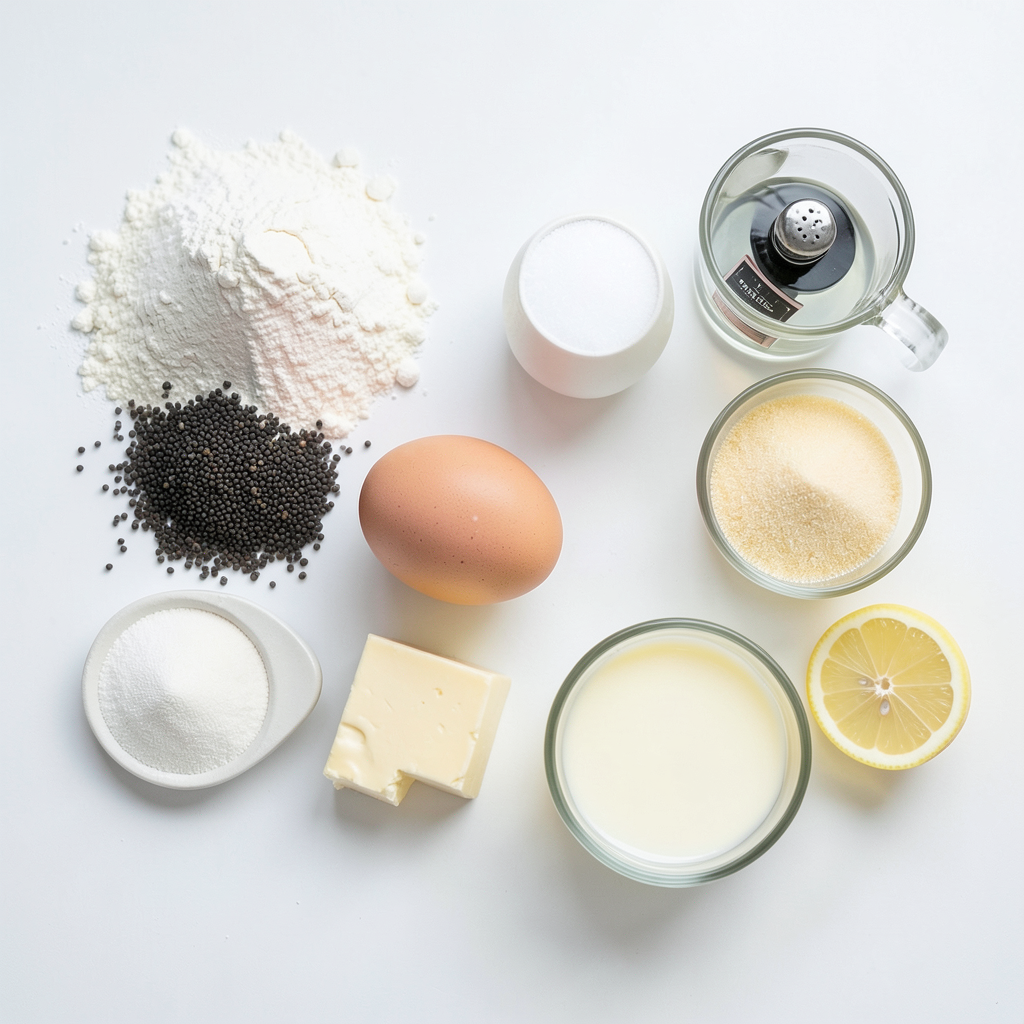
Ingredients
Detailed Ingredient List
- 2 cups all-purpose flour
- 1 tablespoon poppy seeds
- 1 teaspoon baking powder
- 1/2 teaspoon baking soda
- 1/2 teaspoon salt
- 1 cup unsalted butter, softened
- 2 cups granulated sugar
- 4 large eggs
- 2 teaspoons vanilla extract
- 1 tablespoon lemon zest
- 1/2 cup freshly squeezed lemon juice
- 1 cup whole milk
The ingredient list for Lemon Poppy Seed Sheet Cake is both simple and classic. Each item plays a key role in building flavor and texture.
Ingredient Substitutions
You can swap butter with coconut oil or vegetable oil. For sugar, use honey or maple syrup. For gluten-free options, almond flour or gluten-free all-purpose flour work great. If you need dairy-free milk, almond milk or oat milk can replace whole milk easily.
These swaps help you enjoy the cake, regardless of dietary needs. Each ingredient adds something special, so choose what works for you.
Step-by-Step Instructions
Prepping for Baking
First, preheat your oven to 350°F (175°C). This is key for even baking. Next, take a 9x13 inch sheet cake pan and grease it with cooking spray or butter. This step keeps your cake from sticking. Now, sift together the dry ingredients. In a medium bowl, mix 2 cups of all-purpose flour, 1 tablespoon of poppy seeds, 1 teaspoon of baking powder, 1/2 teaspoon of baking soda, and 1/2 teaspoon of salt. Sifting helps to create a light cake.
Mixing the Batter
In a large bowl, beat 1 cup of softened unsalted butter and 2 cups of granulated sugar. Use an electric mixer on medium speed. Mix until it looks light and fluffy, which takes about 3-4 minutes. Next, add 4 large eggs one at a time. Mix well after each egg. After that, stir in 2 teaspoons of vanilla extract, 1 tablespoon of lemon zest, and 1/2 cup of freshly squeezed lemon juice. Make sure everything is well combined.
Combining Ingredients
Now, it’s time to combine the mixtures. Gradually add the dry mix to the wet ingredients. Alternate with 1 cup of whole milk. Start and end with the flour mixture. Mix until just combined. Be careful not to overmix, as this can make the cake tough. A few lumps are okay.
Baking and Cooling
Pour the batter into your prepared pan. Smooth the top with a spatula. Place it in the oven and bake for 30-35 minutes. Check for doneness by inserting a toothpick in the center. If it comes out clean, the cake is ready. Let it cool in the pan for about 10 minutes. Then, transfer it to a wire rack to cool completely. This helps keep it fluffy and moist.
Tips & Tricks
Baking Tips for Perfection
To check for doneness, use a toothpick. Insert it in the center of the cake. If it comes out clean, the cake is ready. If it has batter on it, bake a few more minutes.
Common baking mistakes to avoid include not preheating the oven. Always preheat to 350°F. This helps the cake rise evenly. Another mistake is overmixing the batter. Mix just until combined for a light cake.
Enhancing Flavor
Using fresh ingredients makes a big difference. Fresh lemons give a bright taste. Use real lemon juice and zest for the best flavor.
To maximize lemon flavor, add extra lemon zest. You can also try a splash of lemon extract. This boost adds depth and makes each bite refreshing.
Pro Tips
- Use Fresh Lemons: For the best flavor, opt for fresh lemons instead of bottled juice. Freshly squeezed lemon juice will give your cake a bright and zesty taste.
- Don't Overmix: When combining the wet and dry ingredients, mix until just combined. Overmixing can lead to a dense cake texture.
- Room Temperature Ingredients: Ensure that your butter, eggs, and milk are at room temperature before mixing. This helps create a smooth batter and even baking.
- Cool Completely: Allow the cake to cool completely before frosting or glazing. This ensures that the toppings set properly and don't slide off the warm cake.
Variations
Flavor Add-ins
You can get creative with flavor add-ins to make your Lemon Poppy Seed Sheet Cake even better. Try using other citrus fruits like orange or lime. They add a fresh twist that brightens the cake. You can also use extracts and flavorings. Almond extract adds a nutty taste. Coconut extract brings a tropical vibe. Just a few drops can change the whole cake!
Toppings and Frostings
For a simple yet tasty touch, make a homemade lemon glaze. Mix 1 cup of powdered sugar with 2-3 tablespoons of lemon juice. Drizzle this glaze over the cooled cake for a sweet and tangy finish.
If you want more options, consider alternative toppings. Fresh berries add color and flavor. Whipped cream can make it extra special. You can also use a light cream cheese frosting for a richer taste. Each topping brings its own charm, so choose what you love!
Storage Info
Proper Storage Techniques
To keep your Lemon Poppy Seed Sheet Cake fresh, store it in an airtight container. This method helps maintain moisture and flavor. If you don’t have a container, wrap the cake in plastic wrap. Use foil for added protection.
Place the cake in a cool, dry spot. Avoid sunlight and heat. The ideal room temperature is between 68°F and 72°F. Proper storage keeps the cake fresh for up to three days. If you want to keep it longer, freezing is a great option.
Freezing the Cake
You can freeze Lemon Poppy Seed Sheet Cake for later enjoyment. First, let the cake cool completely. After it cools, cut it into slices. Wrap each slice tightly in plastic wrap. Then, place the wrapped slices in a freezer-safe bag. This method prevents freezer burn.
For best results, use the cake within three months. When you’re ready to enjoy it, remove it from the freezer. Thaw it in the fridge overnight. If you’re in a hurry, you can leave it at room temperature for a few hours. The cake will taste just as fresh as the day you baked it!
FAQs
Common Questions about Lemon Poppy Seed Cake
Can I make this cake in advance? Yes, you can make this cake ahead of time. I suggest baking it a day before your event. Once it cools, cover it well. Store it at room temperature or in the fridge. This will help the flavors blend nicely.
Is it possible to make this cake dairy-free? Absolutely! To make it dairy-free, swap the butter for a dairy-free option like coconut oil or vegan butter. Use almond milk or oat milk instead of whole milk. This keeps the cake moist and tasty.
Troubleshooting Common Issues
What to do if the cake is dense? If your cake is dense, it might be due to overmixing. Make sure to mix the batter just until it's combined. Another reason could be using too much flour. Always spoon flour into your measuring cup and level it off.
How to fix a dry cake? If your cake turns out dry, you can add a simple syrup. Mix equal parts sugar and water, then heat until the sugar dissolves. Brush this syrup over the cake to bring back moisture.
Serving Suggestions
Best pairings and accompaniments for serving This lemon poppy seed cake goes well with fresh berries or a scoop of vanilla ice cream. A dollop of whipped cream can add a nice touch too. For a twist, serve it with lemon curd on the side.
Ideal occasions for serving this cake This cake is perfect for brunch, tea parties, or summer picnics. It also shines at birthday celebrations or any festive gathering. Its bright flavor makes it a crowd-pleaser for any occasion.
This blog post covered all you need to bake a Lemon Poppy Seed Sheet Cake. We explored the ingredients, step-by-step instructions, and tips for success. Substitutions and variations let you customize the cake to fit your diet and taste. Remember, fresh ingredients and careful mixing are key. Store it properly to enjoy later, or freeze for future treats. With this guide, baking this cake will be easy and fun. Enjoy your baking journey and share your results!