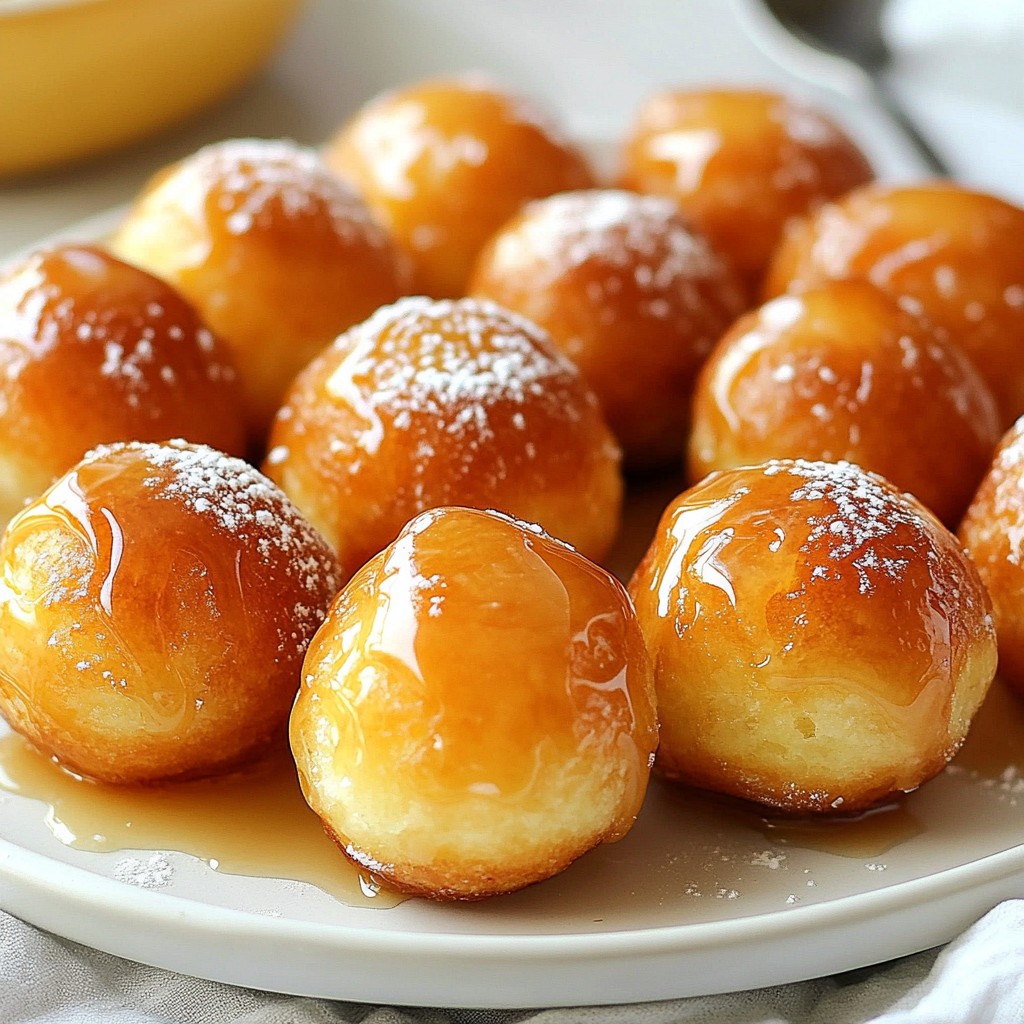
If you've ever craved a sweet, warm treat, these maple glazed donut holes are for you! They’re simple to make and taste fantastic. With just a few common ingredients like flour, sugar, and maple syrup, you can whip up a batch in no time. Perfect for breakfast or a snack, these donut holes will delight your taste buds. Let’s dive into the easy steps and tasty variations!
Why I Love This Recipe
- Quick and Easy: This recipe is perfect for those busy mornings when you want a delicious treat without spending too much time in the kitchen.
- Irresistible Flavor: The combination of maple syrup and cinnamon creates a warm, inviting flavor that’s hard to resist.
- Perfect for Sharing: With 24 bite-sized donut holes, it’s an ideal treat for gatherings, parties, or simply enjoying with family.
- Customizable: You can easily add your favorite toppings or mix-ins, like nuts or chocolate chips, to suit your taste!
Ingredients
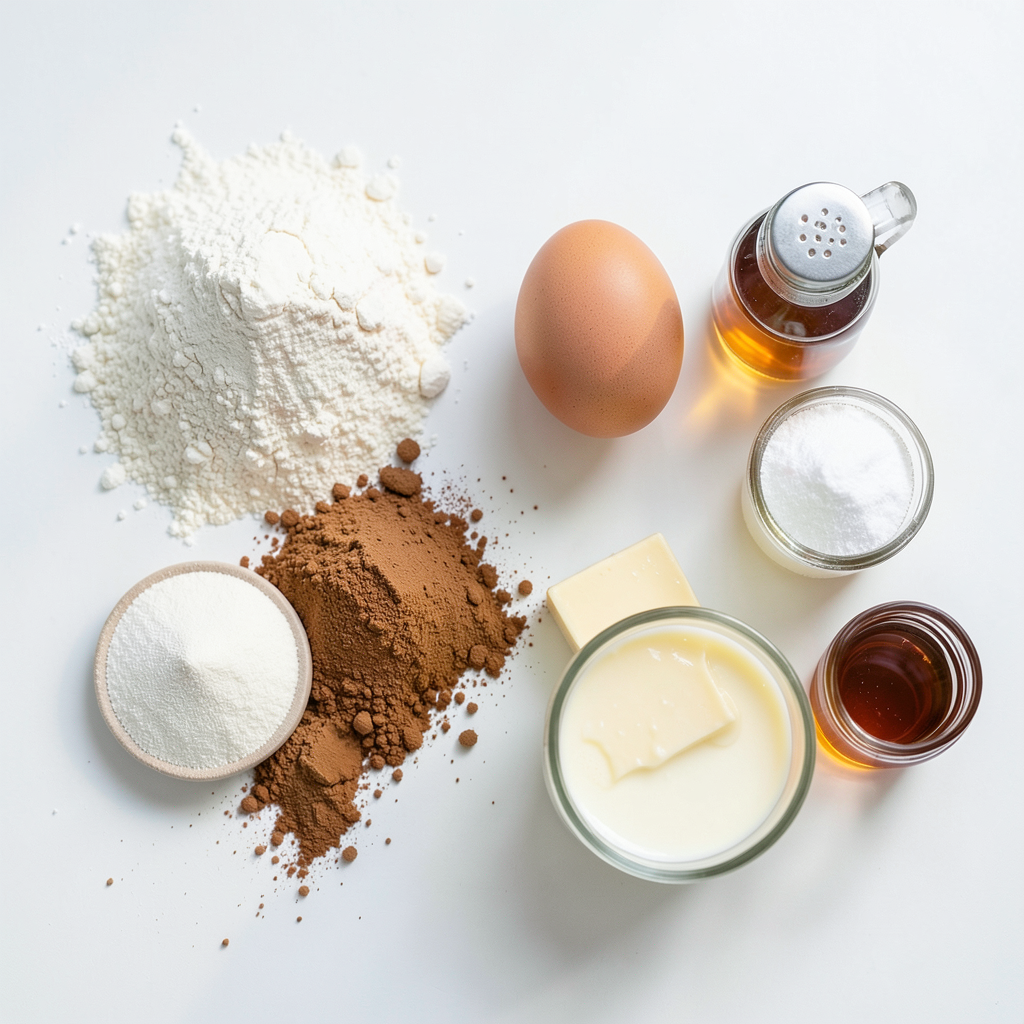
In this section, I’ll share the main ingredients needed for the maple glazed donut holes. Each ingredient plays a key role in making these treats tasty and fluffy.
- 2 cups all-purpose flour
- 1/2 cup granulated sugar
- 2 teaspoons baking powder
- 1/2 teaspoon baking soda
- 1/2 teaspoon salt
- 1/2 teaspoon ground cinnamon
- 1 large egg
- 1/2 cup buttermilk
- 1/4 cup unsalted butter, melted
- 1 teaspoon vanilla extract
- 1/2 cup maple syrup
- 1 cup powdered sugar
I use all-purpose flour as the base for a soft texture. The granulated sugar sweetens the donut holes without being too overpowering. Baking powder and baking soda help them rise, giving that lovely, fluffy bite. A pinch of salt enhances the flavor, while ground cinnamon adds warmth.
The egg and buttermilk create a rich and moist batter. I always melt unsalted butter for a smooth mix and add vanilla extract for a hint of sweetness. Lastly, the maple syrup and powdered sugar combine to make a delicious glaze that brings everything together.
These ingredients make the perfect base for a sweet treat that you can enjoy anytime!
Step-by-Step Instructions
Preparation Steps
1. Preheat your oven to 375°F (190°C). Grease a mini muffin pan lightly. You can also use paper liners for easy removal.
2. In a large bowl, mix the dry ingredients. Combine 2 cups of flour, 1/2 cup of sugar, 2 teaspoons of baking powder, 1/2 teaspoon of baking soda, 1/2 teaspoon of salt, and 1/2 teaspoon of ground cinnamon. Whisk until blended.
3. In a separate bowl, beat one large egg. Add 1/2 cup of buttermilk, 1/4 cup of melted butter, and 1 teaspoon of vanilla extract. Mix these wet ingredients until smooth.
4. Pour the wet mixture into the dry mix. Stir gently until just combined. Do not overmix; this keeps them light and fluffy.
Baking the Donut Holes
1. Use a spoon or a small ice cream scoop to fill each muffin cup about 2/3 full with the batter.
2. Bake in the oven for 10-12 minutes. The tops should be golden brown. Insert a toothpick into the center; it should come out clean.
Preparing the Maple Glaze
1. While the donut holes bake, make the glaze. In a small saucepan, combine 1/2 cup of maple syrup and 1 cup of powdered sugar over medium heat. Stir until smooth. Let it simmer for 2-3 minutes until it thickens slightly.
2. Once the donut holes are out of the oven, let them cool for 5 minutes in the pan. Then, transfer them to a wire rack.
3. Dip each donut hole into the warm maple glaze. Make sure they are fully coated. Let excess glaze drip off.
4. Place the glazed donut holes back on the wire rack. Allow them to set for a few minutes before serving.
Tips & Tricks
Perfecting the Donut Holes
To make light and fluffy donut holes, avoid overmixing the batter. When you blend the wet and dry ingredients, stop as soon as you see no dry flour. This keeps the texture airy and soft. If you mix too much, the donut holes may turn out dense.
Adjust the baking time to get the best results. Check the donut holes at 10 minutes. They should look golden and spring back when touched. If they need more time, add a minute or two. Remember, each oven is different!
Glazing Techniques
For a nice glaze, dip each donut hole fully in the warm maple glaze. This gives them an even coat and enhances flavor. Let the excess glaze drip back into the bowl for a clean finish.
If you want a thicker glaze, add more powdered sugar. For a thinner glaze, stir in a bit of milk or maple syrup. This way, you can customize the glaze to your liking.
Pro Tips
- Use Fresh Ingredients: Ensure your baking powder and baking soda are fresh for the best rise and texture in your donut holes.
- Don’t Overmix: Mix the batter just until combined to keep the donut holes light and fluffy.
- Cool Before Glazing: Let the donut holes cool slightly before dipping them in the glaze to prevent it from melting off.
- Experiment with Flavors: Try adding different spices like nutmeg or cardamom for a unique twist on the classic flavor.
Variations
Flavor Additions
You can make your donut holes even more fun! Adding spices like nutmeg or cardamom gives a warm taste. Just a pinch can change the whole flavor. If you love chocolate, mix in some mini chocolate chips. You can also add small pieces of fruit, like blueberries or raspberries, for a fresh twist. These additions can make each bite unique and tasty.
Different Glaze Options
Want to switch up the glaze? Try a chocolate glaze instead of maple. Just melt chocolate chips and add a little cream for a smooth finish. For a crunchy topping, sprinkle chopped pecans over the warm glaze. This adds a nice texture and flavor. You can mix and match these ideas for your perfect treat!
Storage Info
Storing Donut Holes
To keep your donut holes fresh, store them in an airtight container. This will help maintain their soft texture. Place a paper towel at the bottom of the container to absorb moisture. You can also put another paper towel on top before sealing. This simple trick keeps them tasty for up to two days on your counter.
If you want to save some for later, freezing is a great option. First, let the donut holes cool completely. Then, arrange them in a single layer on a baking sheet. Freeze them for about one hour. Once frozen, transfer them to a freezer bag. Be sure to remove as much air as possible. They will stay good for up to three months.
Reheating Tips
When it’s time to enjoy your frozen donut holes, reheating will bring back their fluffy goodness. You can use an oven or a microwave. If you choose the oven, preheat it to 350°F (175°C). Place the donut holes on a baking sheet and warm them for about 5-7 minutes. This will help keep them soft and delicious.
For the microwave, place a donut hole on a microwave-safe plate. Heat it for about 10-15 seconds. Check to see if it’s warm enough. If not, heat for another 5 seconds. This method is quick but may not keep the texture as nice as the oven. Enjoy your tasty treat!
FAQs
Can I make these donut holes gluten-free?
Yes, you can make these donut holes gluten-free. Use gluten-free flour instead of all-purpose flour. Look for a blend that includes xanthan gum to help with texture. You may need to adjust the liquid slightly. Start with a little less buttermilk. Add more if the batter is too thick.
What can I use instead of buttermilk?
You can use several options instead of buttermilk. One easy choice is to mix regular milk with vinegar. Use one tablespoon of vinegar for each cup of milk. Let it sit for five minutes. For a non-dairy option, try almond milk with vinegar. You can also use yogurt, thinned with a bit of water.
How long do the donut holes stay fresh?
These donut holes stay fresh for about three days at room temperature. Store them in an airtight container. If you want them to last longer, freeze them. They freeze well for up to three months. To reheat, bake them at 350°F for a few minutes. This keeps them soft and tasty.
You learned how to make delicious donut holes using simple ingredients and steps. From the right mix of flour and sugar to mastering the glaze, each part contributes to great taste. I shared tips to perfect your baking and even offered variations to try. Remember to store these treats properly for maximum freshness. With the right techniques, you can impress family and friends with your tasty creations. Enjoy your baking adventure!