No-Bake Biscoff Cookie Butter Truffles Delight

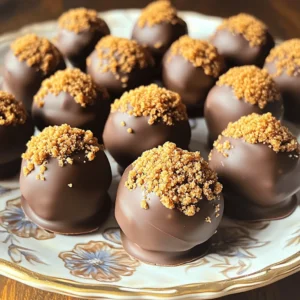
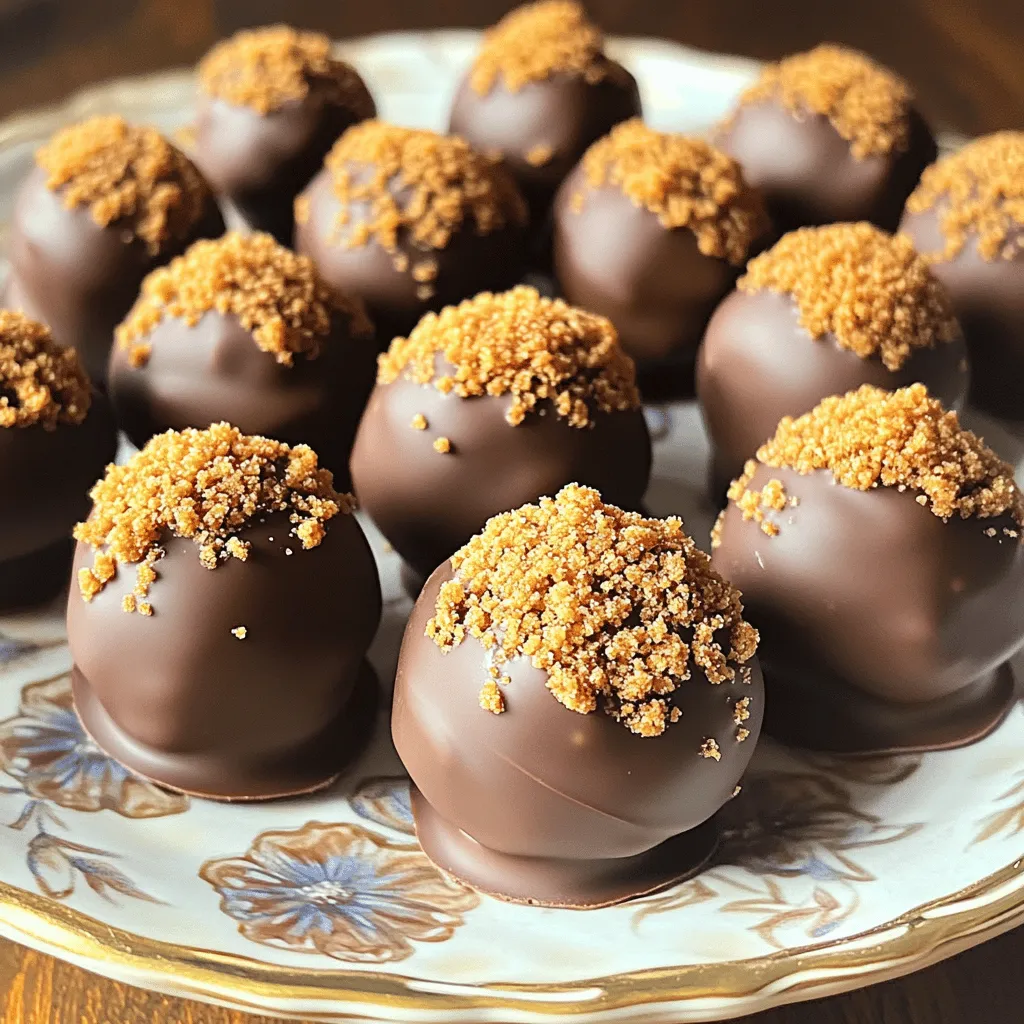
Ready to satisfy your sweet tooth with no oven required? In this post, I’ll share how to make No-Bake Biscoff Cookie Butter Truffles that are creamy, rich, and oh-so-delicious! With just a few simple ingredients and easy steps, you’ll impress your friends and family in no time. Let’s dive into this dessert adventure and whip up a batch of these delightful treats together!

To make No-Bake Biscoff Cookie Butter Truffles, you need the following ingredients: - 1 cup Biscoff cookie crumbs - 1/2 cup creamy Biscoff cookie butter - 1/4 cup cream cheese, softened - 1/2 cup powdered sugar - 1 teaspoon vanilla extract - 1/2 cup dark chocolate chips (for coating) - Additional Biscoff cookie crumbs (for rolling) These ingredients blend to create a rich and creamy treat. The Biscoff cookie crumbs add crunch and flavor. The cookie butter gives a sweet, spiced taste. Cream cheese adds creaminess, while powdered sugar sweetens the mix. You can add some fun garnishes for extra flair: - Drizzle of melted chocolate - Pinches of sea salt - Crushed nuts, like hazelnuts or almonds These garnishes enhance the truffles' look and taste. A drizzle of chocolate adds a touch of elegance. Sea salt balances the sweetness and brings out the flavors. If you lack some ingredients, don't worry! Here are some easy swaps: - Use graham cracker crumbs instead of Biscoff cookie crumbs. - Swap cream cheese with mascarpone for a lighter texture. - Replace dark chocolate with milk chocolate for a sweeter taste. These substitutions work well and still give you delicious truffles. Adjusting ingredients can make this recipe fit your pantry and taste. Start by gathering your ingredients. You need Biscoff cookie crumbs, creamy Biscoff cookie butter, softened cream cheese, powdered sugar, and vanilla extract. In a mixing bowl, combine the Biscoff cookie crumbs, cookie butter, cream cheese, powdered sugar, and vanilla. Mix them well until you have a dough-like consistency. You can use a spatula or your hands to mix. Once blended, pop the bowl in the fridge for about 30 minutes. This helps the mixture firm up, making it easier to shape. After chilling, it’s time to shape the truffles. Use a small cookie scoop or your hands to roll the mixture into bite-sized balls, about 1 inch wide. Make sure each ball is smooth and even. Place the rolled truffles on a parchment-lined baking sheet. This keeps them from sticking and makes for easy cleanup. Next, we coat the truffles in chocolate. In a microwave-safe bowl, add the dark chocolate chips. Melt the chocolate in 30-second intervals. Stir in between until it’s nice and smooth. Now, dip each truffle in the melted chocolate. Make sure they are fully coated. Use a fork to lift them out, letting any extra chocolate drip off. Roll the chocolate-covered truffles in more Biscoff cookie crumbs while the chocolate is still wet. Finally, return the truffles to the baking sheet. Refrigerate them for another 15 to 20 minutes until the chocolate sets. Enjoy the fun of making these tasty treats! To get the right texture for your truffles, mix the ingredients well. Start with the Biscoff cookie crumbs and cookie butter. Add cream cheese, powdered sugar, and vanilla extract. This blend should feel doughy. If it’s too sticky, add more cookie crumbs. If it’s too dry, mix in a bit more cookie butter. Chilling the mixture for 30 minutes helps too. It firms up, making it easy to shape. Melting chocolate can be tricky, but I have some tips. Use a microwave-safe bowl for the dark chocolate chips. Heat them in 30-second bursts. Stir after each interval. This method prevents burning. If you see some lumps, keep stirring. The heat will melt them. The chocolate should be smooth and shiny. If it gets too thick, add a tiny bit of coconut oil to loosen it up. Presentation can make your truffles pop. Use a decorative plate to show them off. Dust the top with extra cookie crumbs for a fun look. You can also place each truffle in a mini cupcake liner. This adds a touch of elegance. For a pop of color, serve with fresh berries or mint leaves. These small touches make your truffles even more inviting! {{image_2}} You can easily adapt these truffles for different diets. For gluten-free eaters, use gluten-free Biscoff cookies. If you're dairy-free, try vegan cream cheese and a dairy-free chocolate. These swaps keep the flavor strong while catering to various needs. Want to mix things up? Add a pinch of salt for contrast. You can also incorporate spices like cinnamon or nutmeg for warmth. For a fun twist, try adding a splash of espresso or coffee to enhance the chocolate flavor. The options are endless! Dark chocolate is delicious, but you can switch it up! Use milk chocolate for a sweeter taste. White chocolate works too, especially if you want a pretty contrast. You can even use colored candy melts for fun occasions. Each choice offers a unique flavor and look. Store your Biscoff cookie butter truffles in an airtight container. This keeps them fresh. I recommend placing a layer of parchment paper between each layer of truffles. This prevents sticking. Keep the container in the fridge for the best taste and texture. Avoid storing them at room temperature. Heat can melt the chocolate coating. These truffles last about one week in the fridge. The flavors develop and deepen over time. If you notice any change in texture or smell, it is best to toss them. Always check for signs of spoilage before enjoying your truffles. You can freeze these truffles for up to three months. To freeze, place them in a single layer on a baking sheet. Once frozen, transfer them to a freezer-safe bag or container. When you're ready to eat, take them out and let them thaw in the fridge. This keeps them creamy and delicious. Enjoy your sweet treat! Yes, you can make these truffles ahead of time. I often prepare them a day in advance. Once they are set, store them in an airtight container in the fridge. This way, they stay fresh and tasty. Just be sure to roll them in extra Biscoff crumbs right before serving for a great look. To keep your chocolate smooth, melt it slowly. Use a microwave and heat in 30-second bursts. Stir in between each burst until it melts completely. If you notice it thickening, you can add a tiny bit of coconut oil. This will help the chocolate stay creamy for dipping. Work quickly when coating the truffles to keep the chocolate soft. There are many fun options for decorating these truffles. You can roll them in chopped nuts or sprinkles. Drizzle melted white chocolate on top for a nice touch. You could even use edible glitter for a sparkly look. Another idea is to use crushed Biscoff cookies mixed with cocoa powder. Each option makes your truffles unique and special. You learned how to make delicious truffles using a simple process. We covered the essential ingredients, shaping techniques, and storage tips. Don’t forget the helpful advice for perfect consistency and chocolate melting. Explore variations to meet dietary needs and enhance flavors. These tricks will polish your truffle-making skills. Now, you can impress friends and family with tasty treats. Enjoy your truffle journey and have fun experimenting with your own ideas!

Ingredients

List of Required Ingredients

To make No-Bake Biscoff Cookie Butter Truffles, you need the following ingredients:

– 1 cup Biscoff cookie crumbs

– 1/2 cup creamy Biscoff cookie butter

– 1/4 cup cream cheese, softened

– 1/2 cup powdered sugar

– 1 teaspoon vanilla extract

– 1/2 cup dark chocolate chips (for coating)

– Additional Biscoff cookie crumbs (for rolling)

These ingredients blend to create a rich and creamy treat. The Biscoff cookie crumbs add crunch and flavor. The cookie butter gives a sweet, spiced taste. Cream cheese adds creaminess, while powdered sugar sweetens the mix.

Optional Garnishes

You can add some fun garnishes for extra flair:

– Drizzle of melted chocolate

– Pinches of sea salt

– Crushed nuts, like hazelnuts or almonds

These garnishes enhance the truffles’ look and taste. A drizzle of chocolate adds a touch of elegance. Sea salt balances the sweetness and brings out the flavors.

Ingredient Substitutions

If you lack some ingredients, don’t worry! Here are some easy swaps:

– Use graham cracker crumbs instead of Biscoff cookie crumbs.

– Swap cream cheese with mascarpone for a lighter texture.

– Replace dark chocolate with milk chocolate for a sweeter taste.

These substitutions work well and still give you delicious truffles. Adjusting ingredients can make this recipe fit your pantry and taste.

Step-by-Step Instructions

Preparation of the Truffle Mixture

Start by gathering your ingredients. You need Biscoff cookie crumbs, creamy Biscoff cookie butter, softened cream cheese, powdered sugar, and vanilla extract. In a mixing bowl, combine the Biscoff cookie crumbs, cookie butter, cream cheese, powdered sugar, and vanilla.

Mix them well until you have a dough-like consistency. You can use a spatula or your hands to mix. Once blended, pop the bowl in the fridge for about 30 minutes. This helps the mixture firm up, making it easier to shape.

Shaping the Truffles

After chilling, it’s time to shape the truffles. Use a small cookie scoop or your hands to roll the mixture into bite-sized balls, about 1 inch wide. Make sure each ball is smooth and even.

Place the rolled truffles on a parchment-lined baking sheet. This keeps them from sticking and makes for easy cleanup.

Coating the Truffles in Chocolate

Next, we coat the truffles in chocolate. In a microwave-safe bowl, add the dark chocolate chips. Melt the chocolate in 30-second intervals. Stir in between until it’s nice and smooth.

Now, dip each truffle in the melted chocolate. Make sure they are fully coated. Use a fork to lift them out, letting any extra chocolate drip off. Roll the chocolate-covered truffles in more Biscoff cookie crumbs while the chocolate is still wet.

Finally, return the truffles to the baking sheet. Refrigerate them for another 15 to 20 minutes until the chocolate sets. Enjoy the fun of making these tasty treats!

Tips & Tricks

How to Achieve the Perfect Consistency

To get the right texture for your truffles, mix the ingredients well. Start with the Biscoff cookie crumbs and cookie butter. Add cream cheese, powdered sugar, and vanilla extract. This blend should feel doughy. If it’s too sticky, add more cookie crumbs. If it’s too dry, mix in a bit more cookie butter. Chilling the mixture for 30 minutes helps too. It firms up, making it easy to shape.

Best Practices for Melting Chocolate

Melting chocolate can be tricky, but I have some tips. Use a microwave-safe bowl for the dark chocolate chips. Heat them in 30-second bursts. Stir after each interval. This method prevents burning. If you see some lumps, keep stirring. The heat will melt them. The chocolate should be smooth and shiny. If it gets too thick, add a tiny bit of coconut oil to loosen it up.

Presentation Ideas for Serving

Presentation can make your truffles pop. Use a decorative plate to show them off. Dust the top with extra cookie crumbs for a fun look. You can also place each truffle in a mini cupcake liner. This adds a touch of elegance. For a pop of color, serve with fresh berries or mint leaves. These small touches make your truffles even more inviting!

Variations

Adjusting for Different Dietary Needs

You can easily adapt these truffles for different diets. For gluten-free eaters, use gluten-free Biscoff cookies. If you’re dairy-free, try vegan cream cheese and a dairy-free chocolate. These swaps keep the flavor strong while catering to various needs.

Flavor Add-ins and Enhancements

Want to mix things up? Add a pinch of salt for contrast. You can also incorporate spices like cinnamon or nutmeg for warmth. For a fun twist, try adding a splash of espresso or coffee to enhance the chocolate flavor. The options are endless!

Using Alternative Chocolate Coatings

Dark chocolate is delicious, but you can switch it up! Use milk chocolate for a sweeter taste. White chocolate works too, especially if you want a pretty contrast. You can even use colored candy melts for fun occasions. Each choice offers a unique flavor and look.

Storage Info

Best Practices for Storage

Store your Biscoff cookie butter truffles in an airtight container. This keeps them fresh. I recommend placing a layer of parchment paper between each layer of truffles. This prevents sticking. Keep the container in the fridge for the best taste and texture. Avoid storing them at room temperature. Heat can melt the chocolate coating.

Shelf Life of Truffles

These truffles last about one week in the fridge. The flavors develop and deepen over time. If you notice any change in texture or smell, it is best to toss them. Always check for signs of spoilage before enjoying your truffles.

Freezing and Thawing Instructions

You can freeze these truffles for up to three months. To freeze, place them in a single layer on a baking sheet. Once frozen, transfer them to a freezer-safe bag or container. When you’re ready to eat, take them out and let them thaw in the fridge. This keeps them creamy and delicious. Enjoy your sweet treat!

FAQs

Can I make these truffles ahead of time?

Yes, you can make these truffles ahead of time. I often prepare them a day in advance. Once they are set, store them in an airtight container in the fridge. This way, they stay fresh and tasty. Just be sure to roll them in extra Biscoff crumbs right before serving for a great look.

How do I prevent the chocolate from hardening too quickly?

To keep your chocolate smooth, melt it slowly. Use a microwave and heat in 30-second bursts. Stir in between each burst until it melts completely. If you notice it thickening, you can add a tiny bit of coconut oil. This will help the chocolate stay creamy for dipping. Work quickly when coating the truffles to keep the chocolate soft.

What are some creative ways to decorate these truffles?

There are many fun options for decorating these truffles. You can roll them in chopped nuts or sprinkles. Drizzle melted white chocolate on top for a nice touch. You could even use edible glitter for a sparkly look. Another idea is to use crushed Biscoff cookies mixed with cocoa powder. Each option makes your truffles unique and special.

You learned how to make delicious truffles using a simple process. We covered the essential ingredients, shaping techniques, and storage tips. Don’t forget the helpful advice for perfect consistency and chocolate melting. Explore variations to meet dietary needs and enhance flavors. These tricks will polish your truffle-making skills. Now, you can impress friends and family with tasty treats. Enjoy your truffle journey and have fun experimenting with your own ideas!

To make No-Bake Biscoff Cookie Butter Truffles, you need the following ingredients: - 1 cup Biscoff cookie crumbs - 1/2 cup creamy Biscoff cookie butter - 1/4 cup cream cheese, softened - 1/2 cup powdered sugar - 1 teaspoon vanilla extract - 1/2 cup dark chocolate chips (for coating) - Additional Biscoff cookie crumbs (for rolling) These ingredients blend to create a rich and creamy treat. The Biscoff cookie crumbs add crunch and flavor. The cookie butter gives a sweet, spiced taste. Cream cheese adds creaminess, while powdered sugar sweetens the mix. You can add some fun garnishes for extra flair: - Drizzle of melted chocolate - Pinches of sea salt - Crushed nuts, like hazelnuts or almonds These garnishes enhance the truffles' look and taste. A drizzle of chocolate adds a touch of elegance. Sea salt balances the sweetness and brings out the flavors. If you lack some ingredients, don't worry! Here are some easy swaps: - Use graham cracker crumbs instead of Biscoff cookie crumbs. - Swap cream cheese with mascarpone for a lighter texture. - Replace dark chocolate with milk chocolate for a sweeter taste. These substitutions work well and still give you delicious truffles. Adjusting ingredients can make this recipe fit your pantry and taste. Start by gathering your ingredients. You need Biscoff cookie crumbs, creamy Biscoff cookie butter, softened cream cheese, powdered sugar, and vanilla extract. In a mixing bowl, combine the Biscoff cookie crumbs, cookie butter, cream cheese, powdered sugar, and vanilla. Mix them well until you have a dough-like consistency. You can use a spatula or your hands to mix. Once blended, pop the bowl in the fridge for about 30 minutes. This helps the mixture firm up, making it easier to shape. After chilling, it’s time to shape the truffles. Use a small cookie scoop or your hands to roll the mixture into bite-sized balls, about 1 inch wide. Make sure each ball is smooth and even. Place the rolled truffles on a parchment-lined baking sheet. This keeps them from sticking and makes for easy cleanup. Next, we coat the truffles in chocolate. In a microwave-safe bowl, add the dark chocolate chips. Melt the chocolate in 30-second intervals. Stir in between until it’s nice and smooth. Now, dip each truffle in the melted chocolate. Make sure they are fully coated. Use a fork to lift them out, letting any extra chocolate drip off. Roll the chocolate-covered truffles in more Biscoff cookie crumbs while the chocolate is still wet. Finally, return the truffles to the baking sheet. Refrigerate them for another 15 to 20 minutes until the chocolate sets. Enjoy the fun of making these tasty treats! To get the right texture for your truffles, mix the ingredients well. Start with the Biscoff cookie crumbs and cookie butter. Add cream cheese, powdered sugar, and vanilla extract. This blend should feel doughy. If it’s too sticky, add more cookie crumbs. If it’s too dry, mix in a bit more cookie butter. Chilling the mixture for 30 minutes helps too. It firms up, making it easy to shape. Melting chocolate can be tricky, but I have some tips. Use a microwave-safe bowl for the dark chocolate chips. Heat them in 30-second bursts. Stir after each interval. This method prevents burning. If you see some lumps, keep stirring. The heat will melt them. The chocolate should be smooth and shiny. If it gets too thick, add a tiny bit of coconut oil to loosen it up. Presentation can make your truffles pop. Use a decorative plate to show them off. Dust the top with extra cookie crumbs for a fun look. You can also place each truffle in a mini cupcake liner. This adds a touch of elegance. For a pop of color, serve with fresh berries or mint leaves. These small touches make your truffles even more inviting! {{image_2}} You can easily adapt these truffles for different diets. For gluten-free eaters, use gluten-free Biscoff cookies. If you're dairy-free, try vegan cream cheese and a dairy-free chocolate. These swaps keep the flavor strong while catering to various needs. Want to mix things up? Add a pinch of salt for contrast. You can also incorporate spices like cinnamon or nutmeg for warmth. For a fun twist, try adding a splash of espresso or coffee to enhance the chocolate flavor. The options are endless! Dark chocolate is delicious, but you can switch it up! Use milk chocolate for a sweeter taste. White chocolate works too, especially if you want a pretty contrast. You can even use colored candy melts for fun occasions. Each choice offers a unique flavor and look. Store your Biscoff cookie butter truffles in an airtight container. This keeps them fresh. I recommend placing a layer of parchment paper between each layer of truffles. This prevents sticking. Keep the container in the fridge for the best taste and texture. Avoid storing them at room temperature. Heat can melt the chocolate coating. These truffles last about one week in the fridge. The flavors develop and deepen over time. If you notice any change in texture or smell, it is best to toss them. Always check for signs of spoilage before enjoying your truffles. You can freeze these truffles for up to three months. To freeze, place them in a single layer on a baking sheet. Once frozen, transfer them to a freezer-safe bag or container. When you're ready to eat, take them out and let them thaw in the fridge. This keeps them creamy and delicious. Enjoy your sweet treat! Yes, you can make these truffles ahead of time. I often prepare them a day in advance. Once they are set, store them in an airtight container in the fridge. This way, they stay fresh and tasty. Just be sure to roll them in extra Biscoff crumbs right before serving for a great look. To keep your chocolate smooth, melt it slowly. Use a microwave and heat in 30-second bursts. Stir in between each burst until it melts completely. If you notice it thickening, you can add a tiny bit of coconut oil. This will help the chocolate stay creamy for dipping. Work quickly when coating the truffles to keep the chocolate soft. There are many fun options for decorating these truffles. You can roll them in chopped nuts or sprinkles. Drizzle melted white chocolate on top for a nice touch. You could even use edible glitter for a sparkly look. Another idea is to use crushed Biscoff cookies mixed with cocoa powder. Each option makes your truffles unique and special. You learned how to make delicious truffles using a simple process. We covered the essential ingredients, shaping techniques, and storage tips. Don’t forget the helpful advice for perfect consistency and chocolate melting. Explore variations to meet dietary needs and enhance flavors. These tricks will polish your truffle-making skills. Now, you can impress friends and family with tasty treats. Enjoy your truffle journey and have fun experimenting with your own ideas!

No-Bake Biscoff Cookie Butter Truffles

Indulge in these No-Bake Biscoff Cookie Butter Truffles that are easy to make and deliciously addictive! With a delightful blend of Biscoff cookie crumbs, creamy cookie butter, and a chocolate coating, these truffles are perfect for any occasion. In just an hour, you can create a sweet treat that's sure to impress. Click through to discover the full recipe and impress your friends with these irresistible bites!

Ingredients
  

1 cup Biscoff cookie crumbs

1/2 cup creamy Biscoff cookie butter

1/4 cup cream cheese, softened

1/2 cup powdered sugar

1 teaspoon vanilla extract

1/2 cup dark chocolate chips (for coating)

Additional Biscoff cookie crumbs (for rolling)

Instructions
 

In a mixing bowl, combine the Biscoff cookie crumbs, Biscoff cookie butter, softened cream cheese, powdered sugar, and vanilla extract.

    Mix the ingredients together until well combined, creating a dough-like consistency. You can use a spatula or your hands to ensure everything is properly mixed.

      Refrigerate the mixture for about 30 minutes to firm it up, making it easier to shape.

        Once chilled, use a small cookie scoop or your hands to roll the mixture into bite-sized balls (about 1 inch in diameter).

          Place the truffles onto a parchment-lined baking sheet.

            In a microwave-safe bowl, melt the dark chocolate chips in 30-second intervals, stirring in between, until smooth.

              Dip each truffle in the melted chocolate, ensuring they are fully coated. Use a fork to lift them out, letting any excess chocolate drip off.

                Roll the chocolate-coated truffles in additional Biscoff cookie crumbs while the chocolate is still wet.

                  Return the truffles to the baking sheet and refrigerate for another 15-20 minutes until the chocolate is set.

                    Prep Time: 10 minutes | Total Time: 1 hour | Servings: 12-15 truffles

                      - Presentation Tips: Serve the truffles on a decorative plate and dust with extra cookie crumbs for an appealing look. You can also place them in mini cupcake liners for an elegant touch!