No-Bake Lemon Cheesecake Cups Simple and Refreshing

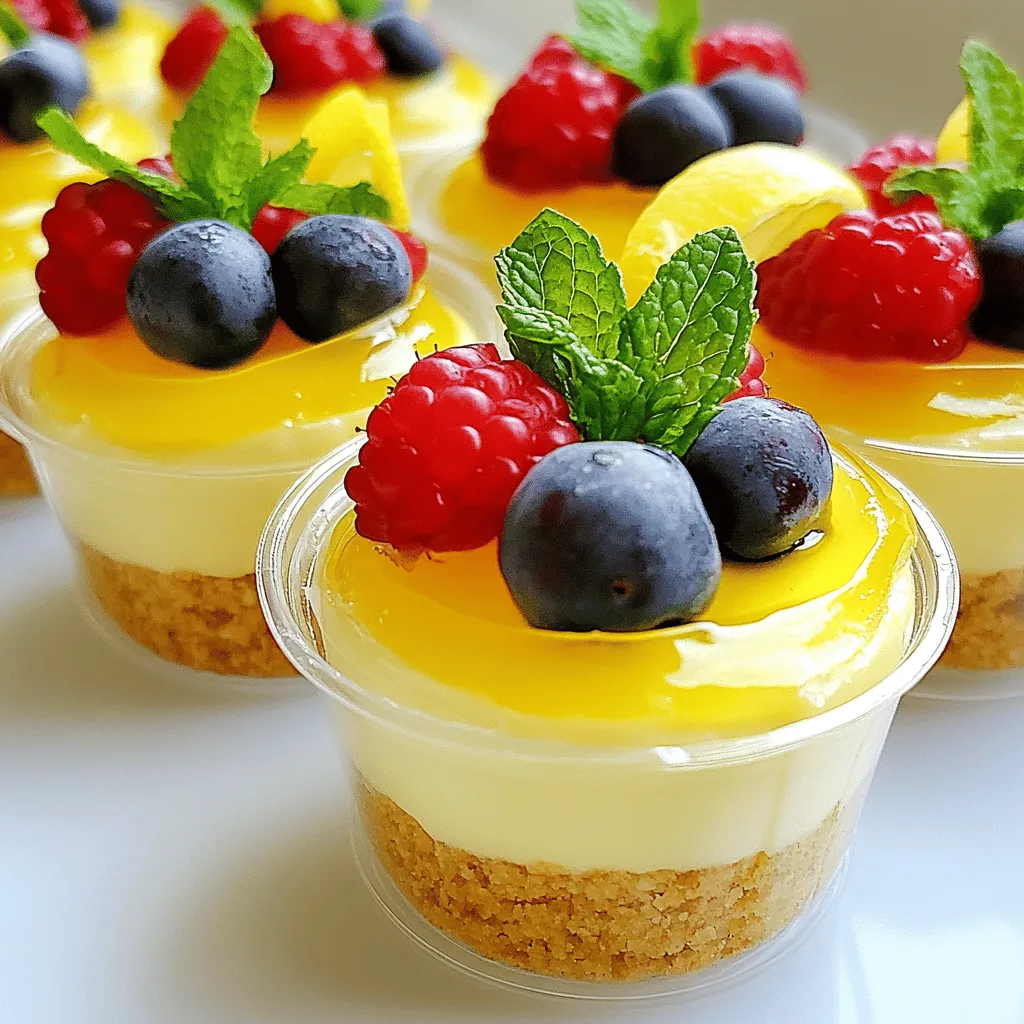
Looking for a light and tasty dessert? These No-Bake Lemon Cheesecake Cups are for you! Bursting with zesty flavor and creamy goodness, they require no oven and little prep time. Whether you’re a busy parent or a novice in the kitchen, this recipe is simple and fun. Join me as we explore how to create these delightful cups that will impress your guests and satisfy your sweet tooth!

To make these no-bake lemon cheesecake cups, gather these ingredients: - 1 ½ cups graham cracker crumbs - ½ cup unsalted butter, melted - 2 cups cream cheese, softened - 1 cup powdered sugar - 1 teaspoon vanilla extract - 1 cup heavy whipping cream - ½ cup fresh lemon juice - Zest of 1 lemon - Fresh berries for garnish (optional) - Mint leaves for garnish (optional) These ingredients come together to create a creamy and zesty dessert. The graham cracker crumbs form a crunchy base, while the cream cheese gives the filling its rich texture. If you need to make changes, here are some ideas: - Graham cracker crumbs: You can use digestive biscuits or vanilla wafers. - Unsalted butter: Coconut oil works well if you want a dairy-free option. - Cream cheese: Use a dairy-free cream cheese or Greek yogurt for a lighter version. - Powdered sugar: You can substitute with coconut sugar or a sugar alternative. - Heavy whipping cream: Try using coconut cream for a dairy-free option. - Fresh lemon juice: Lime juice can be a great substitute for a different flavor. These substitutions keep the spirit of the recipe while accommodating different diets. To get the best flavor and texture, choose high-quality ingredients: - Cream cheese: Look for a brand that is full-fat and has no additives. - Unsalted butter: Use real butter for the best taste. Brands like Kerrygold are great choices. - Heavy cream: Go for organic heavy cream for richer flavor. - Fresh lemons: Choose firm lemons that feel heavy for their size. This means they will have more juice. Using quality ingredients makes your no-bake lemon cheesecake cups taste even better. Enjoy making this delightful treat! To start, grab a mixing bowl. Add 1 ½ cups of graham cracker crumbs and ½ cup of melted unsalted butter. Mix these two ingredients until they are well combined. You want a sandy texture that holds together. Take about 2 tablespoons of this mixture and place it at the bottom of each serving cup. Use your fingers to press down firmly. This ensures a sturdy crust. Set these cups aside for now. Next, take a large mixing bowl. Beat 2 cups of softened cream cheese with an electric mixer until smooth. Add 1 cup of powdered sugar and 1 teaspoon of vanilla extract. Mix until these ingredients are fully combined. In a separate bowl, pour 1 cup of heavy whipping cream. Beat it until stiff peaks form. Gently fold this whipped cream into your cream cheese mixture. This step makes your filling light and fluffy. Finally, stir in ½ cup of fresh lemon juice and the zest of 1 lemon. This gives it that fresh, zesty flavor. Now, it's time to fill the cups. Spoon the lemon cheesecake filling over the crusts in your cups. Fill them to the top for a nice, generous portion. The crust and filling should look inviting and layered. After filling the cups, place them in the refrigerator. Let them chill for at least 4 hours. This will help the filling set properly. When you're ready to serve, take the cups out. Garnish each cup with fresh berries and mint leaves for a pop of color. Enjoy this simple and refreshing treat! To get a great texture, use room temperature cream cheese. Cold cream cheese can make your filling lumpy. Mix it well until it's smooth. When you whip the cream, do it until stiff peaks form. This helps the cheesecake stay light and fluffy. Gently fold the whipped cream into the cream cheese. This keeps the mixture airy. Avoid over-mixing, as it can make the texture dense. One common mistake is skipping the chilling time. If you don't chill the cups long enough, they won't set properly. Aim for at least four hours in the fridge. Another mistake is not pressing the crust firmly enough. If the crust is loose, the cups might fall apart when served. Finally, don’t skip the lemon zest. It adds a burst of flavor that brightens the cheesecake. If you want to mix things up, try adding different fruits. You can use lime juice instead of lemon juice for a zesty twist. Berries can be blended into the filling for extra flavor. You can also add a splash of almond extract for a nutty hint. For a chocolate version, fold in some melted chocolate with the cream cheese. Each of these options will give your cheesecake cups a unique taste! {{image_2}} You can change the flavor of these cheesecake cups easily. Try using lime juice for a twist. Lime brings a bright note that pairs well with the creaminess. You could also add a splash of orange juice for a sweet touch. For a berry flavor, mix in pureed strawberries or blueberries. Just replace some lemon juice with the fruit puree. This gives you a fun and fruity dessert. Each option keeps that refreshing taste while offering something new. Making these cheesecake cups gluten-free is simple. Use gluten-free graham crackers instead of regular ones. This swap keeps the crust tasty without gluten. For a vegan version, substitute cream cheese with a dairy-free option. You can also use coconut cream to give a rich texture. Replace heavy cream with coconut whipped cream for a light topping. These adjustments ensure everyone can enjoy this dessert, no matter their diet. Presentation makes a big difference. Serve each cup on a colorful plate for a pop of color. Add fresh berries on top for a burst of flavor. You can also sprinkle some lemon zest for extra brightness. For a fancy touch, place a mint leaf beside each cup. This adds a nice visual and a hint of freshness. These small touches make your no-bake lemon cheesecake cups even more inviting. To keep your no-bake lemon cheesecake cups fresh, place them in an airtight container. You can also cover the cups with plastic wrap. This helps prevent drying out and keeps flavors intact. Store them in the fridge for best results. These cheesecake cups last up to five days in the fridge. If you notice any change in smell or texture, it’s best to toss them out. Always check for signs of spoilage before enjoying your treat again. You can freeze the cheesecake cups if you want to save some for later. Just make sure they are in airtight containers. They will stay fresh for up to two months in the freezer. To thaw, place them in the fridge overnight before serving. Avoid microwaving them as it can ruin the texture. Enjoy your creamy lemon treats even after freezing! Yes, you can make these cheesecake cups ahead. Just prepare them up to 24 hours in advance. This makes them great for parties or special events. Store them in the fridge after you fill the cups. They need at least four hours to set. Making them ahead also lets the flavors mix well. If you want a substitute for cream cheese, use Greek yogurt. It gives a nice tang and creamy texture. You can also try mascarpone for a richer taste. Both options work well in this recipe. Just keep in mind that Greek yogurt will make it a bit less sweet. You can tell the cheesecake cups are set when they feel firm to the touch. Press gently on the top, and it should bounce back slightly. If the filling jiggles too much, they need more time in the fridge. It usually takes about four hours to set, but longer is fine too. In this article, we covered all the details for making no-bake lemon cheesecake cups. You learned about the key ingredients and how to find quality ones. I shared easy step-by-step instructions for each part of the recipe. We discussed helpful tips to get the right texture and avoid common mistakes. You saw different flavor variations and dietary adjustments. Finally, we reviewed how to store these tasty treats effectively. Remember, with practice, you can create delicious desserts that impress everyone. Enjoy making and sharing your cheesecake cups!

Ingredients

Detailed Ingredient List

To make these no-bake lemon cheesecake cups, gather these ingredients:

– 1 ½ cups graham cracker crumbs

– ½ cup unsalted butter, melted

– 2 cups cream cheese, softened

– 1 cup powdered sugar

– 1 teaspoon vanilla extract

– 1 cup heavy whipping cream

– ½ cup fresh lemon juice

– Zest of 1 lemon

– Fresh berries for garnish (optional)

– Mint leaves for garnish (optional)

These ingredients come together to create a creamy and zesty dessert. The graham cracker crumbs form a crunchy base, while the cream cheese gives the filling its rich texture.

Ingredient Substitutions

If you need to make changes, here are some ideas:

Graham cracker crumbs: You can use digestive biscuits or vanilla wafers.

Unsalted butter: Coconut oil works well if you want a dairy-free option.

Cream cheese: Use a dairy-free cream cheese or Greek yogurt for a lighter version.

Powdered sugar: You can substitute with coconut sugar or a sugar alternative.

Heavy whipping cream: Try using coconut cream for a dairy-free option.

Fresh lemon juice: Lime juice can be a great substitute for a different flavor.

These substitutions keep the spirit of the recipe while accommodating different diets.

Best Quality Recommendations

To get the best flavor and texture, choose high-quality ingredients:

Cream cheese: Look for a brand that is full-fat and has no additives.

Unsalted butter: Use real butter for the best taste. Brands like Kerrygold are great choices.

Heavy cream: Go for organic heavy cream for richer flavor.

Fresh lemons: Choose firm lemons that feel heavy for their size. This means they will have more juice.

Using quality ingredients makes your no-bake lemon cheesecake cups taste even better. Enjoy making this delightful treat!

Step-by-Step Instructions

Preparing the Graham Cracker Crust

To start, grab a mixing bowl. Add 1 ½ cups of graham cracker crumbs and ½ cup of melted unsalted butter. Mix these two ingredients until they are well combined. You want a sandy texture that holds together. Take about 2 tablespoons of this mixture and place it at the bottom of each serving cup. Use your fingers to press down firmly. This ensures a sturdy crust. Set these cups aside for now.

Making the Cream Cheese Filling

Next, take a large mixing bowl. Beat 2 cups of softened cream cheese with an electric mixer until smooth. Add 1 cup of powdered sugar and 1 teaspoon of vanilla extract. Mix until these ingredients are fully combined. In a separate bowl, pour 1 cup of heavy whipping cream. Beat it until stiff peaks form. Gently fold this whipped cream into your cream cheese mixture. This step makes your filling light and fluffy. Finally, stir in ½ cup of fresh lemon juice and the zest of 1 lemon. This gives it that fresh, zesty flavor.

Assembling the Cheesecake Cups

Now, it’s time to fill the cups. Spoon the lemon cheesecake filling over the crusts in your cups. Fill them to the top for a nice, generous portion. The crust and filling should look inviting and layered.

Chilling Time and Serving Instructions

After filling the cups, place them in the refrigerator. Let them chill for at least 4 hours. This will help the filling set properly. When you’re ready to serve, take the cups out. Garnish each cup with fresh berries and mint leaves for a pop of color. Enjoy this simple and refreshing treat!

Tips & Tricks

Achieving the Perfect Texture

To get a great texture, use room temperature cream cheese. Cold cream cheese can make your filling lumpy. Mix it well until it’s smooth. When you whip the cream, do it until stiff peaks form. This helps the cheesecake stay light and fluffy. Gently fold the whipped cream into the cream cheese. This keeps the mixture airy. Avoid over-mixing, as it can make the texture dense.

Common Mistakes to Avoid

One common mistake is skipping the chilling time. If you don’t chill the cups long enough, they won’t set properly. Aim for at least four hours in the fridge. Another mistake is not pressing the crust firmly enough. If the crust is loose, the cups might fall apart when served. Finally, don’t skip the lemon zest. It adds a burst of flavor that brightens the cheesecake.

How to Add More Flavor Variations

If you want to mix things up, try adding different fruits. You can use lime juice instead of lemon juice for a zesty twist. Berries can be blended into the filling for extra flavor. You can also add a splash of almond extract for a nutty hint. For a chocolate version, fold in some melted chocolate with the cream cheese. Each of these options will give your cheesecake cups a unique taste!

Variations

Alternative Flavor Profiles

You can change the flavor of these cheesecake cups easily. Try using lime juice for a twist. Lime brings a bright note that pairs well with the creaminess. You could also add a splash of orange juice for a sweet touch. For a berry flavor, mix in pureed strawberries or blueberries. Just replace some lemon juice with the fruit puree. This gives you a fun and fruity dessert. Each option keeps that refreshing taste while offering something new.

Dietary Adjustments (Gluten-Free, Vegan)

Making these cheesecake cups gluten-free is simple. Use gluten-free graham crackers instead of regular ones. This swap keeps the crust tasty without gluten. For a vegan version, substitute cream cheese with a dairy-free option. You can also use coconut cream to give a rich texture. Replace heavy cream with coconut whipped cream for a light topping. These adjustments ensure everyone can enjoy this dessert, no matter their diet.

Serving Suggestions

Presentation makes a big difference. Serve each cup on a colorful plate for a pop of color. Add fresh berries on top for a burst of flavor. You can also sprinkle some lemon zest for extra brightness. For a fancy touch, place a mint leaf beside each cup. This adds a nice visual and a hint of freshness. These small touches make your no-bake lemon cheesecake cups even more inviting.

Storage Info

How to Store No-Bake Lemon Cheesecake Cups

To keep your no-bake lemon cheesecake cups fresh, place them in an airtight container. You can also cover the cups with plastic wrap. This helps prevent drying out and keeps flavors intact. Store them in the fridge for best results.

Shelf Life Guidelines

These cheesecake cups last up to five days in the fridge. If you notice any change in smell or texture, it’s best to toss them out. Always check for signs of spoilage before enjoying your treat again.

Freezing and Thawing Instructions

You can freeze the cheesecake cups if you want to save some for later. Just make sure they are in airtight containers. They will stay fresh for up to two months in the freezer. To thaw, place them in the fridge overnight before serving. Avoid microwaving them as it can ruin the texture. Enjoy your creamy lemon treats even after freezing!

FAQs

Can I make this recipe ahead of time?

Yes, you can make these cheesecake cups ahead. Just prepare them up to 24 hours in advance. This makes them great for parties or special events. Store them in the fridge after you fill the cups. They need at least four hours to set. Making them ahead also lets the flavors mix well.

What can I use instead of cream cheese?

If you want a substitute for cream cheese, use Greek yogurt. It gives a nice tang and creamy texture. You can also try mascarpone for a richer taste. Both options work well in this recipe. Just keep in mind that Greek yogurt will make it a bit less sweet.

How do I know when the cheesecake cups are set?

You can tell the cheesecake cups are set when they feel firm to the touch. Press gently on the top, and it should bounce back slightly. If the filling jiggles too much, they need more time in the fridge. It usually takes about four hours to set, but longer is fine too.

In this article, we covered all the details for making no-bake lemon cheesecake cups. You learned about the key ingredients and how to find quality ones. I shared easy step-by-step instructions for each part of the recipe. We discussed helpful tips to get the right texture and avoid common mistakes. You saw different flavor variations and dietary adjustments. Finally, we reviewed how to store these tasty treats effectively. Remember, with practice, you can create delicious desserts that impress everyone. Enjoy making and sharing your cheesecake cups!

To make these no-bake lemon cheesecake cups, gather these ingredients: - 1 ½ cups graham cracker crumbs - ½ cup unsalted butter, melted - 2 cups cream cheese, softened - 1 cup powdered sugar - 1 teaspoon vanilla extract - 1 cup heavy whipping cream - ½ cup fresh lemon juice - Zest of 1 lemon - Fresh berries for garnish (optional) - Mint leaves for garnish (optional) These ingredients come together to create a creamy and zesty dessert. The graham cracker crumbs form a crunchy base, while the cream cheese gives the filling its rich texture. If you need to make changes, here are some ideas: - Graham cracker crumbs: You can use digestive biscuits or vanilla wafers. - Unsalted butter: Coconut oil works well if you want a dairy-free option. - Cream cheese: Use a dairy-free cream cheese or Greek yogurt for a lighter version. - Powdered sugar: You can substitute with coconut sugar or a sugar alternative. - Heavy whipping cream: Try using coconut cream for a dairy-free option. - Fresh lemon juice: Lime juice can be a great substitute for a different flavor. These substitutions keep the spirit of the recipe while accommodating different diets. To get the best flavor and texture, choose high-quality ingredients: - Cream cheese: Look for a brand that is full-fat and has no additives. - Unsalted butter: Use real butter for the best taste. Brands like Kerrygold are great choices. - Heavy cream: Go for organic heavy cream for richer flavor. - Fresh lemons: Choose firm lemons that feel heavy for their size. This means they will have more juice. Using quality ingredients makes your no-bake lemon cheesecake cups taste even better. Enjoy making this delightful treat! To start, grab a mixing bowl. Add 1 ½ cups of graham cracker crumbs and ½ cup of melted unsalted butter. Mix these two ingredients until they are well combined. You want a sandy texture that holds together. Take about 2 tablespoons of this mixture and place it at the bottom of each serving cup. Use your fingers to press down firmly. This ensures a sturdy crust. Set these cups aside for now. Next, take a large mixing bowl. Beat 2 cups of softened cream cheese with an electric mixer until smooth. Add 1 cup of powdered sugar and 1 teaspoon of vanilla extract. Mix until these ingredients are fully combined. In a separate bowl, pour 1 cup of heavy whipping cream. Beat it until stiff peaks form. Gently fold this whipped cream into your cream cheese mixture. This step makes your filling light and fluffy. Finally, stir in ½ cup of fresh lemon juice and the zest of 1 lemon. This gives it that fresh, zesty flavor. Now, it's time to fill the cups. Spoon the lemon cheesecake filling over the crusts in your cups. Fill them to the top for a nice, generous portion. The crust and filling should look inviting and layered. After filling the cups, place them in the refrigerator. Let them chill for at least 4 hours. This will help the filling set properly. When you're ready to serve, take the cups out. Garnish each cup with fresh berries and mint leaves for a pop of color. Enjoy this simple and refreshing treat! To get a great texture, use room temperature cream cheese. Cold cream cheese can make your filling lumpy. Mix it well until it's smooth. When you whip the cream, do it until stiff peaks form. This helps the cheesecake stay light and fluffy. Gently fold the whipped cream into the cream cheese. This keeps the mixture airy. Avoid over-mixing, as it can make the texture dense. One common mistake is skipping the chilling time. If you don't chill the cups long enough, they won't set properly. Aim for at least four hours in the fridge. Another mistake is not pressing the crust firmly enough. If the crust is loose, the cups might fall apart when served. Finally, don’t skip the lemon zest. It adds a burst of flavor that brightens the cheesecake. If you want to mix things up, try adding different fruits. You can use lime juice instead of lemon juice for a zesty twist. Berries can be blended into the filling for extra flavor. You can also add a splash of almond extract for a nutty hint. For a chocolate version, fold in some melted chocolate with the cream cheese. Each of these options will give your cheesecake cups a unique taste! {{image_2}} You can change the flavor of these cheesecake cups easily. Try using lime juice for a twist. Lime brings a bright note that pairs well with the creaminess. You could also add a splash of orange juice for a sweet touch. For a berry flavor, mix in pureed strawberries or blueberries. Just replace some lemon juice with the fruit puree. This gives you a fun and fruity dessert. Each option keeps that refreshing taste while offering something new. Making these cheesecake cups gluten-free is simple. Use gluten-free graham crackers instead of regular ones. This swap keeps the crust tasty without gluten. For a vegan version, substitute cream cheese with a dairy-free option. You can also use coconut cream to give a rich texture. Replace heavy cream with coconut whipped cream for a light topping. These adjustments ensure everyone can enjoy this dessert, no matter their diet. Presentation makes a big difference. Serve each cup on a colorful plate for a pop of color. Add fresh berries on top for a burst of flavor. You can also sprinkle some lemon zest for extra brightness. For a fancy touch, place a mint leaf beside each cup. This adds a nice visual and a hint of freshness. These small touches make your no-bake lemon cheesecake cups even more inviting. To keep your no-bake lemon cheesecake cups fresh, place them in an airtight container. You can also cover the cups with plastic wrap. This helps prevent drying out and keeps flavors intact. Store them in the fridge for best results. These cheesecake cups last up to five days in the fridge. If you notice any change in smell or texture, it’s best to toss them out. Always check for signs of spoilage before enjoying your treat again. You can freeze the cheesecake cups if you want to save some for later. Just make sure they are in airtight containers. They will stay fresh for up to two months in the freezer. To thaw, place them in the fridge overnight before serving. Avoid microwaving them as it can ruin the texture. Enjoy your creamy lemon treats even after freezing! Yes, you can make these cheesecake cups ahead. Just prepare them up to 24 hours in advance. This makes them great for parties or special events. Store them in the fridge after you fill the cups. They need at least four hours to set. Making them ahead also lets the flavors mix well. If you want a substitute for cream cheese, use Greek yogurt. It gives a nice tang and creamy texture. You can also try mascarpone for a richer taste. Both options work well in this recipe. Just keep in mind that Greek yogurt will make it a bit less sweet. You can tell the cheesecake cups are set when they feel firm to the touch. Press gently on the top, and it should bounce back slightly. If the filling jiggles too much, they need more time in the fridge. It usually takes about four hours to set, but longer is fine too. In this article, we covered all the details for making no-bake lemon cheesecake cups. You learned about the key ingredients and how to find quality ones. I shared easy step-by-step instructions for each part of the recipe. We discussed helpful tips to get the right texture and avoid common mistakes. You saw different flavor variations and dietary adjustments. Finally, we reviewed how to store these tasty treats effectively. Remember, with practice, you can create delicious desserts that impress everyone. Enjoy making and sharing your cheesecake cups!

No-Bake Lemon Cheesecake Cups

Satisfy your sweet tooth with these zesty no-bake lemon cheesecake cups that are effortlessly delicious! Perfect for any occasion, this simple recipe combines creamy cheesecake filling with a buttery graham cracker crust. With fresh lemon juice and zest for that tangy kick, each cup is a delightful treat. Click to explore the full recipe and impress your friends and family with this easy dessert!

Ingredients
  

1 ½ cups graham cracker crumbs

½ cup unsalted butter, melted

2 cups cream cheese, softened

1 cup powdered sugar

1 teaspoon vanilla extract

1 cup heavy whipping cream

½ cup fresh lemon juice

Zest of 1 lemon

Fresh berries for garnish (optional)

Mint leaves for garnish (optional)

Instructions
 

In a mixing bowl, combine the graham cracker crumbs and melted butter. Mix until well combined.

    Spoon about 2 tablespoons of the mixture into the bottom of each serving cup and press down firmly to form a crust. Set aside.

      In a large mixing bowl, beat the softened cream cheese until smooth and creamy using an electric mixer.

        Gradually add the powdered sugar and vanilla extract, mixing until fully incorporated.

          In a separate bowl, whip the heavy cream until stiff peaks form.

            Gently fold the whipped cream into the cream cheese mixture until well combined.

              Stir in the fresh lemon juice and lemon zest until the mixture is smooth and creamy.

                Spoon the lemon cheesecake filling over the crusts in your cups, filling them to the top.

                  Refrigerate the cheesecake cups for at least 4 hours or until set.

                    Before serving, garnish the cups with fresh berries and mint leaves for an elegant touch.

                      Prep Time: 20 mins | Total Time: 4 hrs 20 mins | Servings: 6