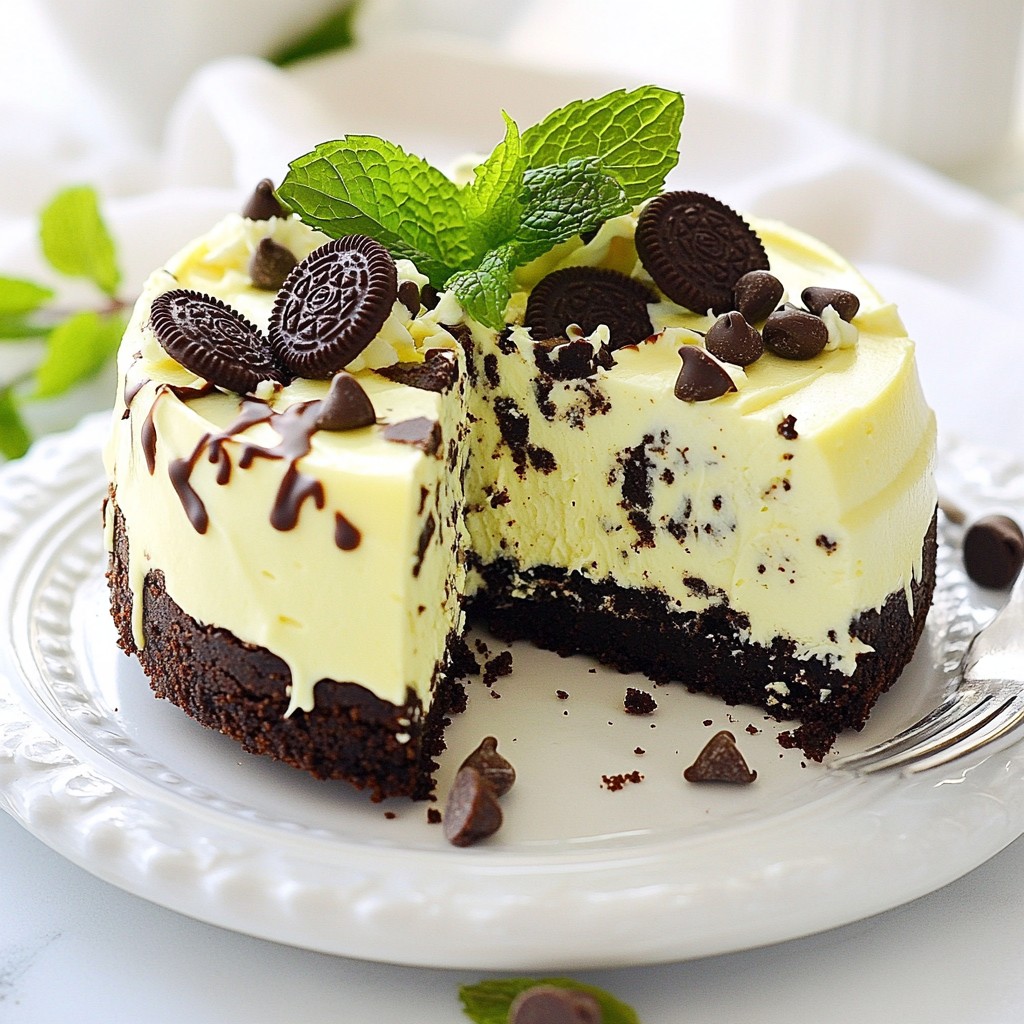
Are you ready to indulge in a dessert that's both easy and delicious? This No-Bake Oreo Mint Cheesecake is a creamy treat that anyone can make. With rich Oreos, cool mint, and a fluffy filling, it’s perfect for events or a cozy night at home. I’ll share all the key ingredients and simple steps you need to create this delightful cheesecake. Let’s get started!
Why I Love This Recipe
- Decadent Flavor: This cheesecake combines the rich taste of Oreos with a refreshing mint twist, making it a perfect dessert for any occasion.
- No-Bake Convenience: No need to turn on the oven! This no-bake recipe saves time and effort, making it ideal for busy days.
- Impressive Presentation: The combination of chocolate chips and mint leaves not only adds flavor but also makes for a stunning visual appeal.
- Perfect for Sharing: With 12 servings, this cheesecake is great for gatherings, ensuring there's enough to go around for family and friends.
Ingredients
Key Ingredients for No-Bake Oreo Mint Cheesecake
- 24 Oreo cookies, crushed
- 1/2 cup unsalted butter, melted
- 16 oz cream cheese, softened
- 1 cup powdered sugar
The base of this cheesecake shines with Oreo cookies. They offer a rich chocolate flavor. You crush them into fine crumbs and mix with melted butter. This forms a tasty crust.
Cream cheese gives the filling its creamy texture. Use softened cream cheese for easy mixing. The powdered sugar adds sweetness and balances the flavors.
Additional Flavor Enhancers
- 1 tsp peppermint extract
- 2 cups heavy whipping cream
- 1/4 cup mini chocolate chips (plus extra for topping)
Peppermint extract brings a refreshing taste. It’s key to that minty flavor we love. Heavy whipping cream makes the cheesecake light and fluffy. Whip it to stiff peaks for the best results.
Mini chocolate chips add little bursts of chocolate in each bite. You can sprinkle extra on top for decoration.
Garnishing Options
- Fresh mint leaves
- Chocolate sauce (optional)
Fresh mint leaves not only look great but also add a nice touch. The chocolate sauce is optional but gives extra sweetness. You can drizzle it over the cheesecake for a fancy finish.
These ingredients combine for a delicious no-bake Oreo mint cheesecake. Each bite is a treat!

Step-by-Step Instructions
Prepare the Crust
Begin by crushing 24 Oreo cookies in a bowl. You want fine crumbs for the best texture. Next, pour in 1/2 cup of melted unsalted butter. Mix them together until all crumbs are coated in butter. This step is key, as it binds the crust. Now, take a 9-inch springform pan. Press the Oreo mixture into the bottom firmly. Make sure it is even and compact.
Make the Cheesecake Filling
In a large mixing bowl, add 16 oz of softened cream cheese. Use an electric mixer to beat it until smooth and creamy. Slowly add 1 cup of powdered sugar while mixing. Keep blending until it is well combined. To add flavor, mix in 1 teaspoon of peppermint extract. This gives the cheesecake its minty kick.
Whip the Cream and Fold
Get another bowl for whipping the cream. Pour in 2 cups of heavy whipping cream. Whip it until stiff peaks form. This means when you lift the beaters, the peaks should hold their shape. Next, gently fold the whipped cream into the cream cheese mixture. Be careful not to deflate the cream. This step makes your cheesecake light and airy.
Combine and Chill
Now, it’s time to add a fun twist. Fold in 1/4 cup of mini chocolate chips. This adds a nice texture and a chocolatey taste. Pour the cheesecake filling into the prepared crust. Use a spatula to smooth the top. Once it’s done, cover it with plastic wrap. Place it in the fridge for at least 4 hours. For the best flavor, let it chill overnight.
Tips & Tricks
Achieving the Perfect Texture
To get the best texture for your cheesecake, pay close attention to your whipping technique. Start with cold heavy cream. Use a clean bowl and beaters. Whip the cream until stiff peaks form. This means the cream stands tall without falling. Gently fold the whipped cream into the cream cheese mixture. Be careful not to stir too hard, or you may deflate the air. This step adds lightness to your cheesecake.
Chilling time is also key. After you pour the filling over the crust, cover it with plastic wrap. Refrigerate for at least four hours. If you can, let it chill overnight. This time helps the cheesecake set and flavors meld. It makes each slice firm and delightful.
Flavor Customization
You can easily adjust the mint intensity in your cheesecake. If you love mint, add a bit more peppermint extract. Start with an extra 1/4 teaspoon. Always taste as you go. If you prefer a milder mint flavor, reduce the extract. This way, you create a cheesecake that fits your taste.
You can also switch up the chocolate types. Instead of mini chocolate chips, try dark chocolate or white chocolate. Each type brings a different flavor profile. Feel free to experiment and find what you like best.
Serving Suggestions
Presentation matters when serving your cheesecake. Slice it into wedges and place each piece on individual plates. Drizzle with chocolate sauce for an extra touch. A sprig of fresh mint on top adds brightness. This makes your dessert pop and looks lovely for guests.
When it comes to beverages, pair this cheesecake with milk or coffee. A cold glass of milk complements the sweetness. A warm cup of coffee balances the minty flavor. Choose whatever you enjoy most to make your dessert time special.
Pro Tips
- Use Room Temperature Cream Cheese: Make sure your cream cheese is softened to room temperature for a creamy and lump-free filling.
- Chill the Whipped Cream: For better results, chill your mixing bowl and beaters before whipping the cream to ensure it reaches stiff peaks more easily.
- Don't Skip the Chill Time: Allowing the cheesecake to set overnight will enhance the flavor and texture, making it even more delicious.
- Garnish Just Before Serving: Add chocolate chips and mint leaves just prior to serving to keep them fresh and appealing.
Variations
Chocolate Mint Swirl Version
For a twist, try adding chocolate ganache. To make this, melt chocolate with heavy cream in a bowl. Once it cools, swirl it into your cheesecake filling. This adds a rich layer of flavor that pairs well with mint. The result will be a stunning dessert that looks as great as it tastes.
Vegan-Friendly Options
You can easily make a vegan version of this cheesecake. Start by using dairy-free cream cheese and coconut cream instead of heavy whipping cream. Replace powdered sugar with a vegan-friendly sweetener. This way, everyone can enjoy this yummy treat, regardless of their diet.
Different Crust Ideas
Get creative with your crust! Instead of using Oreos, try crushed graham crackers or even chocolate wafer cookies. You can also use nuts for a gluten-free option. Each different base brings its own unique flavor and texture to your cheesecake, making it a fun experience every time you bake.
Storage Info
Best Practices for Storing
To keep your No-Bake Oreo Mint Cheesecake fresh, store it in the fridge. Always cover it with plastic wrap or aluminum foil. This helps prevent it from absorbing smells and drying out. If you have a springform pan, it's best to keep the cheesecake in it until serving.
Freezing Options
You can freeze this cheesecake if you want to save some for later. First, let it chill completely in the fridge. Then, wrap it tightly in plastic wrap and place it in an airtight container. When you want to enjoy it, move it to the fridge to thaw overnight.
Shelf Life
The cheesecake lasts about 5 days in the fridge. If frozen, it can stay good for about 2 months. Just remember to check for any signs of freezer burn before you dig in!
FAQs
Can I make this cheesecake ahead of time?
Yes, you can make this cheesecake in advance. It tastes even better after a day in the fridge. To prepare ahead, follow these tips:
- Make the crust and filling as directed.
- Chill the cheesecake overnight for the best taste.
- Cover it with plastic wrap to keep it fresh.
How do I know when the cheesecake is set?
You can tell the cheesecake is set by checking a few signs:
- The top should look firm and not jiggle.
- The edges will pull away slightly from the pan.
- Press lightly with your finger; it should feel firm.
What can I use instead of Oreos?
If you want to switch it up, here are some cookie options:
- Chocolate graham crackers for a chocolatey crust.
- Vanilla wafers for a lighter flavor.
- Gluten-free cookies if you need a gluten-free option.
Can I add other flavors?
You can mix in different flavors for fun. Here are some ideas:
- Swap peppermint extract for almond or vanilla for a new taste.
- Add crushed candy canes for a fun crunch.
- Try a swirl of chocolate ganache for extra richness.
In this blog post, I shared a simple recipe for a No-Bake Oreo Mint Cheesecake. We explored key ingredients like Oreo cookies and cream cheese, along with tips for making the perfect filling. You learned how to garnish with fresh mint or chocolate sauce to enhance flavor. Remember, the texture and taste can be adjusted to your liking. This dessert is flexible, so feel free to try different crusts or flavors. Experimenting can lead to your perfect cheesecake. Enjoy making it and sharing with others!