


LATEST RECIPES


LET'S GET COOKING!
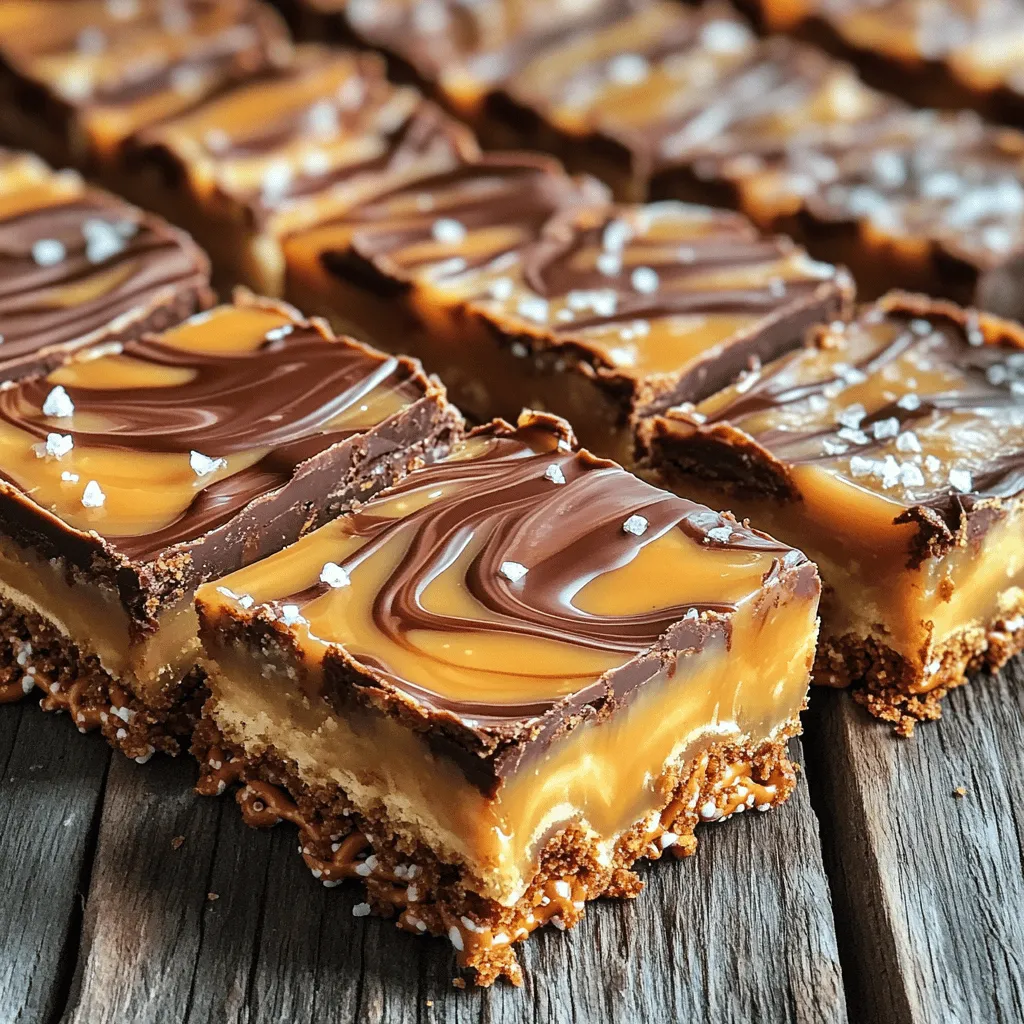
Salted Caramel Pretzel Bars No Bake Delight Recipe
Get ready to treat your taste buds with these Salted Caramel Pretzel Bars! This no-bake delight is quick to make and satisfying to eat. With...
Read Full Recipe →